In this Power Automate tutorial, we will see how to create Approval for a SharePoint list item and based on the Approval request, we will create an item using Power Automate.
For this tutorial, I will use the Power Automate template, ‘When an item is created in SharePoint List, Send approval and create item’, which is used for processing approval based on SharePoint list items. If the approval is accepted by the approver then it will create an item in the SharePoint list.
Now let’s see how we can use this template in Power Automate with an example.
Power Automate template – When an item is created in SharePoint List, Send approval and create an item
Here we will see how we can use the Power Automate template i.e. ‘When an item is created in SharePoint List, Send approval and create an item.
For example, we have a Laptop Agreement list, in this list, employees will request for Laptop to do work from home. This request will go to the Releasing officer, once the officer approves the request, the item get updated with the release date and released by. This list contains the following columns:
- Title -Single Line of text
- Employee name- Person
- Position-Single line of text
- Department-Choice
- Date released-Date/time
- Laptop-Lookup column from Laptop Details List (Title, Brand, Model Number)
- Releasing Officer -Person
- Remarks-Multiple lines of text

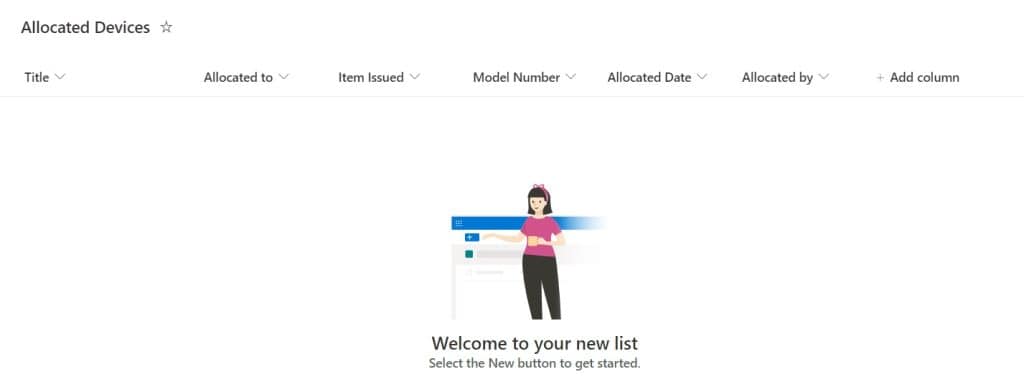
All the information related to equipment i.e. Laptop, like, to whom it is Assigned, Assigned date, Laptop name, Model number, etc., is stored in the SharePoint list called ‘Allocated Device’. This list contains the following columns:
- Title: Single line of text
- Allocated to – Person
- Item issued- Choice
- Model Number-Single line of text
- Allocated Date-Date/Time
- Allocated By-Person
Finally, we will send an email to the requestor/employee the request is approved, you can collect the Laptop. We will send the email to the employee if the request is rejected.
Let’s create a flow using Power Automate template ‘When an item is created in SharePoint List, Send approval and create item’.
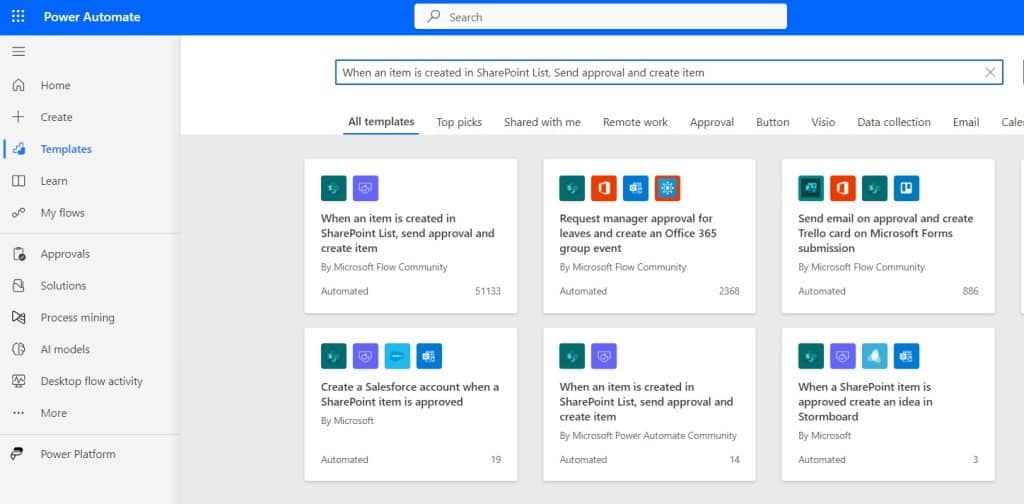
Step 1: Open Power Automate Cloud, then click on Template and search for ‘When an item is created in SharePoint List, Send approval and create item‘. Select the Template ‘When an item is created in SharePoint List, Send approval and create item‘.
Next, create a connection and click on the Continue button.
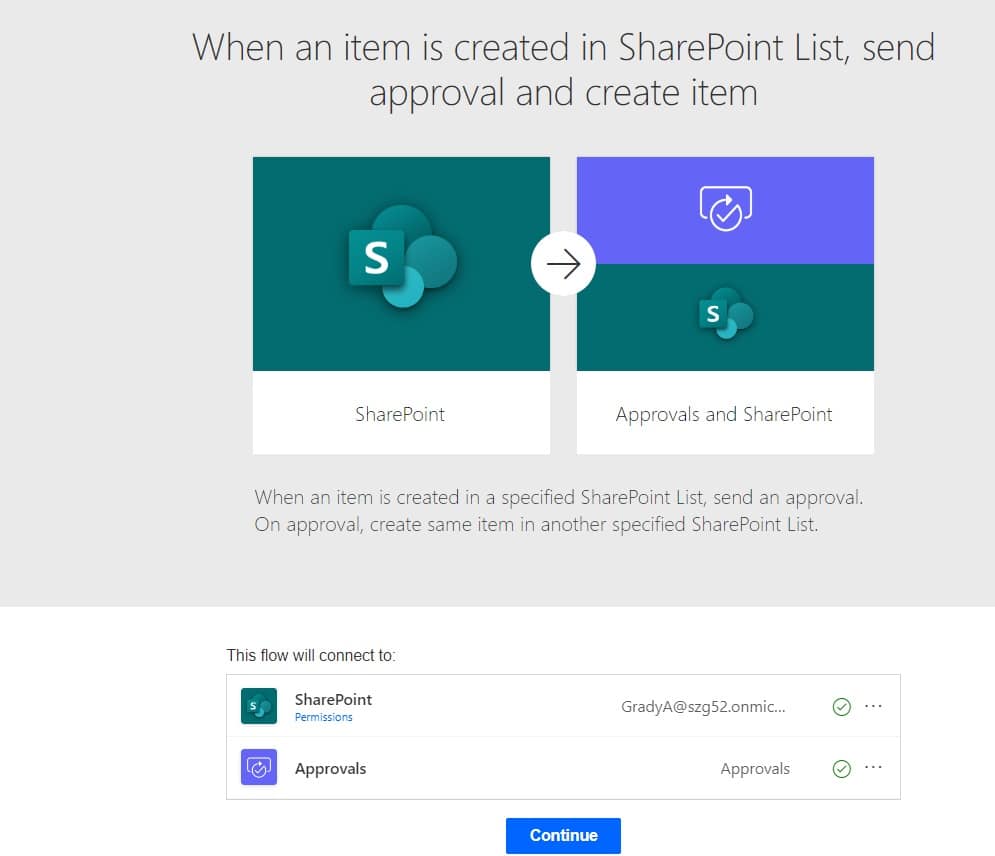
Once you click on Continue, you can see the below flow template in Power Automate.
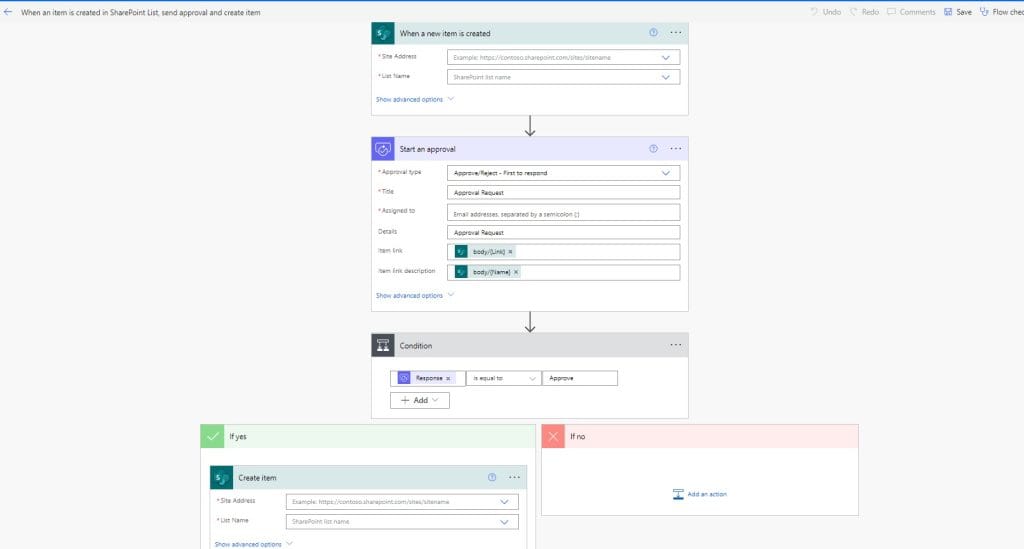
Let’s edit the flow template based on the requirements.
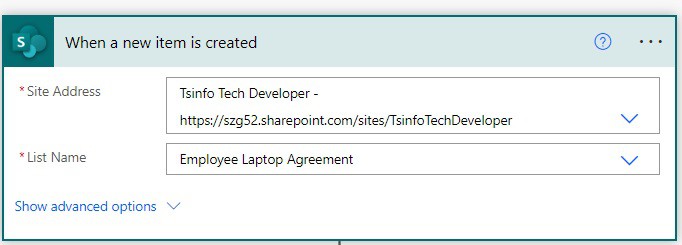
Step 2: Provide the below information in the ‘When an item is created ‘ action:
- Site address: Provide the SharePoint site address
- List name: Provide the SharePoint list name
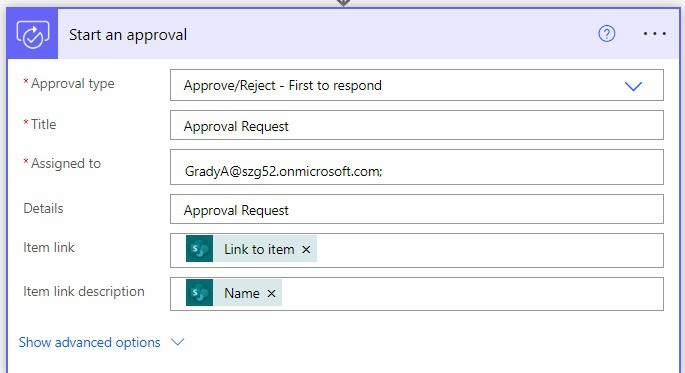
Step 3: In Start an Approval action, provide the below information:
- Approval type:Approve/Reject – First to respond
- Title: Approval Request
- Assigned to: Email addresses
- Details: Approval Request
- Item link: Select the Item link from dynamic content
- Item link description: Provide the item link description.
Step 4: In Condition action, provide the below information, if the information is not provided as below:
- Choose a value: Select the Response from the dynamic content
- Operator: Choose the operator as is equal to
- Choose a value: Select the value as Approve.

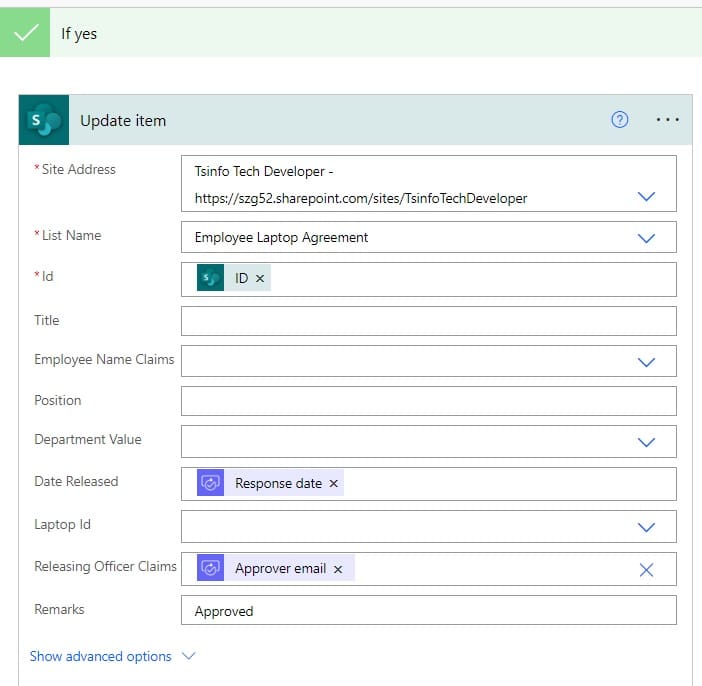
Step 5: Click on Add an action in If yes part to Update the item based on the response, so select Update item action. Then Provide the below information:
- Site address: Select the SharePoint site address
- List name: Select the SharePoint list name
- Id: Select the Id from dynamic content
- Date released: Select the Response date from dynamic content.
- Releasing officer Claims: Select Approver Email from dynamic content
- Remarks: provide the Remarks as Approved.
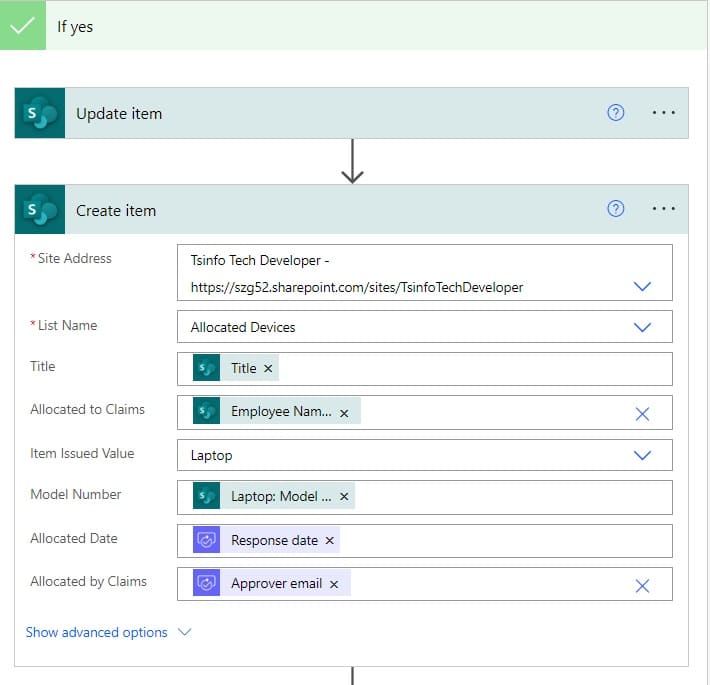
Step 6: Drag and drop the Create item action after the Update item action. Then provide the below information:
- Site address: Select the SharePoint site address
- List name: Select the list name from dynamic content.
- Title: Provide the title from dynamic content.
- Allocated to Claims: Select the Employee Name Claims from dynamic content.
- Item Issued Value: Select the Laptop from dynamic content
- Model Number:Laptop: Select Model Number Value from dynamic content
- Allocated Date: Select Response date from dynamic content
- Allocated by Claims: Select Approver email from dynamic content.
Step 7: We will send an email to the requestor, for this click on Add an action -> select Send an email(V2) action. Then provide the below information:
- To: Select the Employee Name from dynamic content.
- Subject: Provide the subject of an email
- Body: Provide the body of an email.
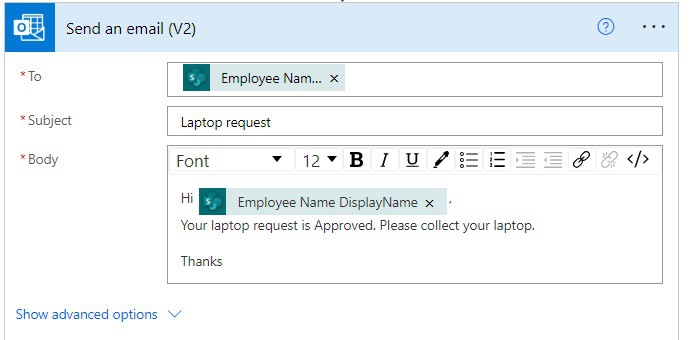
Step 8: Now if the is no part of the condition, we will send a reject email to the Requestor. For this click on Add an Action and select Send an Email(V2) action. Then provide the below information
- To: Select the Employee Name from dynamic content.
- Subject: Provide the subject of an email
- Body: Provide the body of an email.
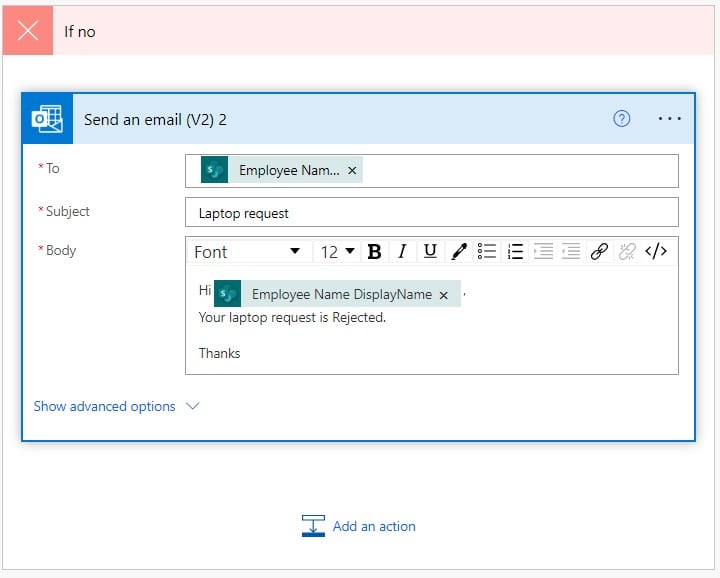
Step 9: Now run the flow manually and create an item in the Employee Laptop Agreement list.

Now you will get an approval request once you approve the user will get an email and the item will be created in the Allocated Device list.

Conclusion
In this Power Automate tutorial, we saw a complete example of “When an item is created in SharePoint list send approval and create item” in Power Automate.
Also, we learned how we can create an approval workflow based on the SharePoint list item, and then based on the response how to create an item in the SharePoint list using Power Automate.
You may also like:
- How to delete all items from a SharePoint list using Power Automate?
- How to Move File from OneDrive to SharePoint using Power Automate?
- How to Convert String to Date for SharePoint list using Power Automate?
I am Bijay a Microsoft MVP (10 times – My MVP Profile) in SharePoint and have more than 17 years of expertise in SharePoint Online Office 365, SharePoint subscription edition, and SharePoint 2019/2016/2013. Currently working in my own venture TSInfo Technologies a SharePoint development, consulting, and training company. I also run the popular SharePoint website EnjoySharePoint.com