It is quite tricky to filter the data table control using a Power Apps check box control. But yes, the code is very simple, and it is easy to achieve this.
In this article, I will explain how to filter Power Apps data table using check box. Also, we will know how to filter the data table control using multiple checkboxes in Power Apps.
How to Filter Power Apps Data Table using Checkbox
Let’s take a simple scenario.
I have a SharePoint Online list, i.e., [Travel Requests], which contains various columns. Apart from all the columns, I have a Yes/No column [Approved], as shown below.
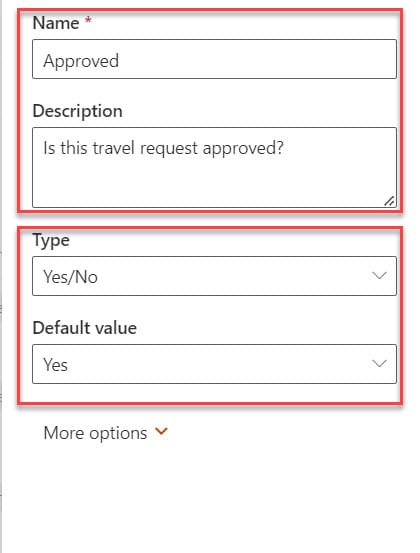
The checkbox control will show the Yes/No field values each time the user adds a new field to the Power Apps data table. However, all checkboxes will be checked by default, as seen below.

Select the Checkbox field [Approved] to resolve this and set its Text property as blank. Then, you will get the respective SharePoint list “Yes/No field” values as shown below.

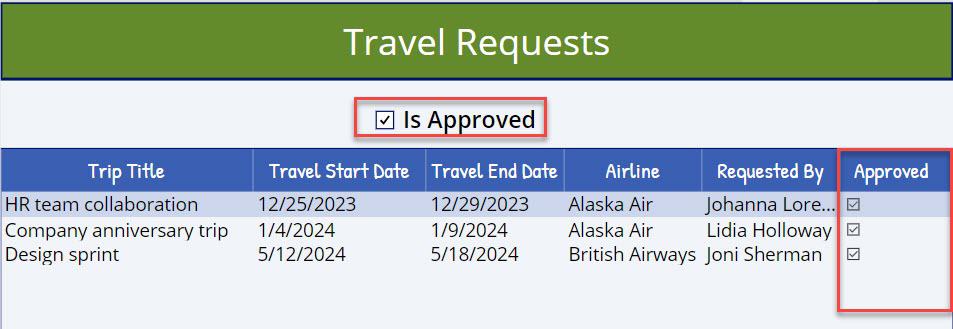
In Power Apps, there is a checkbox control above the data table. The data table filters and displays all the checked items whenever the user selects the ” Is Approved ” checkbox.
In the same way, if the user unchecks or does not select the checkbox, then the data table will filter and display only unchecked items.
Have a look at the below screenshot for the output.

To work around this, follow the below steps.
1. Open Power Apps -> Create a Blank Canvas app and connect it to the specific SharePoint Online list [Travel Requests] like below.
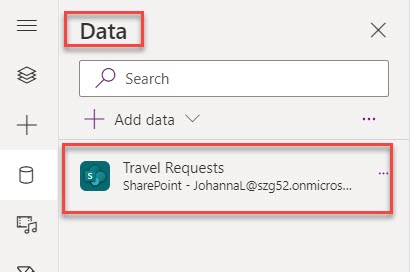
2. On the Power Apps Screen -> Insert a Checkbox control and set its Text property as:
Text = "Is Approved"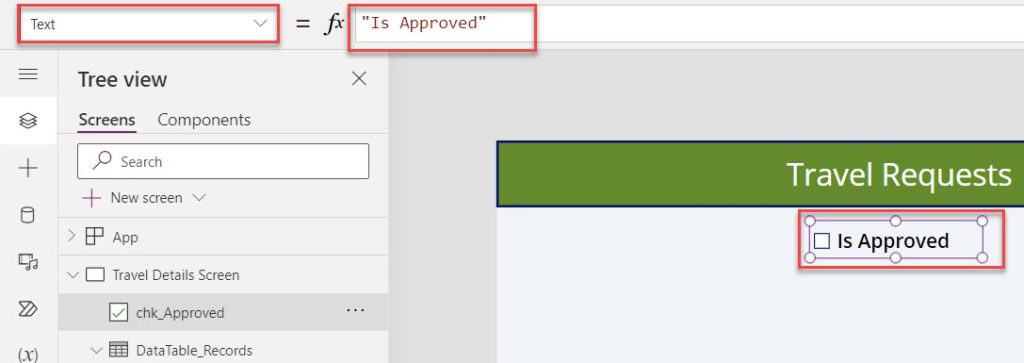
3. Then, insert a Data table control and set its Items property to the code below.
Items = Filter(
    'Travel Requests',
    Approved = chk_Approved.Value
)
Where,
- Filter() = We can use Filter to find a set of records that match one or more criteria
- ‘Travel Requests’ = SharePoint Online list
- Approved = SharePoint list Yes/No field
- chk_Approved = Power Apps checkbox name
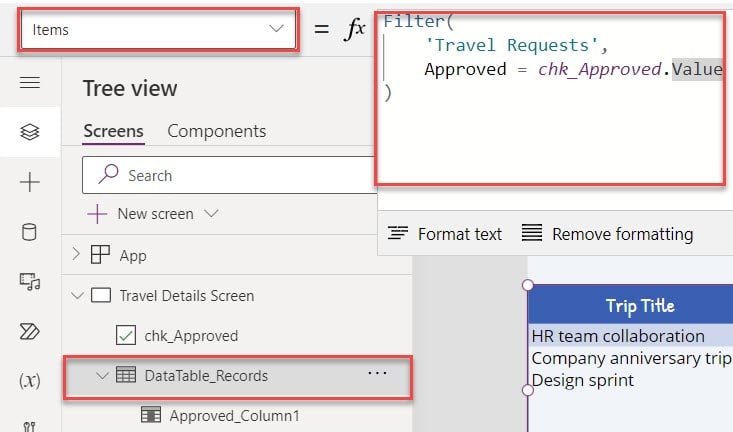
4. Once your app is ready, Save, Publish, and Preview the app. When the user selects or checks the “Is Approved” checkbox control, the data table will filter and display only checked items like below.
This way, you can filter the Power Apps data table using a single checkbox control.
Filter Power Apps Data Table using Multiple Checkboxes
This section will see how to filter the Power Apps data table using multiple checkboxes.
Scenario:
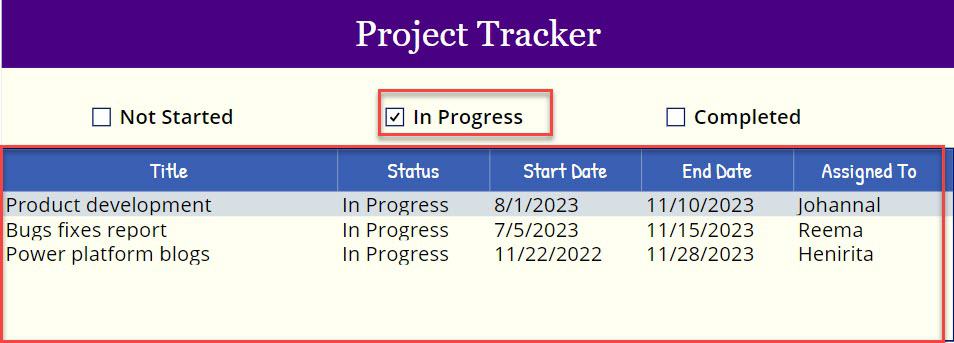
In Power Apps, there are three check box controls [Not Started, In Progress, and Completed] and a data table control that retrieves the records from a collection [colProjects].
The data table will filter and show only in-progress records when the user checks the “In progress” checkbox.
To achieve it, follow the below steps:
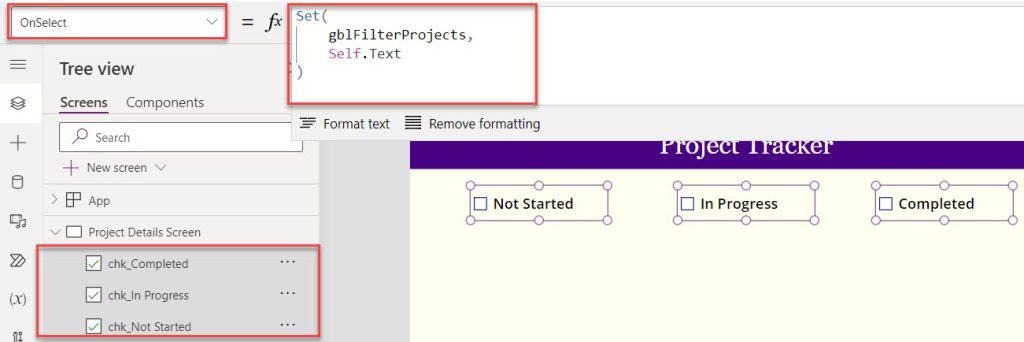
1. On the Power Apps Screen -> Insert three checkbox controls and set their OnSelect property as:
OnSelect = Set(
    gblFilterProjects,
    Self.Text
)
Where,
- gblFilterProjects = Power Apps Global Variable Name
2. Next, insert a Data table control and set its Items property to the code below.
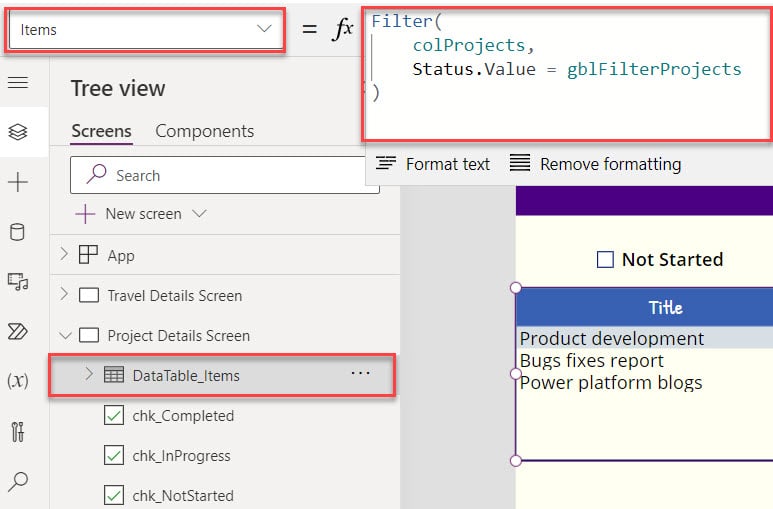
Items = Filter(
    colProjects,
    Status.Value = gblFilterProjects
)
Where,
- colProjects = Power Apps collection
- Status = Collection choice field
3. Save, Publish, and preview the app. If the user selects the “Not started checkbox”, the data table filters and displays not started records. And, if the user selects another checkbox again, like the Completed check box, then the data table will only display completed records.
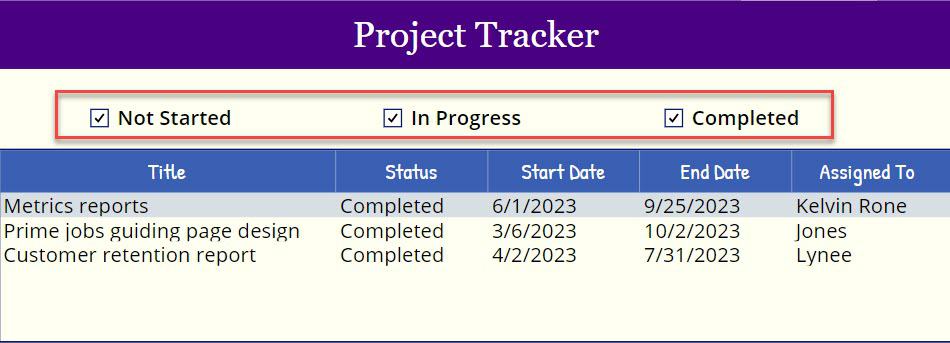
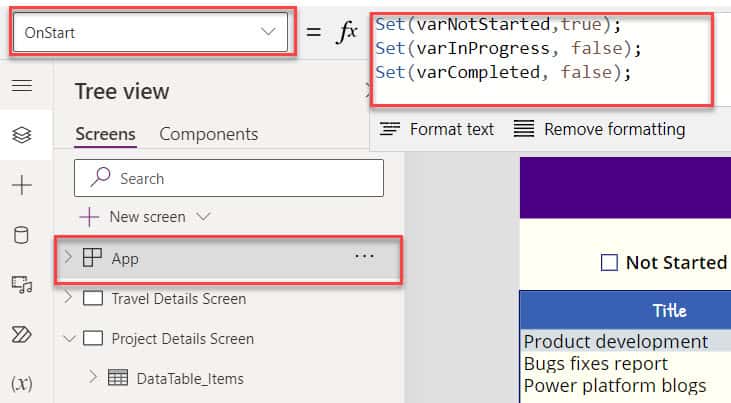
4. But, it should be not like this, to overcome this issue, set the variable to all checkboxes. For that, select the App object and set its Onstart property as:
OnStart = Set(varNotStarted,true);
Set(varInProgress, false);
Set(varCompleted, false)
Where,
- Set() = This function is used to set a global variable to the entire app
- varNotStarted, varInProgress, varCompleted = Variable Names
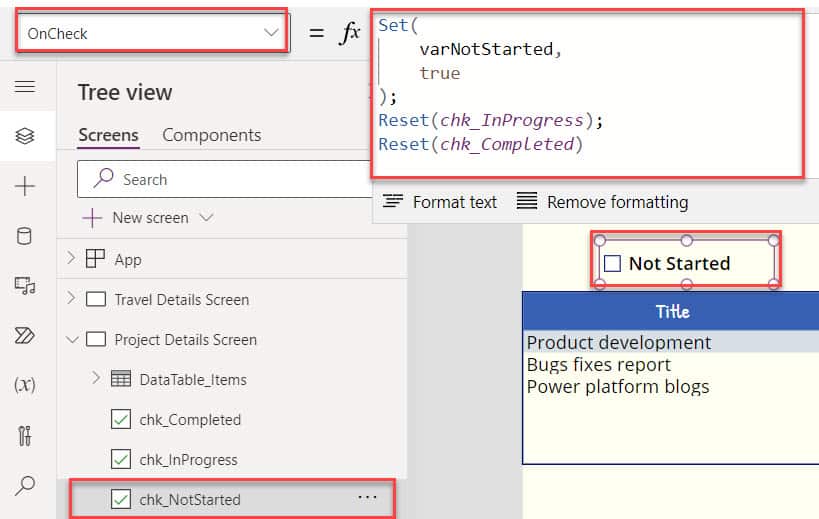
5. Now, select the three Checkbox controls and set their Default and OnCheck properties as shown below.
Default = varNotStarted
OnCheck = Set(
    varNotStarted,
    true                                                                    //For chk_NotStarted
);
Reset(chk_InProgress);
Reset(chk_Completed)

Default= varInProgress
OnCheck = Set(
    varNotStarted,
    false                                                                 //For chk_InProgress
);
Reset(chk_NotStarted);
Reset(chk_Completed)

Default = varCompleted
OnCheck = Set(
    varNotStarted,
    false                                                                //For chk_Completed
);
Reset(chk_InProgress);
Reset(chk_NotStarted)
Where,
- chk_NotStarted, chk_InProgress, chk_Completed = Power Apps checkbox names
- Reset() = This function is used to reset a control to its Default property value
6. Once your app is ready, Save, Publish, and Preview the app. The data table filters and displays each record from the collection based on the checkbox selected value.
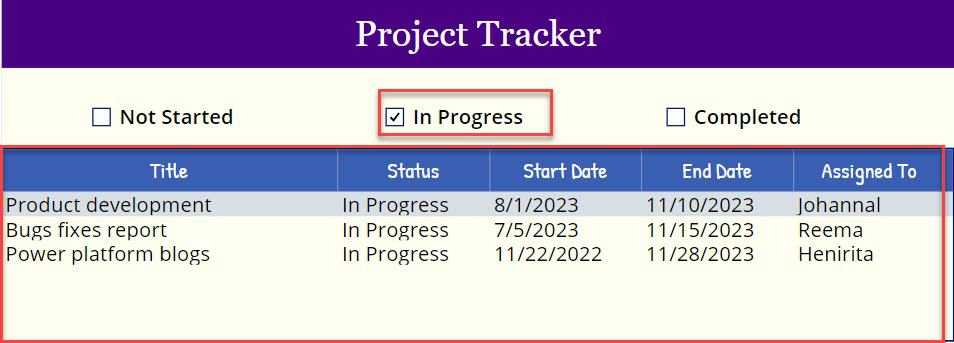
This way. we can filter the Power Apps data table using multiple checkboxes.
I hope you got an overall idea of how to filter the Power Apps data table control using a single check box and multiple checkboxes with different scenarios.
Also, you may like some more tutorials:
- Power Apps Uncheck Checkbox When Another is Checked
- Power Apps Data Table Group By
- Power BI Table Conditional Formatting
- Sort Data Table in Power Apps
I am Bijay a Microsoft MVP (10 times – My MVP Profile) in SharePoint and have more than 17 years of expertise in SharePoint Online Office 365, SharePoint subscription edition, and SharePoint 2019/2016/2013. Currently working in my own venture TSInfo Technologies a SharePoint development, consulting, and training company. I also run the popular SharePoint website EnjoySharePoint.com