Do you want to create a Word document from the SharePoint list item using Power Automate? This Power Automate tutorial will show us how to generate a Word document template from a SharePoint list item using Power Automate.
For example, we have a SharePoint list called Order Tracking, where we track the information related to Customer Order. This SharePoint list contains the following columns:
| Column Name | Type |
|---|---|
| Title | Single line of text |
| Customer Name | Single line of text |
| Shipping Address | Single line of text |
| Order Date | Date/Time |
| Product Ordered | Choice [Laptop, Pendrive, Headphone] |
| Quantity | Number |
| Total Amount | Number |
| Payment Status | Choice [Paid, Unpaid, Declined] |
| Invoice Number | Single line of text |
| Payment With | Chouce [UPI, Cash, Card] |
| Payment Date | Date/Time |
| Invoice | Attachment |

Now, when a new order is added, or the order is modified in the SharePoint list. Suppose the Payment status is paid. Then, based on the data we gave in the SharePoint list, a new Invoice will be generated in the form of a Word document.
To do this in Power Automate, we will create an Automated Cloud Flow that will trigger when a user creates or modifies the SharePoint list. Then, it checks the Payment Status is equal to paid; it will populate the Word document template and map the Sharepoint data with properties. Once it is done, we will create a Word Document in the Invoice library in SharePoint.
At last, we will convert this Word file to a PDF file and update it to the SharePoint list in the Invoice Column.
Create a Word document from a SharePoint list item using Power Automate
Here, we will create a Word document from a SharePoint list item using Power Automate without premium.
First, we will create a Word Document template in our local system, and then we will upload this file to the SharePoint library. This Word document template contains the following properties:
- Date
- Invoice No.
- Customer Name
- Address
- Product Name
- Quantity
- Total Amount
- Payment By
- Order Date
- Status
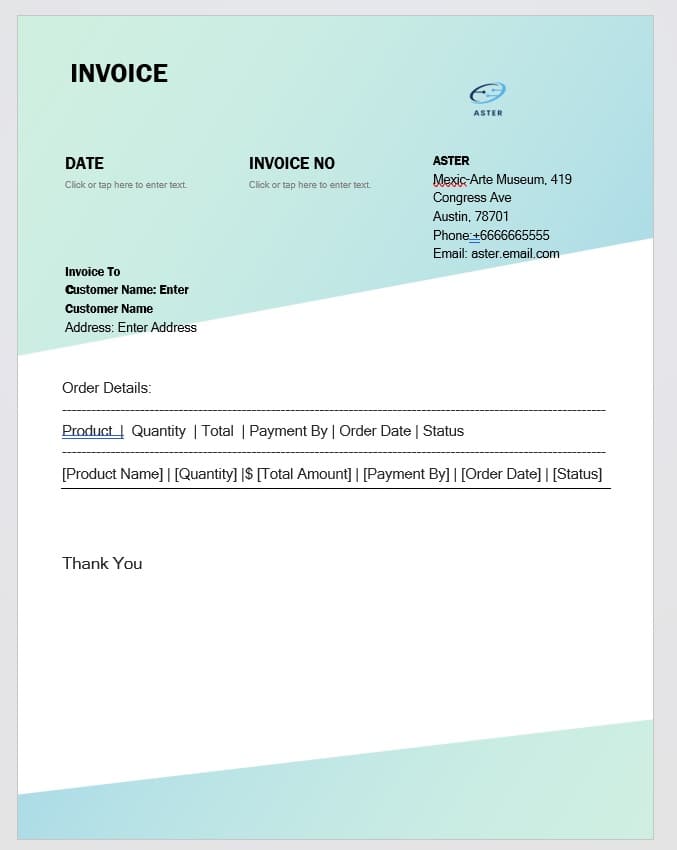
To add properties in the Word document, download the Word document file and follow the below steps:
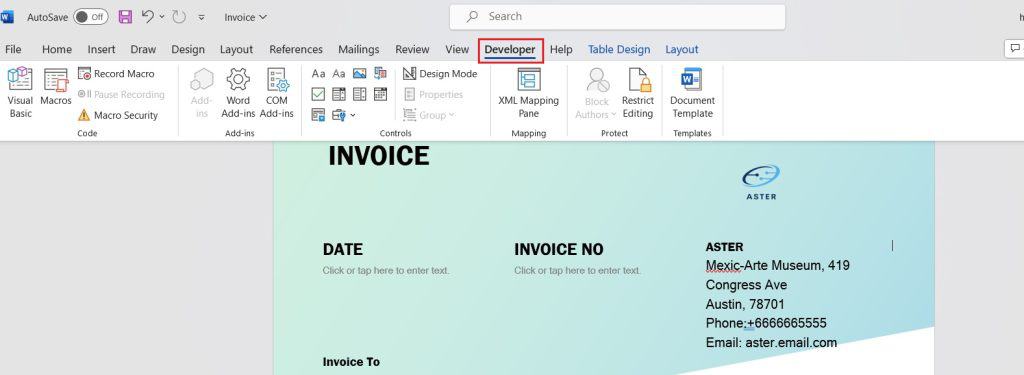
- Click on the Developer tab in the Ribbon toolbar
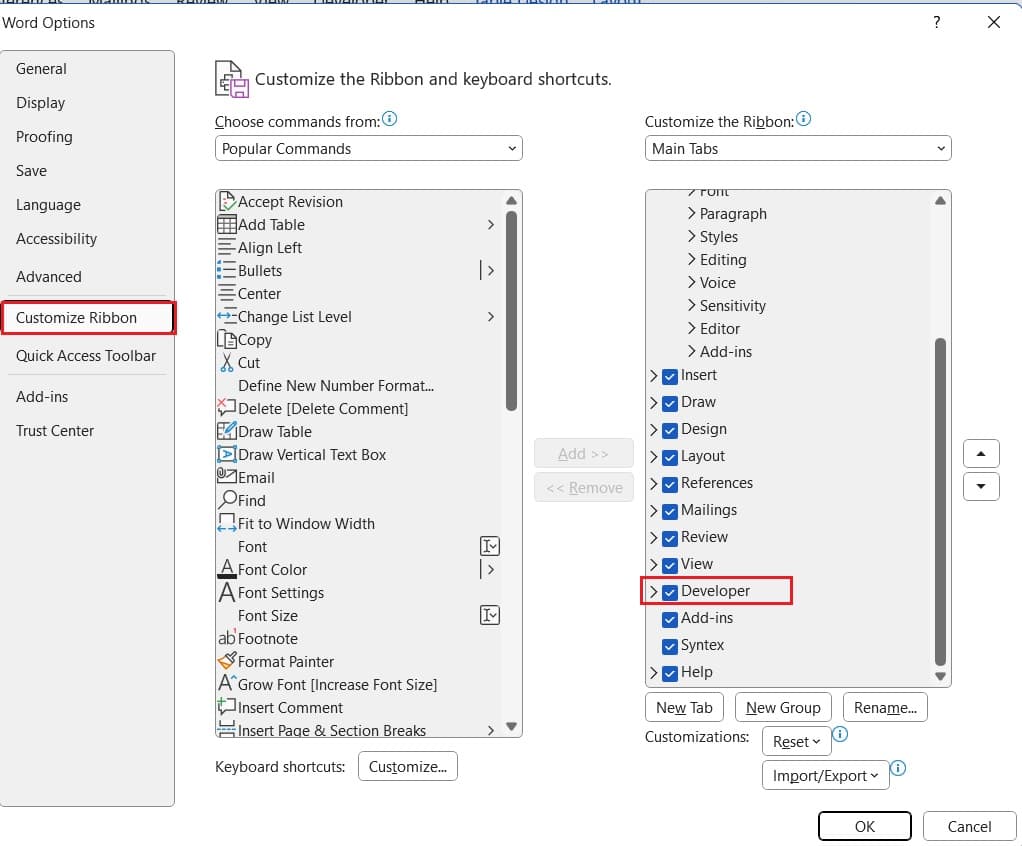
If the Developer option is not available, then click on File -> select Options -> select Customize Ribbon -> select the Developer option. Then click on OK.
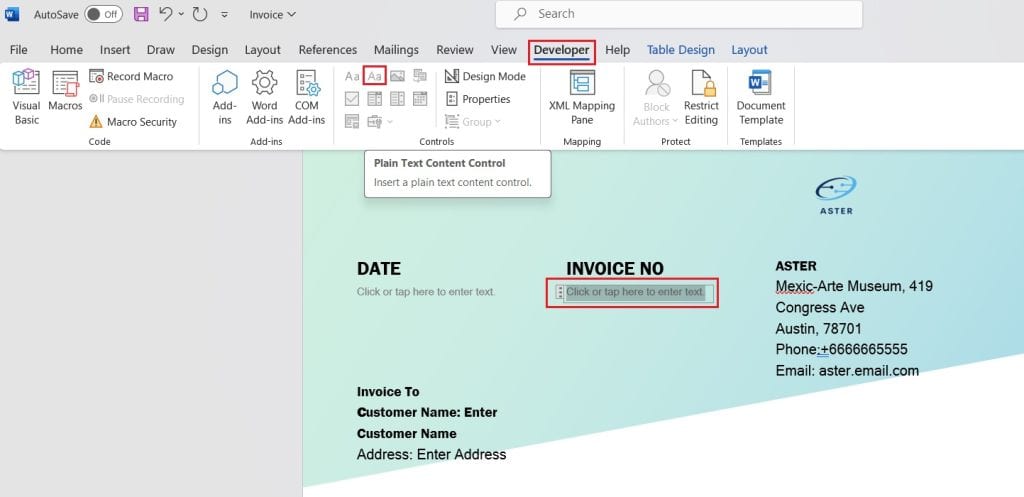
- Next, we will select the Invoice Number and then select the Plain text Content Control option like the one below:
- Once we add the Plain text content control, after the click on the Properties option. Then provide the below information:
- Title: Provide the title of the properties.
- Tag: Provide the tag of the properties
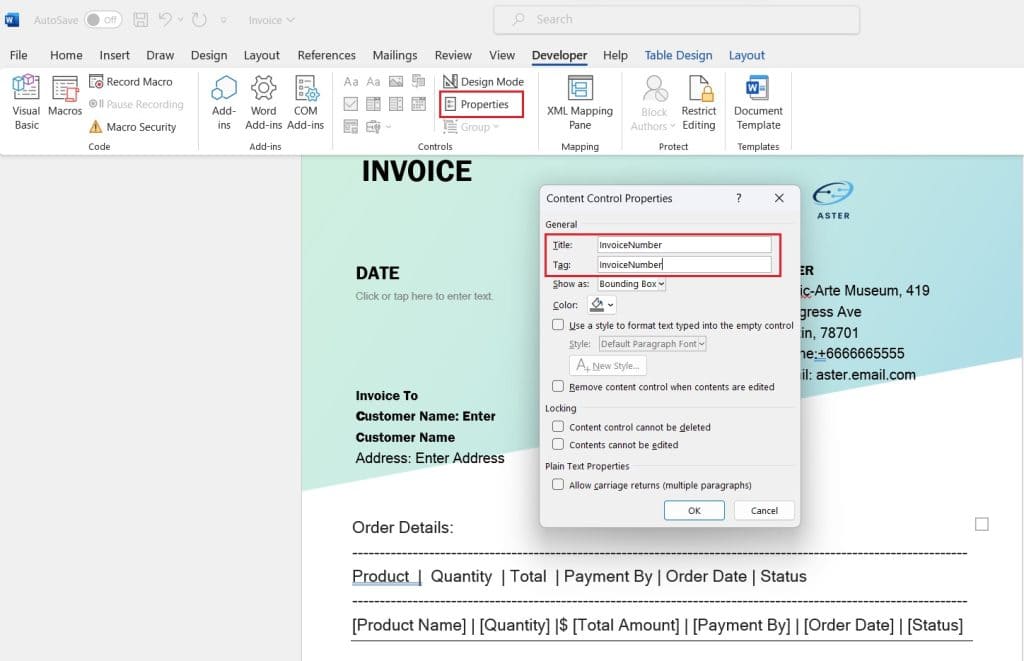
Now, if we click on the Invoice Number, you can enter the Invoice number.
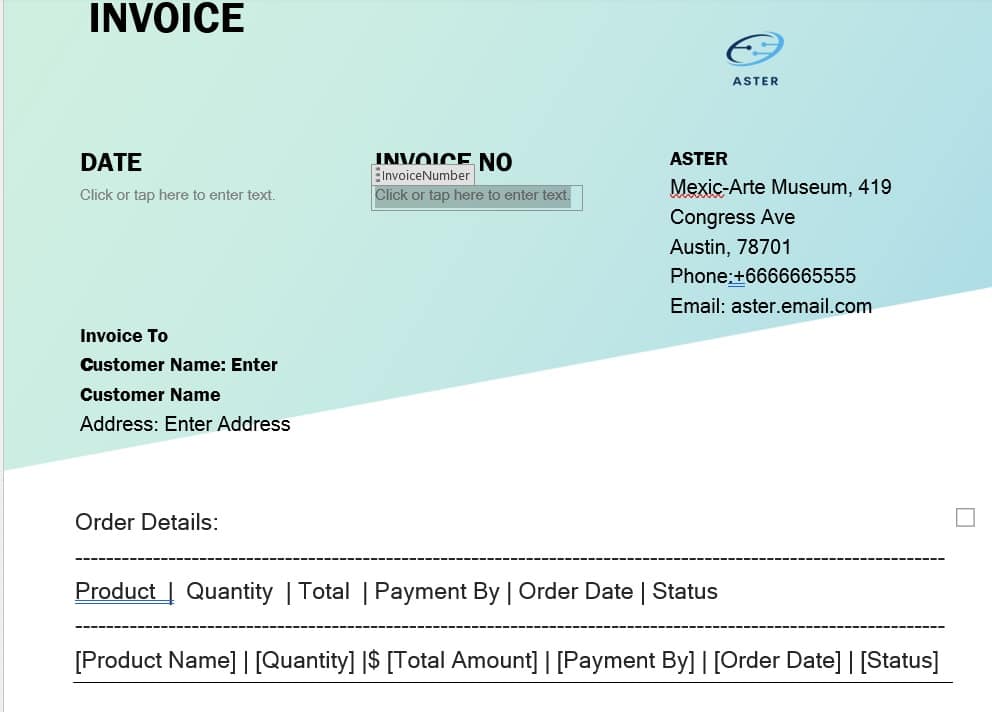
Similarly, you can add the plain text content controller and add properties, title, and tag to the rest of the fields in the Word document.
Once you define all the properties, then upload this document to the SharePoint library. Follow the below steps to create the flow in Power Automate.
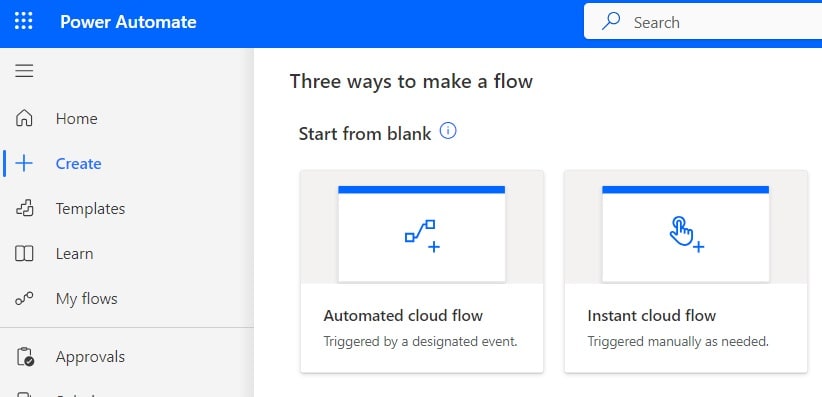
1. Open Power Automate Cloud, click the +Create icon, and select the Automated Cloud flow.
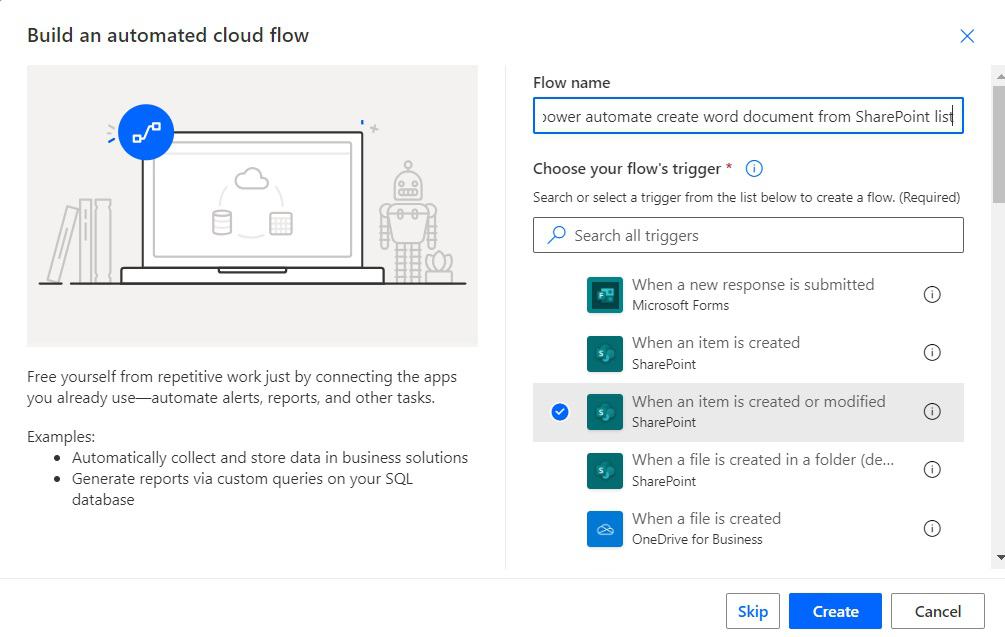
2. Then, provide the flow name and select the ‘When an item is created or modified‘ action. Click on Create.
Now you can see the ‘When an item is created or modified’ action is added to the flow page. Then provide the below information:
- Site address: Provide the SharePoint Site address.
- List name: Provide the List name

3. Next, we will check whether the Payment Status is paid or not; for this, click on +New step -> select Condition action. Then provide the below information:
- Choose a value: Select the Payment Status from dynamic content.
- Operator: Select “is equal to” operator
- Choose a value: Write the value as Paid.

4. If the above condition is true, we will populate the Word document to map the properties values.
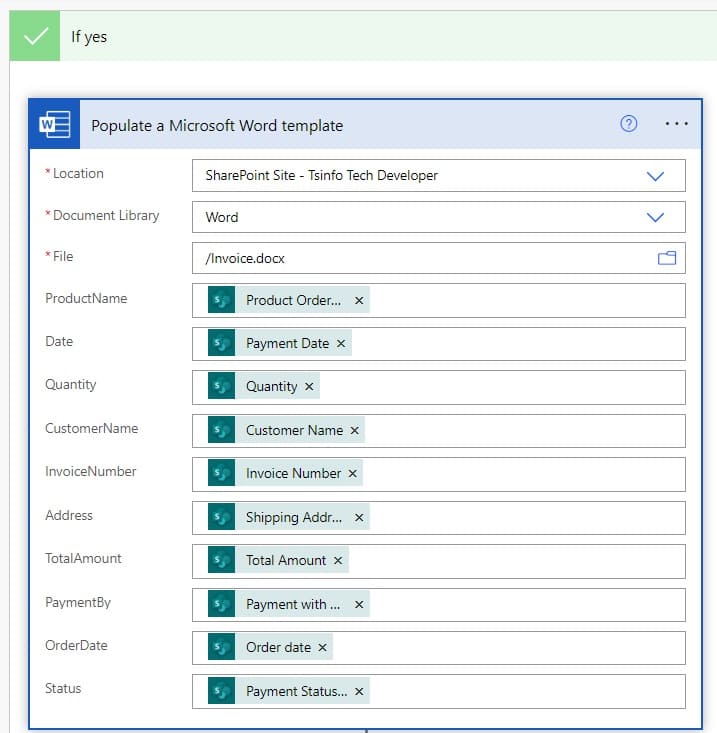
In the If Yes part of the condition, click on Add an action and select the ‘Populate a Microsoft Word document’ action. Then, provide the information below.
- Location: Provide the location word template file
- Document Library: Provide the document library where Word document is located
- File: Select the file.
- ProductName: Select the Product Ordered Value from dynamic content
- Date: Select Payment Date from dynamic content
- Quantity: Select Quantity from dynamic content
- CustomerName: Select Customer Name from dynamic content
- InvoiceNumber: Select Invoice Number from dynamic content
- Address: Select Shipping Address from dynamic content
- TotalAmount: Select Total Amount from dynamic content
- PaymentBy: Select Payment with Value from dynamic content
- OrderDate: Select Order date from dynamic content
- Status: Select Payment Status from dynamic content
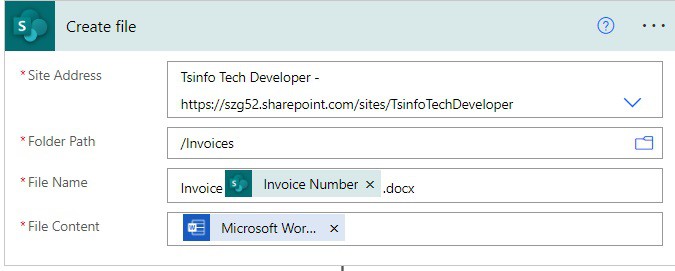
5. Now, we will create a file in the SharePoint library called Invoices; for this, click on Add an action and select the ‘Create File’ action. Then provide the below information:
- Site address: Select or provide the SharePoint site address
- Folder path: Provide the folder path
- File name: Provide the file name with the docx extension
- File content: Select the Microsoft Word document from dynamic content
6. Now, we will convert the Word file to PDF; for this, click on Add an action and select the ‘Convert to pdf’ action from Encodian. Then, provide the below information.
- File name: Provide the File name of docx file
- File content: Provide the Microsoft Word document from dynamic content
- PDF file name: provide the file name with .pdf extension. If you want to use the Invoice number for the file name. Then, use the below expression.
replace(triggerOutputs()?['body/InvoiceNumber'], '#', '')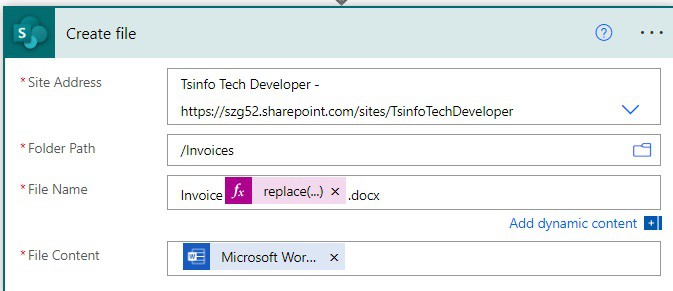
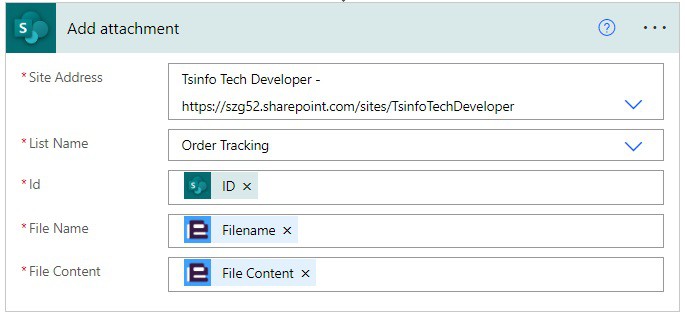
7. At last, we will Add an attachment to the SharePoint list item; for this, click on Add an action and select Add attachment action. Then provide the below information:
- Site Address: Select or Provide the SharePoint site address
- List Name: Provide the list name
- Id: Select the ID from the dynamic content
- File Name: Select the File name -Encodian from dynamic content
- File Content: Select the File content-Encodian from dynamic content.
8. Now save the flow and run the flow manually. Then, create an item in the SharePoint List.

After that, you can see the flow run successfully, and you can see a Word document is created in the SharePoint library having the data from the SharePoint list.
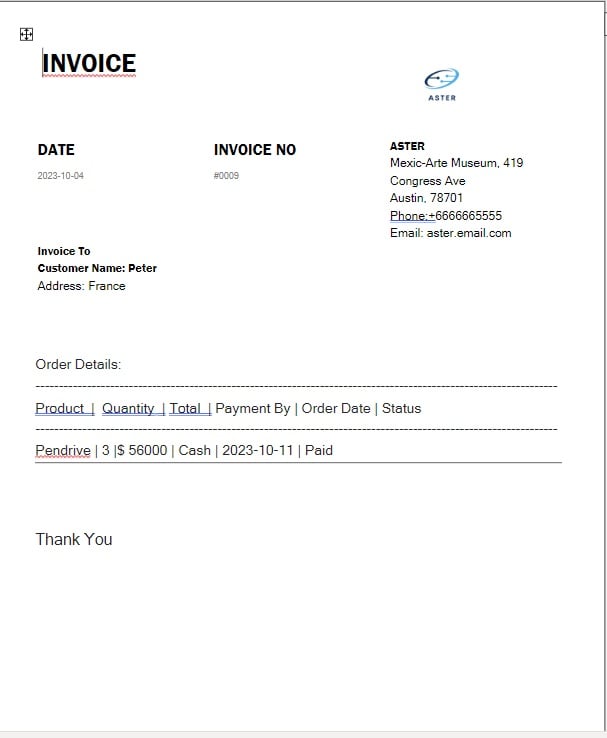
Also, an attachment is added to the SharePoint list.

This is how to create a Word document from a SharePoint list item using Power Automate.
Conclusion
In this Power Automate tutorial, we saw how to automatically create a Word document from a SharePoint list item using Power Automate. This is how to populate a Word document in Power Automate without premium.
You may also like:
- Format Numbers to Decimal Places Using Power Automate
- How to Format Number to Percentage in Power Automate?
- Power Automate Desktop SharePoint Get items Filter Query
- Convert String to Date for SharePoint list using Power Automate
I am Bijay a Microsoft MVP (10 times – My MVP Profile) in SharePoint and have more than 17 years of expertise in SharePoint Online Office 365, SharePoint subscription edition, and SharePoint 2019/2016/2013. Currently working in my own venture TSInfo Technologies a SharePoint development, consulting, and training company. I also run the popular SharePoint website EnjoySharePoint.com