In this Power Automate Desktop tutorial, we will see how to convert data table columns to list in Power Automate. Also, we will see how to retrieve data table columns to list from Excel using Power Automate Desktop.
Here, we are going to cover the topics below:
- How to convert data table column to list using Power Automate Desktop
- How to retrieve data table columns to list from Excel using Power Automate Desktop.
Convert data table column to list using Power Automate Desktop
Here, we will see how to convert the data table column to a list using Power Automate Desktop.
For this, we will take data table variable action, which contains the below columns and data:
- Id
- Name
- Department
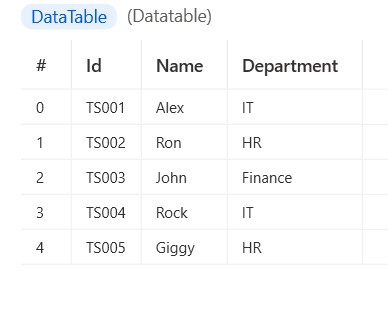
Now we will create a desktop flow that will convert the name column to a list in Power Automate Desktop.
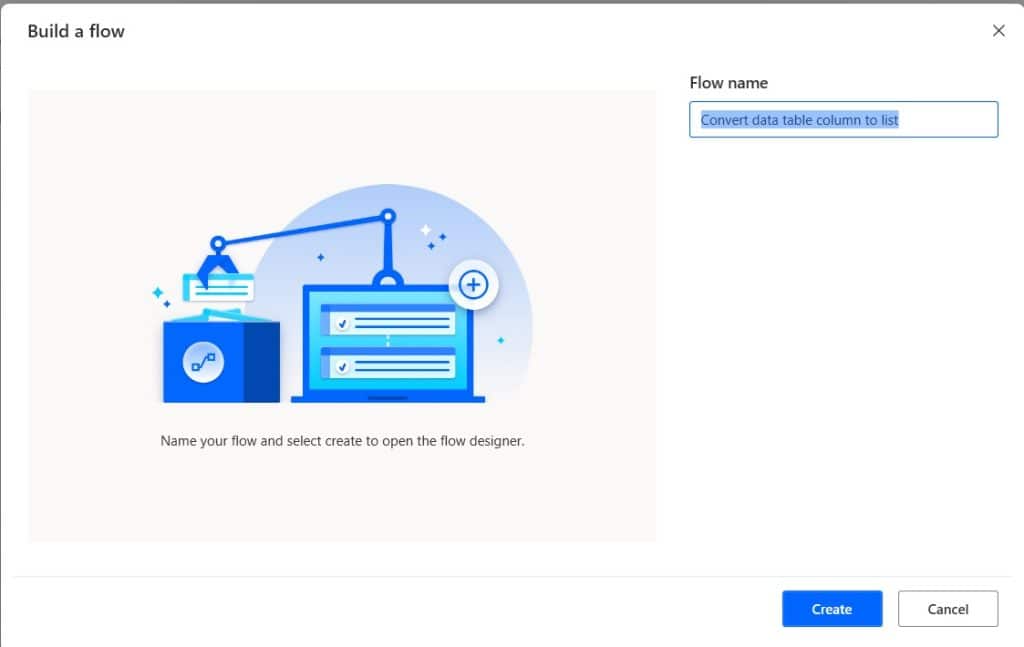
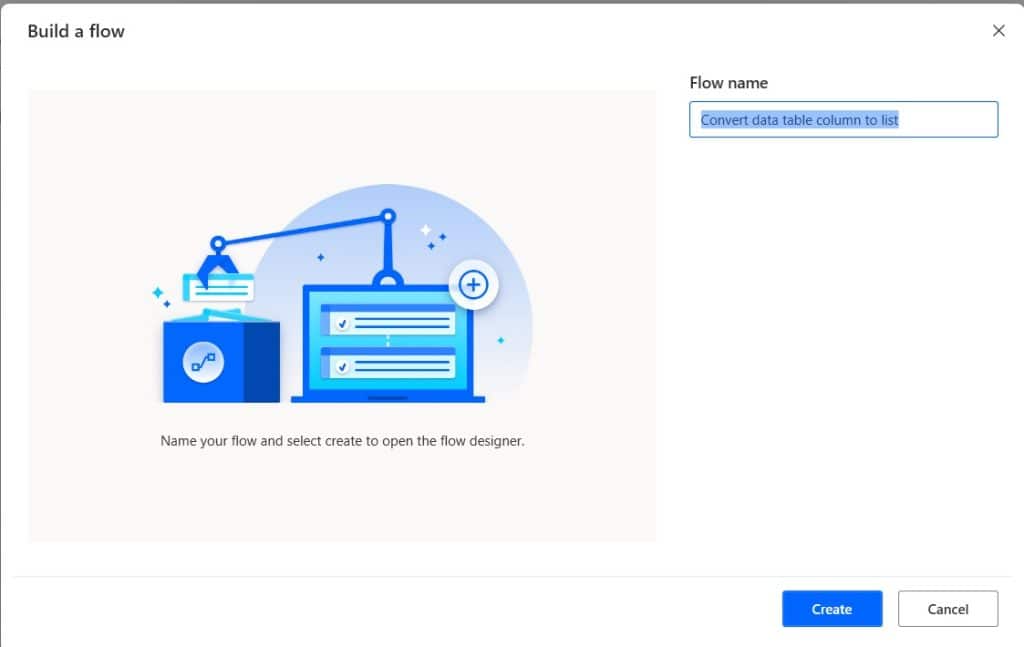
Step 1: Open Power Automate Desktop, then provide the flow name and click on Create.
Step 2: Now we will create the Data table, so expand the variable-> DataTable section. Then, drag and drop the Create data table action to the workspace. follow the below steps:
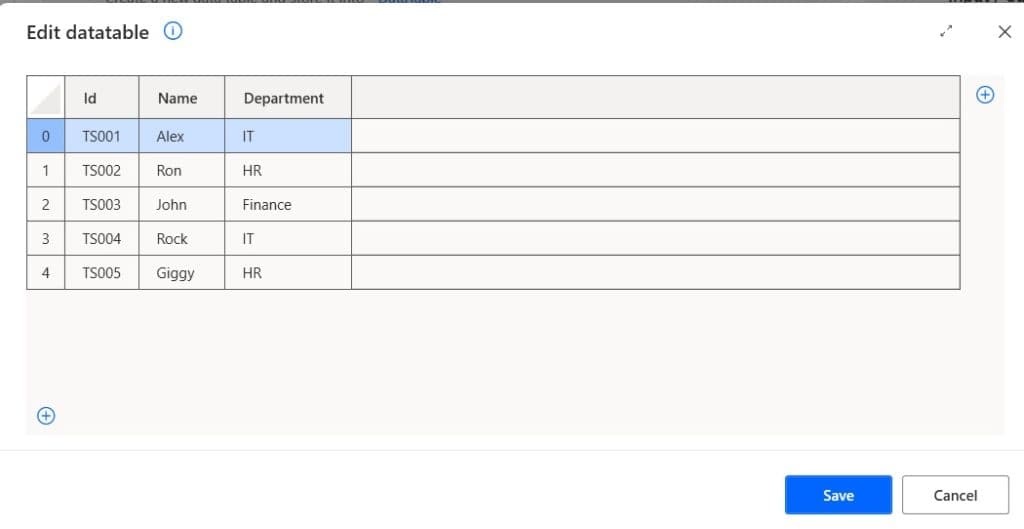
- First, click on the Edit icon to insert the column and data.
- Then, click on the + icon on the right top to add columns.
- Add 3 columns and rename it to Id, Name, and Department.
- As the First row is already there in the table, so, you can enter data like the below image. Then you can click on +icon in the bottom left of the table, and enter the rest data.
Once you enter the data, it will look like the below screenshot. Then click on Save.
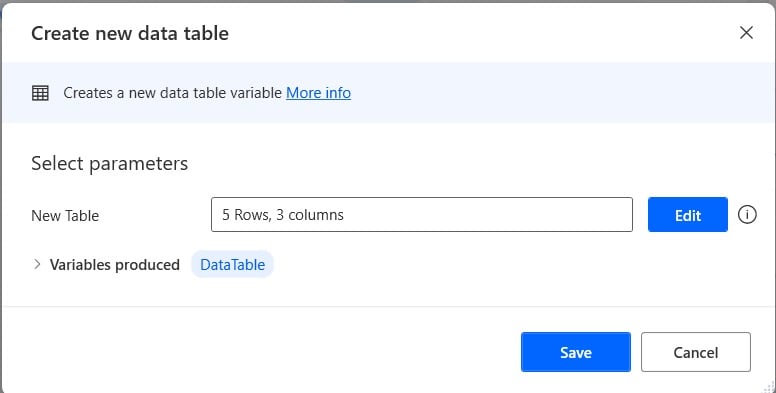
Now you can see the data table contains 5 rows and 3 columns. Then click on Save, and the data table is created.
Step 2: Now we will convert the Name column from the data table to a list, For this, from the Variable section, drag and drop the ‘Retrieve data table column to list’ action, to workspace. Provide the below information:
- Data table: Select the Data table variable by clicking on the select variable icon {x}.
- Column name or index: Here, you can provide the column name i.e. Name. Else you can provide the index i.e. 1, as the index starts from 0.
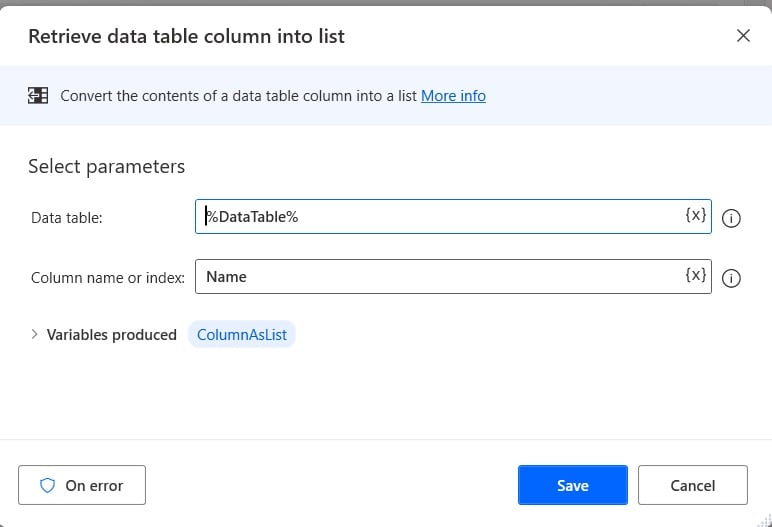
Step 3: Now run the flow by clicking on the run button. Then in the flow variable section, double-click on the ‘ColumnAsList’ variable, and you can see the output.
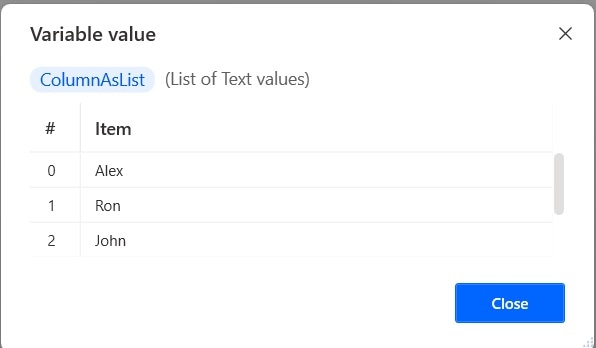
Retrieve data table columns to list from Excel using Power Automate Desktop
Here, we will see how to retrieve data table columns to list from Excel using Power Automate Desktop.
For example, I already have an Excel file Employee.xlsx, which contains the below columns:
- Id
- Name
- Department
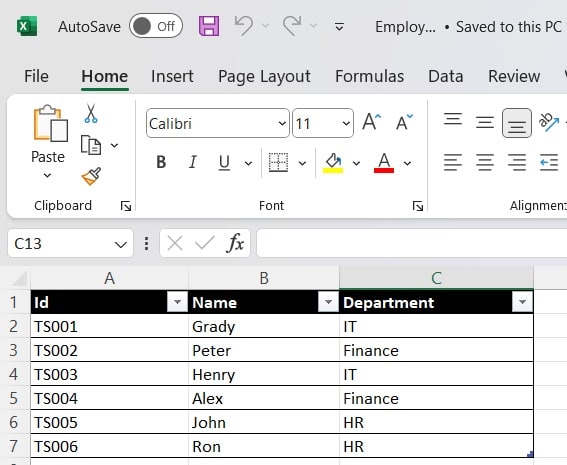
So, we will create a desktop flow, that will open the Excel and select the Name column, as we will convert the name column to List. Then we will copy the selected cells in Excel, and add them to the clipboard. We will use the clipboard text and split it into a List.
Step 1: Open Power Automate Desktop, then provide the flow name and click on Create.
Step 2: First, we will open the Excel, so expand the Excel section and then drag and drop the Launch Excel section. Then provide the below information:
- Launch Excel: Select ‘and open the following document’ option
- Document Path: Provide the document path by clicking on the Select file icon.
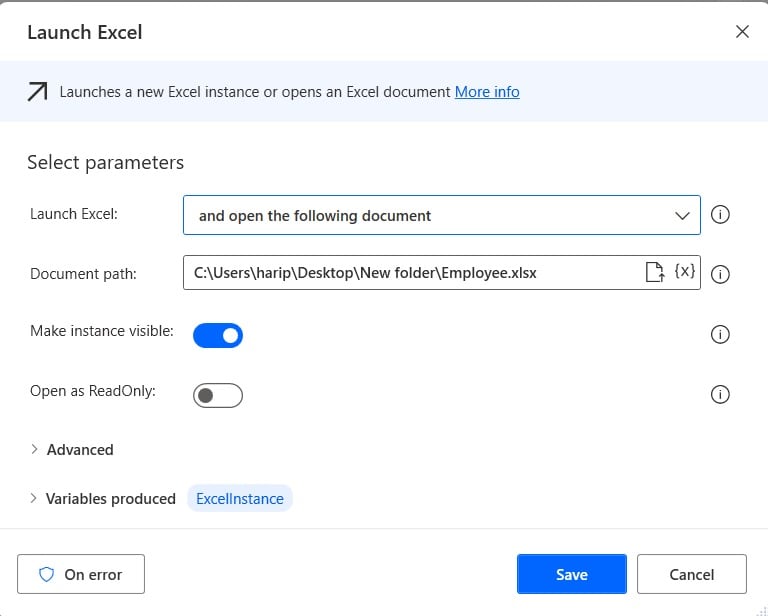
Step 3: Now we will select the cell coming under the name column, for this, expand the Excel section -> expand the Advance section -> then drag and drop the ‘Select cells in Excel worksheet’ action to the workspace. Then provide the below information:
- Excel instance: Select the Excel instance variable
- Select: Select the Range of cells option.
- Start column: Provide the Start column as 2
- Start row: Provide the start row as 2
- End column: Provide the end column as 2.
- End row: Provide the end row as 7.
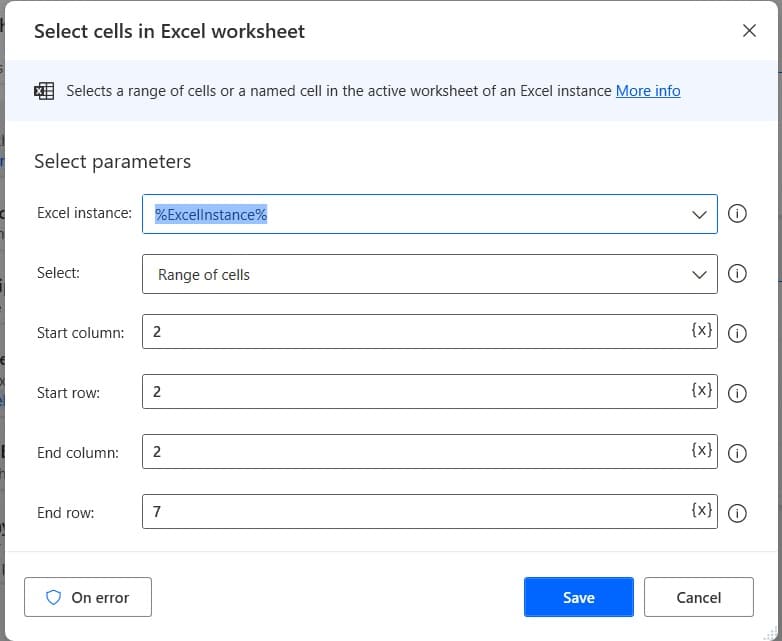
Step 4: We will copy the selected rows, so, from the Excel Advanced section, drag and drop ‘Copy cells from worksheet’ action, then provide the below information:
- Excel Instance: Select the Excel instance variable
- Copy mode: Select the ‘ Values from Selection’ option
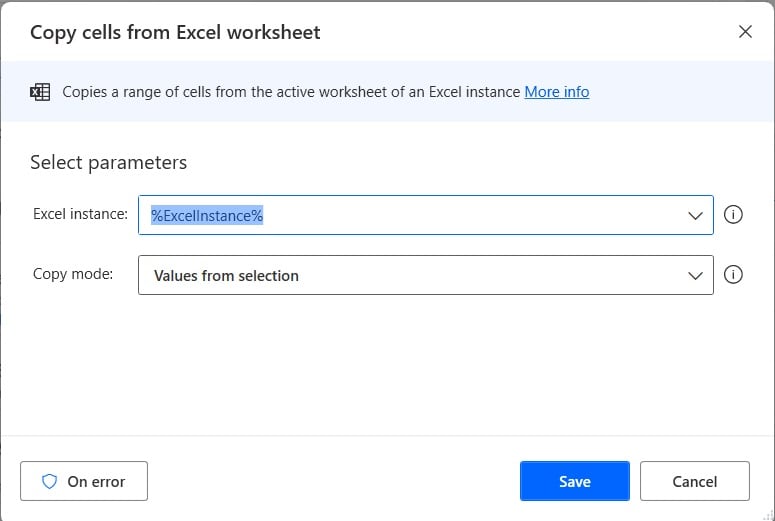
Step 5: Now we will get the copied text from the clipboard, so, expand the clipboard section, then drag and drop the ‘Get Clipboard text’ action to the workspace.
- Here we will get the copied text, which we have copied in the above section, and store it into a variable.
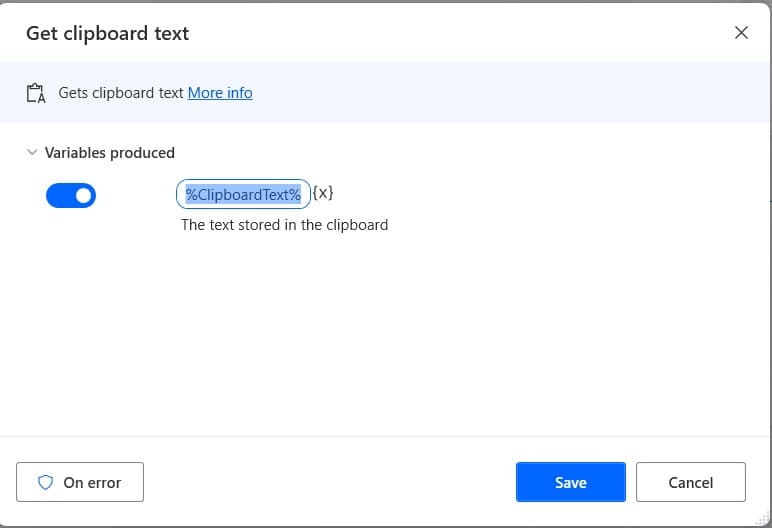
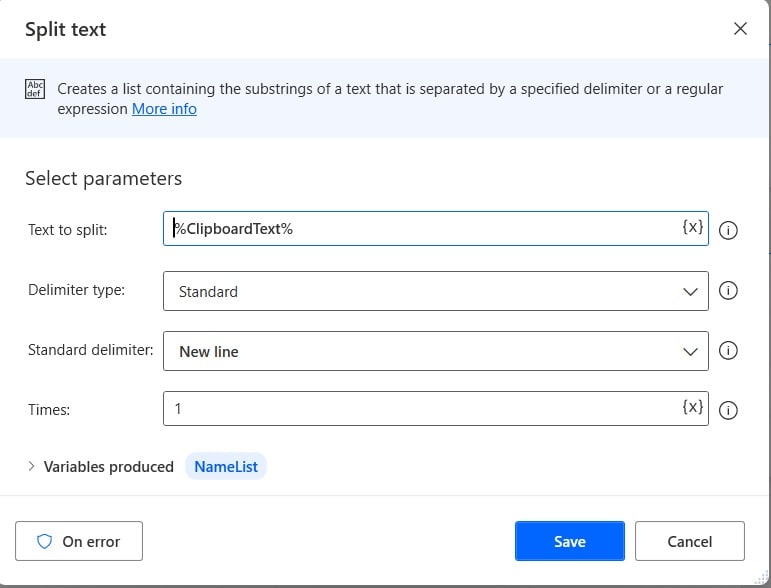
Step 6: Now we will split the text and convert it into a list, for this, expand the Text section, then drag and drop the ‘Split text’ action to the workspace. Then provide the below information:
- Text to split: Here, select the ‘ClipboardText’ variable.
- Delimiter type: Select the type as ‘Standard’
- Standard delimiter: Select the Standard delimiter as New line.
- Times: Select the Times as 1
You can change the variable name as NameList, from dynamic content
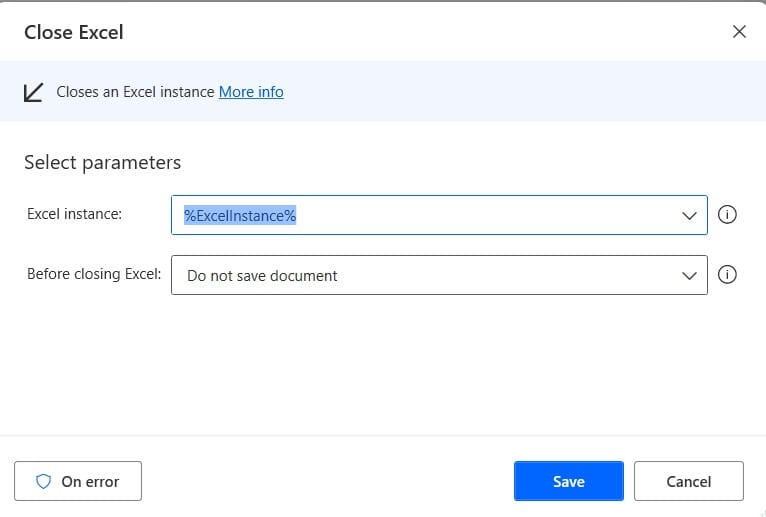
Step 7: Now we will close the Excel; for this, from the Excel section drag and drop the ‘Close Excel’ action. Then provide the below information:
- Excel Instance: Select the Excel Instance variable.
- Before closing Excel: Select the ‘Do not save document option’
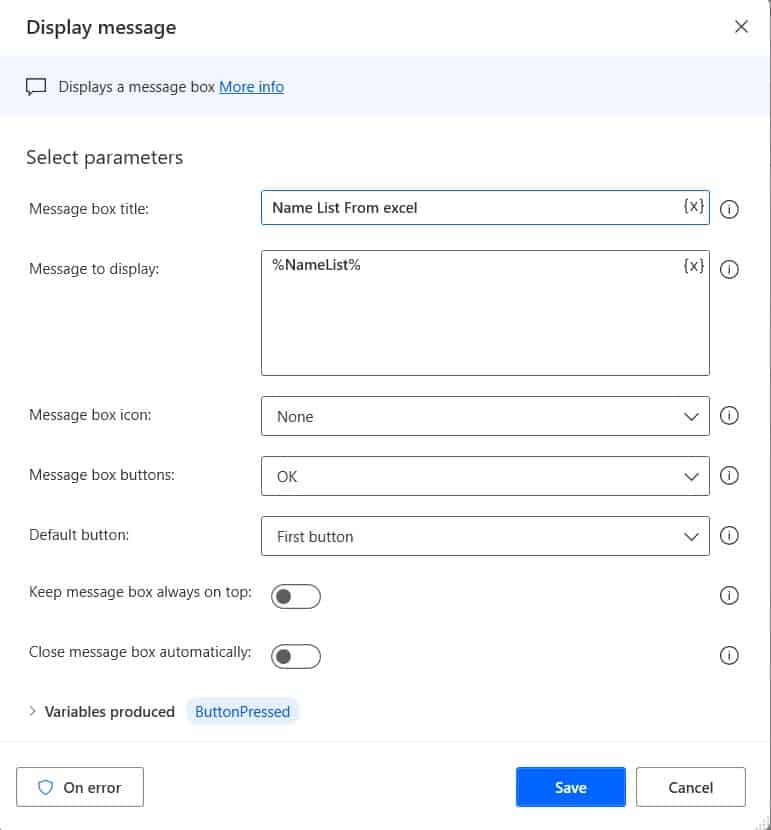
Step 8: Now we will display the output, so, for this, expand the Message box section-> drag and drop the Display the Message’ action to the workspace. Then provide the below information:
- Message box title: Provide the message box title like below.
- Message to display: Select the NameList variable
Step 9: Now run the flow by clicking on the run button; here, you can see the list of names displayed in the Message box.
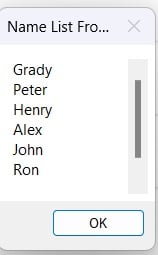
This is how we can retrieve data table columns into a list from Excel using Power Automate Desktop.
Conclusion
In this Power Automate Desktop tutorial, we saw how to convert data table columns to list using Power Automate. Also, we saw how we can retrieve data table columns into a list from Excel using Power Automate Desktop.
You may also like:
- Create File in SharePoint using Power Automate Desktop
- How to Merge Pdf files in Power Automate Desktop?
- How to get an item from a list using Power Automate Desktop?
- Convert Value to String in Power Automate
I am Bijay a Microsoft MVP (10 times – My MVP Profile) in SharePoint and have more than 17 years of expertise in SharePoint Online Office 365, SharePoint subscription edition, and SharePoint 2019/2016/2013. Currently working in my own venture TSInfo Technologies a SharePoint development, consulting, and training company. I also run the popular SharePoint website EnjoySharePoint.com