In this Power Automate Desktop tutorial, we will see how to get items from a SharePoint list using Power Automate. Once we get the items, we will write them down in Excel.
For example, I have created a Sharepoint list called Product List, which contains the following columns:
- Title-Single line of text
- Name: Single line of text
- Description: Multiple Lines of text
- Price: Currency
- Quantity: Number
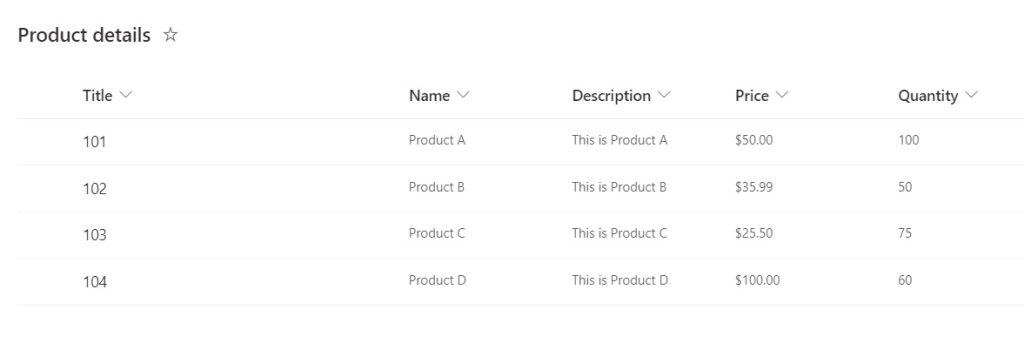
Now, we’ll create a desktop flow that will get items from the above SharePoint list using Power Automate Desktop. Then, loop through each item and write in the Excel worksheet.
For this, i have already created a Product.xlsx worksheet, which contains the below columns:
- Id
- Name
- Price
- Quantity
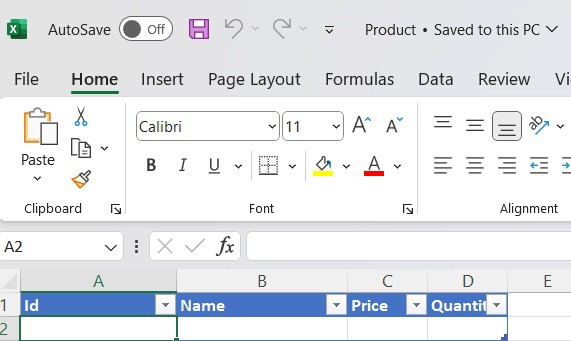
Get items from a SharePoint list using Power Automate Desktop
Here, we will see how to get items from the list using Power Automate Desktop.
Before we start creating the flow, set the SharePoint list, add some items to it, and set up an Excel file in the local system.
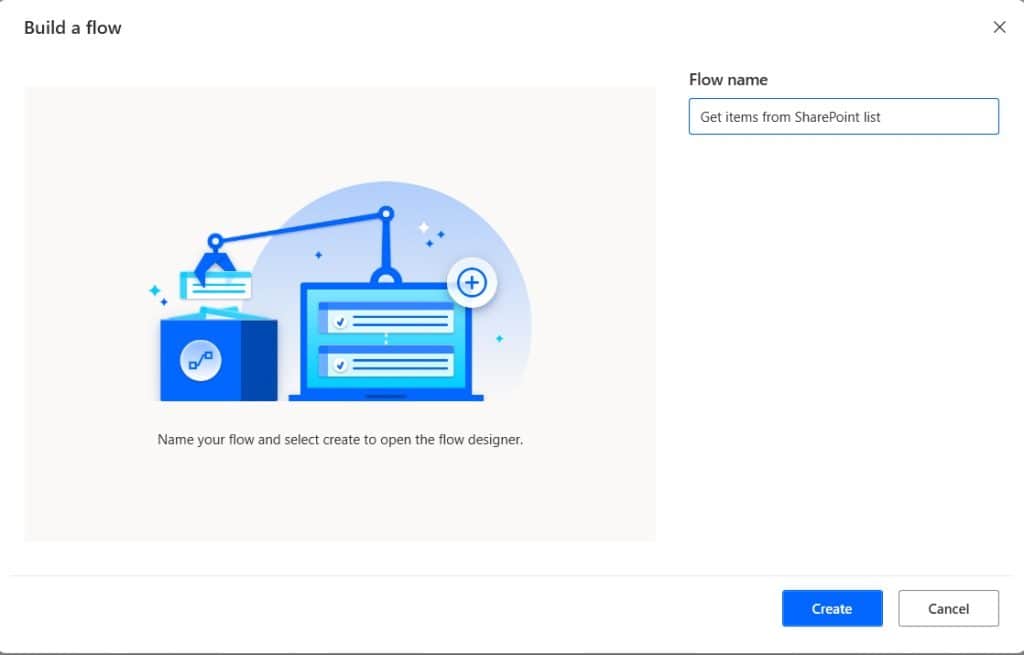
Step 1: Open Power Automate Desktop, provide the flow name, and click on Create.
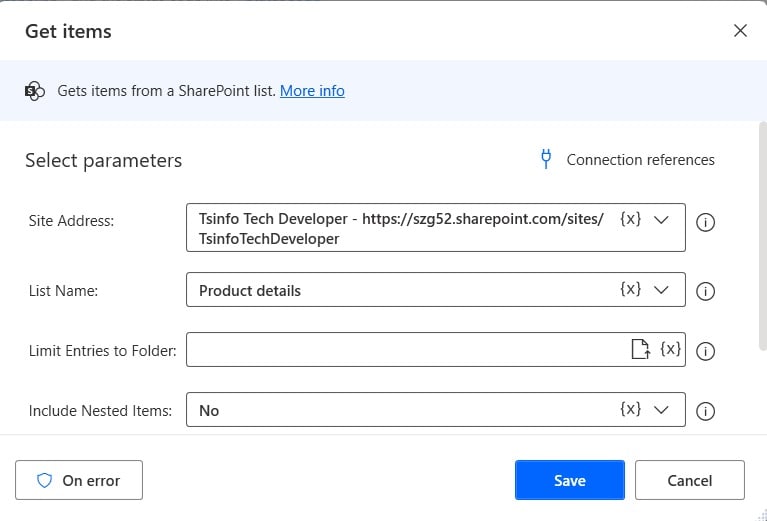
Step 2: Now we will get items action, for this, expand the SharePoint section, then drag and drop the Get items action to Workspace. Then provide the below information:
- Site address: Select the SharePoint site address from dropdown
- List name: Select the List name from the dropdown.
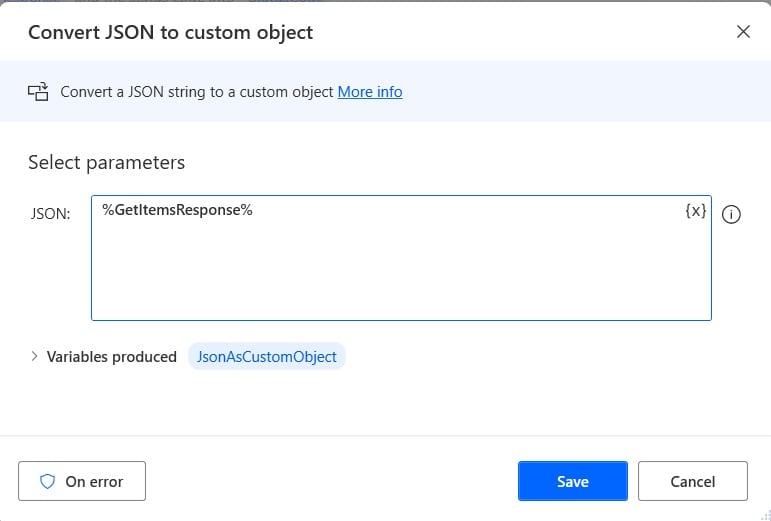
Step 3: Now we will convert JSON to object; drag and drop the Convert JSON to object action. Then provide the below information:
- JSON: So, click on the variable icon{x}, then select ‘GetItemResponse’ and click on Select.
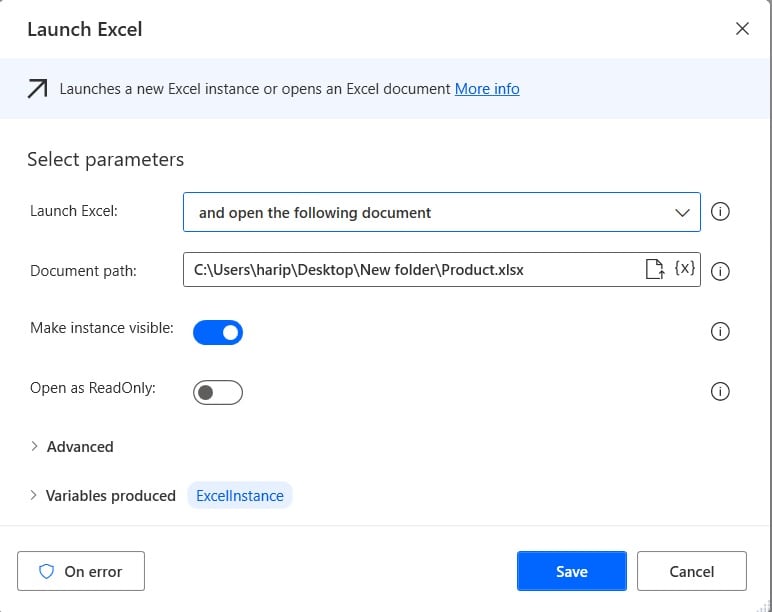
Step 4: Now we will open the Excel, so drag and drop the Launch Excel action to the Canvas. This action will generate a variable ‘ExcelInstance’, or you can change the variable name based on your requirement.
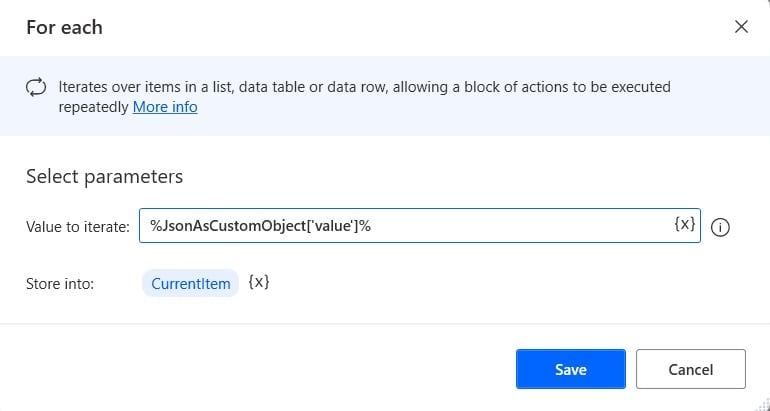
Step 5: Now we will loop through each item in an Excel, so, expand the loop section and then drag and drop the For each action to Workspace. Then provide the below information:
- Value to Iterate: Here, we will select the value array, for this, provide like below
%JsonAsCustomObject['value']%- Store into: The value will be stored in CurrentItem.
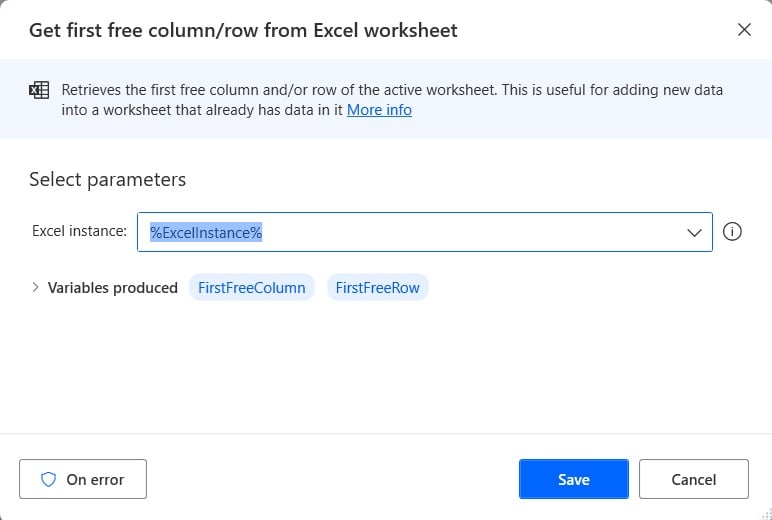
Step 6: We will get the free row in Excel after each iteration, so, expand the Excel section, then drag and drop the ‘ Get first free row/column from Excel worksheet’ action to canvas. Then provide the below information:
- ExcelInstance: Select the ExcelInstance from the variable option.
This action will generate two variables, i.e. FirstFreeRow and FirstFreeColumn.
Step 7: Now we will write in the Title column of the Excel, for this, drag and drop the ‘Write to Excel worksheet’ action to canvas. Then provide the below information:
- Excel Instance: Select the Excel Instance variable.
- Value to write: Provide the below expression:
%CurrentItem.Title%- Write Mode: Select On specified cell option
- Colum: Provide the column as 1.
- Row: Click on variable icon{x}, select FreeRow variable, and click on the Select button.
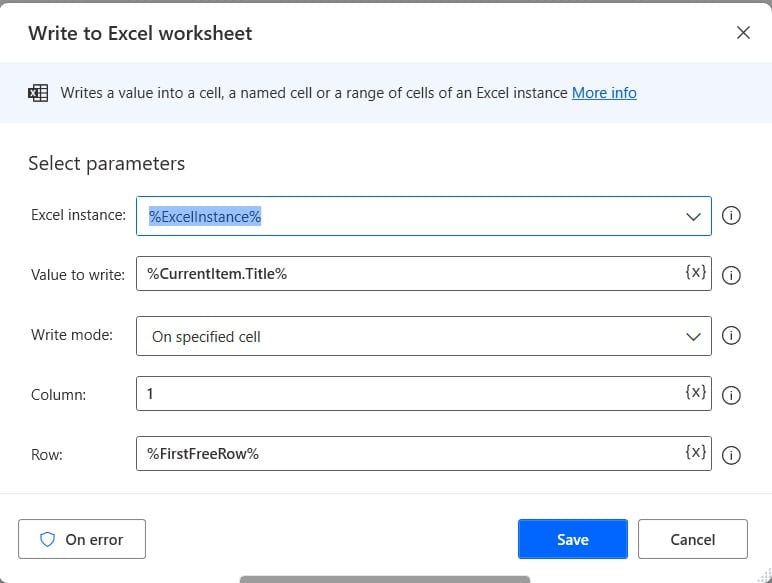
Similarly, we will write in the Name column of the Excel; for this, drag and drop the ‘Write to Excel worksheet’ action to canvas. Then provide the below information:
- Excel Instance: Select the Excel Instance variable.
- Value to write: Provide the below expression:
%CurrentItem.Name%- Write Mode: Select On specified cell option
- Colum: Provide the column as 2.
- Row: Click on variable icon{x}, select FreeRow variable, and click on the Select button.
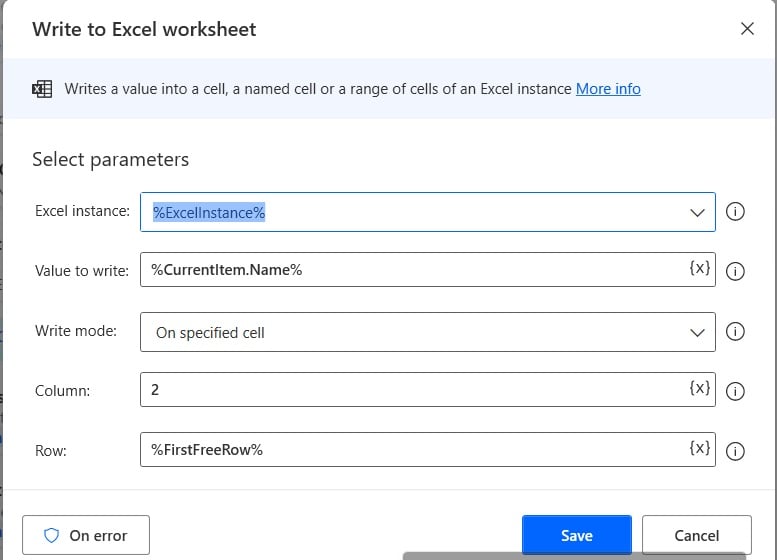
We will write in the Price column of Excel; for this, drag and drop the ‘Write to Excel worksheet’ action to Canvas. Then provide the below information:
- Excel Instance: Select the Excel Instance variable.
- Value to write: Provide the below expression:
%CurrentItem.Price%- Write Mode: Select On specified cell option
- Colum: Provide the column as 3.
- Row: Click on variable icon{x}, select FreeRow variable, and click on the Select button.
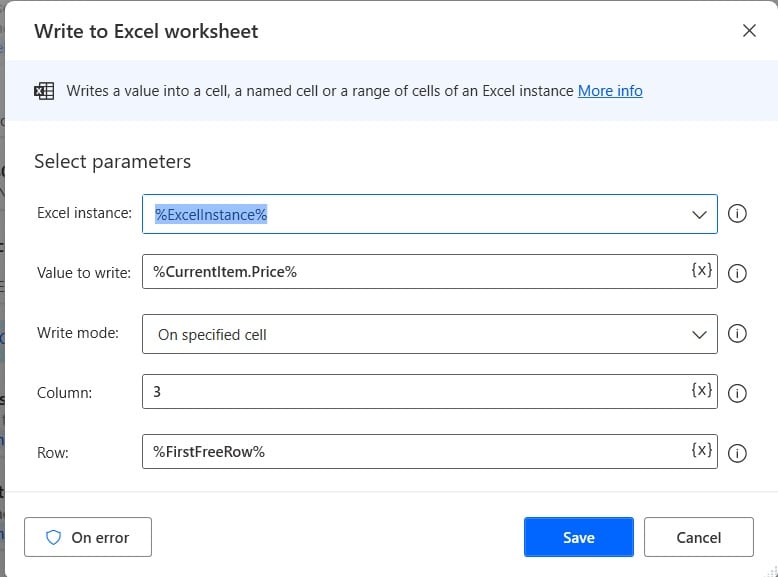
Next, we will write in the Quantity column of Excel; for this, drag and drop the ‘Write to Excel worksheet’ action to Canvas. Then provide the below information:
- Excel Instance: Select the Excel Instance variable.
- Value to write: Provide the below expression:
%CurrentItem.Quantity%- Write Mode: Select On specified cell option
- Colum: Provide the column as 4.
- Row: Click on variable icon{x}, select FreeRow variable, and click on the Select button.
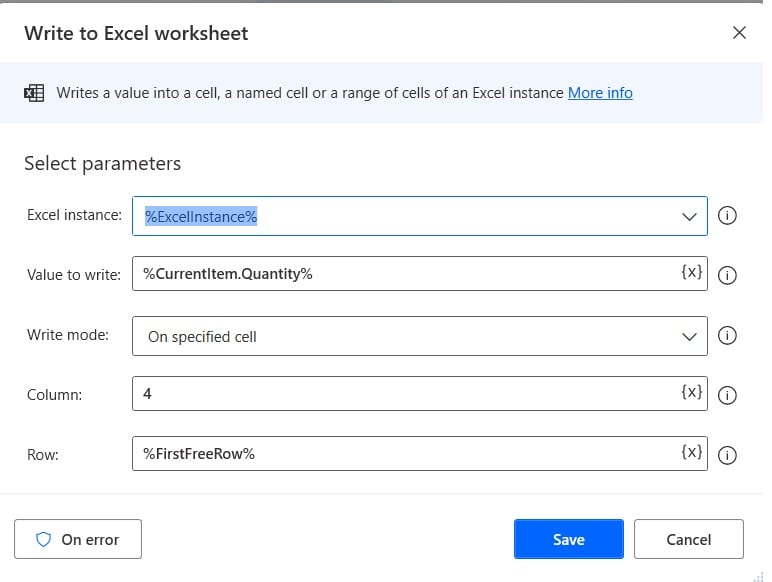
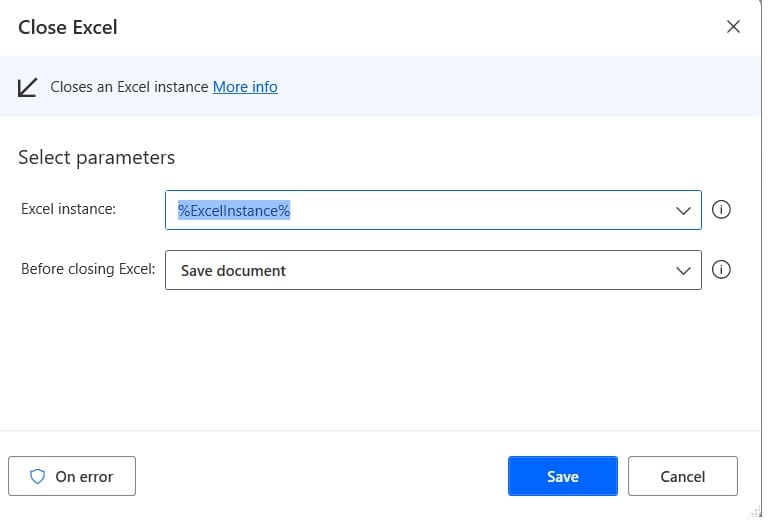
Step 8: We will last close our Excel action for this drag and drop the Close Excel action to the workspace. Then provide the below information:
- Excel Instance: Select the ExceInstance variable.
- Before closing Excel: Select Save document.
Step 9: Now run the Flow by clicking on the run button, and you can see the flow run successfully. You can see the SharePoint list data is added to the Excel.
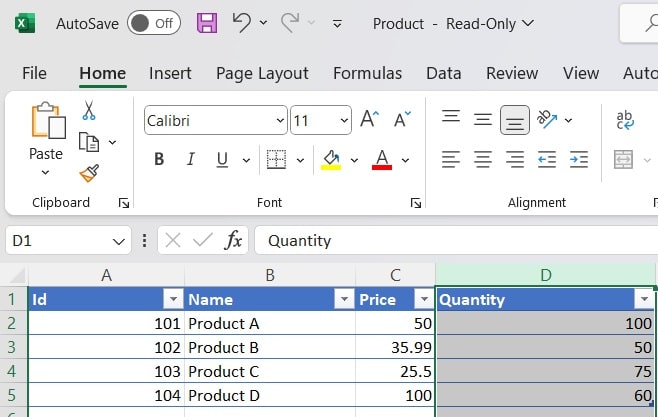
This is how we can get all items from the SharePoint list items using Power Automate Desktop.
Conclusion
In this Power Automate Desktop tutorial, we saw how to get a SharePoint list item in Power Automate Desktop. Also, we saw how to enter SharePoint list data into Excel Workbook using Power Automate Desktop.
You may also like the following Power Automate desktop tutorials:
- Convert Data Table Columns to List in Power Automate Desktop
- Create File in SharePoint using Power Automate Desktop
- How to Merge Pdf files in Power Automate Desktop?
- How to Create and Delete an Item from a SharePoint List using Power Automate Desktop?
I am Bijay a Microsoft MVP (10 times – My MVP Profile) in SharePoint and have more than 17 years of expertise in SharePoint Online Office 365, SharePoint subscription edition, and SharePoint 2019/2016/2013. Currently working in my own venture TSInfo Technologies a SharePoint development, consulting, and training company. I also run the popular SharePoint website EnjoySharePoint.com