This Power Automate Desktop tutorial will show us how to create an item in a SharePoint list using Power Automate Desktop. Also, we will see how to delete an item from the SharePoint list using Power Automate Desktop.
Now, let’s see an example of how to create an item in the SharePoint list using Power Automate Desktop.
For example, in Power Automate Desktop, we have a custom form that contains the below columns and collects the information related to the product:
- Id-Text
- Name- Text
- Description-Text(Multi-line)
- Price-Number
- Quantity-Number
- Testimonial-File type
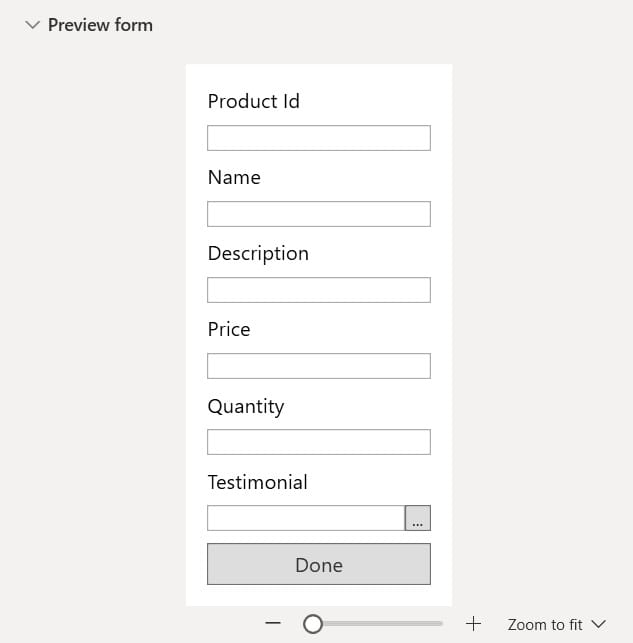
Once we fill out the form and click the Submit button, the item is created in the Product Details SharePoint list. Also, we will add the attachment to that particular item.
So, this SharePoint list ‘Product Details’ contains the below columns:
- Title-Single line of text
- Name- Single line of text
- Description-Multiple lines of text
- Price- Currency
- Quantity- Number

Create an item in a SharePoint list using Power Automate Desktop
Here, we will see how to create an item in the SharePoint list using Power Automate Desktop.
Before creating the desktop flow, set the SharePoint Online List with the above-defined columns.
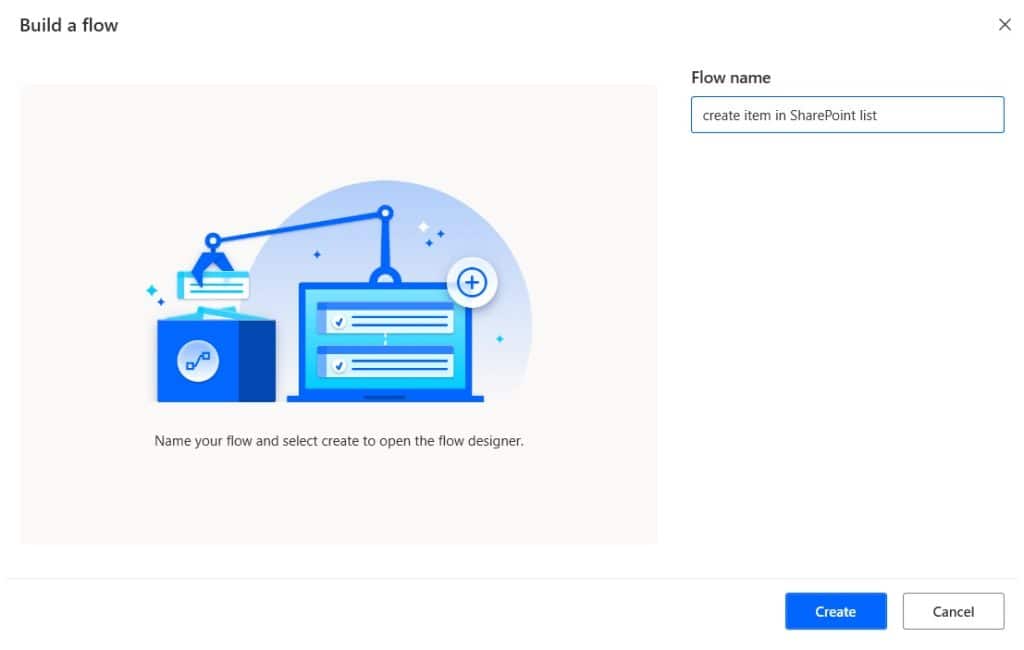
Step 1: Open Power Automate Desktop, provide the Flow name, and click the Create button.
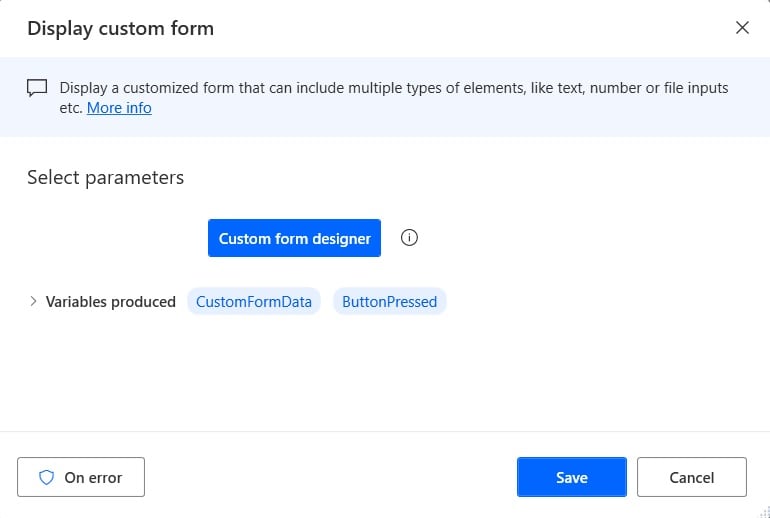
Step 2: We will create a custom form in Power Automate Desktop. For this, expand the Display message section, drag and drop the Display Custom form action, and then provide the below information:
- Select the Custom Form Designer button.
Then provide the Form name on the right-hand side under the Title section.
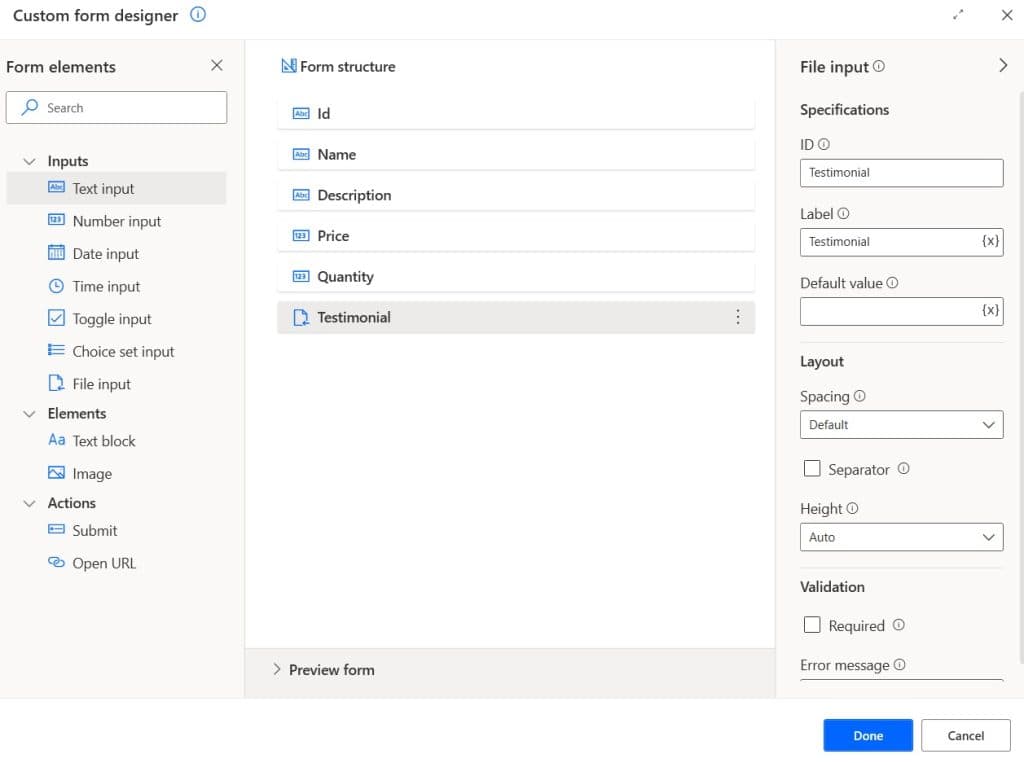
- Next, we will create the First field i.e. Id field, so, drag and drop the Text field to the designer area.
- Then on the right side provide the field name and label that will be displayed in the form.
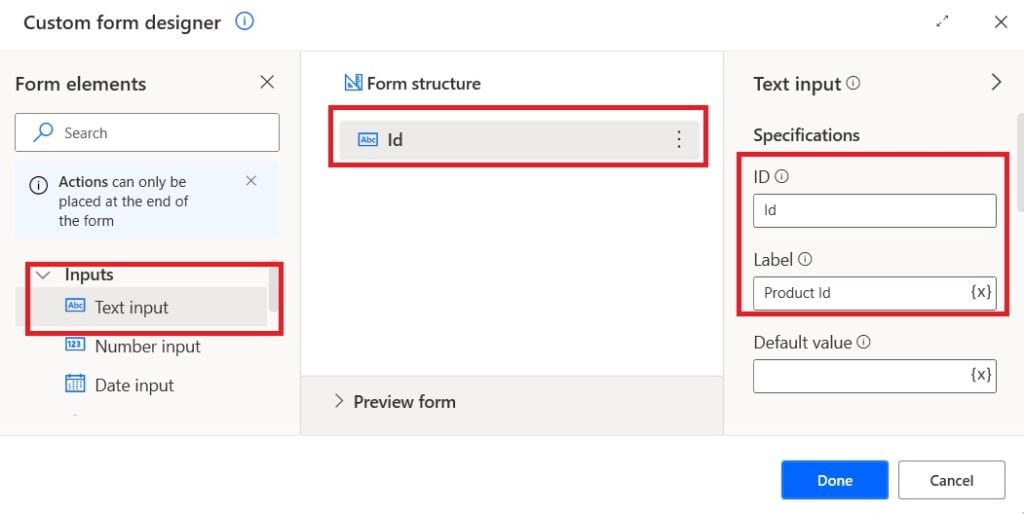
Similarly, add the rest of the field i.e. Name, Description, Price, and Quantity field. Drag and drop the File Input Field to the Designer area to add the Testimonial field.
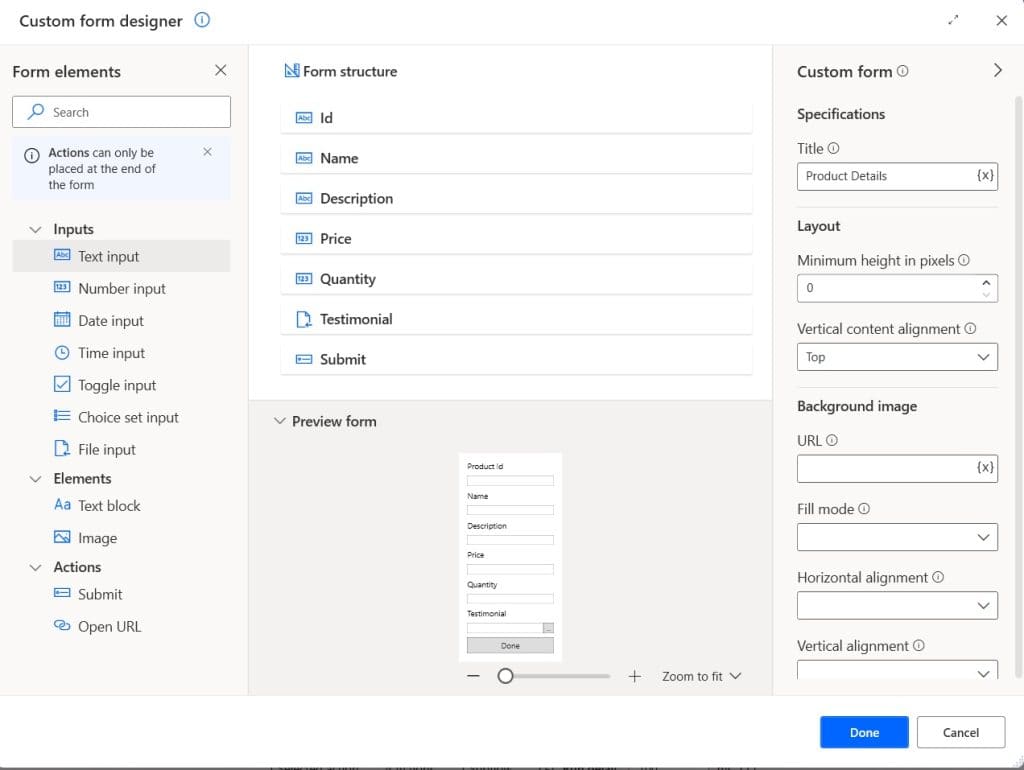
Now, you can change the Field name and Label on the right-hand side of the window. Now you can preview the Form after adding the fields to the form. It looks like below:
Next, we will add the Submit button so we can submit the form and add the output data. For this drag and drop the Submit action, then provide the ID as Submit and Title as Done.
Step 3: Now, we will create an item in the SharePoint list; for this, drag and drop the Create Item action. Then provide the below information:
- Site address: Select SharePoint site address.
- List name: Select the List name as Product Details
- Title:
%CustomFormData.Id%- Name:
%CustomFormData.Name%- Description:
%CustomFormData.Description%- Price:
%CustomFormData.Price%- Quantity:
%CustomFormData.Quantity%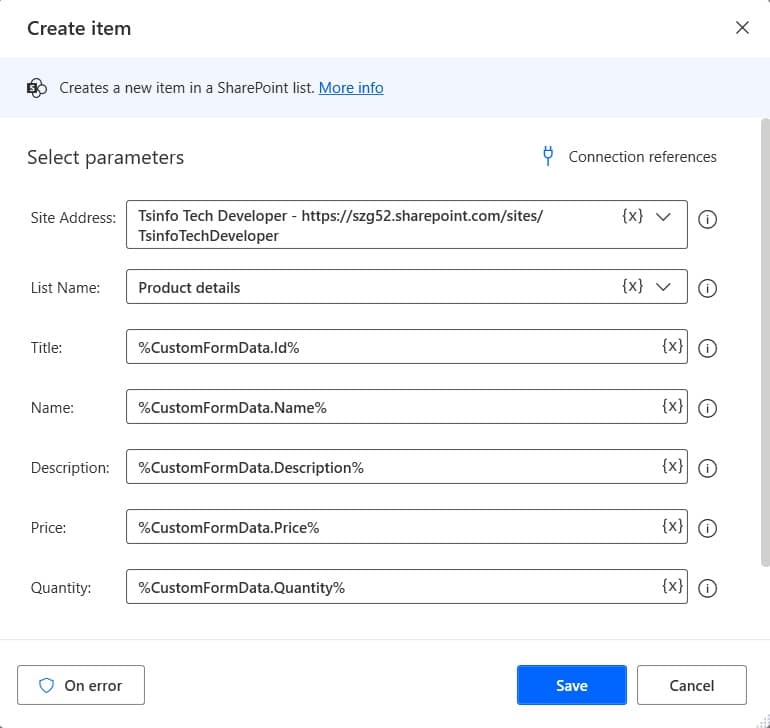
Step 4: We need to convert the file to binary to add attachments to the SharePoint list item. Drag and drop the ‘Convert File to binary’ action for this. Then provide the below information:
- File path: Provide the below argument:
%CustomFormData.Testimonial%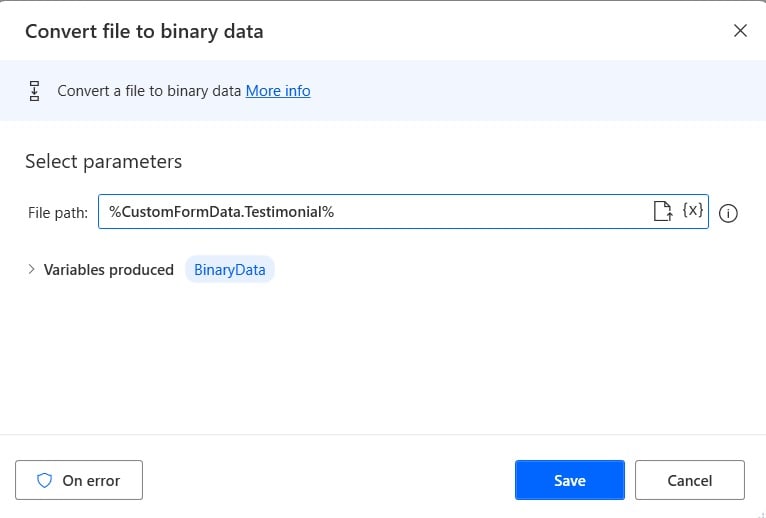
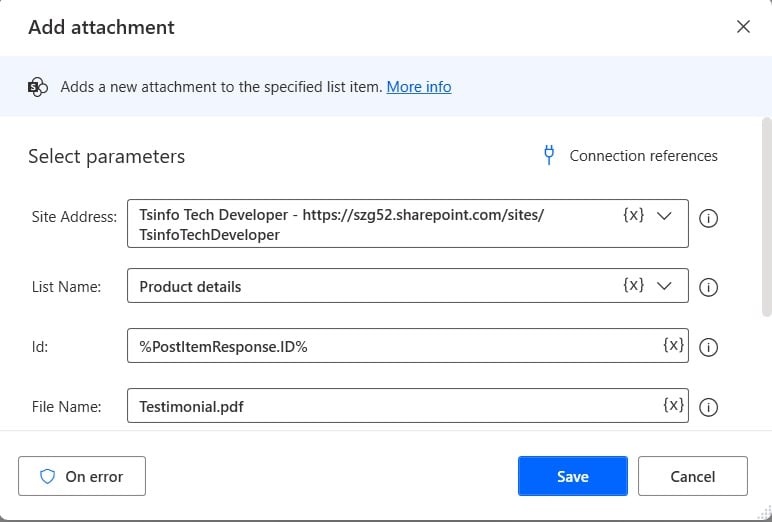
Step 5: Now, we will add an attachment to the SharePoint list; for this, drag and drop the Add attachment action to the canvas. Then provide the below information:
- Site address: Select the SharePoint site address
- List name: Provide the list name
- Id: Provide the below argument
%PostItemResponse.ID%- File name: Provide the file name.
- File content: Click on variable icon {x}, select the ‘Binary Data’ variable, and click on Select.
Step 6: Now run the flow by clicking on the run button. Fill out the form and click on the ‘Done’ button. Once the flow runs successfully, you can see the item added successfully to the SharePoint list.

This is how to create items in the SharePoint list using Power Automate Desktop.
Delete an item from the SharePoint list using Power Automate Desktop
Here, we will see how to delete an item from the SharePoint list using Power Automate Desktop.
For this example, i will use the same Product Details SharePoint list, and I will create a desktop flow that will get all the items from the SharePoint list and check the quantity of the item. If the quantity is equal to 0, then we will delete the item from the SharePoint list.

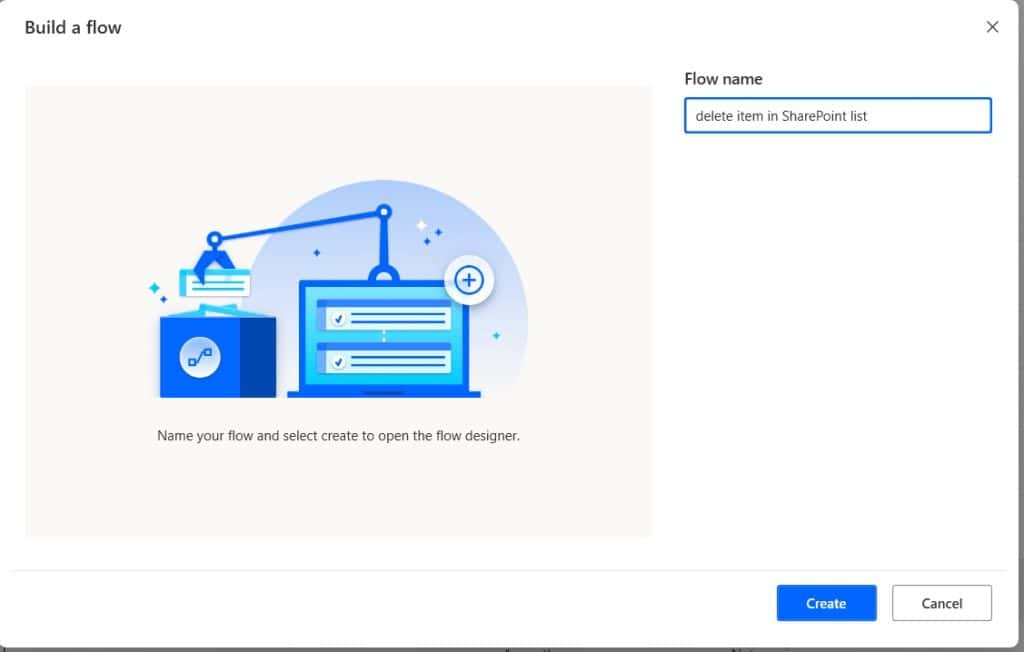
Step 1: Open Power Automate Desktop, click on the +New flow -> then provide the flow name and click on the Create button.
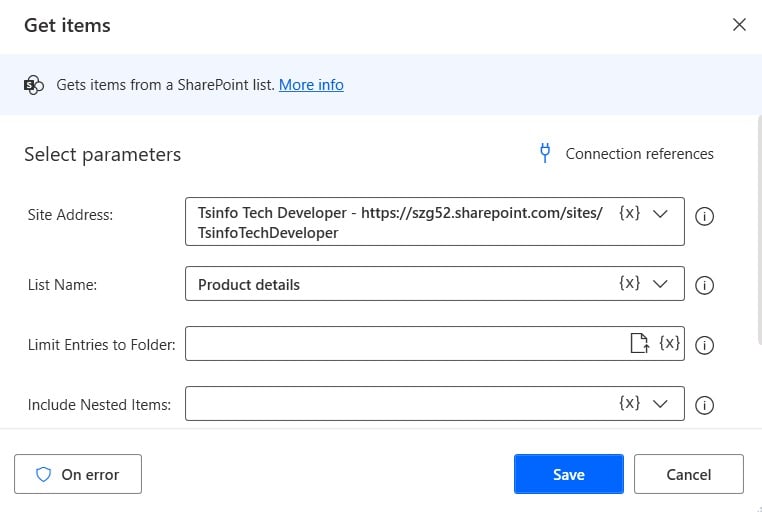
Step 2: We will get items from the SharePoint list using Power Automate Desktop. For this, drag and drop the ‘Get items’ action. Then provide the below information:
- Site address: Select the Site address from the dropdown.
- List name: Select the list name from the drop-down.
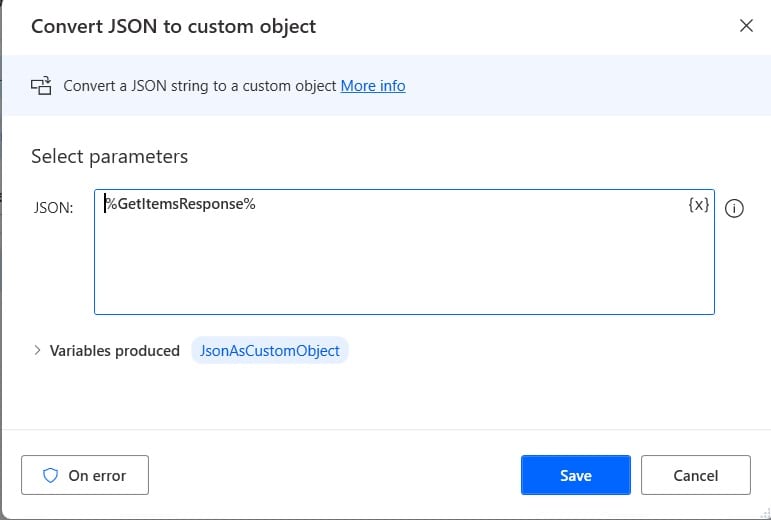
Step 3: We will parse the JSON output of the last step, so drag and drop the ‘Convert JSON to custom object’ action to canvas. Then provide the below information:
- JSON: Click on the variable icon {x}, and select the ‘GetItemResponse’ variable.
Step 4: Now, we will loop through the SharePoint items from the list. So drag and drop the ‘For each’ action to the canvas. Then provide the below information:
- Value to iterate: Provide the below argument:
%JsonAsCustomObject.value%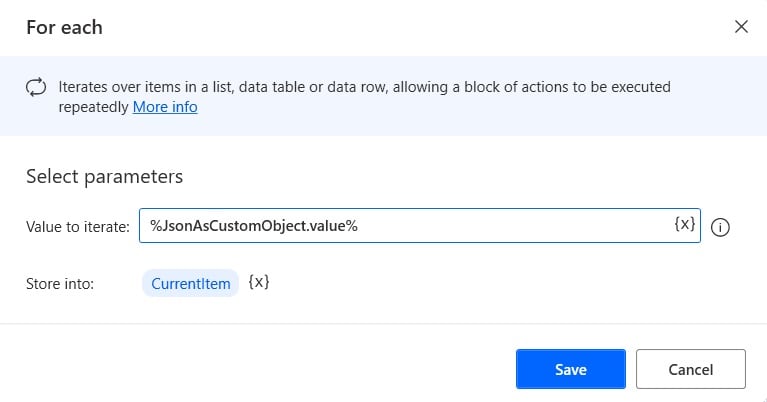
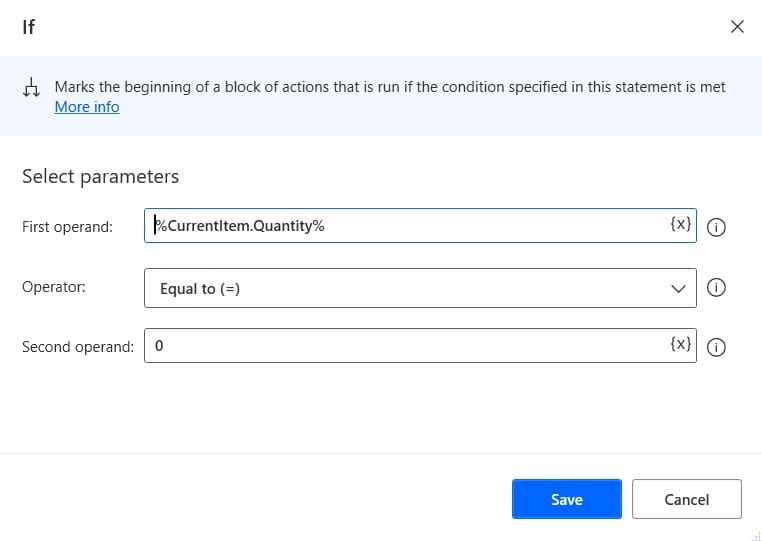
Step 5: Next, we will check that the Quantity is equal to 0, then delete that particular item. For this drag and drop the IF condition action to canvas. Then provide the below information:
- First Operand: Provide the first operand as:
%CurrentItem.Quantity%- Operator: Select the operator as ‘equal to’ from the options.
- Second Operand: Provide the Second operand as 0.
Step 6: Now we will delete items in the SharePoint list, for this, drag and drop the Delete item action to canvas. Then provide the below information:
- Site address: Select the SharePoint site address
- List name: Select the list name from dropdown
- Id: Provide the Id as below argument:
%CurrentItem.ID%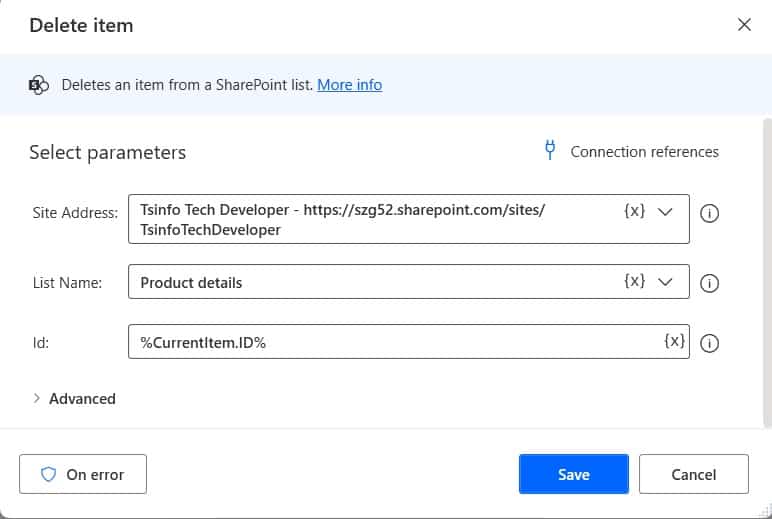
Step 7: Now run the flow by clicking on the run button. Once the flow runs successfully, you can see the item is deleted whose quantity =0.

This is how to delete a SharePoint list item using Power Automate Desktop.
Conclusion
In this Power Automate Desktop tutorial, we saw how to create an item in a SharePoint list using Power Automate Desktop. Also, we saw how to delete items from a SharePoint list using Power Automate Desktop.
You may also like the following tutorials:
- Get items from SharePoint List using Power Automate Desktop
- Create File in SharePoint using Power Automate Desktop
- How to get an item from a list using Power Automate Desktop?
I am Bijay a Microsoft MVP (10 times – My MVP Profile) in SharePoint and have more than 17 years of expertise in SharePoint Online Office 365, SharePoint subscription edition, and SharePoint 2019/2016/2013. Currently working in my own venture TSInfo Technologies a SharePoint development, consulting, and training company. I also run the popular SharePoint website EnjoySharePoint.com