Do you want to know how to use the SharePoint management shell? In this PowerShell tutorial, I will explain how to connect with SharePoint sites from Microsoft PowerShell.
I will show you how to use the SharePoint Online management shell to connect with SharePoint Online sites and also how to work with SharePoint on-premises sites like SharePoint 2019 and SharePoint 2016/2013 using PowerShell.
By reading this SharePoint PowerShell tutorial, you will learn various PowerShell SharePoint commands and PowerShell SharePoint snapin and learn about the PowerShell commands for SharePoint administrators.
Introduction to PowerShell SharePoint
PowerShell is a command line scripting language, and we can use PowerShell in SharePoint, which will provide administrators with full access to SharePoint objects.
By using PowerShell in SharePoint, Administrators can work directly with SharePoint objects like web applications, site collections, sites/subsites, lists, libraries, fields/columns, etc.
By default, in any Windows operating system, you will find PowerShell in the below location:
<%SystemRoot%>\System32\WindowsPowerShell\v1.0\PowerShell.exe.
To write, debug, and test PowerShell scripts/commands or snapin, you can use Windows PowerShell ISE or Visual Studio Code, which is FREE.
Now, we will see how to use PowerShell in SharePoint on-premise and SharePoint Online.
PowerShell SharePoint On-premises versions
Once you install SharePoint 2016/2013 in a SharePoint server, PowerShell cmdlets are available in the SharePoint 2016/2019 management shell or SharePoint 2013 management shell. You need not install additional things to work in PowerShell SharePoint On-premise.
In a SharePoint server, all PowerShell SharePoint cmdlets are available in Microsoft.SharePoint.PowerShell.dll.
If you are not using SharePoint management shell, using Windows PowerShell ISE, then you have to manually register Microsoft.SharePoint.PowerShell.dll module for SharePoint Server cmdlets. You can do this by adding the below line at the beginning of a PowerShell file.
Add-PSSnapin Microsoft.SharePoint.PowerShellYou can also add the below lines.
$snap = Get-PSSnapin | Where-Object {$_.Name -eq 'Microsoft.SharePoint.PowerShell'}
 if ($snap -eq $null) {
 Add-PSSnapin Microsoft.SharePoint.PowerShell
 }
To work with PowerShell SharePoint 2013/2016, the account you are using should have securityadmin server role membership in SQL Server. The account should also be a member of the Administrators group.
Remember, the account you have used while installing SharePoint 2019/2016/2013, is provided with proper permissions to run or execute PowerShell cmdlets in the SharePoint server.
Note: Always use Open SharePoint management shell or PowerShell ISE as Run as administrator.
SharePoint Online Management Shell
PowerShell is very useful and powerful for managing SharePoint sites or site collections, etc. By using SharePoint Online Management Shell as an Office 365 global administrator or SharePoint administrator, you can manage SharePoint site collections, sites, users, etc.
You can write and execute command-line and batch operations using SharePoint Online Management Shell.
Download and Install SharePoint Online Management Shell
Unlike Windows PowerShell ISE, by default, the SharePoint Online management shell will not be available in your system.
Note: You do not need SharePoint to be installed in your system to work with the SharePoint Online management shell.
First, download SharePoint Online Management Shell from this MSDN URL. Choose the language and click on Download.

Then, it will ask to download either the 64-bit or 32-bit versions. Choose the 64-bit version and click Next to download the MSI file.
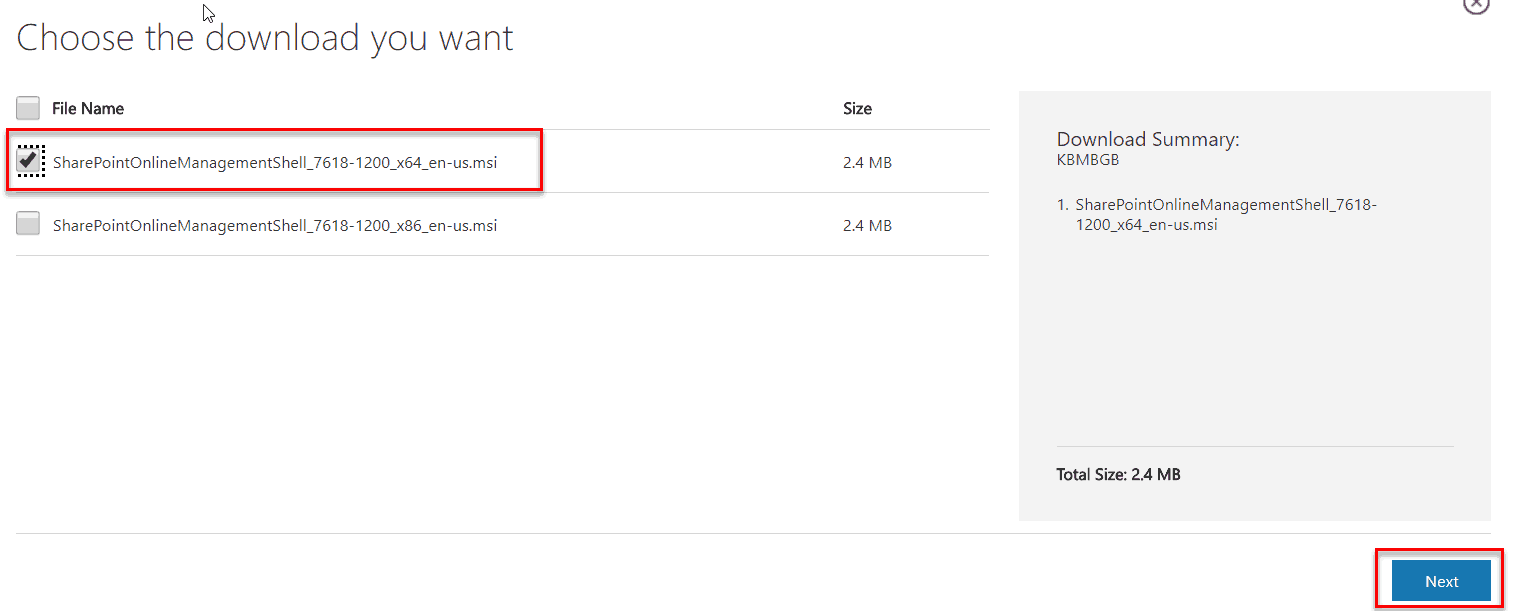
Now double-click on the MSI file and click on Run like below:
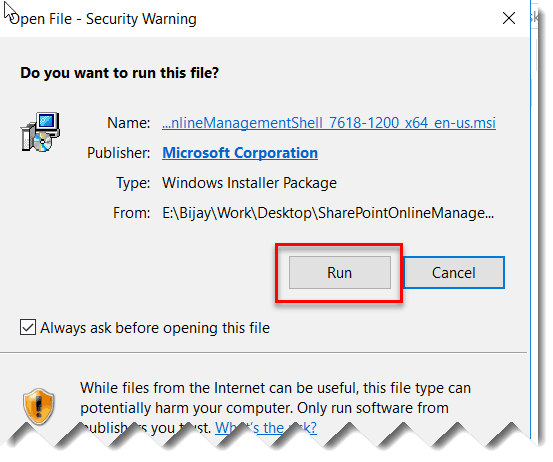
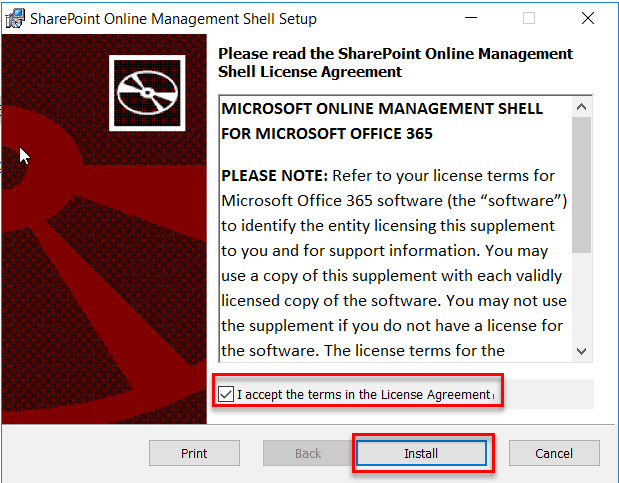
Then, in the SharePoint Online Management Shell Setup, accept the license agreement and click Install.
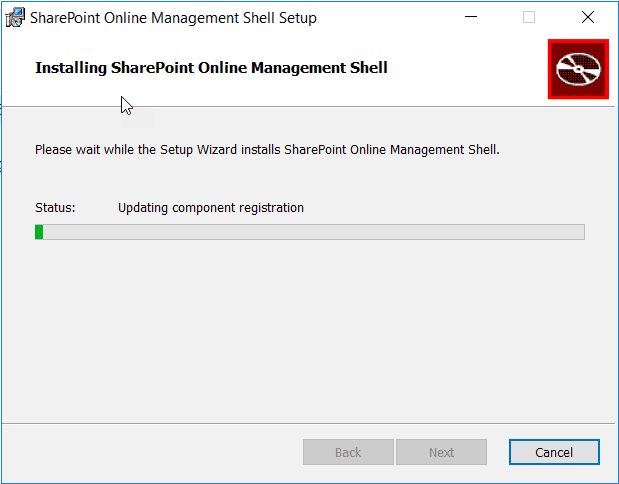
Then the installation will progress like below:
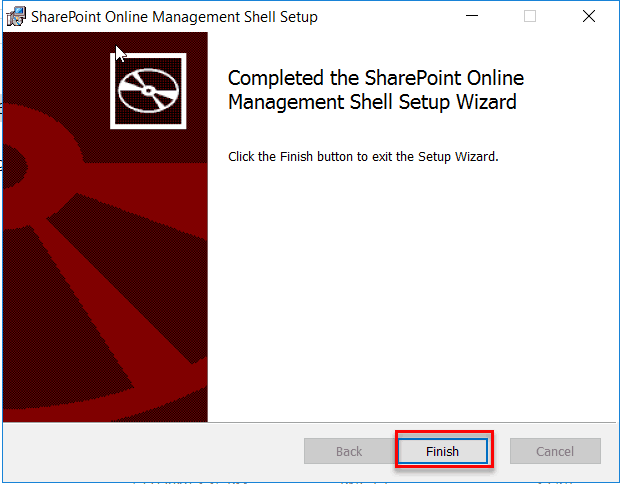
Once the installation is over, it will show the Installation completion wizard like below:
How to connect SharePoint Online management shell
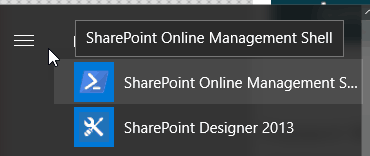
Once the installation is over, you can search for “SharePoint Online Management Shell” in Windows, and you will find the tool.
Now you can run the below SharePoint online management shell cmdlets.
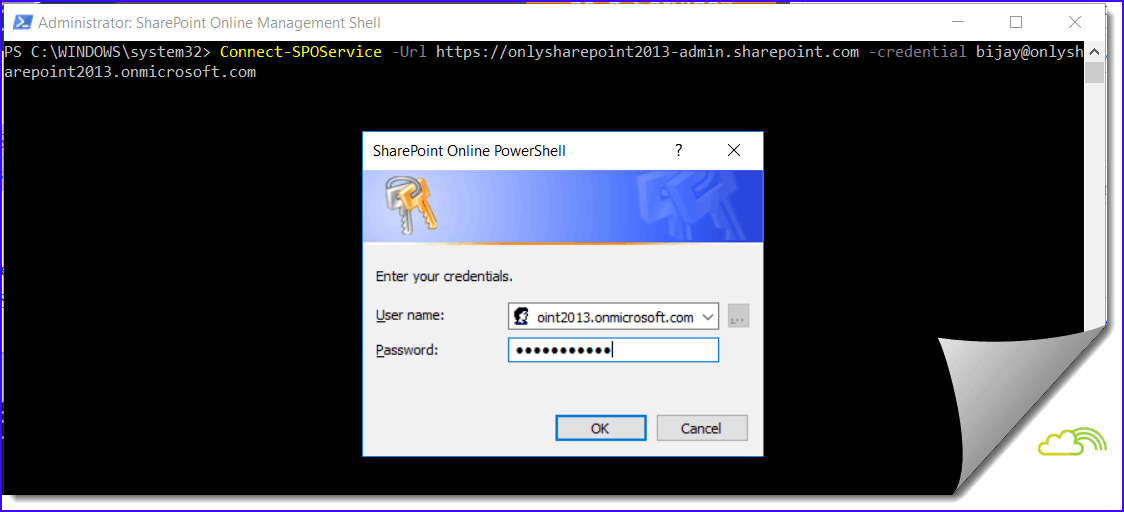
We can use Connect-SPOService cmdlets to connect to the SharePoint online site. Remember we need to provide the admin site URL https://<tenantid>-admin .sharepoint.com.
Connect-SPOService -Url https://onlysharepoint2013-admin.sharepoint.com -credential bijay@onlysharepoint2013.onmicrosoft.com
If you do not provide the SharePoint Online admin site URL, you will get an error like the one below:
Then it will ask for your credentials like below:
Once it is connected successfully, we can run SharePoint online PowerShell cmdlets.
SharePoint Online Management Shell Commands
To work with the SharePoint Online management shell, we need to add the PowerShell Online module.
- Microsoft.Online.SharePoint.PowerShell.dll
You can display all the Commands available in the above module in the below command:
Get-Command –Module Microsoft.Online.SharePoint.PowerShellSharePoint Online management shell commands
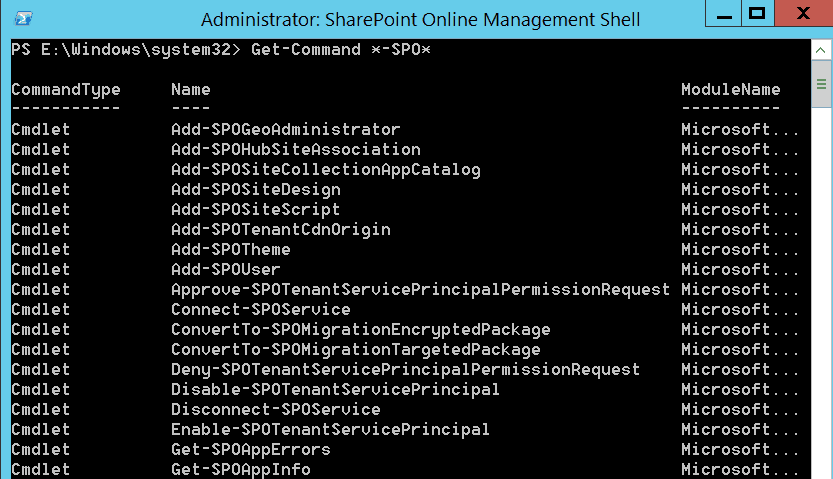
You can also display all the available commands in SharePoint Online management shell, like below:
Get-Command *-SPO*Once you run the commands, you can see the output below:
- Add-SPOGeoAdministrator
- Add-SPOHubSiteAssociation
- Add-SPOSiteCollectionAppCatalog
- Add-SPOSiteDesign
- Add-SPOSiteScript
- Add-SPOTenantCdnOrigin
- Add-SPOTheme
- Add-SPOUser
- Approve-SPOTenantServicePrincipalPermissionReques
- Connect-SPOService
- ConvertTo-SPOMigrationEncryptedPackage
- ConvertTo-SPOMigrationTargetedPackage
- Deny-SPOTenantServicePrincipalPermissionRequest
- Disable-SPOTenantServicePrincipal
- Disconnect-SPOService
- Enable-SPOTenantServicePrincipal
- Get-SPOAppErrors
- Get-SPOAppInfo
- Get-SPOBrowserIdleSignOut
- Get-SPOCrossGeoMovedUsers
- Get-SPOCrossGeoMoveReport
- Get-SPOCrossGeoUsers
- Get-SPODataEncryptionPolicy
- Get-SPODeletedSite
- Get-SPOExternalUser
- Get-SPOGeoAdministrator
- Get-SPOGeoMoveCrossCompatibilityStatus
- Get-SPOGeoStorageQuota
- Get-SPOHideDefaultThemes
- Get-SPOHubSite
- Get-SPOMigrationJobProgress
- Get-SPOMigrationJobStatus
- Get-SPOMultiGeoCompanyAllowedDataLocation
- Get-SPOMultiGeoExperience
- Get-SPOPublicCdnOrigins
- Get-SPOSite
- Get-SPOSiteContentMoveState
- Get-SPOSiteDataEncryptionPolicy
- Get-SPOSiteDesign
- Get-SPOSiteDesignRights
- Get-SPOSiteGroup
- Get-SPOSiteScript
- Get-SPOStorageEntity
- Get-SPOTenant
- Get-SPOTenantCdnEnabled
- Get-SPOTenantCdnOrigins
- Get-SPOTenantCdnPolicies
- Get-SPOTenantContentTypeReplicationParameters
- Get-SPOTenantLogEntry
- Get-SPOTenantLogLastAvailableTimeInUtc
- Get-SPOTenantServicePrincipalPermissionGrants
- Get-SPOTenantServicePrincipalPermissionRequests
- Get-SPOTenantSyncClientRestriction
- Get-SPOTenantTaxonomyReplicationParameters
- Get-SPOTheme
- Get-SPOUnifiedGroup
- Get-SPOUser
- Get-SPOUserAndContentMoveState
- Get-SPOUserOneDriveLocation
- Get-SPOWebTemplate
- Grant-SPOHubSiteRights
- Grant-SPOSiteDesignRights
- Invoke-SPOMigrationEncryptUploadSubmit
- Invoke-SPOSiteDesign
- New-SPOMigrationEncryptionParameters
- New-SPOMigrationPackage
- New-SPOPublicCdnOrigin
- New-SPOSdnProvider
- New-SPOSite
- New-SPOSiteGroup
- Register-SPODataEncryptionPolicy
- Register-SPOHubSite
- Remove-SPODeletedSite
- Remove-SPOExternalUser
- Remove-SPOGeoAdministrator
- Remove-SPOHubSiteAssociation
- Remove-SPOMigrationJob
- Remove-SPOMultiGeoCompanyAllowedDataLocation
- Remove-SPOPublicCdnOrigin
- Remove-SPOSdnProvider
- Remove-SPOSite
- Remove-SPOSiteCollectionAppCatalog
- Remove-SPOSiteCollectionAppCatalogById
- Remove-SPOSiteDesign
- Remove-SPOSiteGroup
- Remove-SPOSiteScript
- Remove-SPOStorageEntity
- Remove-SPOTenantCdnOrigin
- Remove-SPOTenantSyncClientRestriction
- Remove-SPOTheme
- Remove-SPOUser
- Repair-SPOSite
- Request-SPOPersonalSite
- Request-SPOUpgradeEvaluationSite
- Restore-SPODataEncryptionPolicy
- Restore-SPODeletedSite
- Revoke-SPOHubSiteRights
- Revoke-SPOSiteDesignRights
- Revoke-SPOTenantServicePrincipalPermission
- Revoke-SPOUserSession
- Set-SPOBrowserIdleSignOut
- Set-SPOGeoStorageQuota
- Set-SPOHideDefaultThemes
- Set-SPOHubSite
- Set-SPOMigrationPackageAzureSource
- Set-SPOMultiGeoCompanyAllowedDataLocation
- Set-SPOMultiGeoExperience
- Set-SPOSite
- Set-SPOSiteDesign
- Set-SPOSiteGroup
- Set-SPOSiteOffice365Group
- Set-SPOSiteScript
- Set-SPOStorageEntity
- Set-SPOTenant
- Set-SPOTenantCdnEnabled
- Set-SPOTenantCdnPolicy
- Set-SPOTenantContentTypeReplicationParameters
- Set-SPOTenantSyncClientRestriction
- Set-SPOTenantTaxonomyReplicationParameters
- Set-SPOUnifiedGroup
- Set-SPOUser
- Set-SPOWebTheme
- Start-SPOSiteContentMove
- Start-SPOUserAndContentMove
- Stop-SPOUserAndContentMove
- Submit-SPOMigrationJob
- Test-SPOSite
- Unregister-SPOHubSite
- Update-SPODataEncryptionPolicy
- Upgrade-SPOSite
Work with PowerShell SharePoint Online using Client Side Object Model (csom)
Another efficient way we can work with PowerShell SharePoint Online is to use the client-side object model (csom). For this, you required the below two dlls:
- Microsoft.SharePoint.client.dll
- Microsoft.SharePoint.client.runtime.dll
To work with CSOM in PowerShell SharePoint, you need to add the above SharePoint client
Try{
Add-Type -Path 'E:\Program Files\Common Files\microsoft shared\Web Server Extensions\16\ISAPI\Microsoft.SharePoint.Client.dll'
Add-Type -Path 'E:\Program Files\Common Files\microsoft shared\Web Server Extensions\16\ISAPI\Microsoft.SharePoint.Client.Runtime.dll'
}
catch {
}
Note, the above path is from a SharePoint server, but if you have not installed SharePoint like in any Windows 10 laptop, you download the client dlls from the Nuget package, and you can refer it from there like below:
Try{
Add-Type -Path 'E:\ClientDLLs\Microsoft.SharePoint.Client.dll'
Add-Type -Path 'E:\ClientDLLs\Microsoft.SharePoint.Client.Runtime.dll'
}
catch {
}
Conclusion
Once you install SharePoint 2019 or any SharePoint on-premises servers, then PowerShell cmdlets are available in the SharePoint 2019 Management Shell. If you want to work with PowerShell with SharePoint Online, you need to download and install the SharePoint Online management shell.
You may like the following tutorials:
- How to check if a list exists in SharePoint Online site using PNP PowerShell
- SharePoint download multiple files
- Delete all items from a SharePoint Online list using PnP PowerShell
- Create SharePoint Online Modern Page
I am Bijay a Microsoft MVP (10 times – My MVP Profile) in SharePoint and have more than 17 years of expertise in SharePoint Online Office 365, SharePoint subscription edition, and SharePoint 2019/2016/2013. Currently working in my own venture TSInfo Technologies a SharePoint development, consulting, and training company. I also run the popular SharePoint website EnjoySharePoint.com