Do you want to show or hide controls based on the checkbox checked value in PowerApps? In this PowerApps tutorial, I will explain two different examples: “Power Apps visible if checkbox is checked.“
PowerApps Visible if Checkbox is Checked
Here, we will discuss the Power Apps visible if the checkbox is checked with two different scenarios:
Scenario-1: (Show or Hide label control using checkbox checked)
In this example, I will show you how to show or hide a label control based on a checkbox checked value in a Power Apps canvas app.
In Power Apps, there is a Checkbox control and a Text label control. When the user checks the Power Apps Checkbox, the Text label text will be visible, or else it will be in disable mode as in the screenshot below.

To work around this, follow the below-mentioned steps. Such as:
1. On the Power Apps Screen -> Insert a Checkbox control and set its Text property as:
Text = "Select Online Payment"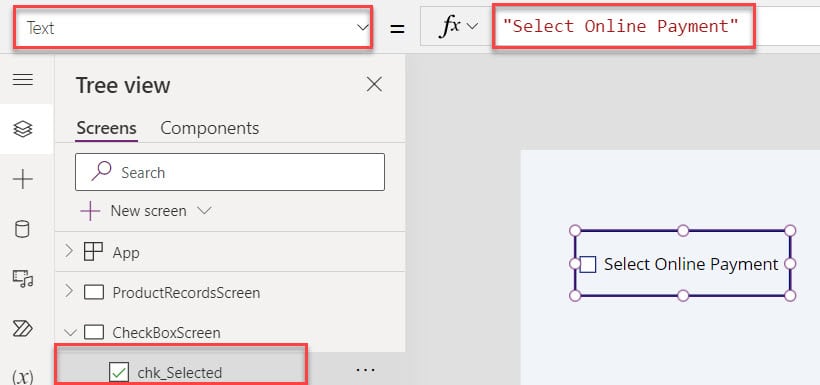
2. Then, insert a Text label and set its Text property to the code below.
Text = "Thanks for Choosing Online Payment"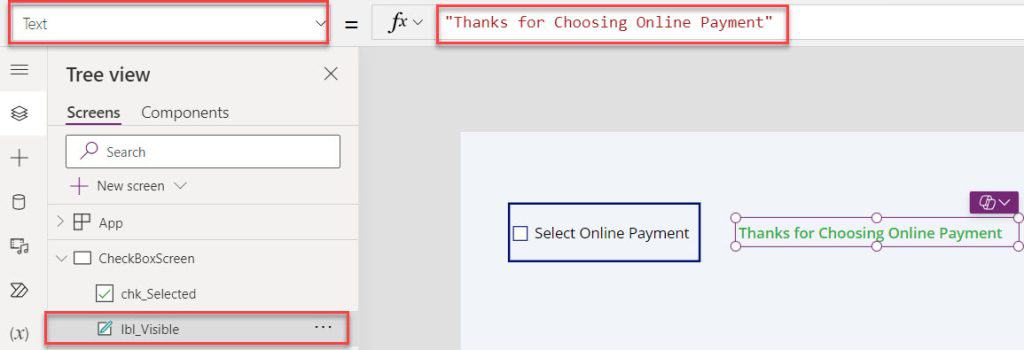
3. Now, select the Text label and set its Visible property to the code below.
Visible = If(
    chk_Selected.Value = true,
    true
)
Where,
- If() = This Power Apps If() function is used to evaluate the unrelated conditions
- chk_Selected = Power Apps Checkbox Name
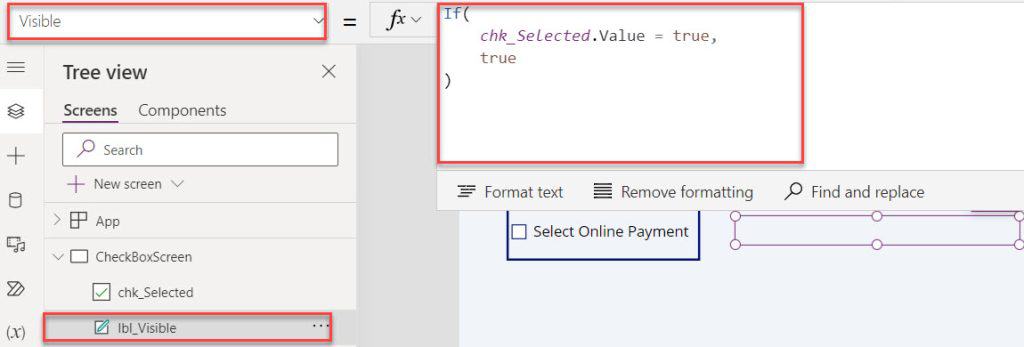
4. Save, Publish, and Preview the app. Whenever the user checks the Power Apps Checkbox, the Text label text will be visible, or else it will be in disable mode, as shown below.

Scenario-2: Show or Hide checkbox control based on checkbox value
In this example, I will show you how to show or hide a checkbox control based on a Power Apps checkbox checked or unchecked value. Using this example, you can show or hide any Power Apps control.
In Power Apps, there are two Checkbox controls, i.e., [Select Online Payment and Select Offline Payment]. Whenever the user selects one checkbox value, the other checkbox control will be disabled mode as shown below.

To do so, follow the below-mentioned steps. Such as:
1. On the Power Apps Screen -> Insert two Checkbox controls and set its Text property to the code below.
Text = "Select Online Payment"
Text = "Select Offline Payment"
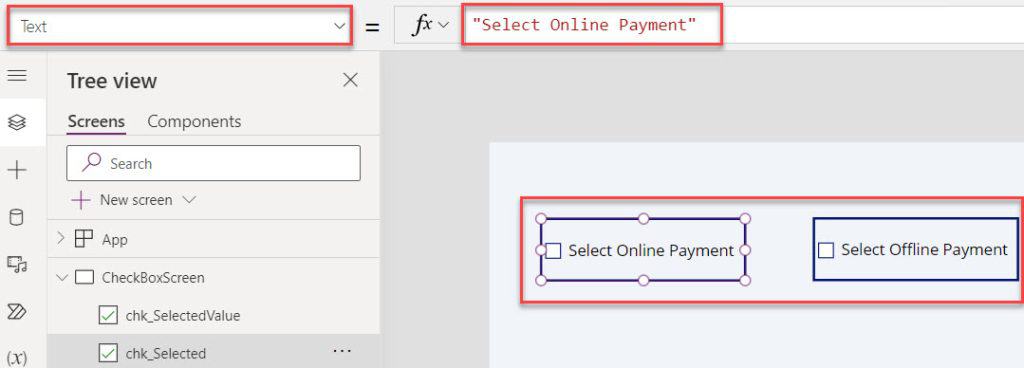
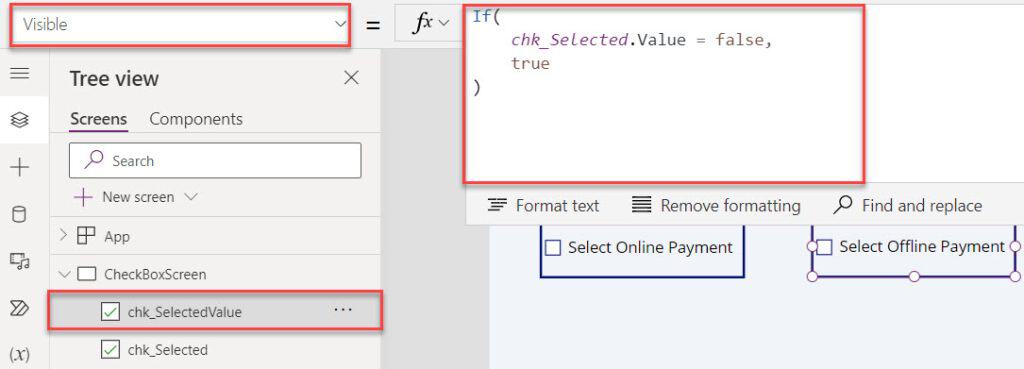
2. Then, select the second checkbox control [Select Offline Payment] and set its Visible property to the code below.
Visible = If(
    chk_Selected.Value = false,
    true
)
Where,
- chk_Selected = Power Apps First Checkbox Name
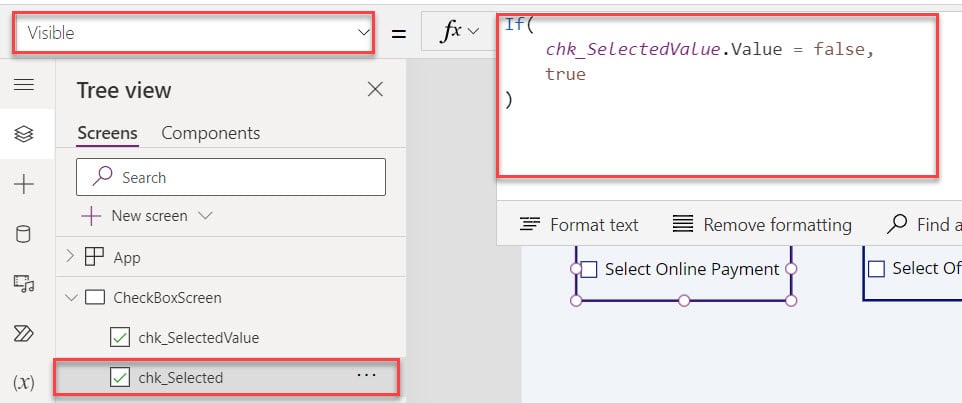
3. Similarly, select the first checkbox control [Select Online Payment] and set its Visible property to the code below.
Visible = If(
    chk_SelectedValue.Value = false,
    true
)
Where,
- chk_SelectedValue = Power Apps Second Checkbox Name
4. Save, Publish, and Preview the app. When the user selects one checkbox value, the other checkbox control will be disabled mode as in the screenshot below.

This is all about the Power Apps visible if the checkbox is checked.
Conclusion
I trust this Power Apps tutorial taught in detail information about the Power Apps visible if the checkbox is checked with two different examples.
Here, I have explained how to show or hide any control based on a checkbox checked value in a Power Apps canvas app.
You may also like:
- How to Set Power Apps List Box Default Value?
- How to Patch Power Apps Collection to SharePoint List?
I am Bijay a Microsoft MVP (10 times – My MVP Profile) in SharePoint and have more than 17 years of expertise in SharePoint Online Office 365, SharePoint subscription edition, and SharePoint 2019/2016/2013. Currently working in my own venture TSInfo Technologies a SharePoint development, consulting, and training company. I also run the popular SharePoint website EnjoySharePoint.com