In this Power Automate Desktop tutorial, we will see how to format date in Power Automate Desktop.
Here we will cover the below examples:
- Power automate desktop format date
- Power automate desktop Excel date format
- Power automate desktop convert datetime to text
Power automate desktop format date
Here we will see how to format the current date to a shorthand date, i.e., ‘dd-MM-YYYY’ in Power Automate desktop.
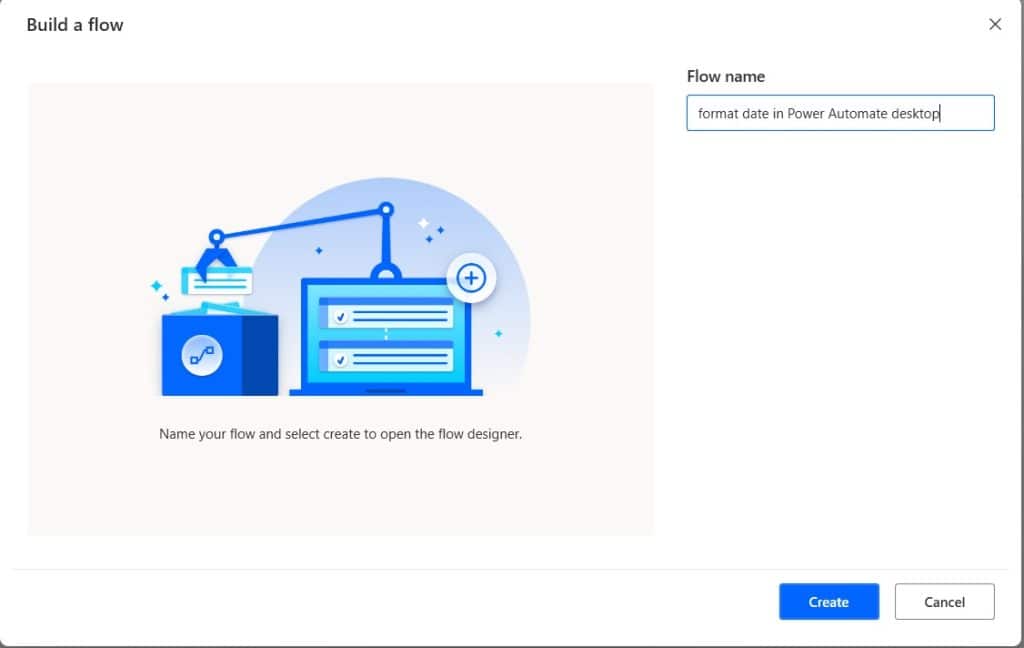
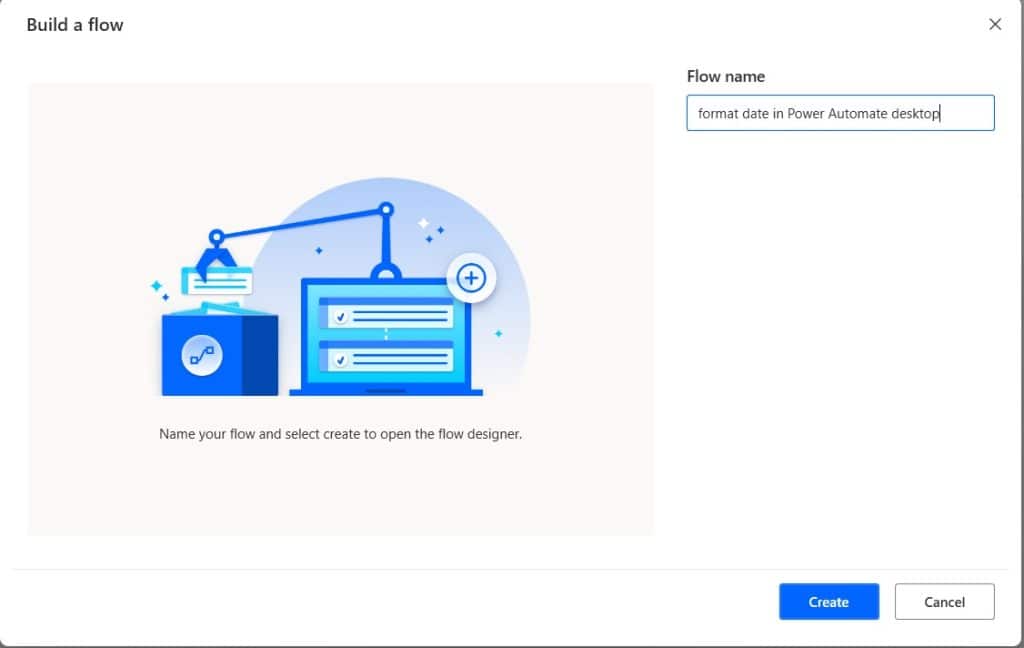
Step 1: Open Power Automate Desktop, click on +New flow -> provide the flow name. Then click on Create button.
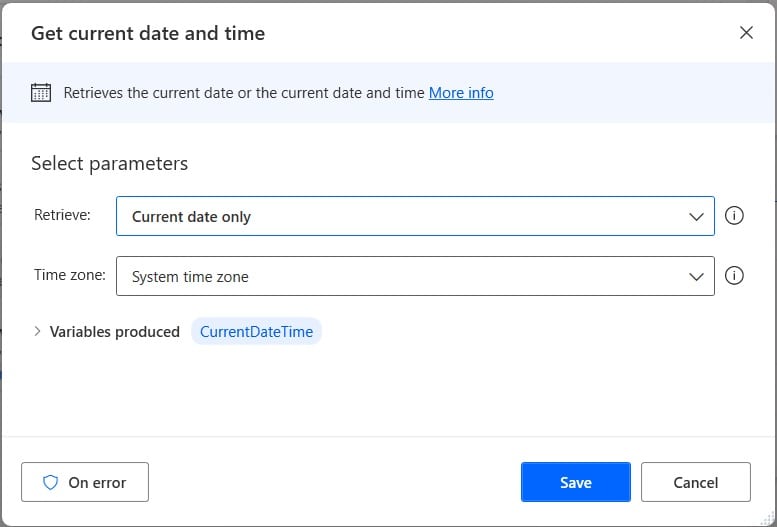
Step 2: Next, we will get the current date; for this, expand the DateTime section, then drag the get current date time action. Provide the below information:
- Retrieve: Select the Current date only option.
- Time zone: Provide the time zone based on your requirement.
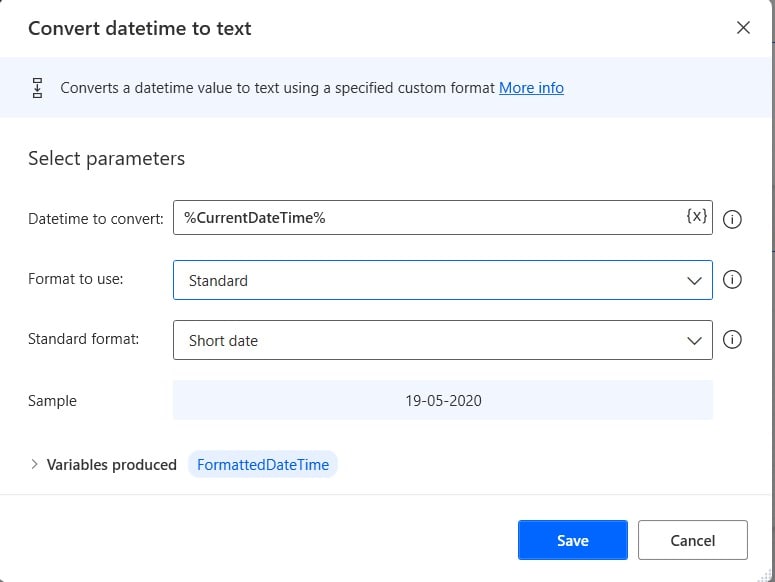
Step 3: Now we convert the current date to ‘dd-MM-yyyy’ format, for this, expand the Text section, and then drag and drop the ‘Convert DateTime to text’ action to the flow area. Then provide the below information:
- DateTime to convert: Select ‘currentDateTime’ variable from the dropdown.
- Format to use: Select the Standard.
- Standard format: Select a short date format.
Step 4: To run the flow, click on the Run button. Once the flow runs successfully, you can double-click on the ‘FormattedDateTime’ variable, under the Flow variable. Now you can see the output.
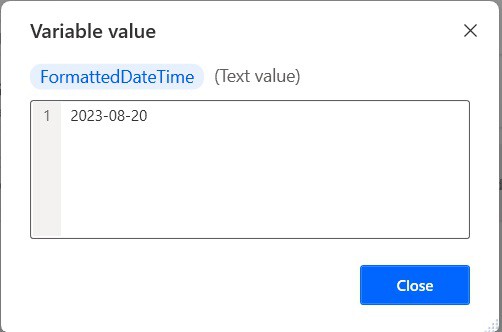
This is an example of “Power automate desktop format date.”
Power automate desktop convert Excel date to date format
Here we will see how to convert Excel date-to-date format using Power Automate Desktop.
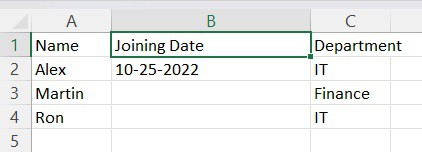
For example, we will use the below Excel i.e. Sample Excel, which contains a date in column B and 2nd row in text format. We will convert this text to date format i.e. ‘MM/dd/yyyy’.
Step 1: Open Power Automate Desktop -> click on +New flow -> provide the flow name. Then click on Create button.
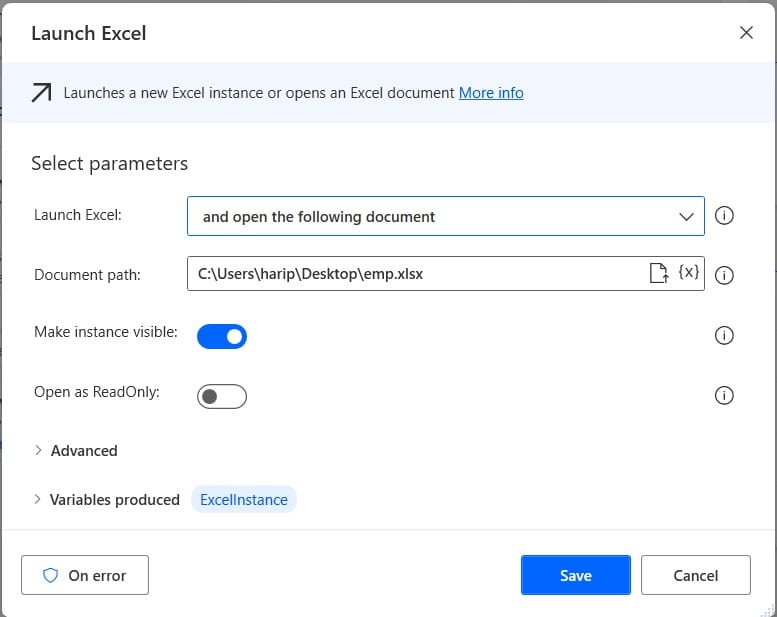
Step 2: We will open Excel, so expand the Excel section -> drag and drop the Launch Excel action to the canvas area. Then Provide the below information:
- Launch Excel: Select the ‘and open the following document’ option.
- Document Path: By clicking on the select file icon, select the document path of the Excel file.
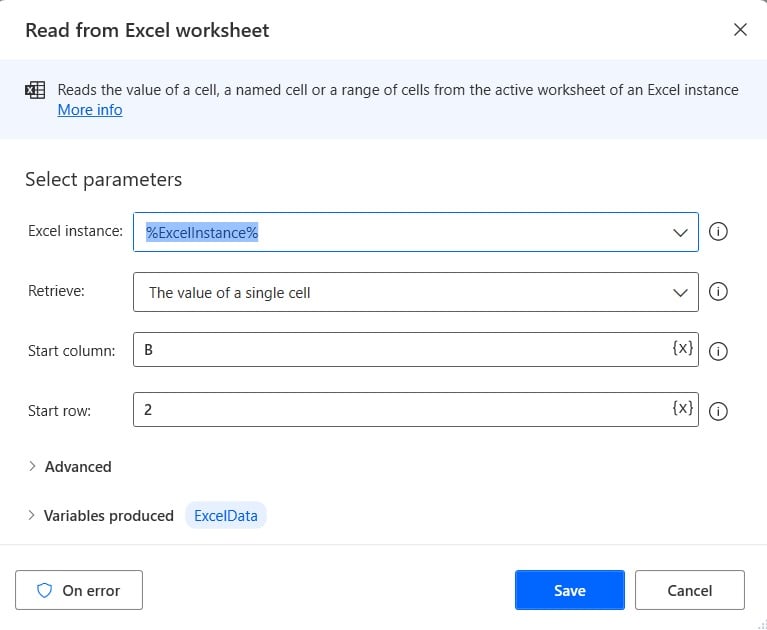
Step 3: Next, we will read the date from the Excel worksheet, so, expand the Excel section -> then drag and drop the ‘Read from Excel Worksheet’ action to the canvas area. Then provide the below information:
- Excel Instance: The ‘ExcelInstance’ variable is already selected.
- Retrieve: Select ‘The value of a single cell’.
- Start column: Select the Start column as B.
- Start row: Provide the row as 2.
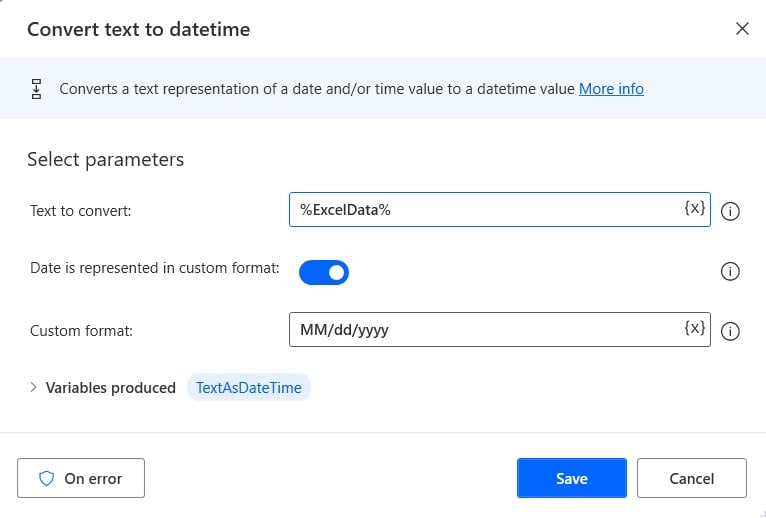
Step 4: Now we will convert the text from Excel to date time format, so expand the Text section -> drag and drop the Convert Excel to text action. Then provide the below information.
- Text to convert: Select the ‘ExcelData’ variable.
- Enable Date is represented in the Custom format.
- Custom Format: Provide the format as ‘MM/dd/yyyy’.
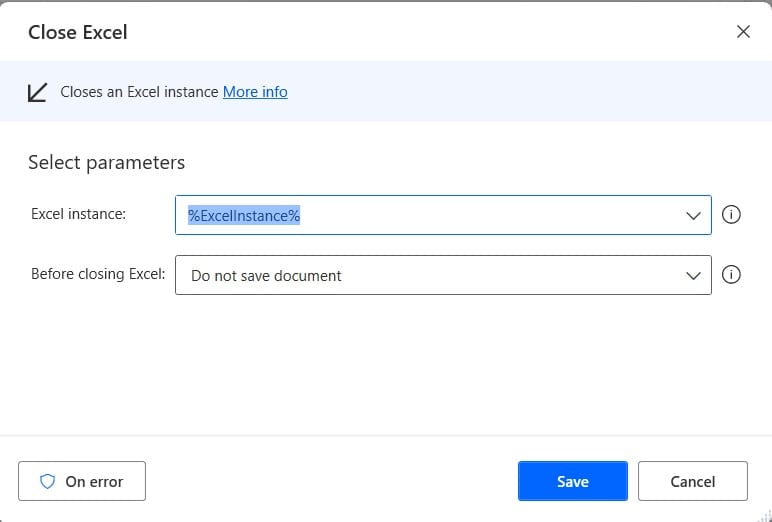
Step 5: We will close the Excel, so, from Action drag and drop the Close Excel action. Then provide the below information:
- Excel Instance: As the ExcelInstance variable is already selected.
- Before Closing Excel: Select the Do not save document option.
Step 6: To run the flow, click on the Run button. Once the flow runs successfully, you can double-click on the ‘TextAsDateTime’ variable, under the Flow variable. Now you can see the output.
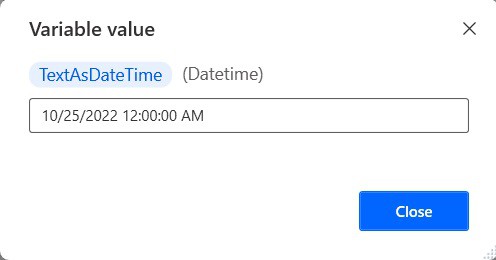
This is how to convert Excel date to date format in Power Automate Desktop.
Power automate desktop convert datetime to text
Here we will see how to convert datetime to text using Power Automate Desktop.
So here, we will take the current date time and convert it to text using the Convert datetime to text action.
Step 1: Open Power Automate Desktop, click on +New flow -> provide the flow name. Then click on Create button.
Step 2: Next, we will get the current date, for this, expand the DateTime section, then drag and drop the Get current date time action. Provide the below information:
- Retrieve: Select the Current date only option.
- Time zone: Provide the time zone based on your requirement.
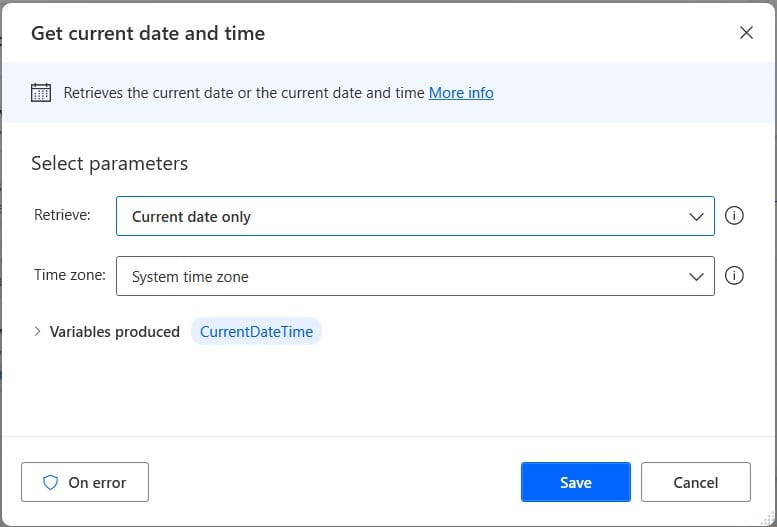
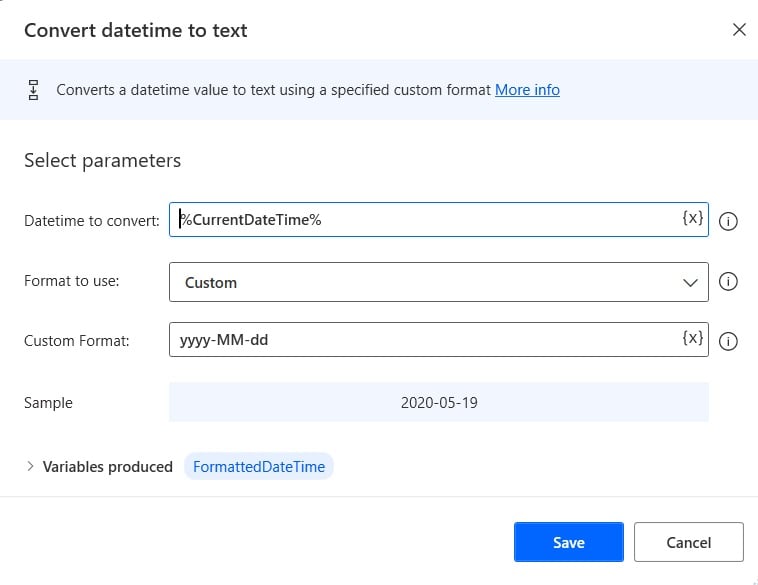
Step 3: Now we convert the current date to ‘dd-MM-yyyy’ format, for this, expand the Text section, and then drag and drop the ‘Convert DateTime to text’ action to the flow area. Then provide the below information:
- DateTime to convert: Select the ‘currentDateTime’ variable from the dropdown.
- Format to use: Select Custom.
- Standard format: Provide the format as ‘yyyy-MM-dd’.
Step 4: To run the flow, click on the Run button. Once the flow runs successfully, you can double-click on the ‘FormattedDateTime’ variable, under the Flow variable. Now you can see the output.
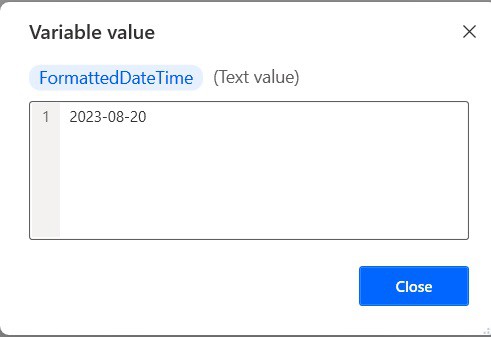
This is how to convert datetime to text in Power Automate Desktop.
Conclusion
In this Power Automate Desktop, we saw how to format date in Power Automate Desktop.
You may like the following tutorials:
- Power Automate Desktop loop through Excel rows
- Data table in Power Automate Desktop
- Extract Data from Word Documents to Excel using Power Automate Desktop
I am Bijay a Microsoft MVP (10 times – My MVP Profile) in SharePoint and have more than 17 years of expertise in SharePoint Online Office 365, SharePoint subscription edition, and SharePoint 2019/2016/2013. Currently working in my own venture TSInfo Technologies a SharePoint development, consulting, and training company. I also run the popular SharePoint website EnjoySharePoint.com