Microsoft Provides a list of controls to Power Apps to build business applications. This Microphone control enables users to interact with the application through voice commands or capture audio input.
In this tutorial, I will explain to you what Power Apps Microphone control is, the key properties of the Power Apps Microphone control, and how to use the PowerApps Microphone control in real-time scenarios like:
- Use Microphone control to direct playback
- Add Sounds to Power Apps Gallery Control
- Upload Power Apps Audio to SharePoint Library
Power Apps Microphone Control
Power Apps Microphone control allows users to record any sounds or audio clips from their devices. Power Apps offers a control called “Audio Input” that allows users to capture audio using the device’s microphone.
Before using this Microphone control, a user must authorize the app to use the microphone, and also, the device should have a microphone that the user will use.
Access the most recent audio recording via the Audio property. This property allows for various actions with the recorded audio, such as:
- Playback using the Audio control
- Listen to the recording through the Audio control
- Temporarily stored in a variable or collection
If you want to record audio using the Power Apps Microphone control, you must follow the format to record audio:
- 3gp format for Android
- AAC format for iOS
- OGG format for web browsers
Note: Power Apps Microphone control has only supported Browsers like Chrome, Firefox, Microsoft Edge based on Chromium. Also, supports only with the Android and iOS Devices.

If you are using any other browser and platform, then maybe it will show a warning that some features of the app will not work.
Power Apps Microphone Control Properties
Let me explain what are the key properties available in the Power Apps Microphone control. For that, refer to the below table.
| Property | Description |
| Audio | The audio clip was obtained through user recordings using the device’s microphone |
| Mic | When a user stops the recording with a Microphone control, it specifies how the app responds. |
| OnStop | This property specifies the image name that is displayed in an image, audio, or Microphone control. |
| Image | When the user starts to record with a microphone control, it specifies how the app responds. |
| OnSelect | When the user selects the control, it specifies how the app responds |
| OnStart | When the user starts to record with a microphone control, it specifies how the app responds. |
| Reset | This property helps to determine whether a control reverts to its default value. |
| Visible | It specifies whether the Microphone control displays or is hidden. |
How to use Microphone Control in Power Apps
Here, I will show you how to add the Microphone control in Power Apps and how to use the Microphone control with different examples.
Use Microphone control to direct playback
In this example, we will discuss a direct connection between a Microphone and an Audio control to enable immediate playback. To do so, follow the below steps. Such as:
1. Open your Power Apps app -> Select the screen where you want to add the Microphone control -> Insert a Microphone control.
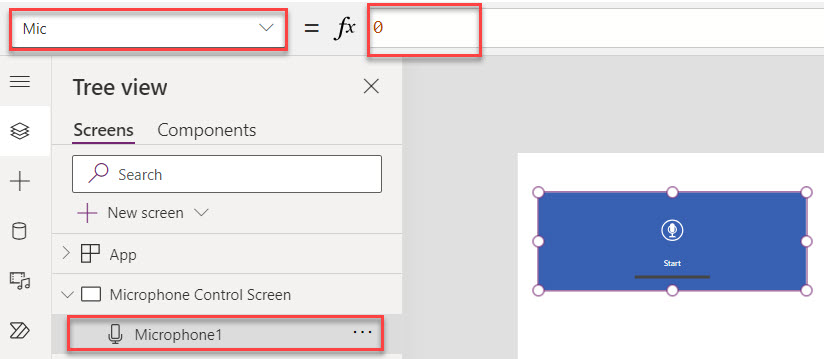
2. Whenever the user adds a Microphone control, it will give the control’s name as “Microphone1” and Its Mic property as “0” like below.
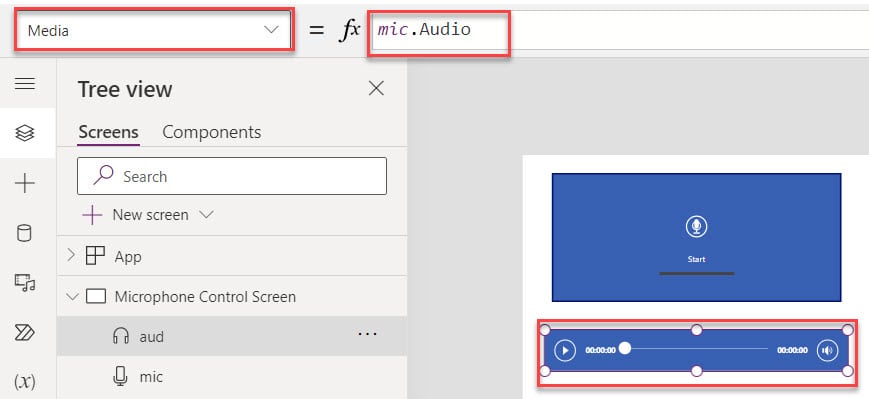
3. Now, to listen to your recently recorded audio clips, you need to insert an Audio control under the Microphone and set its Media property as:
Media = mic.AudioWhere,
- mic = Power Apps Microphone name
4. Save, Publish, and Preview the app. Select or tap the Microphone control to start the recording and speak something to record your voice. Again, tap the Microphone control to stop the recording.
5. Finally, click on the start button of the Audio control to listen to the recorded audio clip.

Add Sounds to Power Apps Gallery Control
Next, I will show you how to add sounds or audio to the Power Apps gallery control with a scenario.
Scenario:
Suppose there are some important Audio clips, and you want to collect all the recently recorded audio clips. In that case, you can store the Power Apps Collect() function in a Gallery control.
To achieve this, follow the below steps.
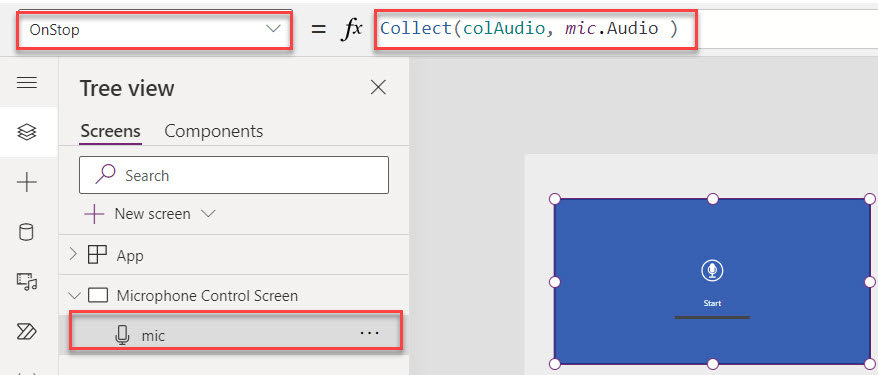
1. On the Power Apps Screen -> Insert a Microphone control and set its OnStop property as:
OnStop = Collect(colAudio, mic.Audio )Where,
- colAudio = Power Apps Collection
- mic = Power Apps Microphone Name
2. Next, Insert a Gallery control (Insert -> Gallery -> Vertical) and Change the Layout to Title. Also, select the Gallery control and set its Items property
Items = colAudio
3. Then, insert the Audio control inside the gallery control and set its Media property as:
Items = ThisItem.Value
4. Now, Save, Publish, and Preview the app. Start and stop the recording by using the Microphone control. All the recorded audio clips have been stored in the gallery control.

5. If you want to listen to the audio clips, click on any Play button of the audio control.
This way, you can add Power Apps Microphone audio record to the gallery control.

How to Upload Power Apps Audio to SharePoint Library
Follow the steps below to upload a Power Apps Microphone Audio file into the Power Apps document library.
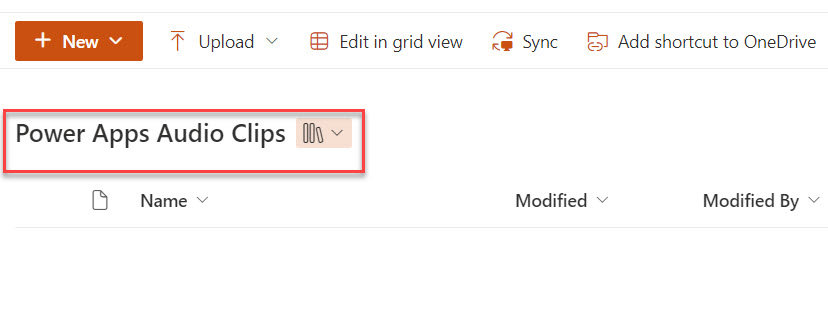
1. Create a SharePoint Online document library [Power Apps Audio Clips] where you want to store all the Powerapps microphone audio records.
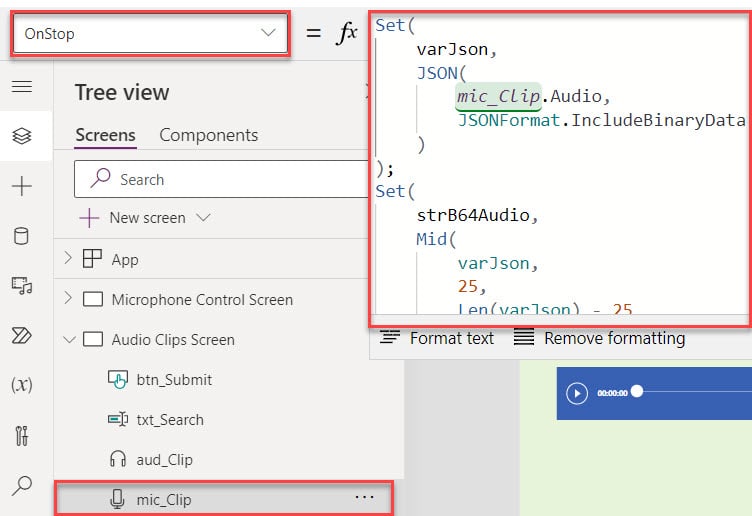
2. Go to the Power Apps Screen -> Insert a Microphone control and set its OnStop property:
OnStop = Set(
    varJson,
    JSON(
        mic_Clip.Audio,
        JSONFormat.IncludeBinaryData
    )
);
Set(
    strB64Audio,
    Mid(
        varJson,
        25,
        Len(varJson) - 25
    )
);
Where,
- varJson = Power Apps variable name
- mic_Clip = Microphone control name
Note: If you want to provide an Image to the Microphone control, you can use its Image property to add the imge
3. Next, insert an Audio control and set its Media property as:
Media = mic_Clip.Audio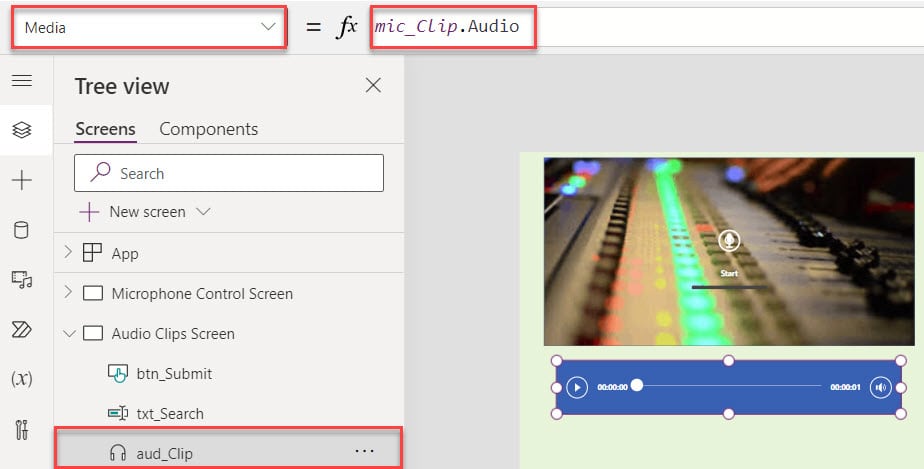
4. Insert a Text input control [To provide the Record file name], make its Default property as “Blank“, and set the Hint text as “Enter Audio Clip Name” as in the screenshot below.

Note: As we can not save the audio clip directly in SharePoint through Power Apps, So we need to convert the voice to a binary format and set it in a Variable.
5. Now, it’s time to create a Flow or Power Automate in Power Apps. For that, click on the Power Automate section -> Select the “Create new flow button” -> Select the + Create a flow button like below.
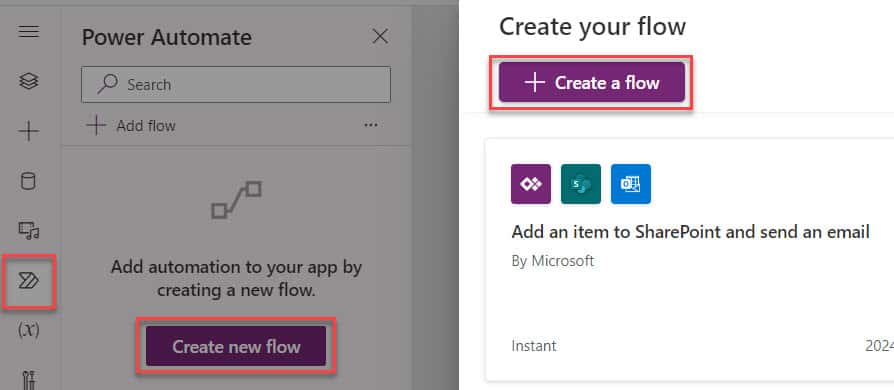
6. Once you click on the “Create a flow” option, it will redirect you to the “Create your flow” page, where you will get, by default, a trigger as Power Apps (V2).
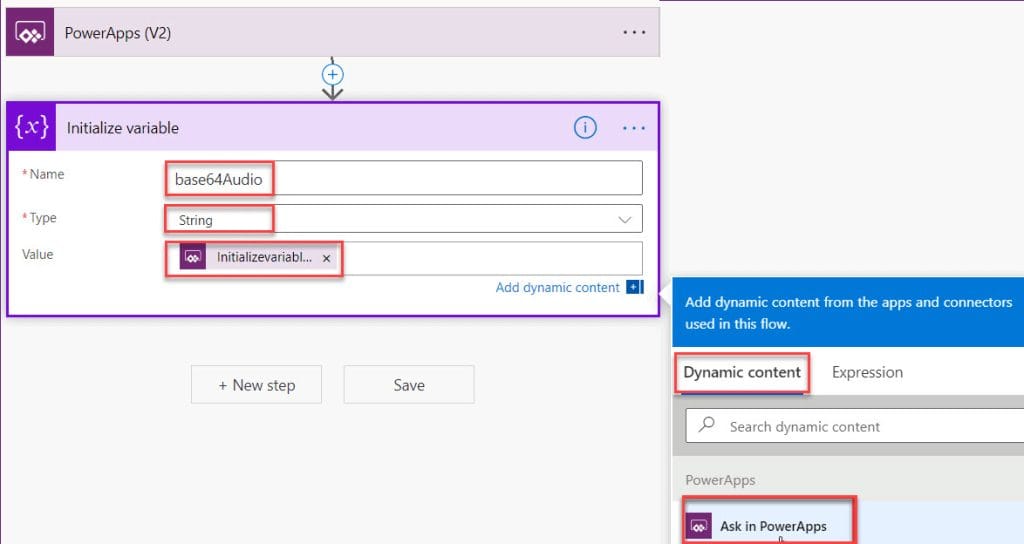
7. Next, click on the + New step to insert the Initialize variable action and provide the information below.
- Name = Enter a name for the Initialize variable
- Type = Select the Variable type as String
- Value = Select the Value field and add “Ask in PowerApps” from the “Dynamic content”
8. Now, add a Create file [In SharePoint] under the Initialize Variable action. Also, provide the below information.
- Site Address = Provide the SharePoint Site address
- Folder Path = Specify the Folder path or Library name (Power Apps Audio Clips) where you want to save the Power Apps recorded audio clips
- File Name: Select the field -> Go to the Dynamic content tab -> Ask in Power Apps -> Set the property Createfile-FileName with an extension of “.webm“
- File Content: Select the field -> Go to Expression tab -> add base64ToBinary(variables(‘base64Audio’)) -> Click on OK
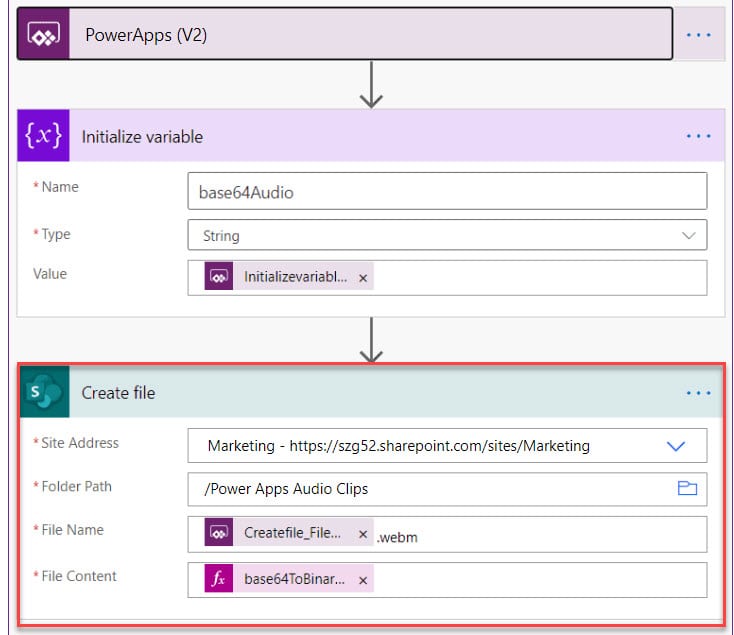
9. Once your flow is done, save the flow, and you will get the created flow under the Power Automate section like below.
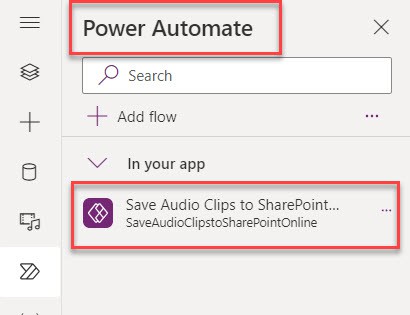
10. Finally, insert a Button control and set its OnSelect property to the code below.
OnSelect = SaveAudioClipstoSharePointOnline.Run(strB64Audio,txt_Search.Text)Where,
- SaveAudioClipstoSharePointOnline = Power Apps Flow name
- strB64Audio = Initialize Variable value
- txt_Search = Power Apps text input name

11. Once your app is ready, Save, Publish, and Preview the app. Start and stop the recording by tapping on the Powerapps Microphone control. Click on the play button from the Audio control [You can listen to the voice recorder you have recently recorded].
12. Then, enter the Audio Clip Name in the text box control and click the button control to submit the audio file into the SharePoint document library. Have a look at the below screenshot for the output.

This is how we can upload a Power Apps Microphone audio into the SharePoint document library.
Now, if you have any Power Apps Microphone control requirements, you can follow this Power Apps complete tutorial to do it. I explained information about the Power Apps Microphone control using different real-time scenarios.
Additionally, you may like some more Power Apps articles:
I am Bijay a Microsoft MVP (10 times – My MVP Profile) in SharePoint and have more than 17 years of expertise in SharePoint Online Office 365, SharePoint subscription edition, and SharePoint 2019/2016/2013. Currently working in my own venture TSInfo Technologies a SharePoint development, consulting, and training company. I also run the popular SharePoint website EnjoySharePoint.com
Thanks for this… successfully set up app to record sound and save to SP online… works find from my laptop BUT does save to SP from iPhone after I publish… it’ records find just doesn’t make it to SP… any tips??