PowerApps get current user – In this PowerApps tutorial, we will discuss Power Apps get current user details like display name, email, user ID, department, profile, etc.
Also, I will tell you what does mean by Power Apps User() Function, How to get the current user email in Power Apps, and many more like:
- How to get user profile in Power Apps
- Working with Power Apps get current user ID
- Power Apps get user department
Power Apps User() Function
PowerApps User() is a function that helps return detailed information about the current user or the logged-in user.
Always, this PowerApps User function returns the record details of the current logged-in user. Detailed information means it will retrieve the current User Email address, User full name or user ID, User Department, etc.
NOTE:
PowerApps User() function will match the Account information that is displayed in the PowerApps players and studio that can be found outside of any authored apps. This may not match the current user’s information in Office 365 or other services.
Power Apps User() Function Syntax
The syntax of the Power Apps User() function is:
User()The table below represents some PowerApps user() function properties with their descriptions:
| Property | Description | Output |
| User() | This function returns all the information about the current user (in PowerApps). | { FullName: “Alex Wilber”, Email: “AlexW@szg52.onmicrosoft.com”, Image: “blob:1234…5678” } |
| User().Email | This Powerapps function returns the email address of the current user (in PowerApps) | “AlexW@szg52.onmicrosoft.com” |
| User().FullName | This Powerapps function helps to return the full name of the current user, including the first and last name. | “Alex Wilber” |
| User().Image | This function returns the image URL of the current user. But the image URL will appear with the form like “blob:identifier“. You can set the Image property of the Image control to this value to display the image in the app. | “blob:5678…1234” |
These are all about PowerApps user() function properties.
Power Apps Get Current User
To get the current user in Power Apps, we can use the User().FullName function.
Example:
Let me show you how to get the current user in Power Apps screen or form.
- Sign in the PowerApps app with your valid Microsoft 365 credentials.
- Create a blank new Canvas app and choose any one Layout, either Tablet or Phone.
- On the PowerApps Blank screen, take these below input controls as:
- Insert one Label control (Insert -> Label) and rename it to lblUserName.
- Add one Text input control (Insert -> Input -> Text input) and rename it to txtUserName.
- Select the text input control (txtUserName) and set its Default property as:
Default = User().FullNameSave and Preview (F5) the app. Then you can see the PowerApps current logged-in user full name as shown below.
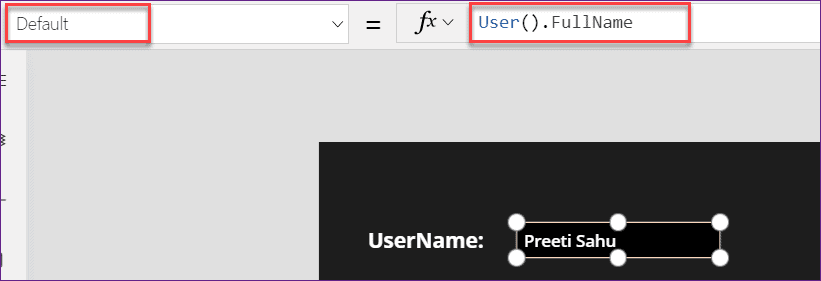
This way, we can get current user in Power Apps.
Power Apps Get User Email
We can use the User().Email function to get the current user email address.
Example:
- On the PowerApps screen, insert a Label for UserEmail and a Text input control to display the value.
- Select the text input control and set its Default property as:
Default = User().EmailSave and Preview (F5) the app. Then you can see the PowerApps current logged-in user Email Address as shown below.
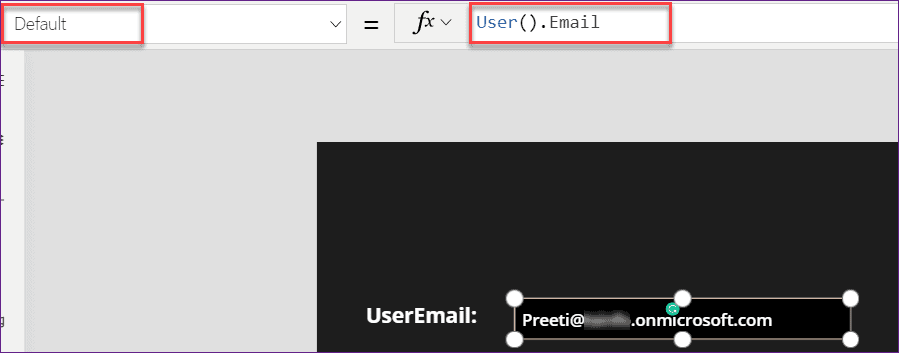
This is how to get the user email id in Power Apps.
Power Apps Get User Profile
Here, we will see how to get the user profile in Power Apps using a simple scenario. This is also known as PowerApps Auto Fill User Profile Details.
Example:
All of the information about the currently logged-in user is included in the current user profile details (in Power Apps).
The user name, ID, email address, department, job title, etc. should all be included in the user information. We need to obtain this user data in a single Power Apps form.
Follow the below steps to do so:
- I have created a SharePoint Online list named Employee User Profile. This list has the following columns:
| Column | Datatype |
|---|---|
| Title | Single line of text |
| Employee Name | Person or Group Data type |
| Employee ID | Single line of text |
| Employee Email | Single line of text |
| Department | Single line of text |
| Job Title | Single line of text |
Refer to the image below:

- Create a Blank PowerApps Canvas app.
- Connect the Office 365 Users Data source connector to the app.
- Connect the SharePoint Data source and add the SharePoint Online list (Employee User Profile).
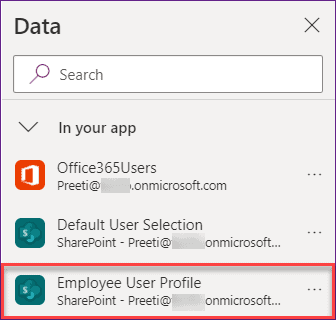
- Insert one PowerApps Edit form and add the SharePoint list Data source onto it. Then, the form will appear with these fields, as shown below. [You can design the form with various properties as per your need.]
- Next, Unlock all the Data card field values in the edit form.

- It’s time to set the user information details to each field. Let’s see how to apply the formulas to each control in the edit form.
- Title: You need to enter the values before submitting the form.
- Employee Name: To get the user name, repeat the same steps from the above example (Set current user Powerapps)
- Employee ID: To get the current employee ID, Select the Employee ID field and apply this below formula on its Default property as:
Default = If(Form1.Mode = FormMode.New, Office365Users.UserProfile(User().Email).Id ,Parent.Default)4. Employee Email: To get the current employee Email Address, Select the Employee Email field and apply the below formula on its Default property as:
Default = If(Form1.Mode = FormMode.New, Office365Users.UserProfile(User().Email).Mail ,Parent.Default)5. Department: To get the current employee Department, Select the Department field, and apply the below formula on its Default property as:
Default = If(Form1.Mode = FormMode.New, Office365Users.UserProfile(User().Email).Department ,Parent.Default)6. Job Title: To get the current employee Job Title, Select the Job Title field and apply the below formula on its Default property as:
Default = If(Form1.Mode = FormMode.New, Office365Users.UserProfile(User().Email).JobTitle ,Parent.Default)- All these above values should be fetched from the connector only when the form is opened in New mode. Otherwise, it will display the saved value from the database.
The screenshot below is for your reference.

NOTE:
Not only the Office 365 Users connector have this much user information, but also it has many user profile details like City, Company Name, Country, Mobile Phone, Postal Code, Telephone Number, Surname, Business Phones, etc.
- Save and Preview the app. You can see all the Current logged-in user profile details in the below screenshot.

This is how to get a current user profile in Power Apps.
Power Apps Get Current User ID
To get the current user ID in Power Apps, we can use the Office365Users.UserProfile(User().Email).Id function.
Example:
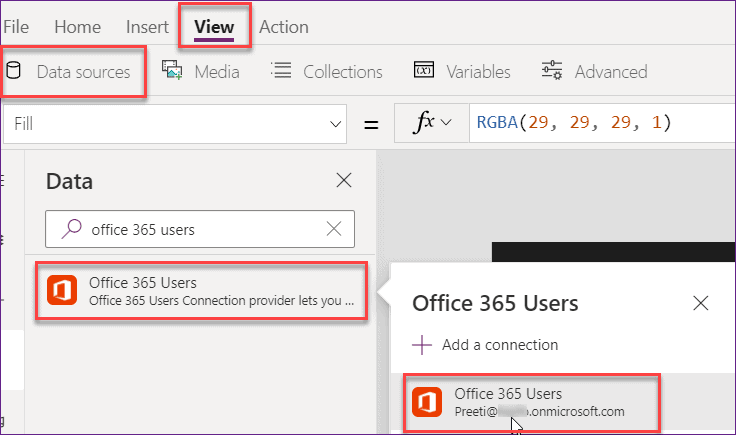
- On the PowerApps screen, Connect the Office 365 Users Data source connector to the app.
- Go to the View tab -> Data sources -> Search Office 365 Users -> Add a new or existing connection, as shown below.
- Insert a Text input control to display the User ID. Select the text input control and apply the below formula on its Default property:
Default = Office365Users.UserProfile(User().Email).IdOnce you save and preview (F5) the app, you can see the Power Apps and the currently logged-in user ID, as shown below.
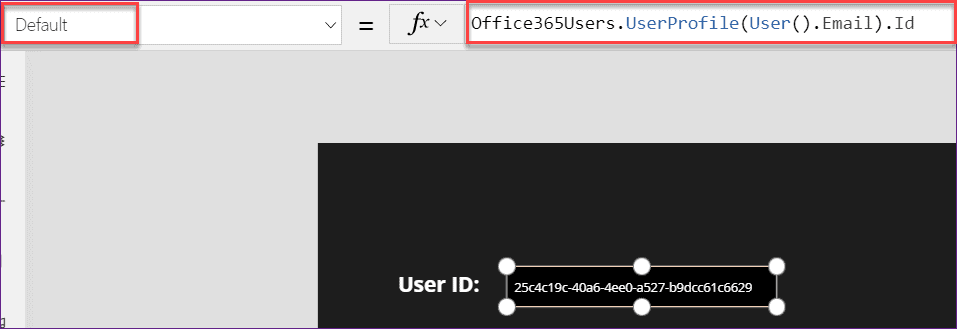
This is how to get the current user ID in Power Apps.
Get User Department in Power Apps
Also, we can retrieve the current user’s department in Power Apps. To get the user department, we can use the Office365Users.UserProfile(User().Email).Department function.
Example:
- In the same above example, you will add the Office 365 Users Data source connector to the app.
- Insert a Text input control and set its Default property as:
Default = Office365Users.UserProfile(User().Email).DepartmentWhen you save and preview (F5) the app, you can see the PowerApps current logged-in user Department like the below screenshot.

In this way, we can get the user department in Power Apps.
Conclusion
I hope you got a detailed idea about the Power Apps User() Function and its syntax.
Also, we learned how to get current user in Power Apps, Work with Power Apps get user email, get current user ID in Power Apps, and get user department.
I have also explained how to work with Power Apps to get user profiles of the current user.
Also, you may like the below Power Apps Tutorials:
- Power Apps Show/Hide Button Based On The Current User
- Filter Gallery by Current User in Power Apps
- Power Apps Different Home Screen Based On Different User
- Get users from Office 365 Group in PowerApps
I am Bijay a Microsoft MVP (10 times – My MVP Profile) in SharePoint and have more than 17 years of expertise in SharePoint Online Office 365, SharePoint subscription edition, and SharePoint 2019/2016/2013. Currently working in my own venture TSInfo Technologies a SharePoint development, consulting, and training company. I also run the popular SharePoint website EnjoySharePoint.com
Why employee ID is displayed as a string. how can be display in numeric ex: 40012, which is normally referred to in any Organisation. How is that possible
Hi Bijay,
please note, that the User().Email function does not return the users email adresse but the UPN. Thats a big difference and may cause an error for some implementations if those are not equal.
Regards