Microsoft Power Apps platform allows users to create or build custom applications using low-code. Creating a PowerApps login page provides secure authentication to ensure only authorized users can access the application’s functionality.
Follow this tutorial to learn how to create a Power Apps login screen using two different ways. Such as:
- How to create login page in PowerApps using SharePoint list
- How to create login page in Power Apps using Collection
Power Apps Login Page
Power Apps Login page is a simple screen that helps users enter the identifier information into the system to access that specific app.
Example:
When you are accessing a particular App or Website, first, it is asking to log in to the app by entering the username and password. If that username and password validations are correct, then only the app will open. Otherwise, it will give a notification error.
Similarly, we can create a custom Power Apps login screen that contains a Username, Password, and Login button.
Whenever the user enters the username and correct password and clicks on the login button, it will navigate or redirect to the Welcome Screen.
Output:
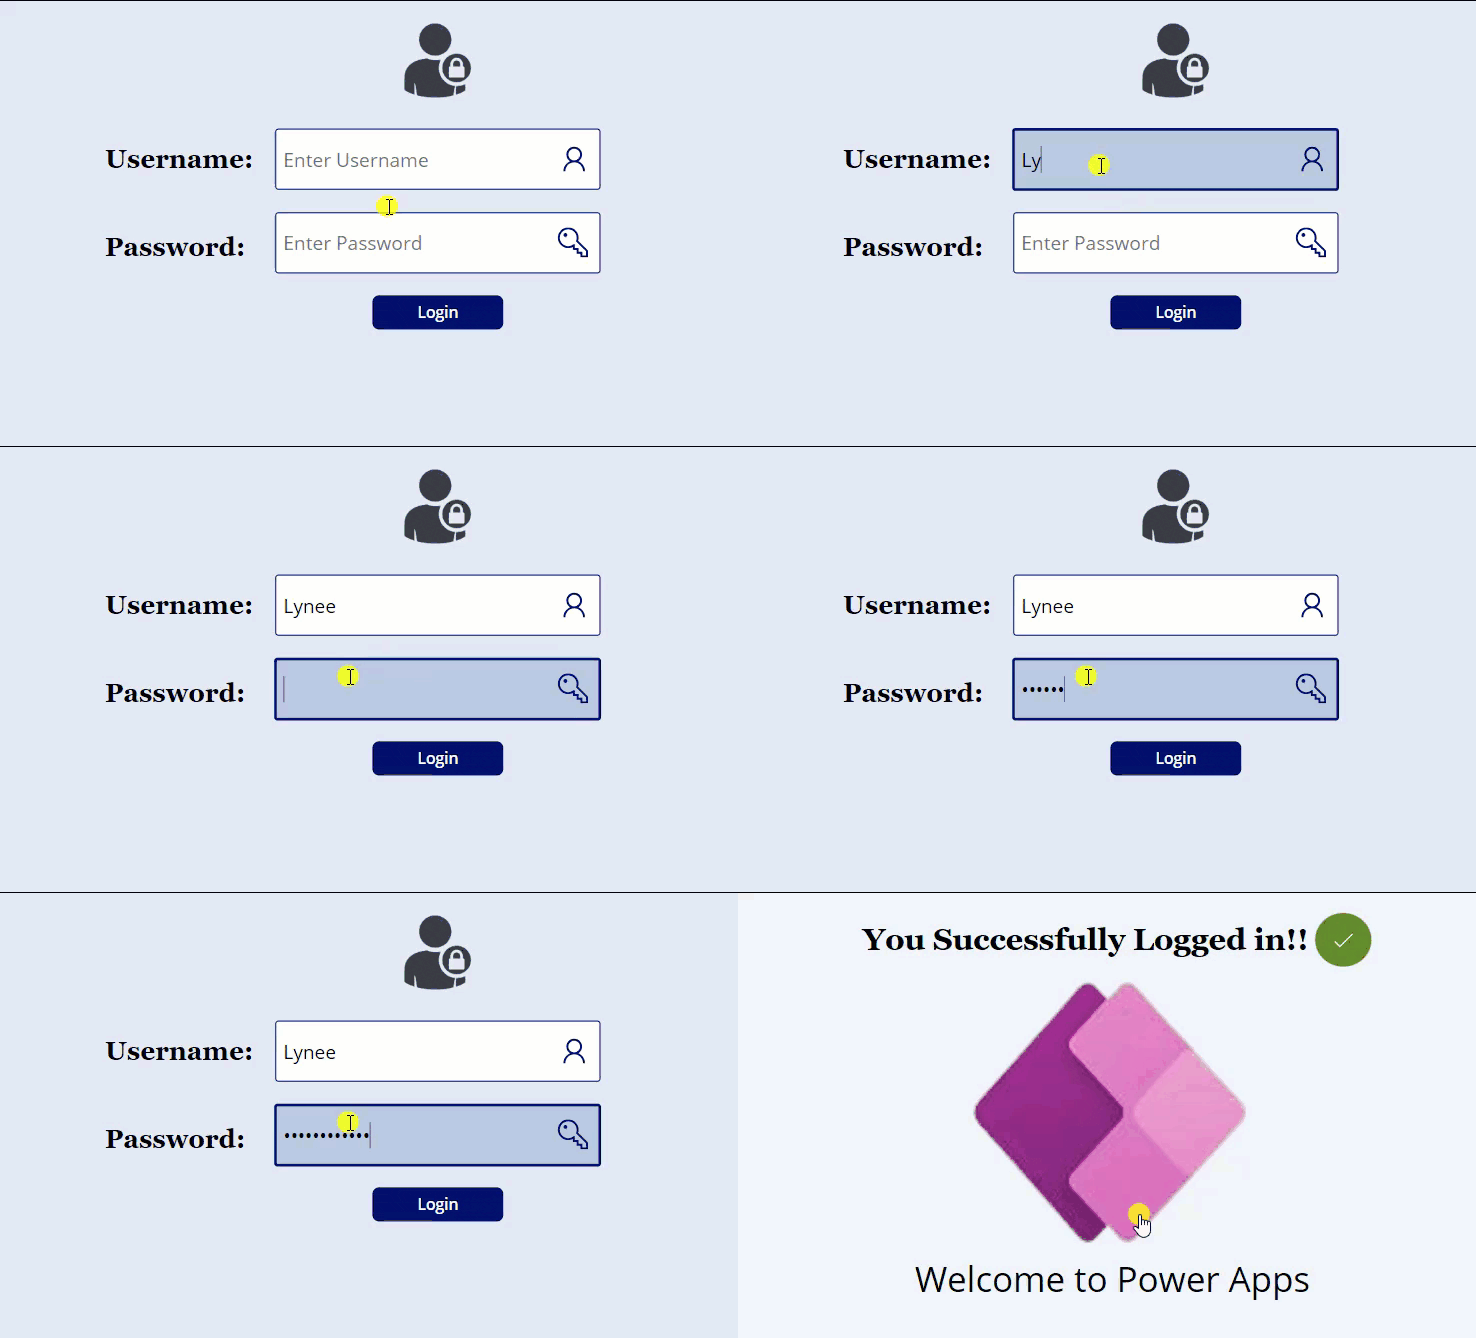
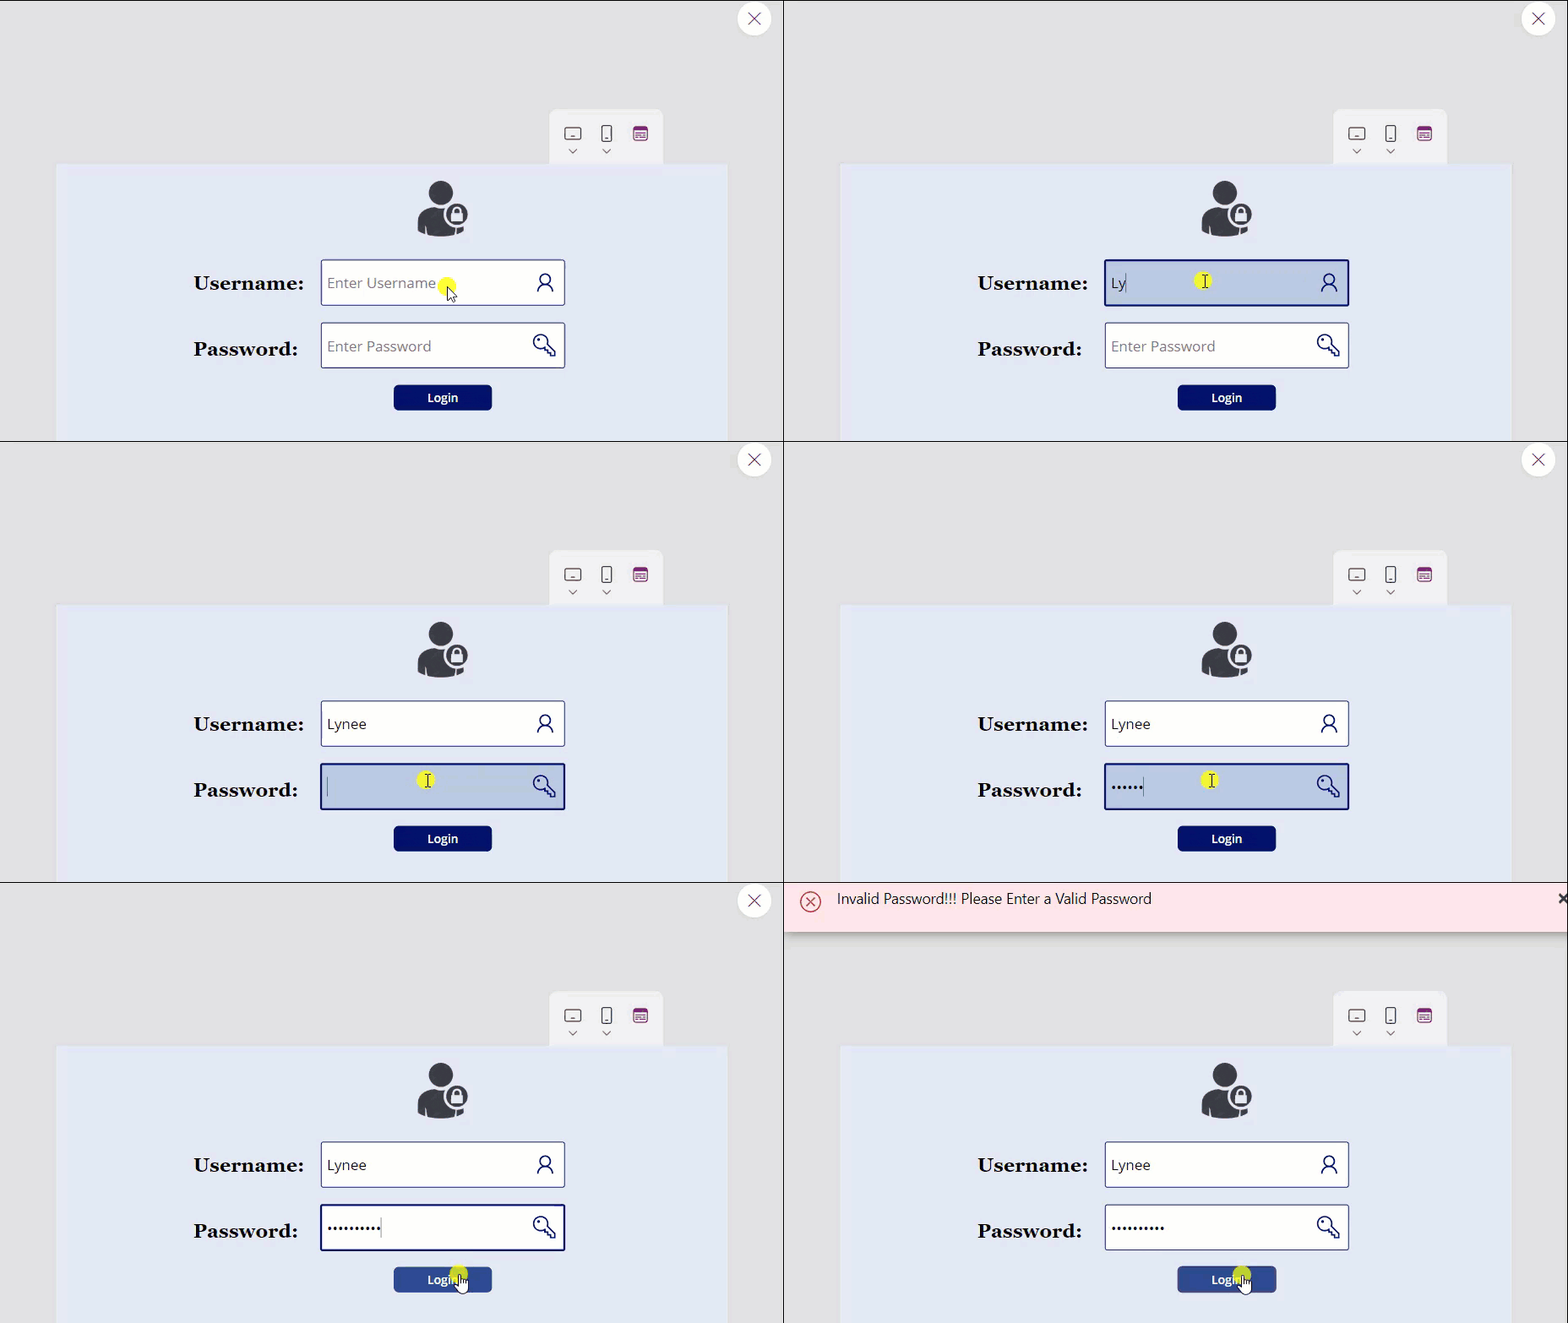
On the other hand, when you enter an invalid password and log in, the error notification will appear, as shown below.
To work around this, follow the below steps. Such as:
1. On the Power Apps Screen, insert a Text input control [txt_Username], set its Default property to blank, and give the Hint text [Enter Username].

2. In the same way, insert another Text input control [txt_Password], set its Default property as blank, and give the Hint text [Enter Password]. Also, you can set its Mode property as:
Mode = TextMode.Password
3. Finally, insert a Button control and set its OnSelect property to the code below.
OnSelect = If(
    txt_Password.Text = "Moonlight@321",
    Navigate(
        'Welcome Screen',
        ScreenTransition.None
    ),
    Notify(
        "Invalid Password!!! Please Enter a Valid Password",
        NotificationType.Error
    )
);
Reset(txt_Username);
Reset(txt_Password);
Where,
- txt_Password, txt_Username = Power Apps text input control names for user name and password
- ‘Welcome Screen’ = Power Apps second screen name
4. Once your app is ready, Save, Publish, and Preview the app. If the Password validation is correct, then at the same time the “Welcome screen” will appear as shown below.

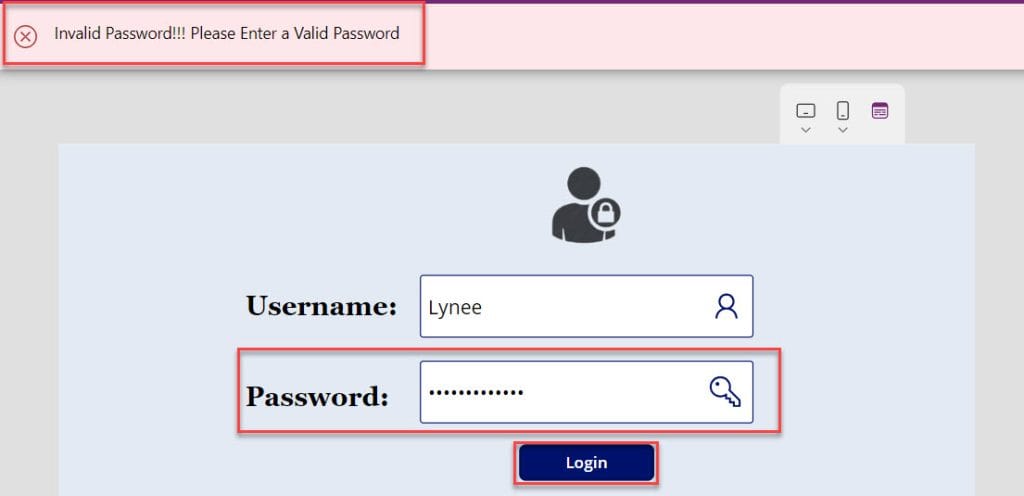
5. Likewise, When you enter an invalid password and log in, the error notification will appear as in the screenshot below.
This is the normal way to create the Power Apps login screen.
How to create login page in Power Apps using SharePoint list
Next, I will show you how to create a login page in Power Apps using a SharePoint list with a simple example.
Example:
I have a SharePoint Online list named [User Credentials], having the below records based on the respective fields.
| Column Name | Data Type |
| Username | It is a default single line of text |
| Password | A single line of text |
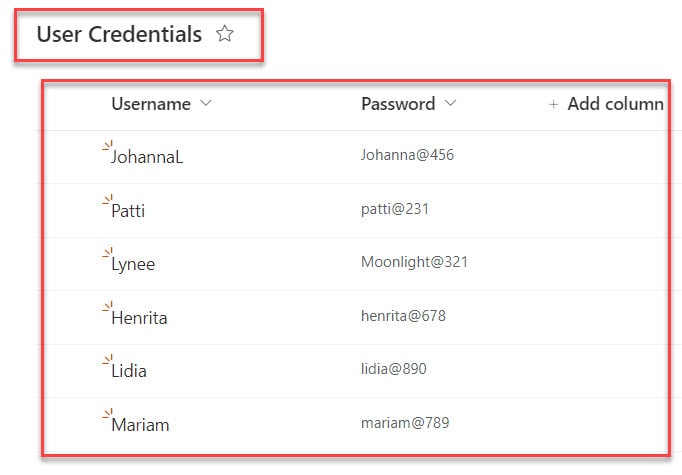
When a user logs in to the Powerapps app, it checks whether the specific user exists or is from the SharePoint list. If the user exists, the app will log in and navigate to the welcome screen; otherwise, it will display an error notification.

To achieve it, follow the below steps.
1. On the Power Apps User Login Screen, select the Button control and set its OnSelect property as:
OnSelect = If(
    CountRows(
        Filter(
            'User Credentials',
            And(
                txt_Username.Text = Title,
                txt_Password.Text = Password
            )
        )
    ) = 1,
    Navigate(
        'Welcome Screen',
        ScreenTransition.None
    ),
    Notify(
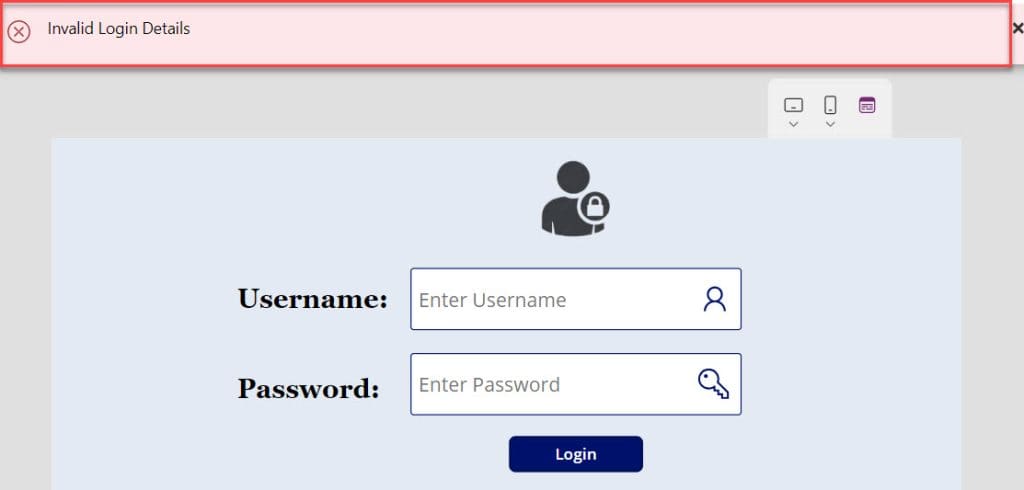
        "Invalid Login Details",
        NotificationType.Error
    )
);
Reset(txt_Username);
Reset(txt_Password);
Where,
- ‘User Credentials’ = SharePoint Online list

2. Also, you will get the Delegation warning [Delegation warning. The highlighted part of this formula might not work correctly on large data sets. The “CountRows” operation is not supported by this connector.]

3. To resolve this issue, you can create a Power Apps collection using the SharePoint list. For that, select the App object [From the left navigation] and set its OnStart property to the code below.
OnStart = ClearCollect(
    colUserCredentials,
    'User Credentials'
)
Where,
- colUserCredentials = Power Apps collection name

4. Now, select the Button control and set its OnSelect property to the code below.
OnSelect = If(
    CountRows(
        Filter(
            colUserCredentials,
            And(
                txt_Username.Text = Title,
                txt_Password.Text = Password
            )
        )
    ) = 1,
    Navigate(
        'Welcome Screen',
        ScreenTransition.None
    ),
    Notify(
        "Invalid Login Details",
        NotificationType.Error
    )
);
Reset(txt_Username);
Reset(txt_Password);
Where,
- colUserCredentials = Power Apps collection name

5. Save, Publish, OnStart, and Preview the app. When the user enters the correct Username and Password validations, the Welcome screen will appear simultaneously.
6. However, if you enter an invalid Username or password and then Log in, the error notification will appear on the screen, as shown below.
This is how we can work with creating a login page in Power Apps using a SharePoint list.
How to create login page in Power Apps using Collection
Suppose, In Power Apps, you want to store some important User Login details. In this case, you can collect it by using the PowerApps Collection.
Follow the below steps to create a login page in the Power Apps using a collection [colUserLogin].
1. On the Power Apps Screen -> Insert a Button control [Login User Collection] and set its OnSelect property as:
OnSelect = Collect(
    colUserLogin,
    {
        UserName: txt_Username.Text,
        Password: txt_Password.Text
    }
);
Reset(txt_Username);
Reset(txt_Password);
Where,
- colUserLogin = Power Apps collection name
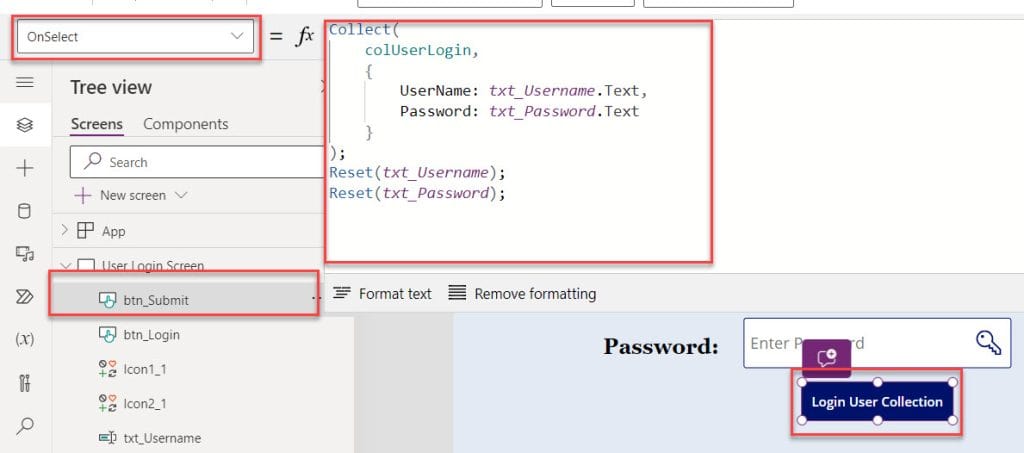
2. Now, Save, Publish, and Preview the app. Whenver the user enters their Username and Password and then clicks on the button, he/she will get their logged-in user details in the specific collection [Variables -> Collections -> View Table].
Have a look at the below screenshot for the output.

This Power Apps tutorial explains all the information about how to create a Power Apps login page with an example.
Also, we saw how to create a login page in Power Apps using SharePoint list and create a login page in Power Apps using Collection.
Also, you may like:
- 6 Easiest Ways to Filter Gallery in Power Apps
- Power Apps Upload File to SharePoint Document Library
- Create Power Apps Popup Message
- Container in Power Apps
- Create Power Apps Quiz App
I am Bijay a Microsoft MVP (10 times – My MVP Profile) in SharePoint and have more than 17 years of expertise in SharePoint Online Office 365, SharePoint subscription edition, and SharePoint 2019/2016/2013. Currently working in my own venture TSInfo Technologies a SharePoint development, consulting, and training company. I also run the popular SharePoint website EnjoySharePoint.com
Does every end-user need a Power App license to access this Login page?
yes
Hi,
Interesting training for Powerapps beginner ! thanks
I did it using SHarepoint List, but i have an alert saying that the ‘ Countrows’ is not supported by this connector !
Is it coming from my List ? (both column are Single line of text)
thanks in advance
All I can say is , this blog is a blessing. It has helped so much problems for me. Thank you Bijay
Another tutorial that does not work.
How to share this power app with users? I did share it on sharepoint but the issue is that users need to have access to the credential list in order for the login screen to work.
Wow, can I have the project of sign up I want do it like that