The Power Apps quiz app means it is a survey app that contains single or multiple questions where each question has multiple-choice options.
You can follow this complete Power Apps tutorial to get an idea to create a PowerApps quiz app with a simple scenario.
Power Apps Quiz App
The Power Apps Quiz App is a user-friendly application designed to make a quiz to test the knowledge of the participants.
Suppose in the Power Apps app, I have created 3 different screens [Welcome Screen, Quiz Screen, and Sucess Screen]. The Quiz Screen contains multiple numbers of questions (with multiple-choice options).
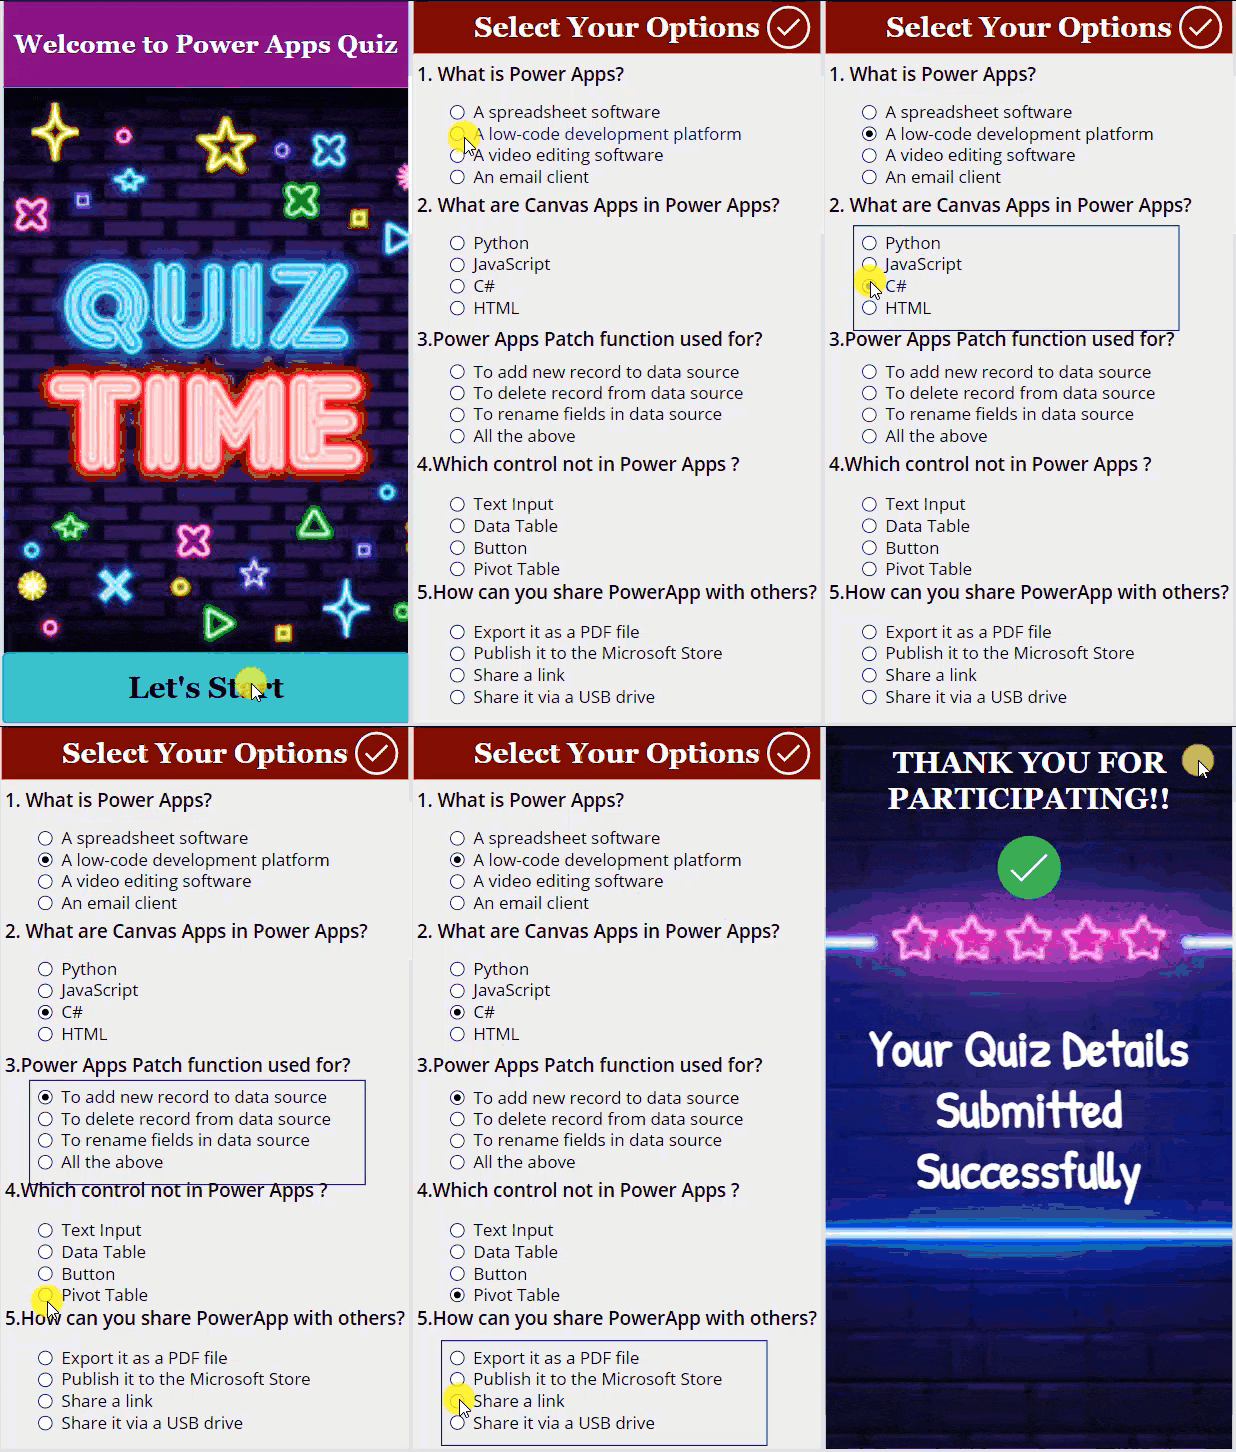
When a user completes the task or quiz, all the user answers are saved into Data sources like SharePoint, Excel, etc. At the same time, the Success Screen appears.

To work around this, follow the below-mentioned steps. Such as:
1. I have created a SharePoint Online list named “Quiz Details” and this list contains the below fields.
| Column Name | Data Type |
| Participant | It is a default single line of text |
| Quiz1 | Multiple lines of text |
| Quiz2 | Multiple lines of text |
| Quiz3 | Multiple lines of text |
| Quiz4 | Multiple lines of text |
| Quiz5 | Multiple lines of text |
NOTE:
Quiz1, Quiz2, Quiz3, Quiz4, Quiz5: These are multiple-line text columns. My app will have only four multiple-choice questions, so I have created only four columns. You can create more columns depending on your number of questions.

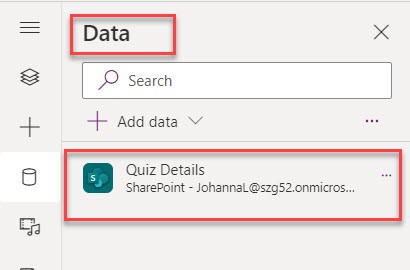
2. Open Power Apps -> Create a Blank canvas app with a Mobile layout and connect it to the respective SharePoint Online list, as shown below.
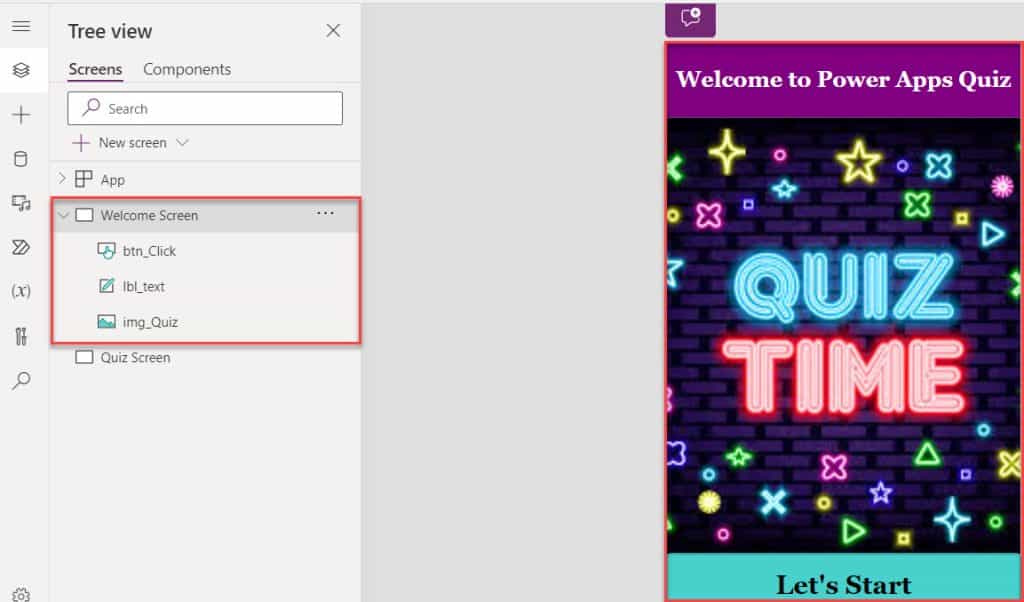
3. Rename the Power Apps default screen [Welcome Screen] and insert the below control to make the screen more attractive and responsive. Such as:
- Text label = To provide the welcome message [Welcome to Power Apps Quiz]
- Image control = We can add an image from the local device or stock images to make the app more attractive
- Button control = We can use this button control to navigate to another screen [Quiz Screen]
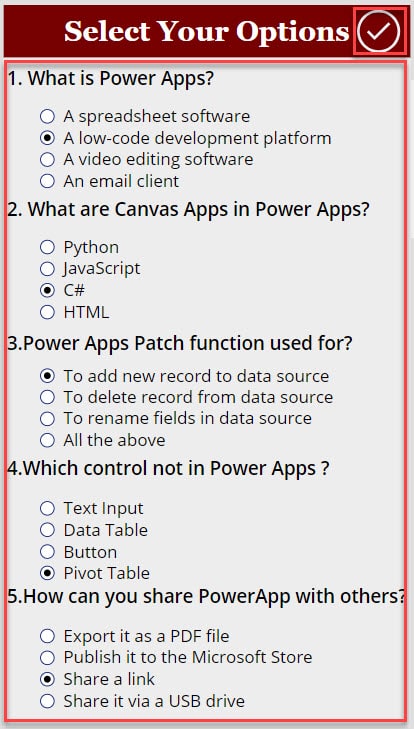
4. Next, insert another blank screen [Quiz Screen] and insert the below control. Such as:
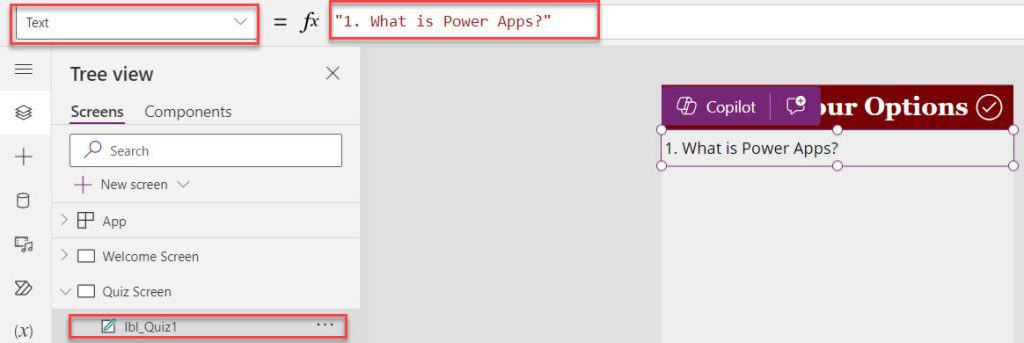
- Text labels = I have inserted five text labels for five different questions and set their Text property, like below.
- Radio buttons = Likewise, I have added five radio button controls to provide the choices for the respective questions using its Items property.

- Submit icon = To submit the answers to the SharePoint Online list and navigate to the success screen
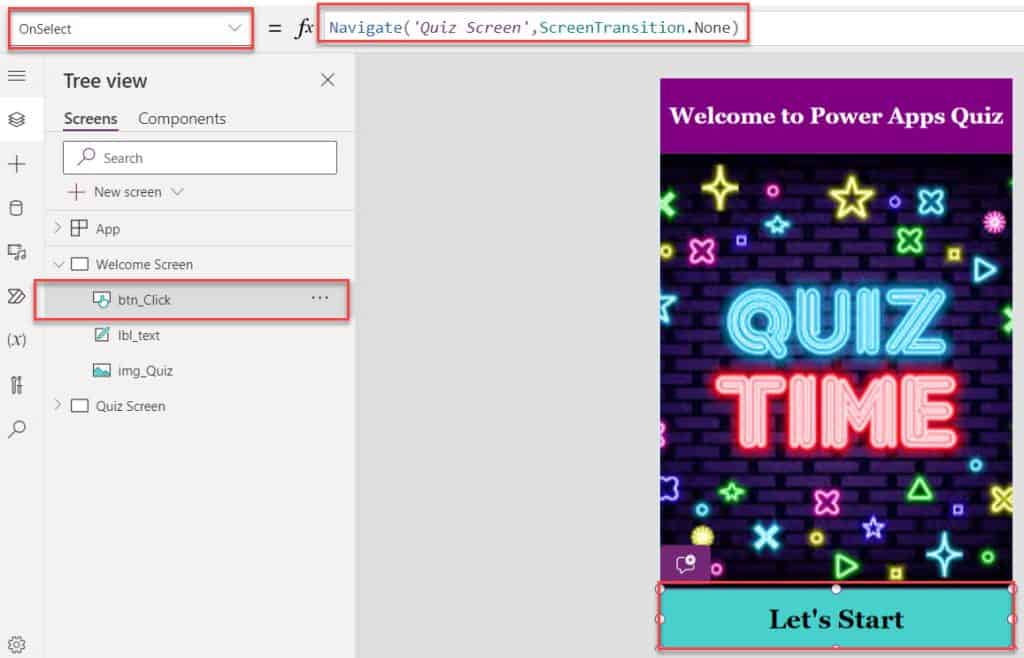
5. Now, go to the Welcome Screen -> Select the Button control [Let’s Start] and set its OnSelect property to the code below.
OnSelect = Navigate('Quiz Screen',ScreenTransition.None)Where,
- ‘Quiz Screen’ = Power Apps second screen name
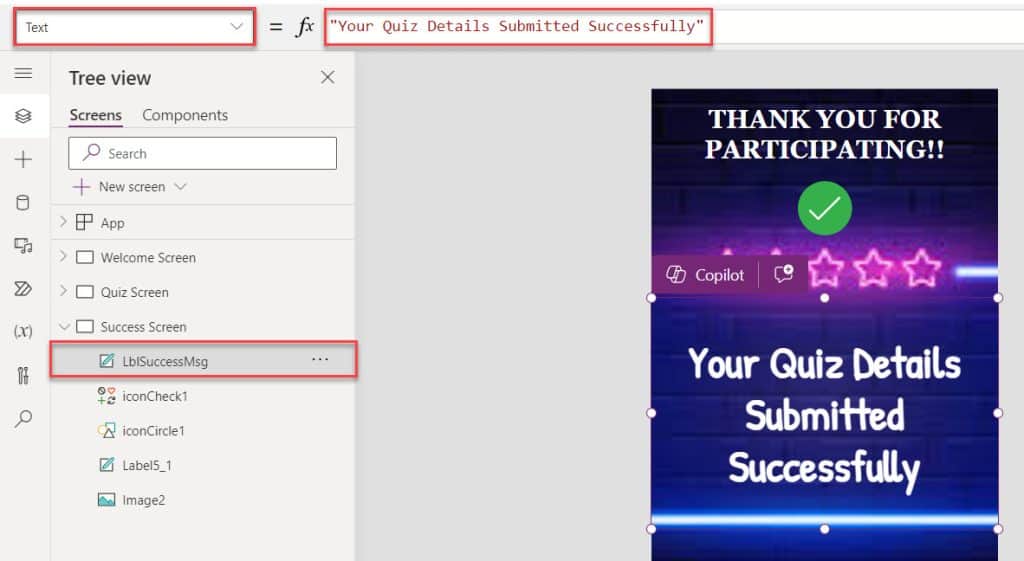
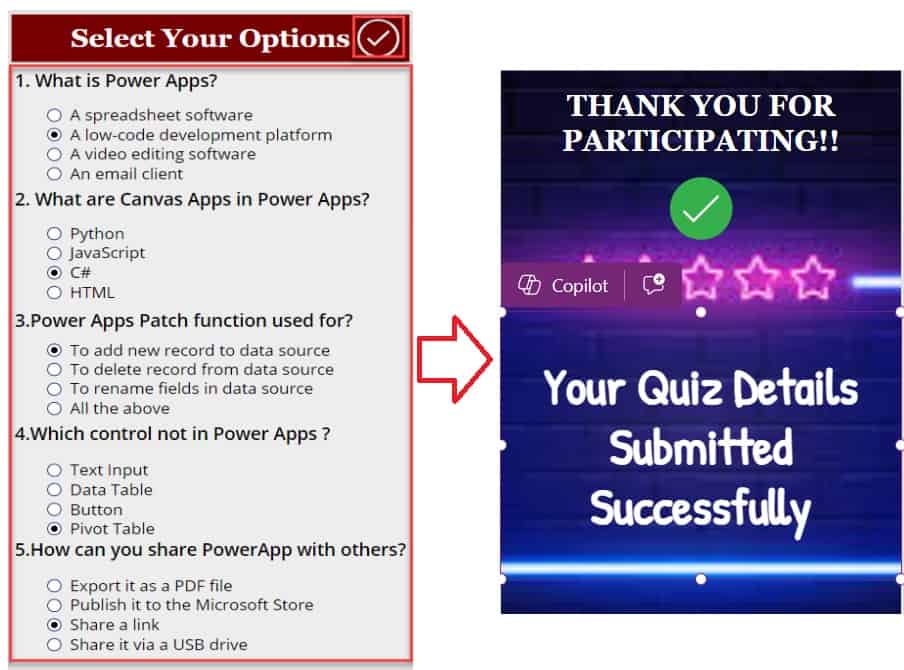
6. Next, insert another screen [Success Screen] and add the below controls. Such as:
- Text labels = To add a success message [Your Quiz Details Submitted Successfully] and a thanks message [THANK YOU FOR PARTICIPATING!!]
- Image control = We can add the background image to the screen
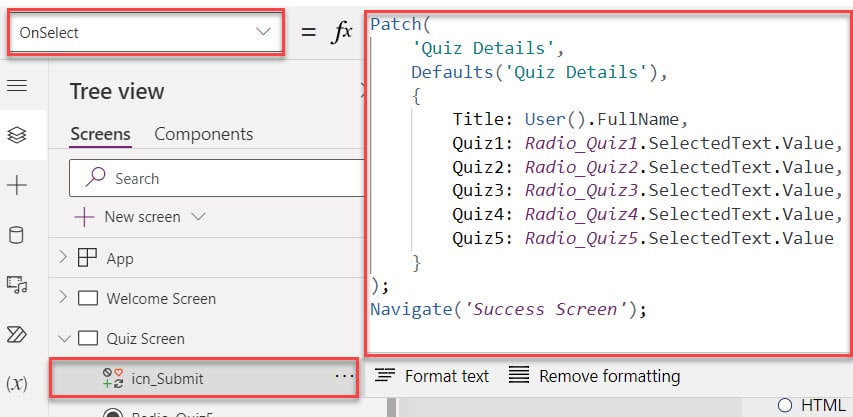
7. Finally, select the Submit icon from the second screen [Quiz Screen] and set its OnSelect property to the code below.
OnSelect = Patch(
    'Quiz Details',
    Defaults('Quiz Details'),
    {
        Title: User().FullName,
        Quiz1: Radio_Quiz1.SelectedText.Value,
        Quiz2: Radio_Quiz2.SelectedText.Value,
        Quiz3: Radio_Quiz3.SelectedText.Value,
        Quiz4: Radio_Quiz4.SelectedText.Value,
        Quiz5: Radio_Quiz5.SelectedText.Value
    }
);
Navigate('Success Screen');
Where,
- ‘Quiz Details’ = SharePoint Online list
- User().FullName = We can use this function to log in user name
- Quiz1: Radio_Quiz1, Quiz1: Radio_Quiz2, Quiz1: Radio_Quiz3, etc. = Power Apps Radio button control names
- ‘Success Screen’ = Power Apps third screen name
8. Once your app is ready, Save, Publish, and Preview it. Whenever the user clicks on the Let’s Start button from the Welcome Screen, the app will navigate or redirect to the Quiz Screen, where the user selects the answers.
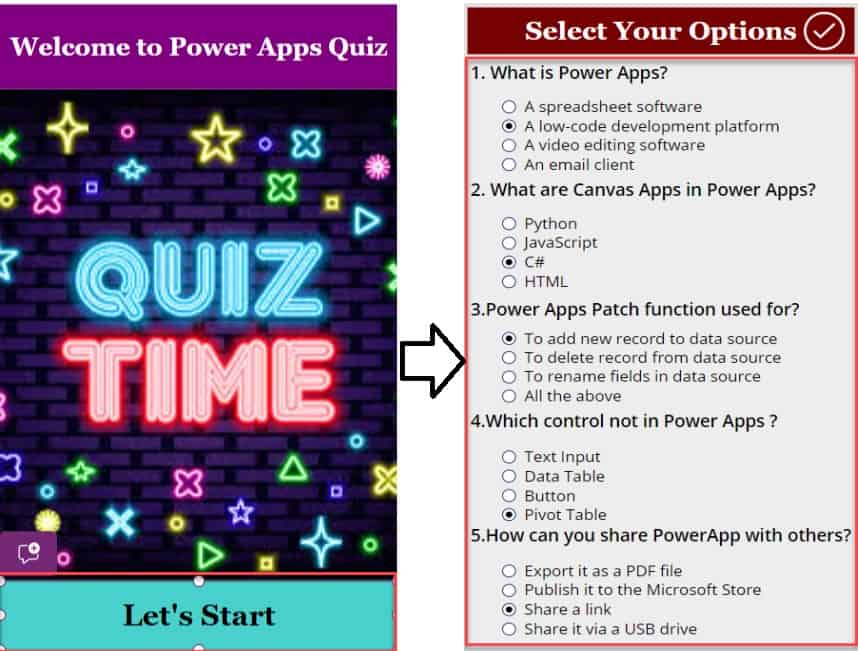
9. Once you complete the quiz with selected options, click on the submit icon. When you click on the Finish button, the quiz answer details will be saved into the SharePoint List (Quiz Details).
Also, at the same time, the “Sucess Screen” will appear. Have a look at the below screenshot for the output.
10. Open the SharePoint Online List (Quiz Details), where you will get the user’s answer details, including his or her full name, as shown in the screenshot below.

This is how we can create or make a Power Apps quiz app.
Also, you may like:
- Create Power Apps Login Page
- 6 Easiest Ways to Filter Gallery in Power Apps
- Power Apps Upload File to SharePoint Document Library
- Create Power Apps Popup Message
- Create CSV File in SharePoint Using Power Apps
I hope you find this article helpful. If you have any requirements related to the Power Apps quiz app, you can follow this tutorial until the end to get an idea of how to do it.
I am Bijay a Microsoft MVP (10 times – My MVP Profile) in SharePoint and have more than 17 years of expertise in SharePoint Online Office 365, SharePoint subscription edition, and SharePoint 2019/2016/2013. Currently working in my own venture TSInfo Technologies a SharePoint development, consulting, and training company. I also run the popular SharePoint website EnjoySharePoint.com
Thank you so much for the wonderful blog 🙏
Why are we using Sharepoint lists and not some other database
Please be more specific in the Quiz screen, Thank you
“Questions: I have inserted four Labels for four different questions and set their Text property.
Options: These are the Powerapps Radio Button controls where I have inserted the choice values on their Items property.”