Are you new to Power Apps and wondering how to make a canvas app in Power Apps from Excel as quickly as possible? This detailed guide will walk you through how to create Power Apps from Excel.
As far as we know, Microsoft lets us build a canvas application in Power Apps using various data sources, including SQL, Excel, and SharePoint.
Refer to the complete article to learn how to create Power Apps from a SharePoint list.
How to Create Power Apps From Excel
Follow the five easy steps listed below to create a canvas app from Excel in Power Apps:
- Create an Excel spreadsheet and format the Excel as a Table
- Upload your Excel file to a cloud location like OneDrive for Business
- Sign in to Power Apps
- Create Power Apps Canvas App from Excel File
- Save, Publish, and Preview the Power Apps app
Let’s explore one by one.
I have created an Excel file as “Financial Sheet” and added some records here. I will use the same Excel to create a Power Apps canvas app.
1. Create an Excel spreadsheet and format the Excel as a Table
- Building a Power Apps canvas app using Excel is one of the most important processes. The Excel file must be formatted as a table. If not, an error message stating that “There are no tables in this file” will appear.
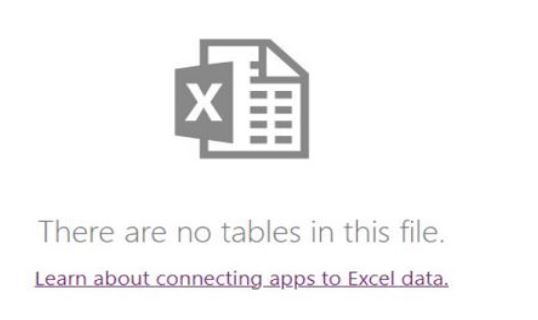
- We must format the Excel as a table to avoid this above error. To do so, Select all the Excel records you want -> Go to the Home tab -> Format as Table -> Select any table format or layout as shown below.

- Next, choose “My table has headers” from the dialogue box that appears. I want my header columns to be in the first row.
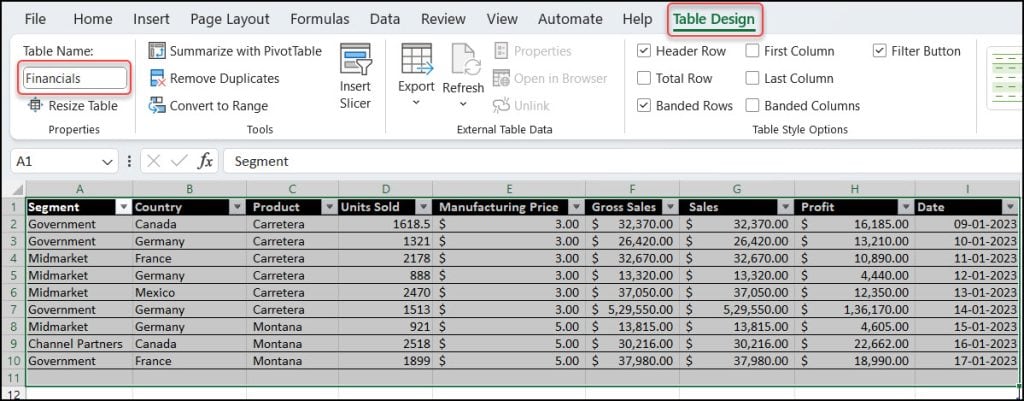
- In the end, select the Table Design tab from the ribbon and enter the table name as shown below. This is how Table 1 would appear when you create the app in Power Apps if you don’t give it a proper name.
2. Upload your Excel file to a cloud location like OneDrive for Business
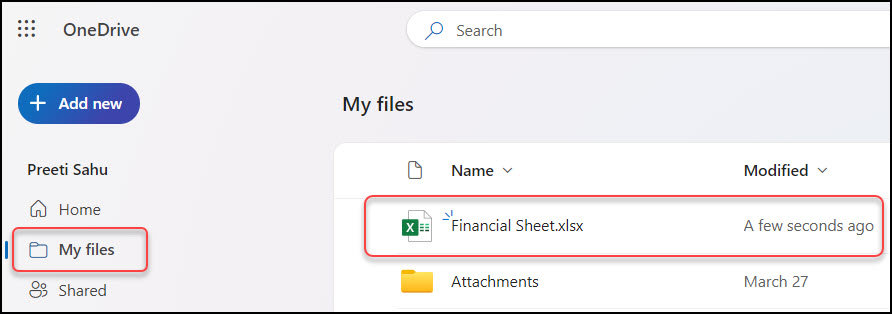
- Upload the Excel file now to OneDrive for Business or another cloud location. I saved the file to the My files folder on OneDrive for Business.
NOTE:
You must provide permissions to this file in addition to the Power Apps app if you want to share the app later on and allow other users in an organisation to use it.
The Excel file is now ready for the Power Apps Canvas app. Let’s create it.
3. Sign in to Power Apps
- Go to https://make.powerapps.com and open it. It will ask you to log in with your credentials if you haven’t already.
- I’ve used my Microsoft 365 developer tenant to log in here. You can also sign up for a Microsoft 365 developer account if you’re a developer and want to use Power Apps for development.
4. Create Power Apps Canvas App from Excel File
- On the Power Apps home page, click the + Create [from the left nav] -> Choose Excel from the Start from section.

- After that, it will display every connection you currently have. Since I have already established a connection for OneDrive for Business, that connection is also displayed here.
- Using the + New connection option, you can also create a new connection.
- You may view every Excel file in the My Files folder. Additionally, you are free to select any folder and the necessary file.

- It will then display every table in that specific Excel file [financials] for viewing. I have one table in this case; choose it and click Connect.
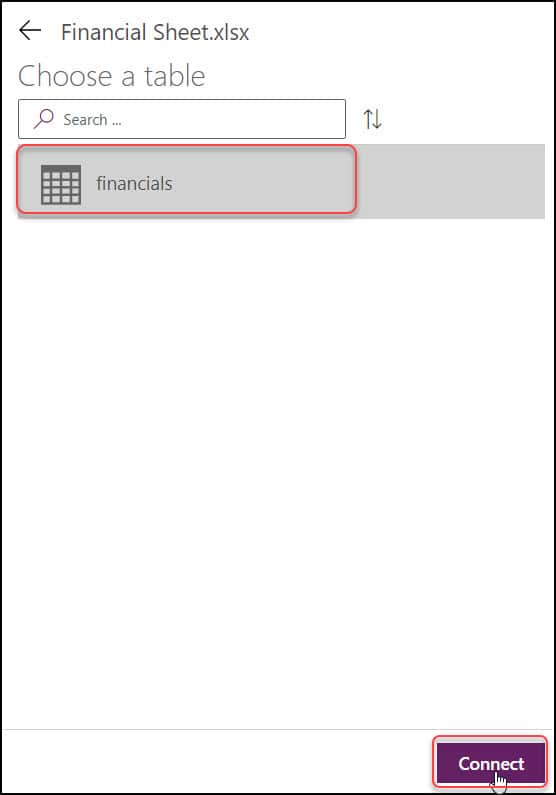
- After you hit the Connect button, Power Apps will generate an app. With this completely functional system, you may perform all the tasks.
Refer to the image below how the canvas app looks like:
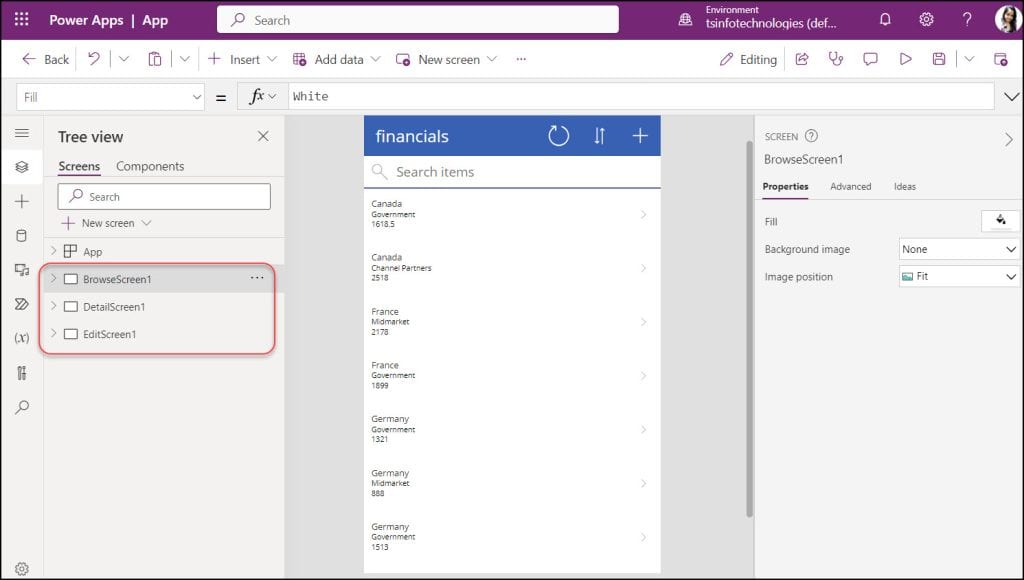
- The above screen shows the app created with three Power Apps Screens. Such as:
- BrowseScreen1
- DetailScreen1
- EditScreen1
Now, Preview the app [from top right corner of the app] and do some operations like:
1. BrowseScreen1:
Using a Power Apps Gallery control, you can see every item from the Excel file on the Browse screen.
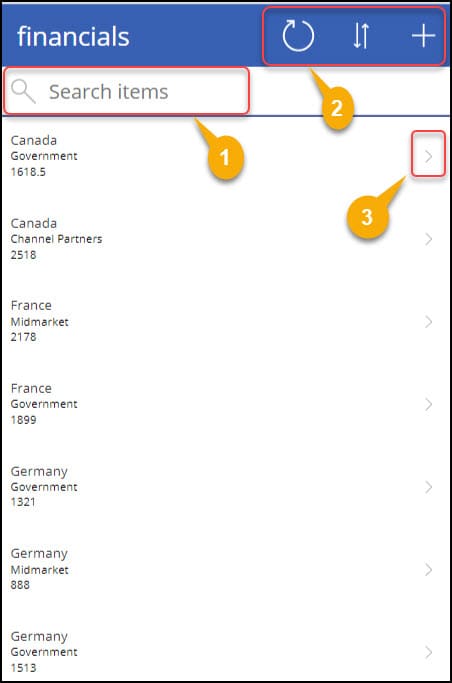
This screen contains the below controls with different functionalities. Such as:
| Control | Description |
|---|---|
| Gallery | This control displays all the items from the Excel sheet. |
| Reload/Refresh | This icon helps to refresh the Power Apps canvas app. |
| Sort | It helps to sort the items in ascending order or descending order. |
| Add/New | You can use this icon to add a new item using the new form. |
| Search box | This icon helps to search items using this search box. |
| Next arrow | This icon lets you view specific item details on the detail screen. |
2. DetailScreen1:
This screen contains a Power Apps Display Form that helps to display details about a particular item. You can see below:
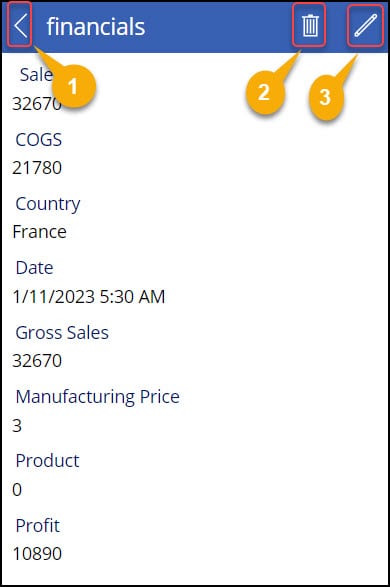
Also, it has some controls below with various functionalities like:
| Control | Description |
|---|---|
| Back arrow | It helps to navigate back to the browse screen. |
| Trash icon | By using this icon, you can delete the specific item. |
| Pen/Edit icon | If you want to modify the specific item details, then this icon will help you redirect the edit form so that you can edit the item if you want to change any specific item details. |
3. EditScreen1:
You can edit a specific item on this Edit screen page. A new item can be added to the Power Apps canvas app [using a new form] using the same screen.
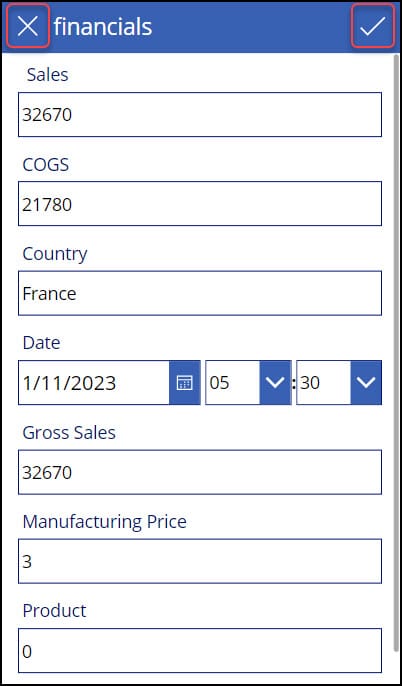
Refer to the table below to know this Edit screen control properties:
| Control | Description |
|---|---|
| Cancel | This icon helps to cancel the changes you have made on the screen. |
| Save | This icon helps to accept the changes and Save the item. |
This is how to create a canvas app in Power Apps from Excel with different functionalities.
5. Save, Publish, and Preview the Power Apps app
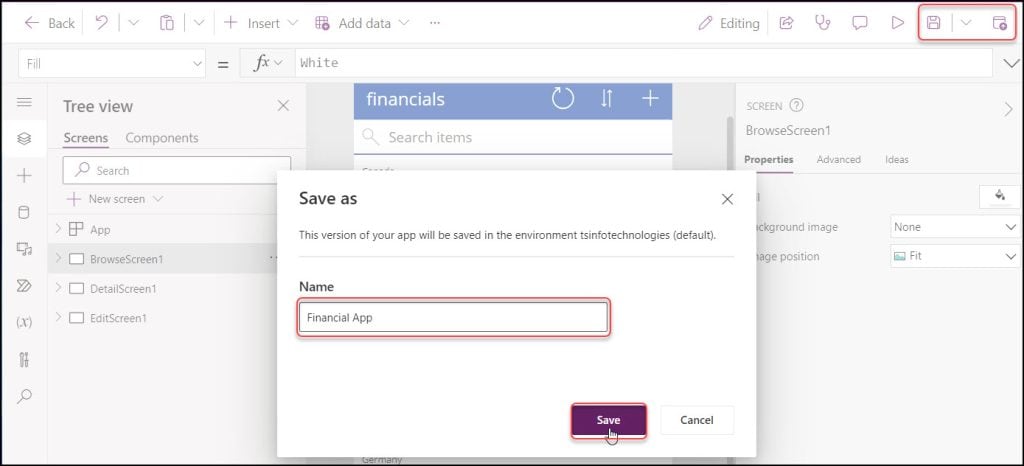
- Finally, Save and Publish the app from the top right corner. Provide a unique app name and click on Save.
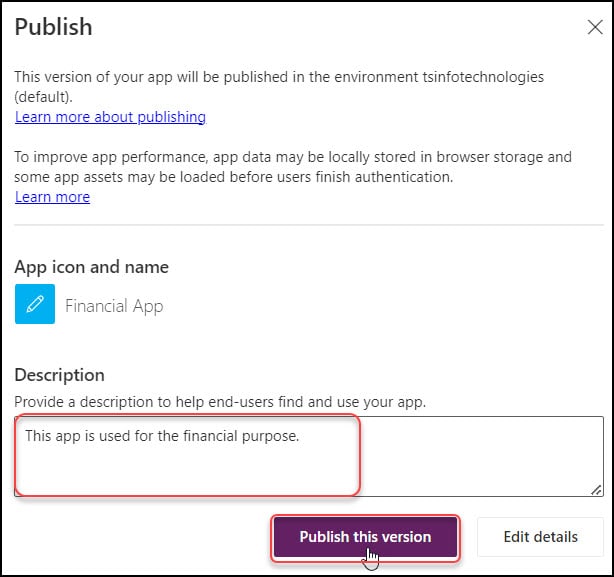
- When you publish the app, the below window will appear where you can provide the app description. Then, click on the Publish this version.
- Again, if you want to test or run the app, then click on the Preview icon and play it as per your need,
- Once the app is saved and published, you can see it on the Power Apps Home page as shown below:

This is how to create a canvas app from an Excel file in Power Apps.
Conclusion
This Power Apps tutorial taught us how to create a canvas app from an Excel file in Power Apps. Also, we saw all three different Power Apps screens with various functionalities.
Furthermore, you may like some more Power Apps tutorials:
- Create a Power Apps Canvas App From a Template
- Submit Form to SharePoint List in Power Apps
- How to Add Comments in Power Apps Canvas App
- Create Collection in Power Apps
I am Bijay a Microsoft MVP (10 times – My MVP Profile) in SharePoint and have more than 17 years of expertise in SharePoint Online Office 365, SharePoint subscription edition, and SharePoint 2019/2016/2013. Currently working in my own venture TSInfo Technologies a SharePoint development, consulting, and training company. I also run the popular SharePoint website EnjoySharePoint.com
Excellent guide! Unfortunately the forms under Dispaly is deprecated, seems we need to use the vertical container now… can you update the guide? thanks
Followed your approach, PowerApps creates something, doesn’t show any data. What an annoying system. AI? More like Zero Intelligence.