Do you know how to submit to SharePoint in Power Apps? Fine, in this Power Apps tutorial, I will explain everything about the Power Apps Submit Form to SharePoint List.
Also, we will see how to connect the SharePoint List Data source connector to the Power Apps form and save the form to the SharePoint list using a simple scenario.
Power Apps Submit Form to SharePoint List
“Power Apps Submit Form to SharePoint List” describes how to build or edit a form using Microsoft Power Apps and then submit (or save) the form’s data to a SharePoint List.
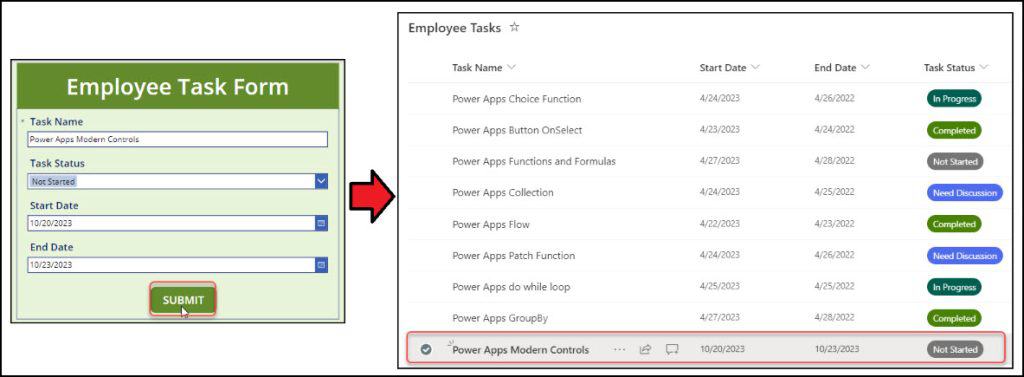
Refer to the screenshot below for how it works:
The table below represents some of the benefits of using it:
| Benefit | Explanation |
|---|---|
| Customization | Power Apps allows for tailored form design to meet specific business needs. |
| No Code/Low Code | Users can create applications without deep coding knowledge, democratizing app development. |
| Data Integrity | Direct submission to SharePoint means data is consistently and correctly stored without intermediaries. |
| Mobile Integration | Power Apps forms can be used on mobile devices, ensuring data capture on the go. |
| Seamless Microsoft Integration | Native integration with SharePoint and other Microsoft products like Power Automate enhances functionality. |
| Real-time Data Collection | Data submitted through the form is instantly updated in the SharePoint List. |
| Centralized Data Storage | SharePoint Lists offer a centralized place to store and manage data, simplifying data governance. |
| Role-based Permissions | Power Apps forms can be used on mobile devices, ensuring data capture. |
| Automated Workflows | Integration with Power Automate allows for automated workflows post-data submission. |
| Scalability | Suitable for both small tasks and enterprise-level applications due to SharePoint’s scalability. |
These are the some of advantages of using Power Apps Submit Form to SharePoint List.
Here, I will tell you how to quickly save the Power Apps Form data to the SharePoint Online list.
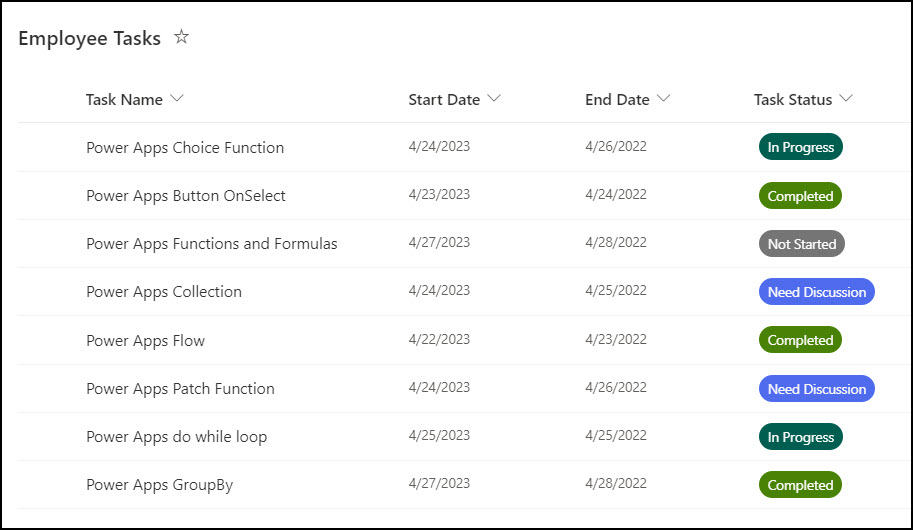
1. I have a SharePoint list called Employee Tasks. This list has four fields below with different data types:
| Column | Datatype |
|---|---|
| Task Name | Title field with Single line of text [Just renamed it to Task Name] |
| Start Date | Date and time |
| End Date | Date and time |
| Task Status | Choice [Not Started, In Progress, Completed, Need Discussion] |
Refer to the image below.
2. Sign into Power Apps with valid credentials.
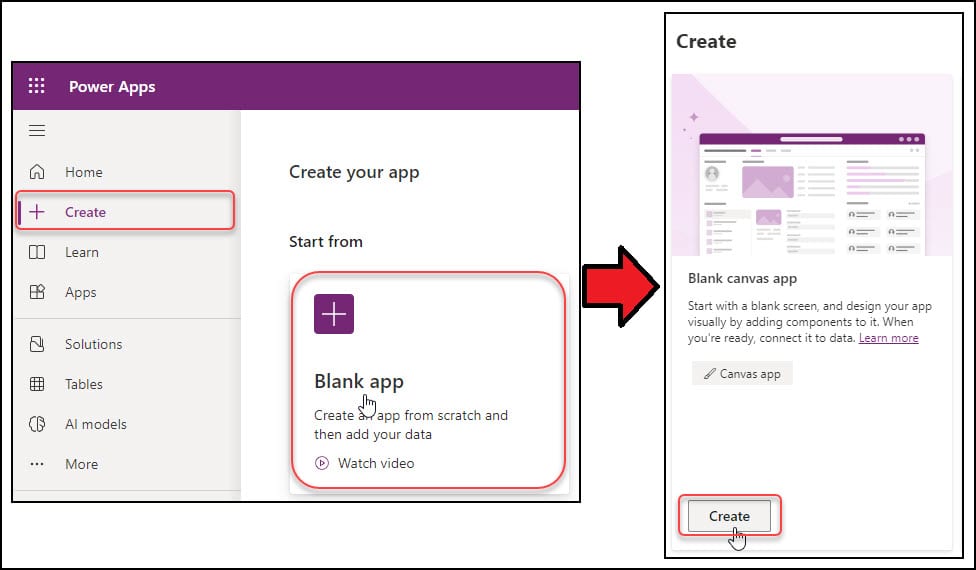
3. Go to + Create -> Select Blank app -> Click Create under the Blank canvas app.
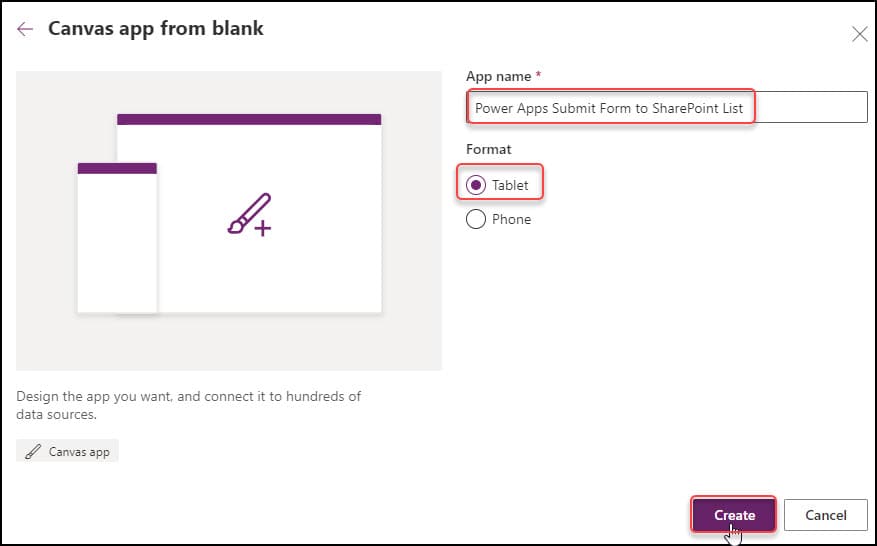
4. Provide the App name and choose the Format [Tablet/Phone]. Click on Create.
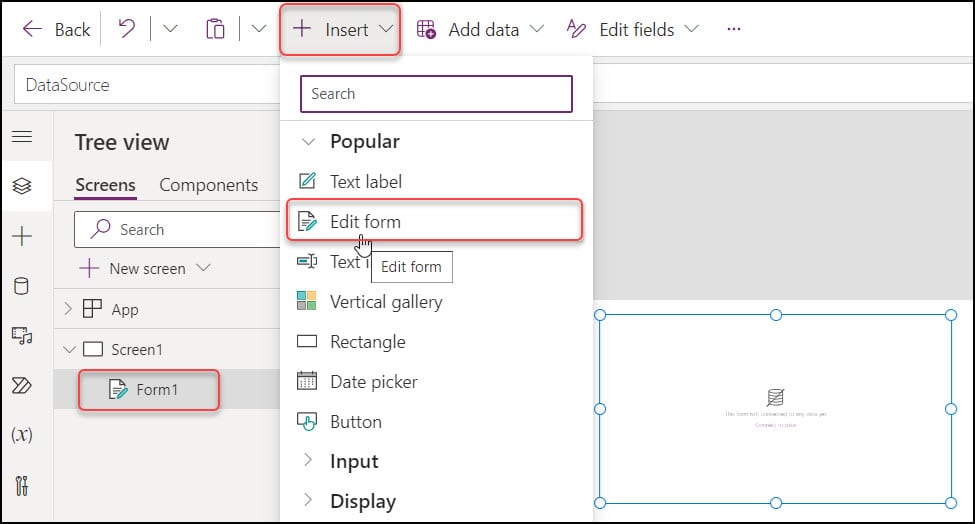
5. Add an Edit form [+ Insert -> Edit form] on the Power Apps Screen.
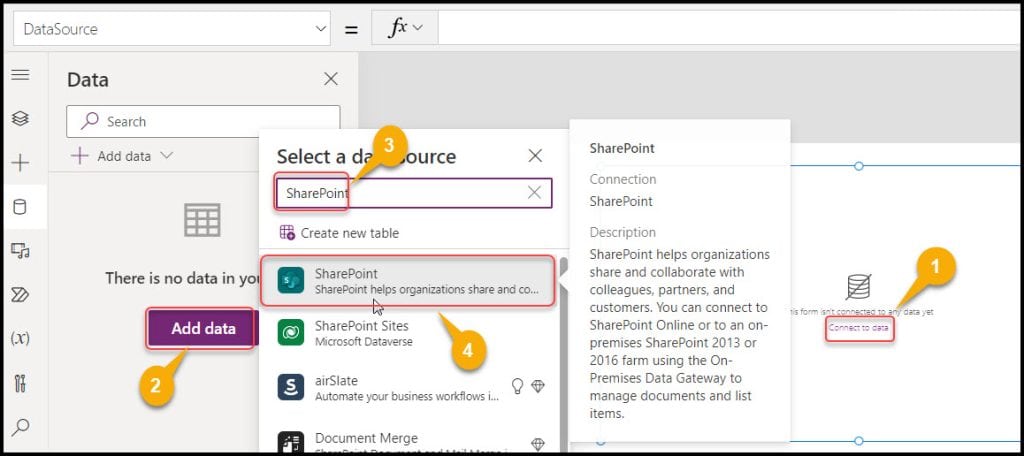
6. Connect the SharePoint data source connector to the app and edit form. Select Connect to data from the edit form -> Click on Add data -> Search and select SharePoint as shown below.
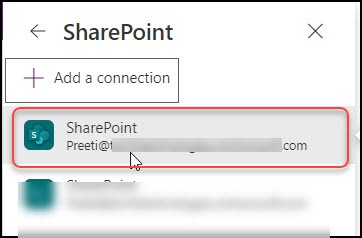
7. Add a new or existing SharePoint connection to the app.
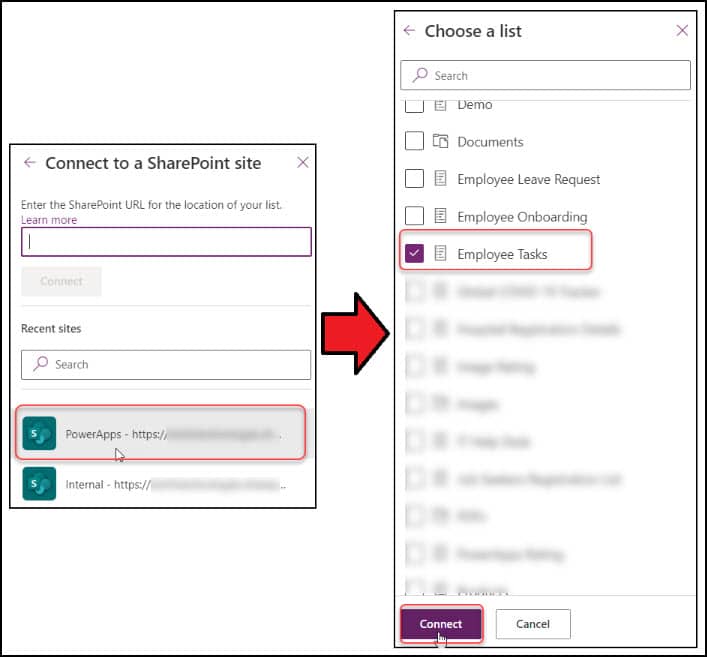
8. Select the specific SharePoint site -> Choose the particular SharePoint list -> Click on Connect.
9. Now, the SharePoint connection has been added to the app. Then, select the Power Apps edit form and set its DataSource property to the list:
DataSource = 'Employee Tasks' 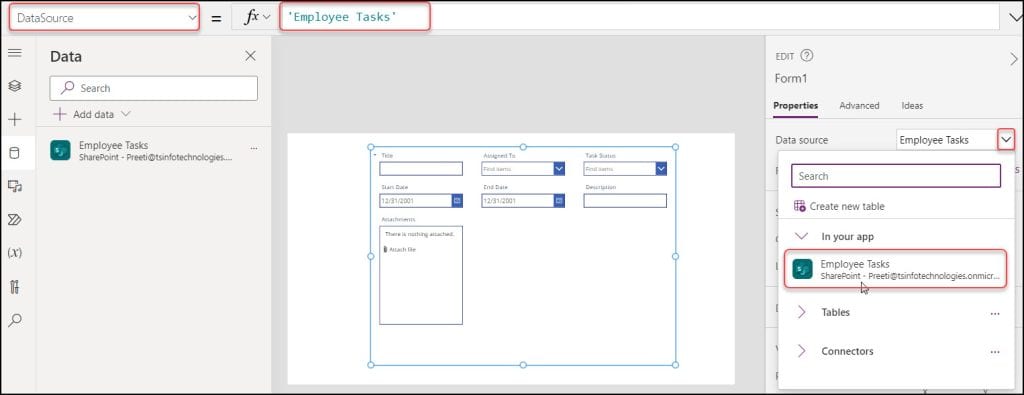
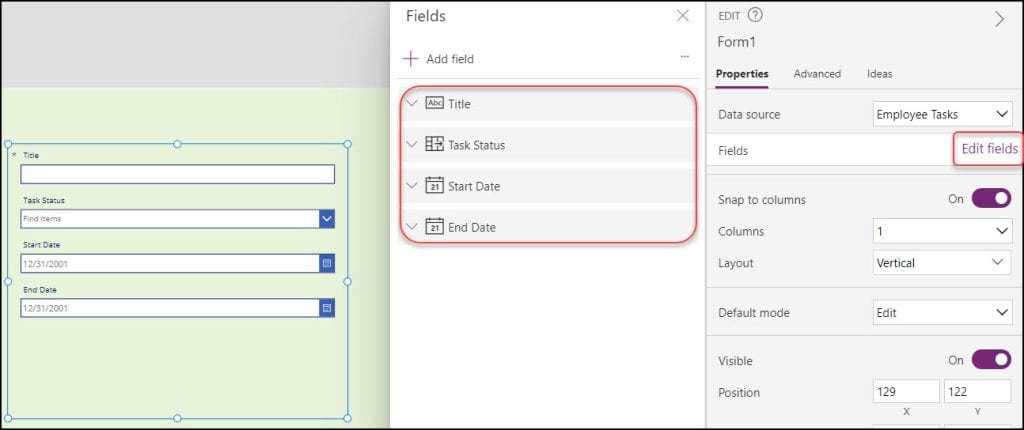
10. You can customize and design the Power Apps edit form according to your needs like:
- Add fields to the form
- Delete unnecessary fields from the form
- Add a title on the top of the form
- Change the Field Name
- Specify Form Columns
- Form Font Size
- Background Color, etc.
11. Next, add a Button control [+ Insert -> Button] inside the edit form [at the bottom of the form]. Rename the button using its Text property:
Text = "SUBMIT"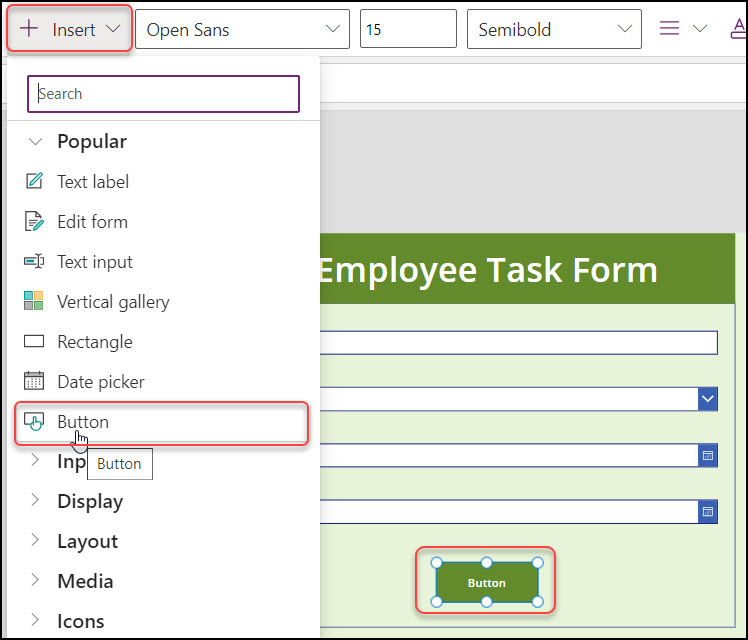
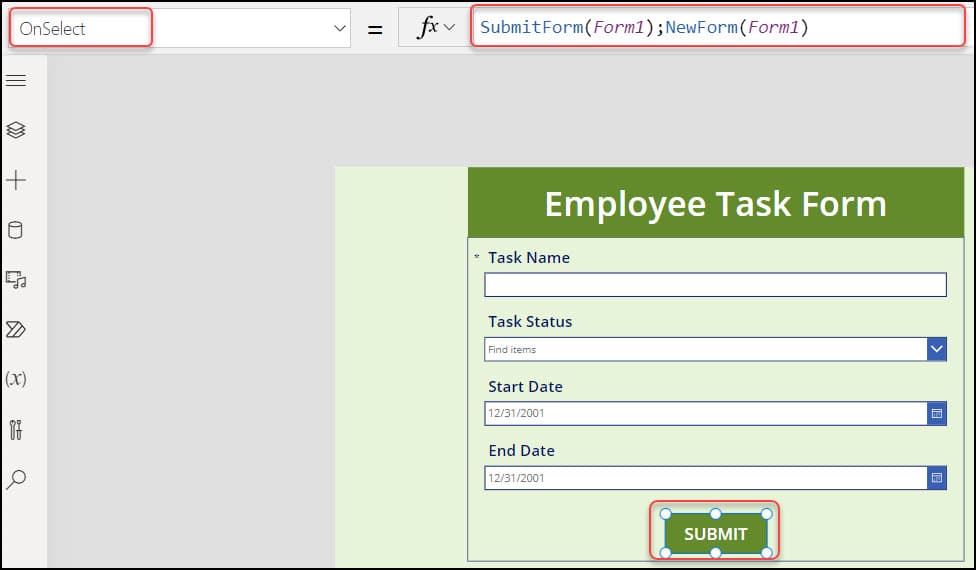
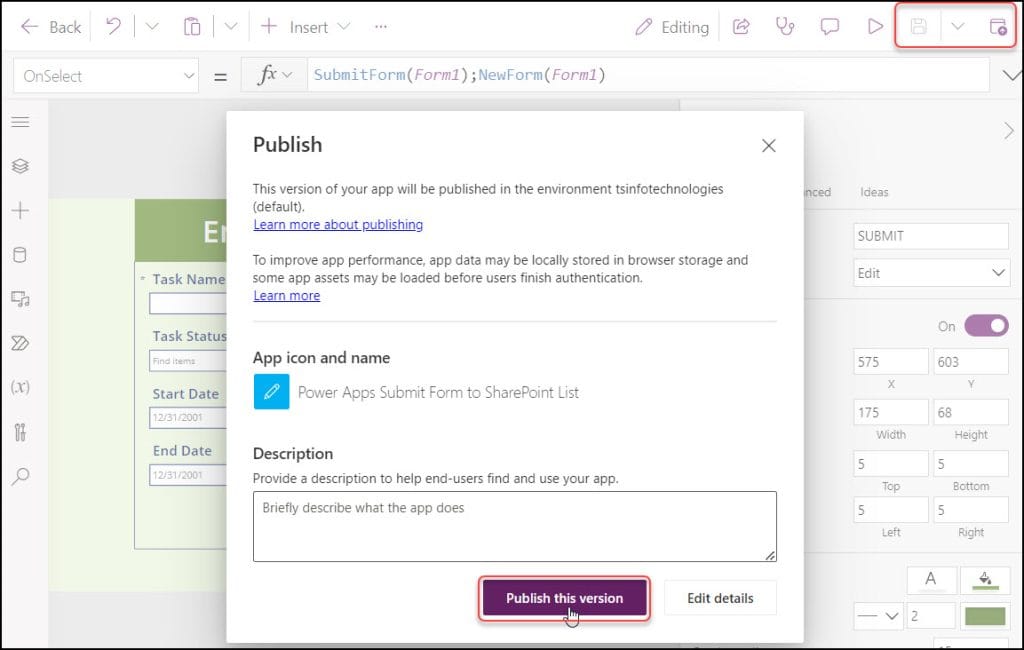
12. Select the SUBMIT button and apply the code below on its OnSelect property as:
OnSelect = SubmitForm(Form1);NewForm(Form1)Where,
Form1 = Power Apps Edit Form Name
13. Then, Select the App’s OnStart property and set the code below:
OnStart = NewForm(Form1)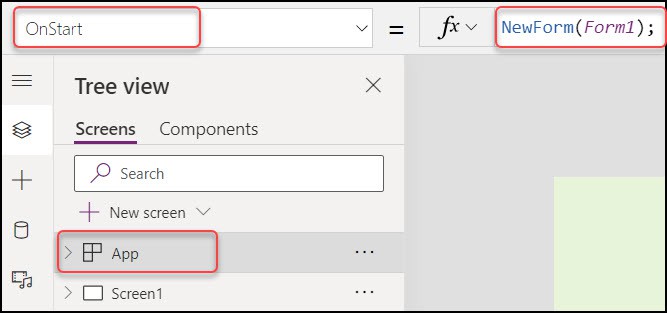
14. Finally, Save and Publish the app. Click on the Publish this version button. Close the app once.
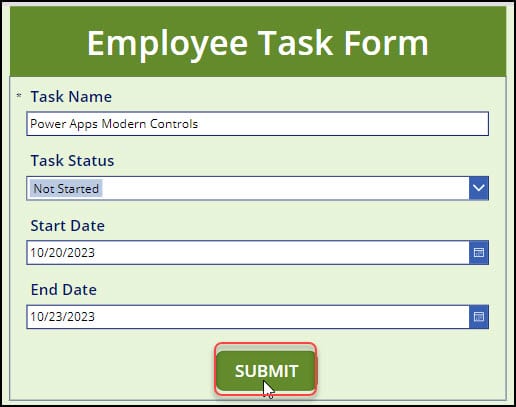
15. Play the app. Enter all the field details of the Employee Task Form and tap on the SUBMIT button.
16. Now go back to the SharePoint list and refresh it once. The new task has been added to the list, as in the image below.
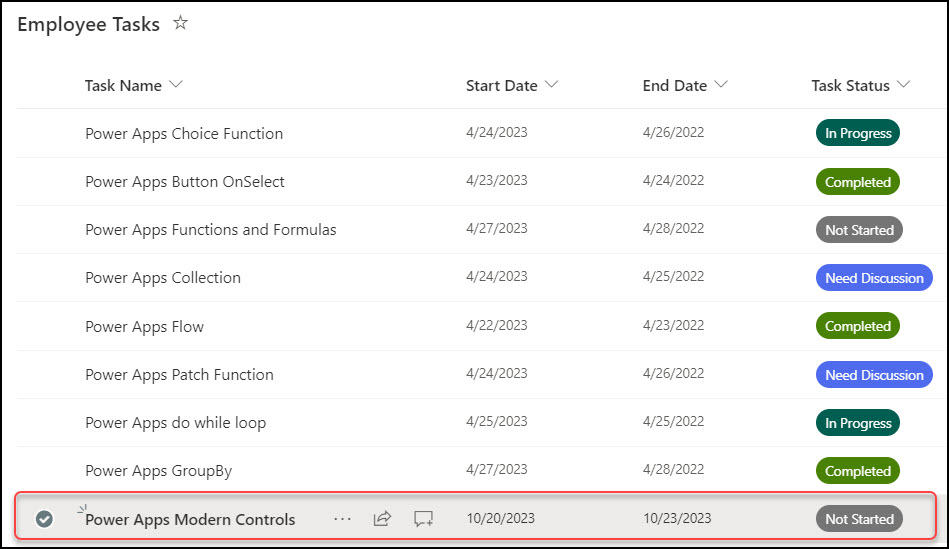
This is how to submit form Power Apps to the SharePoint list.
Conclusion
From this Power Apps tutorial, I hope you got some idea of how to save the Power Apps form to a SharePoint list and many more like:
- Create Power Apps Blank Canvas App
- How to connect the SharePoint List Data source connector to the app and Power Apps form
- How to Submit the Power Apps Form to the SharePoint list.
Also, you may like some more Power Apps tutorials:
- Create a canvas app in PowerApps from a SharePoint list
- Delete Power Apps Customize Form from SharePoint List
- Dataverse create table from SharePoint list
- Create Collection from SharePoint List in PowerApps
- Power Apps Display SharePoint List Items – 5 Ways
I am Bijay a Microsoft MVP (10 times – My MVP Profile) in SharePoint and have more than 17 years of expertise in SharePoint Online Office 365, SharePoint subscription edition, and SharePoint 2019/2016/2013. Currently working in my own venture TSInfo Technologies a SharePoint development, consulting, and training company. I also run the popular SharePoint website EnjoySharePoint.com
When I put in the necessary info for the Submit button for OnSelect, it gives me an error that says, “Invocation of unknown or unsupported function.” What do I do?
SubmitForm(Form1);NewForm(Form1)
This info is helpful but there are so may ads on this site that I can barely load it
Thank sir.
This was very helpful! Thanks a lot 🙂
Glad the article helped you.
This is great!!
Submitform does not work updating from powerapp to sharepoint list.
What could be the issue?