Have you ever created a Power Apps Canvas App from a template? No worries!
This Power Apps tutorial will explain what Power Apps Templates means and the key features of Power Apps Templates.
Also, I will show you how to create a Power Apps Canvas app from a template and its uses with a simple scenario.
Power Apps Templates
Power Apps templates let users easily start and create various apps without starting from scratch. They are pre-built, flexible designs and structures.
These templates give you a head start by giving you a pre-defined structure, user interface, and occasionally even built-in features that apply to typical business cases.
Some of the Power Apps Templates are:
- Fundraiser
- Asset Checkout
- Power Apps Training
- Help Desk
- Budget Tracker
- Site Inspection
- Leave Request
- Shoutouts and many more
The screenshot below represents all the PowerApp templates ready to use.
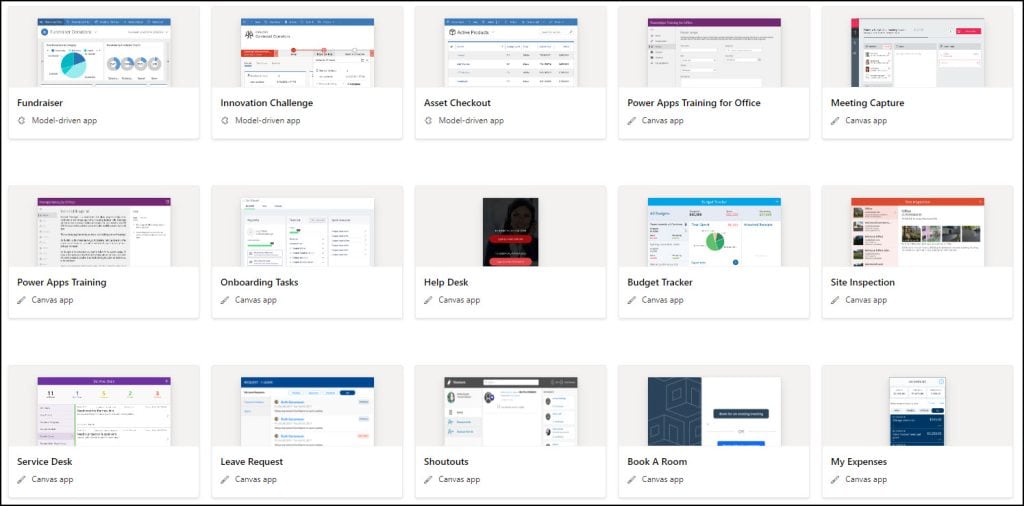
These all are the free Power Apps templates.
Key features of Power Apps Templates
Here’s a tabulated representation of the key features of Power Apps Templates:
| Feature | Description |
|---|---|
| Ready-to-Use Designs | Templates offer built-in layouts, controls, and screens tailored for specific applications, simplifying initial setup and design efforts. |
| Customizability | While they provide a foundation, templates are inherently flexible. Users can adapt, add to, or remove elements to suit unique requirements. |
| Diverse Use-Cases | Power Apps offers templates that cater to various business scenarios, from task management to customer relations and inventory control. |
These are the Power Apps Templates’ key features.
How to Create a Power Apps Canvas App From a Template
Now, we will see how to create a Power Apps Canvas app from a template step by step:
1. Sign in to Power Apps with valid Microsoft credentials.
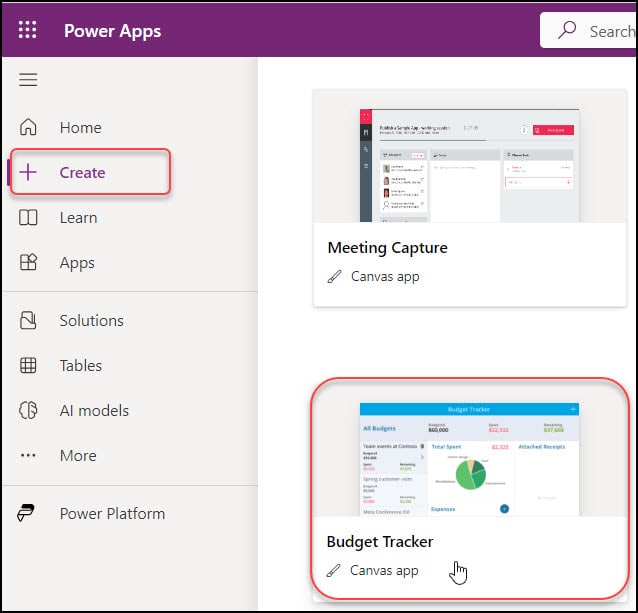
2. Go to + Create [from the left navigation] -> Select any template as per your need [let’s say Budget Tracker].
NOTE:
If you’re looking for a certain template, you can also use the search box.
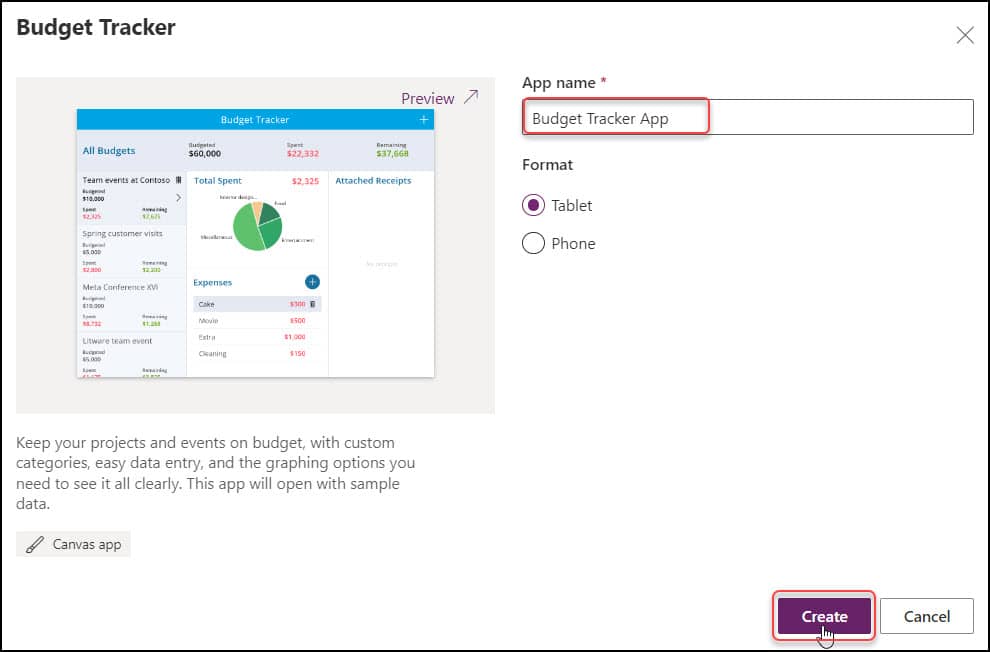
3. Provide the App name [you can rename] -> Click on Create.
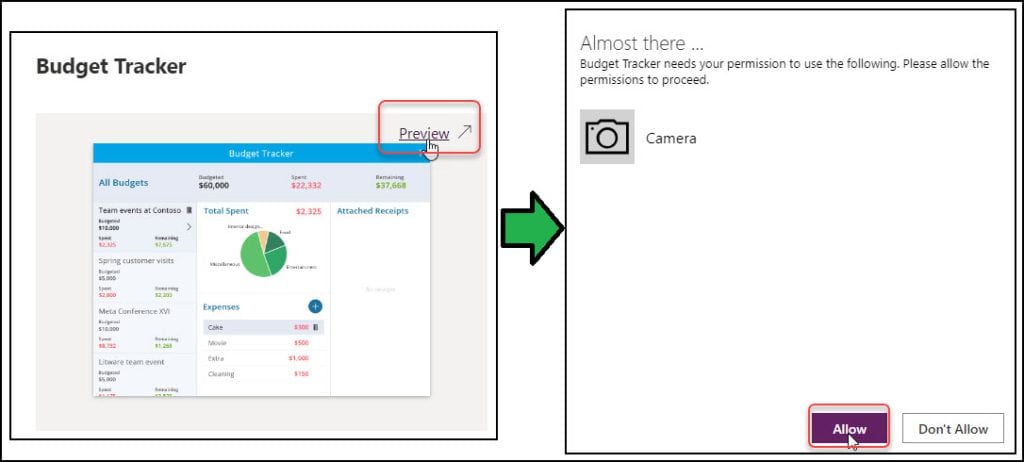
4. Also, you can preview the app. Click on the Preview button -> Allow as shown below.
5. You can see the Budget Tracker template will appear like the image below:
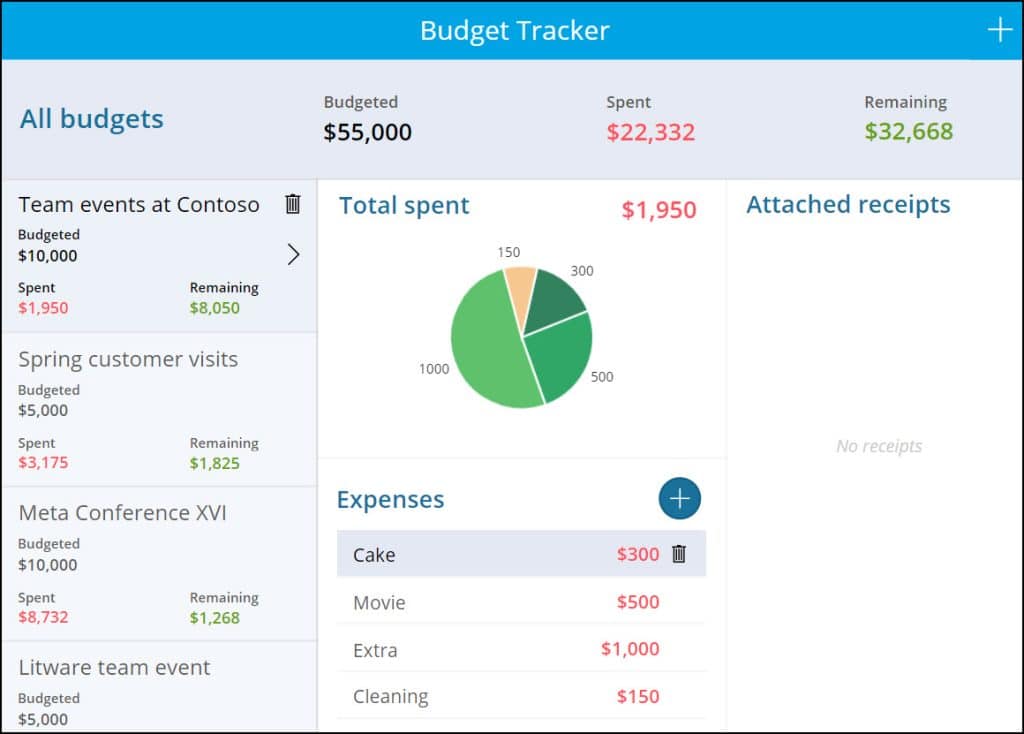
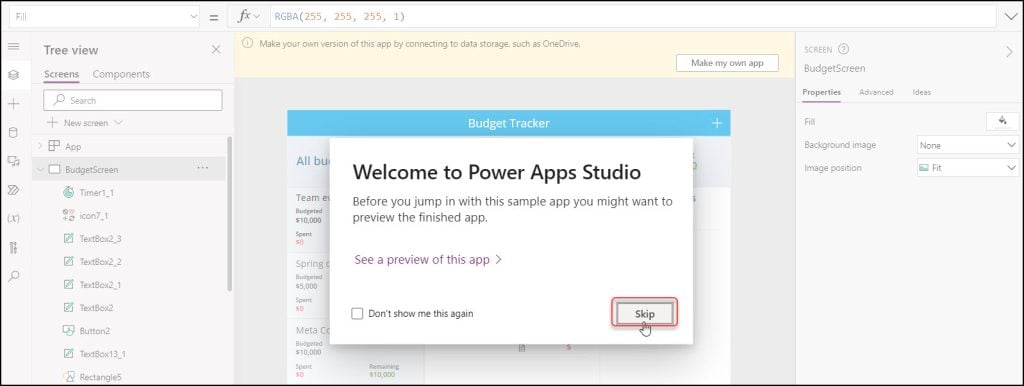
6. Once you create the app template, click the Skip button in the Power Apps Studio. Click Make my own app to link it to cloud storage services like OneDrive, OneDrive for Business, etc.
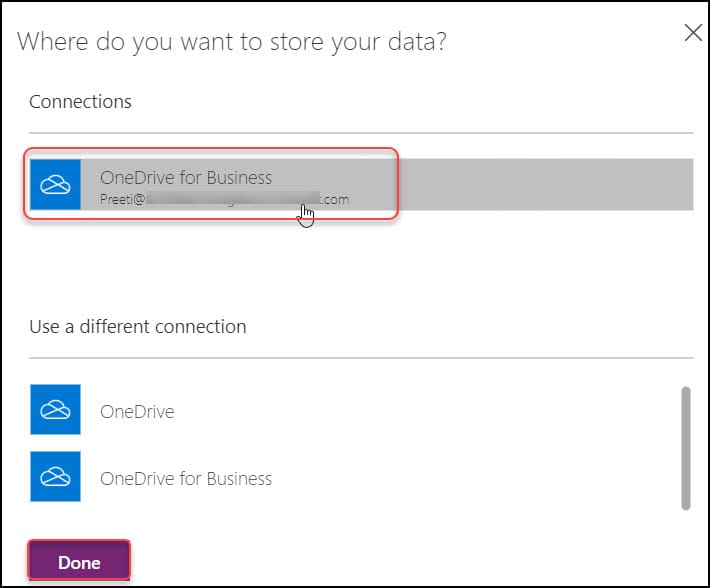
7. Choose OneDrive for Business and click on Done.
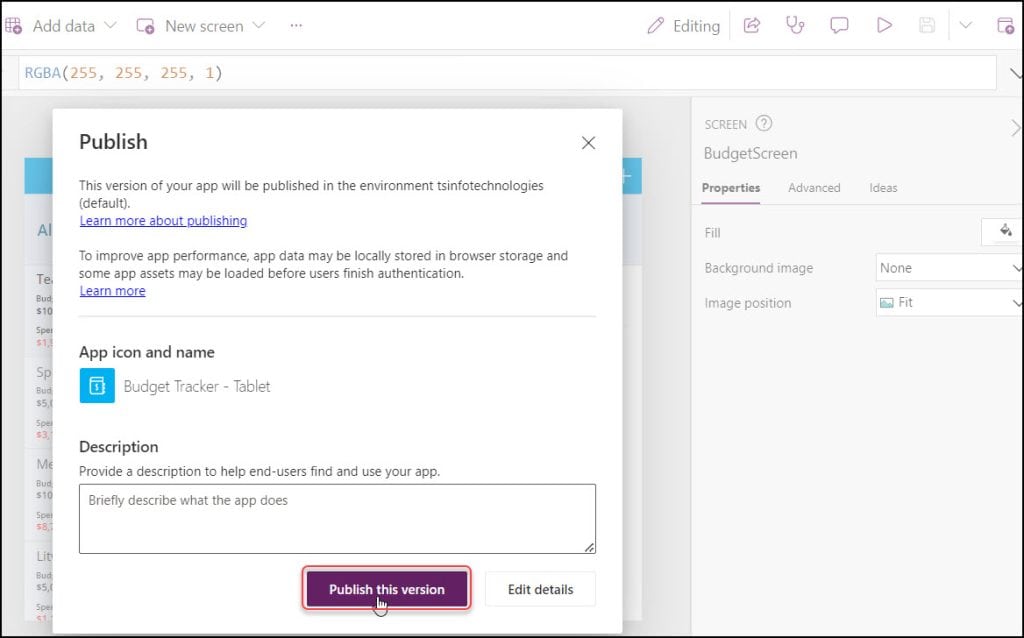
8. Then, you must Save and Publish the app template first. Click on Publish this version. To preview the app, click on Play or Preview button and play with the app.
This is how to create a Power Apps Canvas app from a template.
Power Apps App Template Functionalities
Next, we will discuss some of the Power Apps template functionalities.
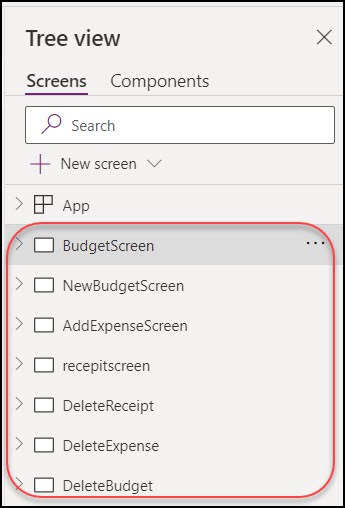
This Power Apps Template [Budget Tracker] has a total of seven screens:
- BudgetScreen
- NewBudgetScreen
- AddExpenseScreen
- ReceiptScreen
- DeleteReceipt
- DeleteExpense
- DeleteBudget
Refer to the screenshot below for how the Budget Tracker Home Screen looks like:
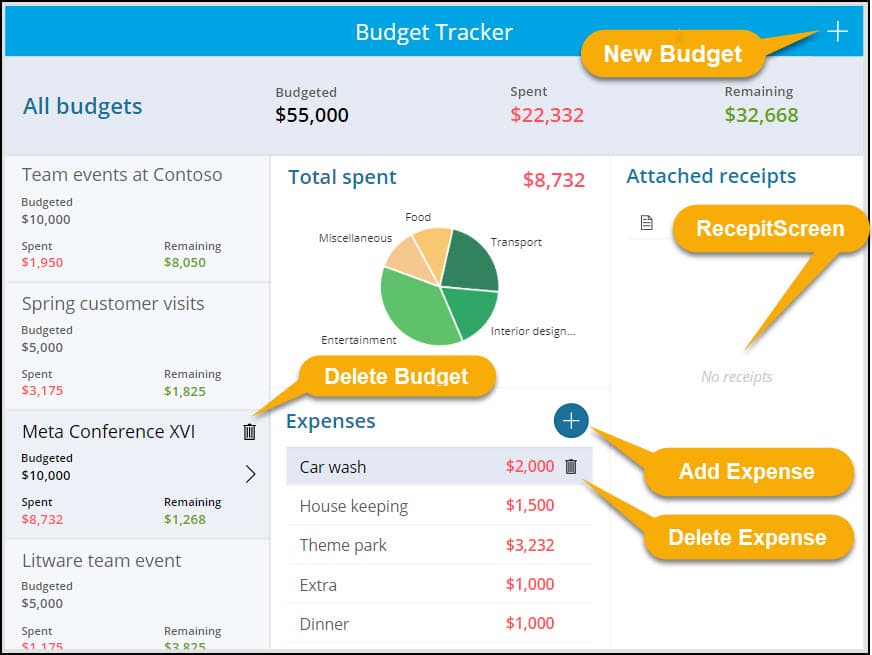
Let’s elaborate one by one.
1. Budget Screen:
- This first screen contains some Gallery controls, Text Box Controls, Rectangles, a Pie chart, Timers, Icons, etc.
- Every control has different functionalities with different codes. Such as:
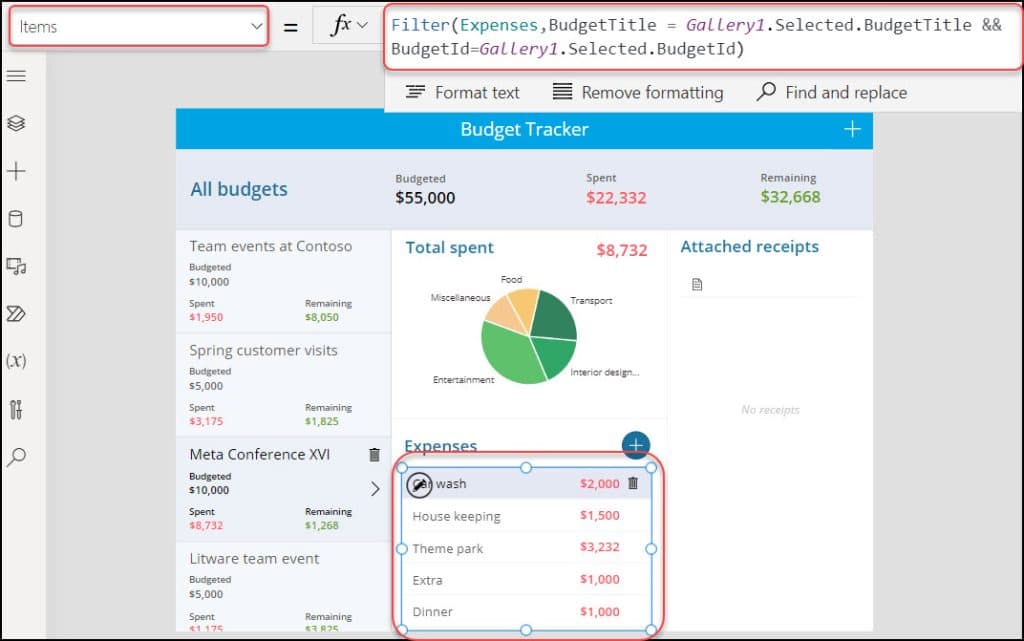
Expenses Gallery:
Items = Filter(
    Expenses,
    BudgetTitle = Gallery1.Selected.BudgetTitle && BudgetId = Gallery1.Selected.BudgetId
)
2. New Budget Screen:
- When the user clicks on the + icon from the Budget Screen, it will redirect to the second screen [New Budget Screen].
- This screen contains an Edit form and a Save button. The user will provide the Budget title and amount and click the Save button to save the record.
- The below code represents the Save button’s OnSelect property:
OnSelect = SubmitForm(FormNewBudget)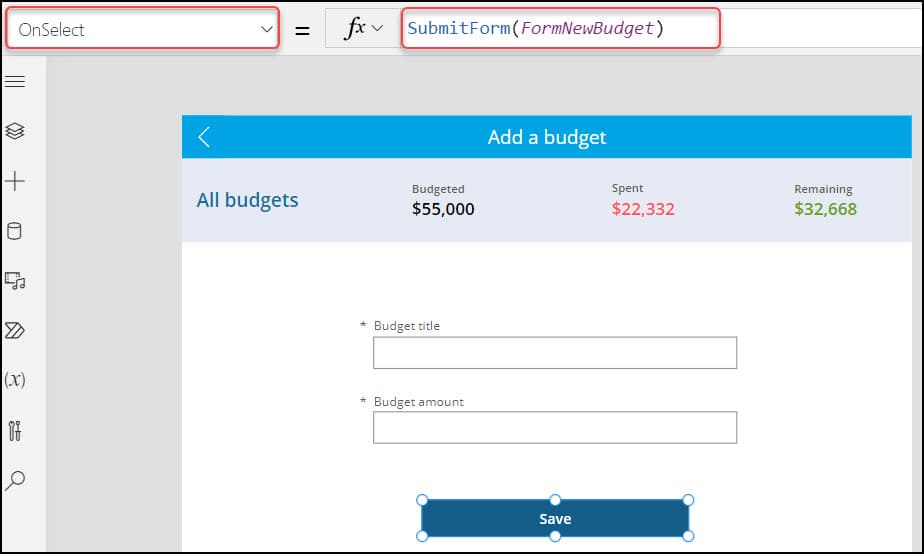
3. Add Expense Screen:
- Once the user clicks on the + icon from the Expenses section [from Budget Screen], he/she will navigate to the below screen.
- Provide the Expense name, amount, Category, and Picture. Click on the Save button to save the expense.
- The below code represents the Save button’s OnSelect property:
OnSelect = SubmitForm(FormNewExpense)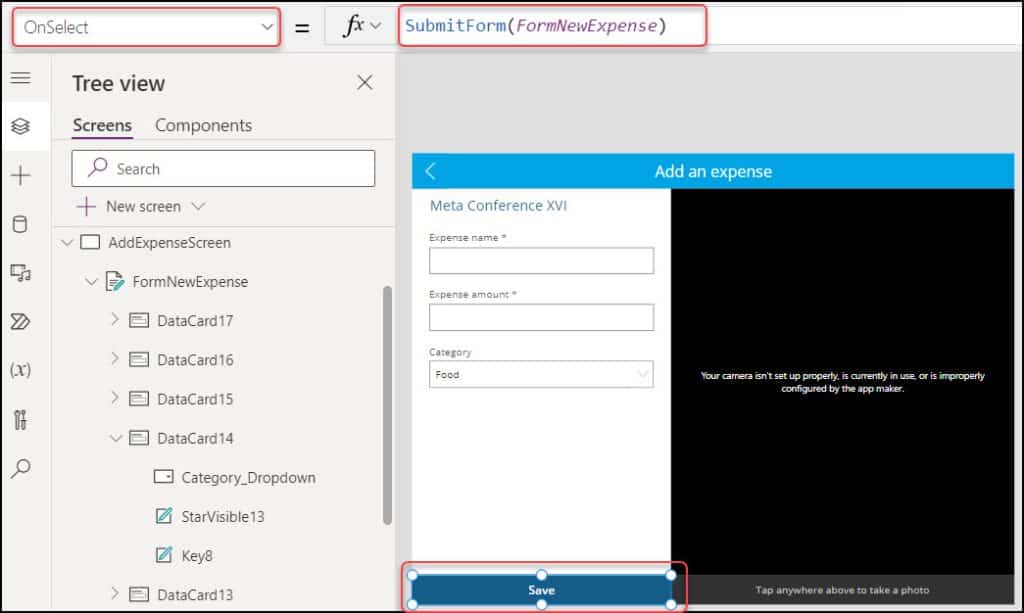
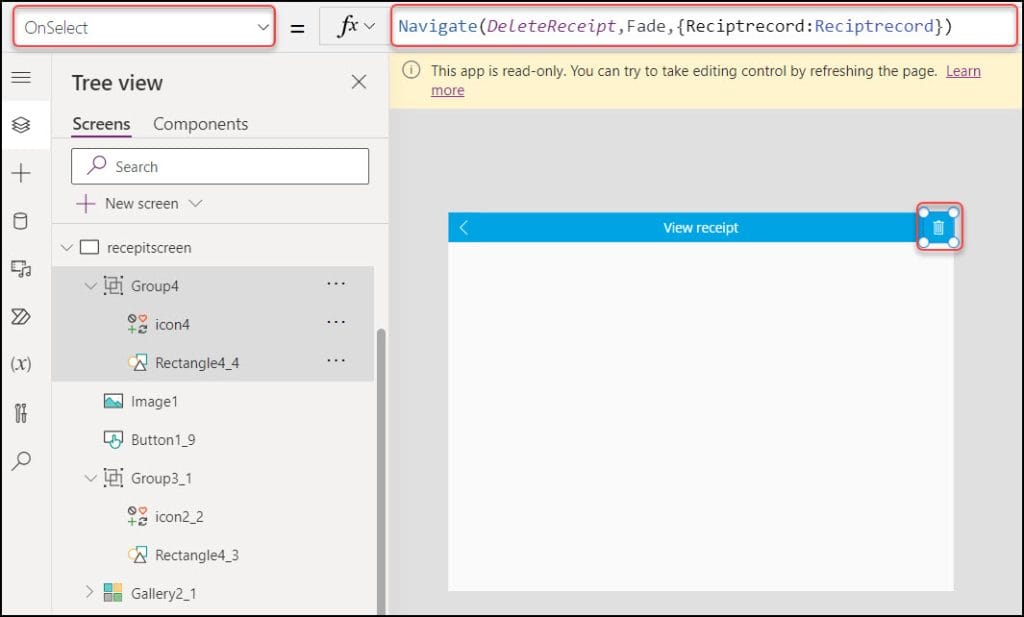
4. Receipt Screen:
- This screen contains a Receipt image, a Back button, and a Trash icon. This app does not contain receipts and shows us a blank screen.
- To delete a specific receipt from the screen, click on the Trash button that contains the code below:
OnSelect = Navigate(
    DeleteReceipt,
    ScreenTransition.Fade,
    {Reciptrecord: Reciptrecord}
)
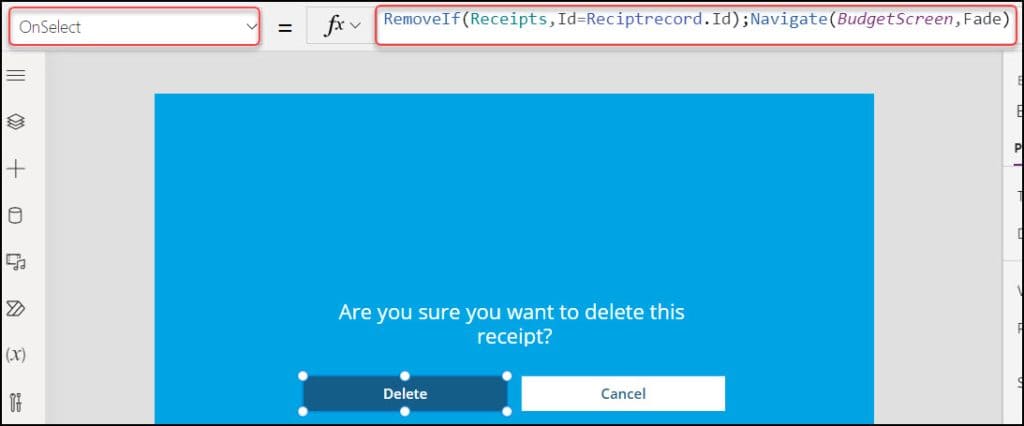
5. Delete Receipt:
- If the user wants to delete the receipt, they will navigate to the screen below. This screen has two buttons: Delete and Cancel.
- The Delete button has the code below on its OnSelect property:
OnSelect = RemoveIf(Receipts,Id=Reciptrecord.Id);Navigate(BudgetScreen,ScreenTransition.Fade)
6. Delete Expense:
- Users who want to delete the expense will navigate to the screen below. This screen has two buttons: Delete and Cancel.
- The Delete button has the code below on its OnSelect property:
OnSelect = RemoveIf(
    Receipts,
    ExpenseId = Gallery4.Selected.Id
);
RemoveIf(
    Expenses,
    Id = Gallery4.Selected.Id
);
Patch(
    ExpenseByCategory,
    LookUp(
        ExpenseByCategory,
        Category = Gallery4.Selected.Category && BudgetId = Gallery1.Selected.BudgetId
    ),
    {
        Expense: LookUp(
            ExpenseByCategory,
            Category = Gallery4.Selected.Category && BudgetId = Gallery1.Selected.BudgetId
        ).Expense - Gallery4.Selected.Expense
    }
);
Navigate(
    BudgetScreen,
    ScreenTransition.None
)
7. Delete Budget:
- Users who want to delete the budget will navigate to the screen below. This screen has two buttons: Delete and Cancel.
- The Delete button has the code below on its OnSelect property:
OnSelect = RemoveIf(
    Receipts,
    BudgetId = Gallery1.Selected.BudgetId
);
RemoveIf(
    ExpenseByCategory,
    BudgetId = Gallery1.Selected.BudgetId
);
RemoveIf(
    Expenses,
    BudgetId = Gallery1.Selected.BudgetId
);
RemoveIf(
    Budgets,
    BudgetId = Gallery1.Selected.BudgetId
);
Navigate(
    BudgetScreen,
    ScreenTransition.None
)
This is all about functionalities in the Power Apps App Template.
Conclusion
I hope you got a detailed idea about Power Apps Templates and its features.
Moreover, we learned how to create a Power Apps Canvas app from a template and its all functionalities and uses with an example.
Also, you may like some more Power Apps tutorials:
- Create a canvas app in PowerApps from a SharePoint list
- Create a canvas app from Excel in PowerApps
- Power Apps Radio Button
- Power Apps Modern Table Control
- Create PowerApps GridView
I am Bijay a Microsoft MVP (10 times – My MVP Profile) in SharePoint and have more than 17 years of expertise in SharePoint Online Office 365, SharePoint subscription edition, and SharePoint 2019/2016/2013. Currently working in my own venture TSInfo Technologies a SharePoint development, consulting, and training company. I also run the popular SharePoint website EnjoySharePoint.com