While working with PowerApps applications, you can easily create popup message boxes using various controls and functions. To display the Power Apps notification popup, we can mostly use the Notify() function.
Follow this tutorial to learn all about how to create Power Apps Popup message using different real-time scenarios.
Power Apps Message Box
Power Apps popup message box is one type of box where users can show a notification or alert with a confirmation popup. The screenshot below shows how the dialog box looks.
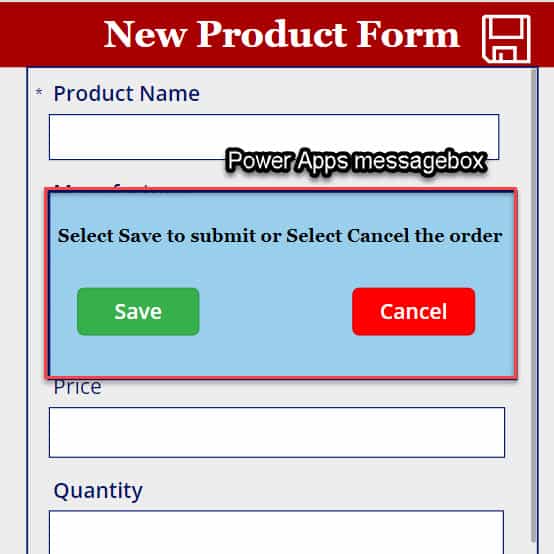
Power Apps Notification Popup
Suppose the Power Apps app has a button control, a message box containing the label text, and a button.
Whenver the user clicks on the button control [Click to View Message Box], the Message box will appear with a text label and button control [Close]. Once you click on the Close button, then the dialogue box will disappear.
Output:

To Work around this, follow the below steps. Such as:
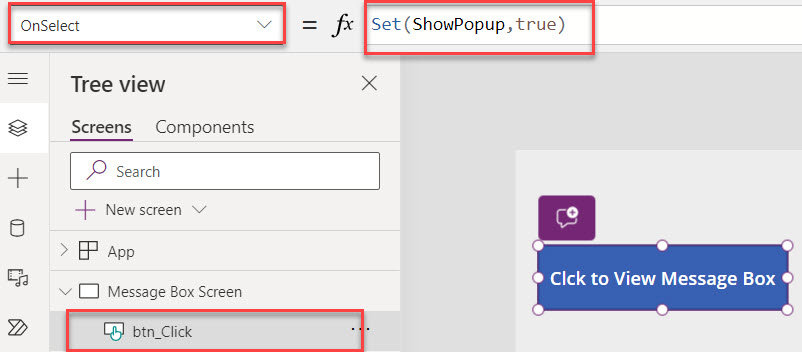
1. On the Power Apps Screen, insert a Button control and set its OnSelect property as:
OnSelect = Set(ShowPopup,true)Where,
- ShowPopup = Power Apps variable
2. Insert the Rectangle control and Text label, and set its Text property as:
Text = "Click on Close button to dissapear the popup box"
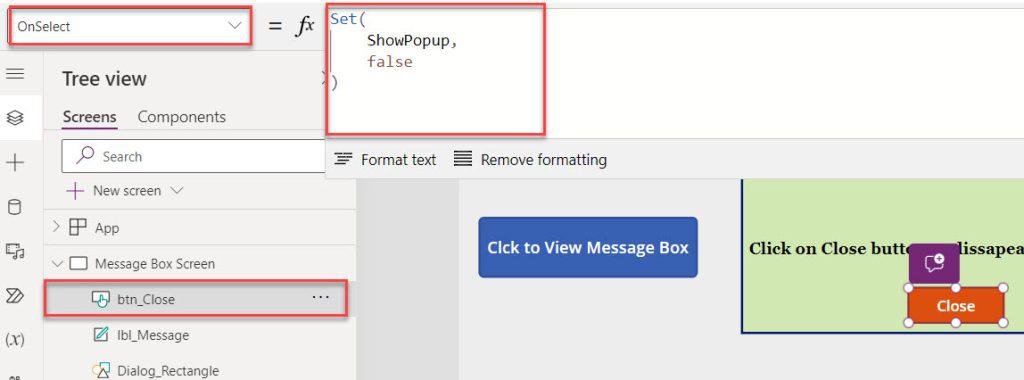
3. Next, insert another button control [Close] and set its OnSelect property as:
OnSelect = Set(
    ShowPopup,
    false
)
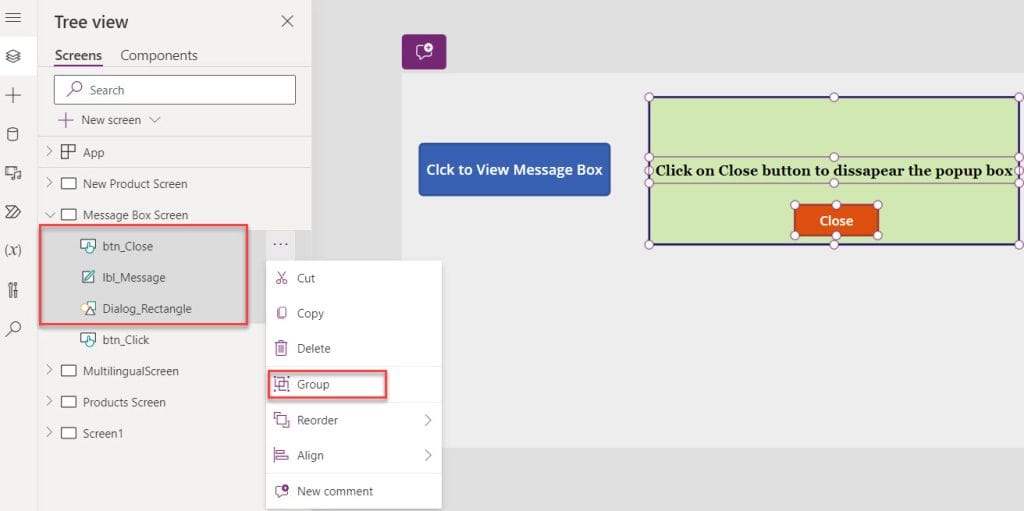
4. Then, select (Ctrl + Click) the specific control [Rectangle, Text label, and Button] for those you want to make a group. Click on the More options (…) and select the Group option.
5. Now, select the group [Group_MessageBox] and set its Visible property to the code below.
Visible = ShowPopup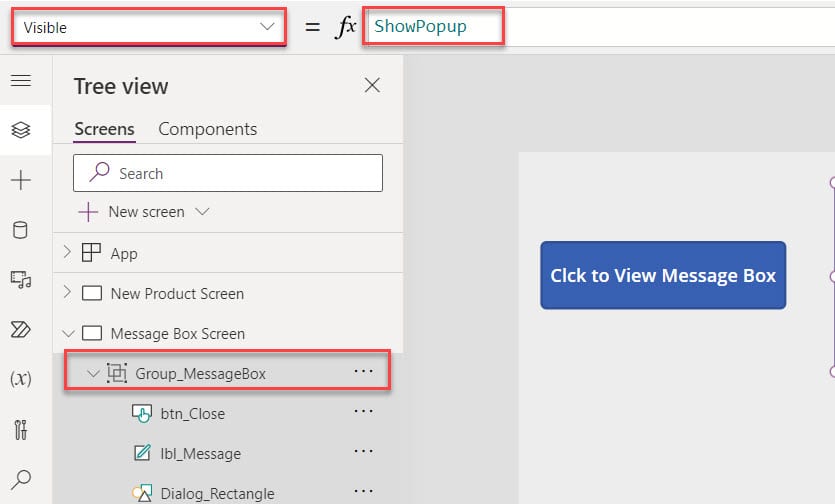
6. Once your app is ready, Save, Publish, and Preview it. Once you click on the button [Click to View Message Box], a message dialog box will appear. Also, once you click on the Close button, the dialogue box will disappear.

Power Apps Popup Message After Submit Form
I have a SharePoint Online list named “Product Details” and this list contains the below fields.
| Column Name | Data Type |
| Product Name | It is a default single line of text |
| Price | Currency |
| Quantity | Number |
| Purchase date | Date and time |
| Manufacturer | Choice |
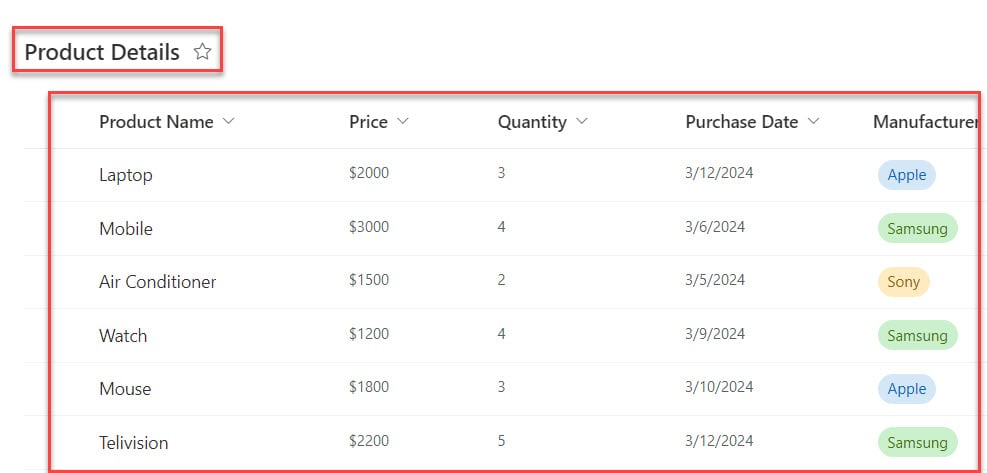
In Power Apps, there is a “New Product Form” where the user can add new product details. Also, there is a Save icon to save data.
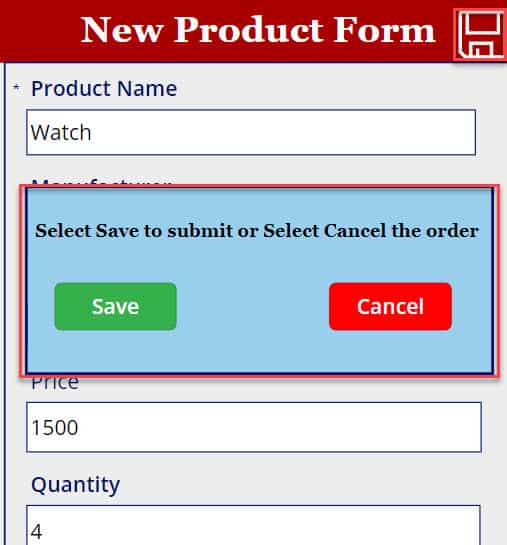
But here, my requirement is that when the user clicks on the Save icon, a message box will appear with two buttons, such as Save and Cancel. As per the user’s selection, the form will proceed to save the data or cancel the product.
Output:
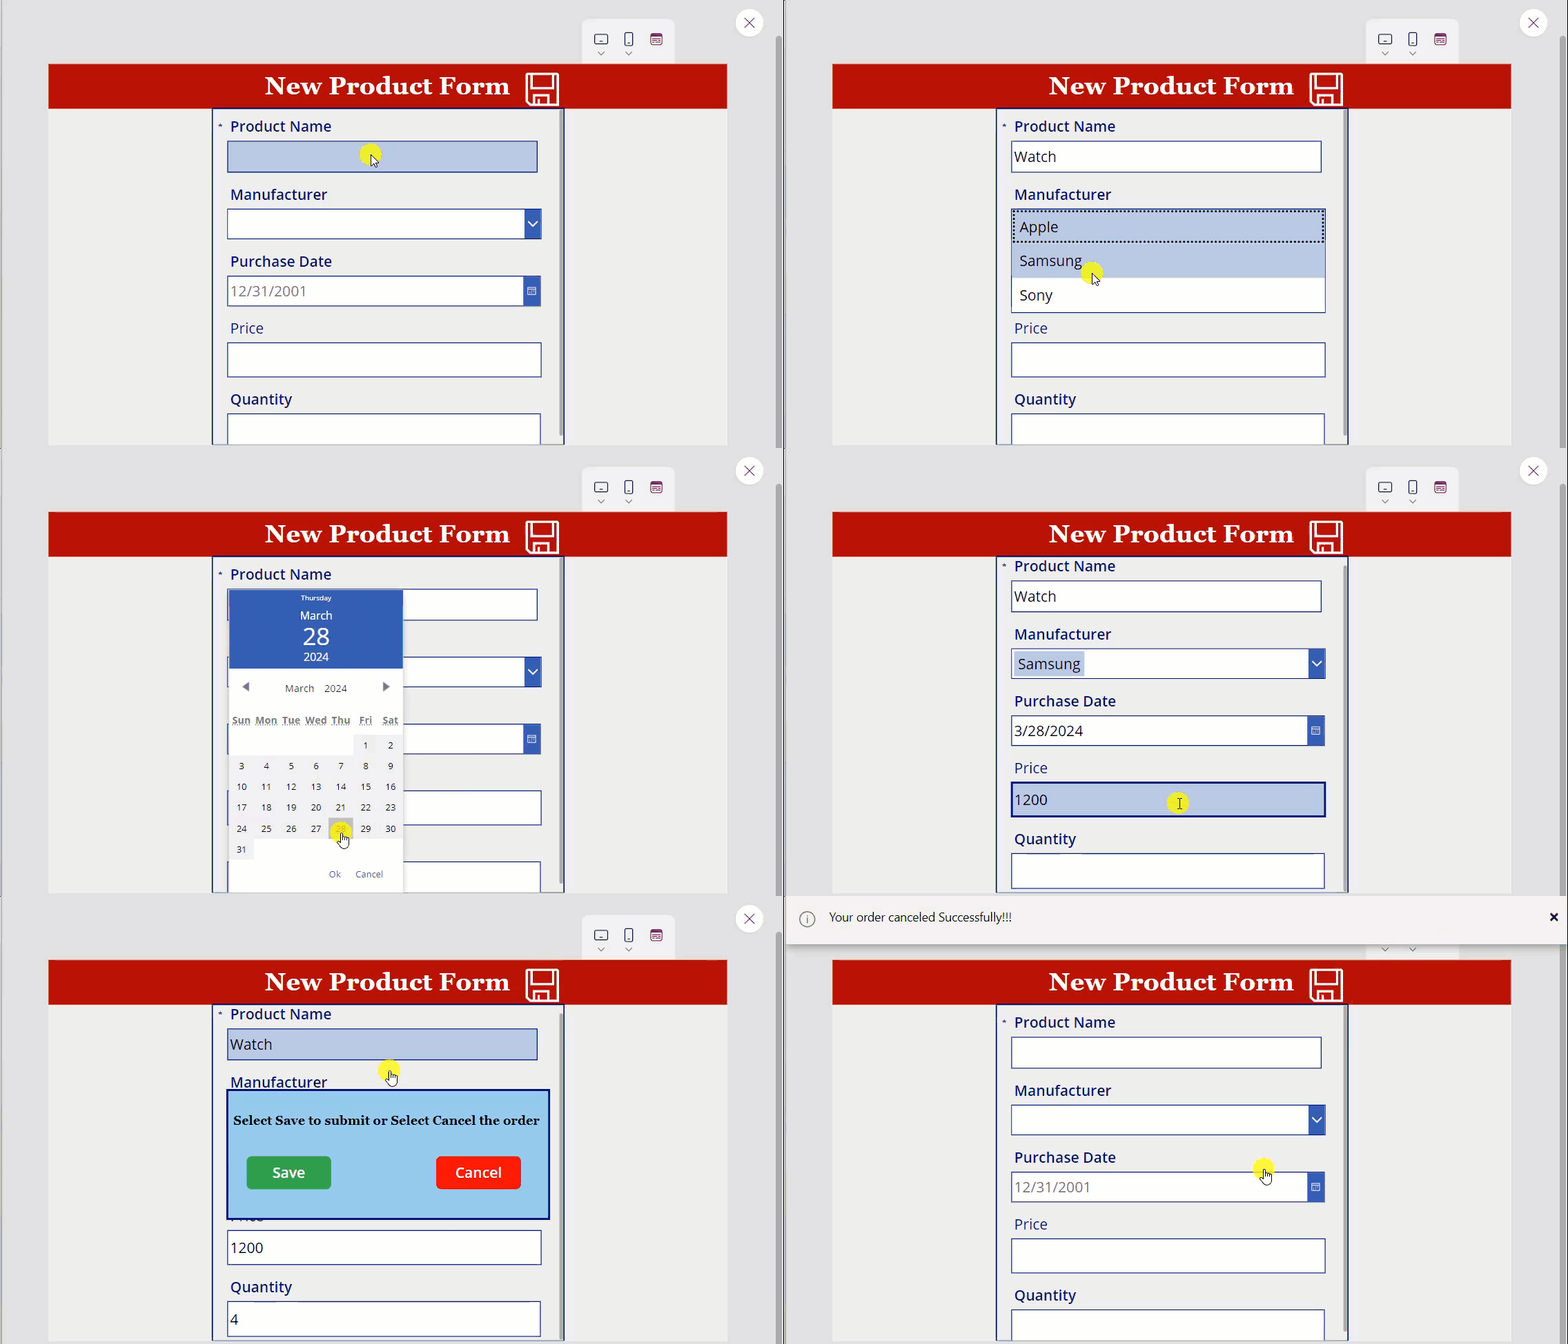
To achieve it, follow the below steps.
1. On the Power Apps Screen, insert an Edit form and set its DataSource as:
DataSource = 'Product Details'Where,
- ‘Product Details’ = SharePoint Online list
2. Also, add a save icon to the edit form and place it on top of the form, as shown below.
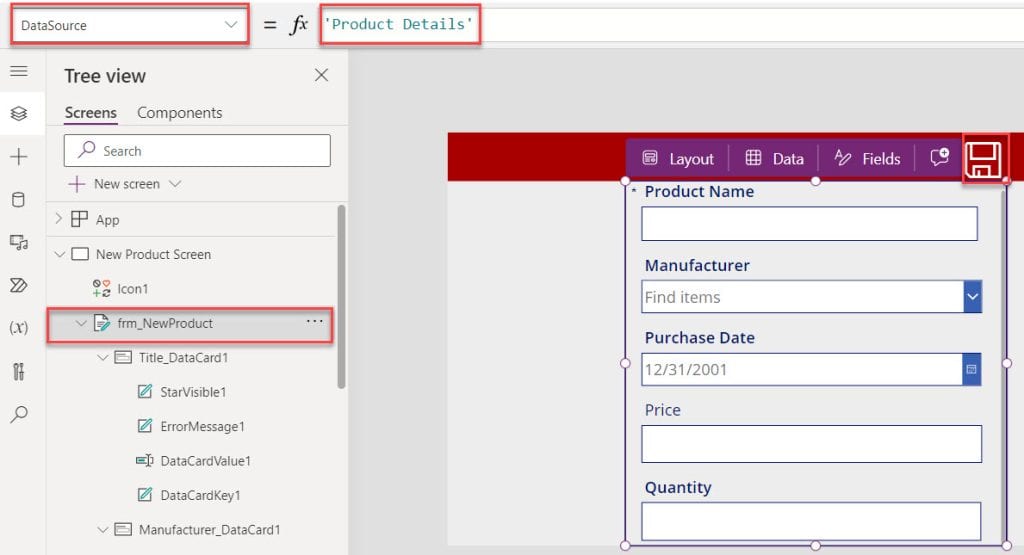
3. As there is no specific control available to create a dialog or message box. To add a Power Apps message box, insert a Rectangle [Message_Rectangle]. Also, insert the below control and make those controls as a group. Such as:
- Text Label: Add a text label and set its Text property as:
Text = "Select Save to submit or Select Cancel the order" - Button Controls: You can add two button controls [Save and Cancel] to notify the messages.
4. Once you have added all the components, let’s group them. To do this, press Ctrl+ to select the above-mentioned components. Then click on the More options […]. and select the Group option, as shown below.

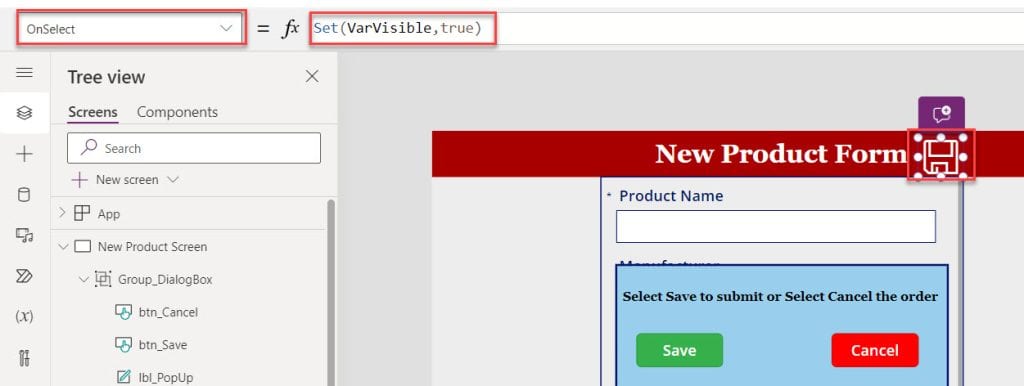
5. Now, select the Save icon and set its OnSelect property to the below.
OnSelect = Set(VarVisible,true)Where,
VarVisible = Variable name
6. Select the group [Group_DialogBox] and set its Visible property as:
Visible = VarVisible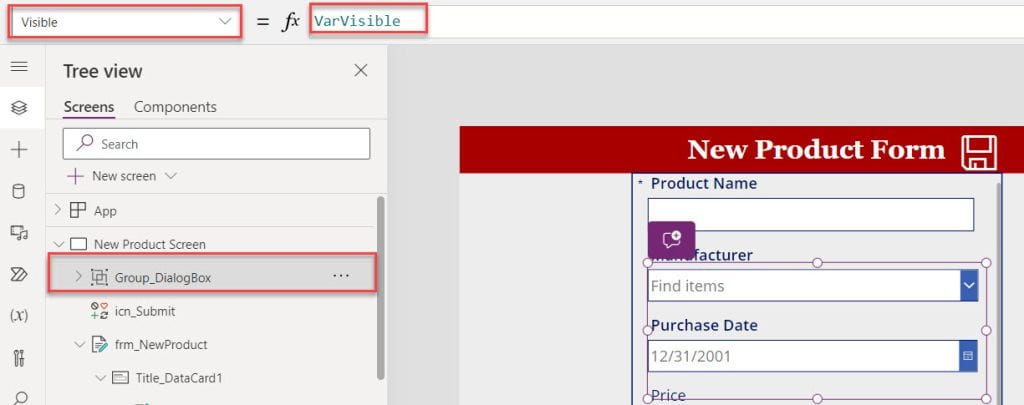
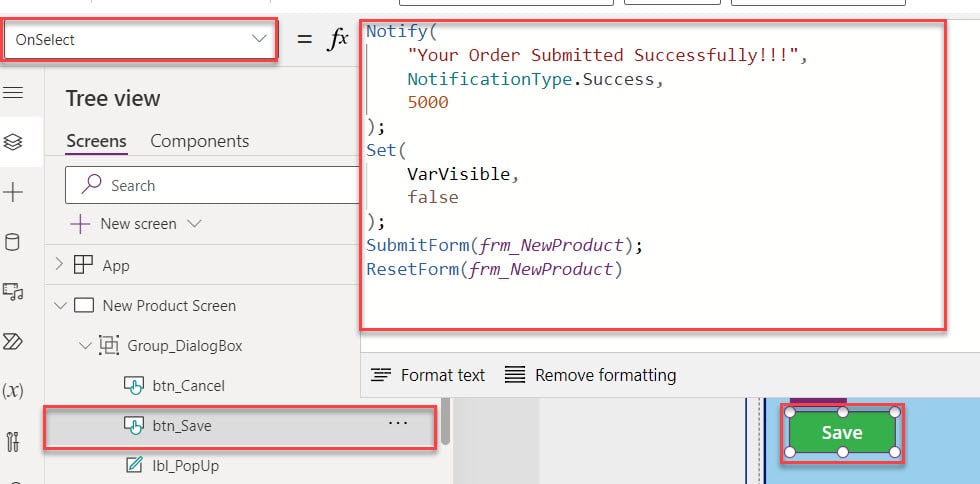
7. Next, Select the Save button and set its OnSelect property to the code below.
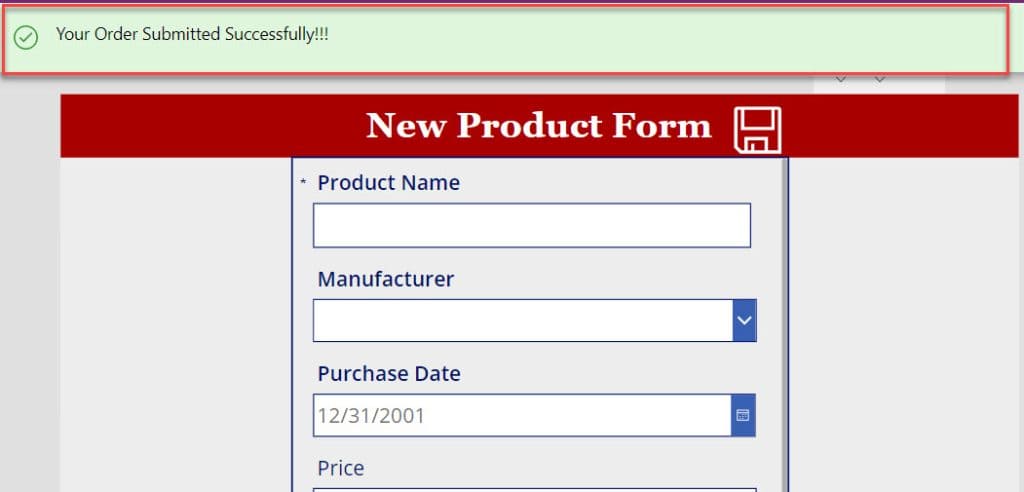
OnSelect = Notify(
    "Your Order Submitted Successfully!!!",
    NotificationType.Success,
    5000
);
Set(
    VarVisible,
    false
);
SubmitForm(frm_NewProduct);
ResetForm(frm_NewProduct)
Where,
- VarVisible = Power Apps variable name
- frm_NewProduct = Power Apps form name
8. In the same way, select the Cancel button and set its OnSelect property as:
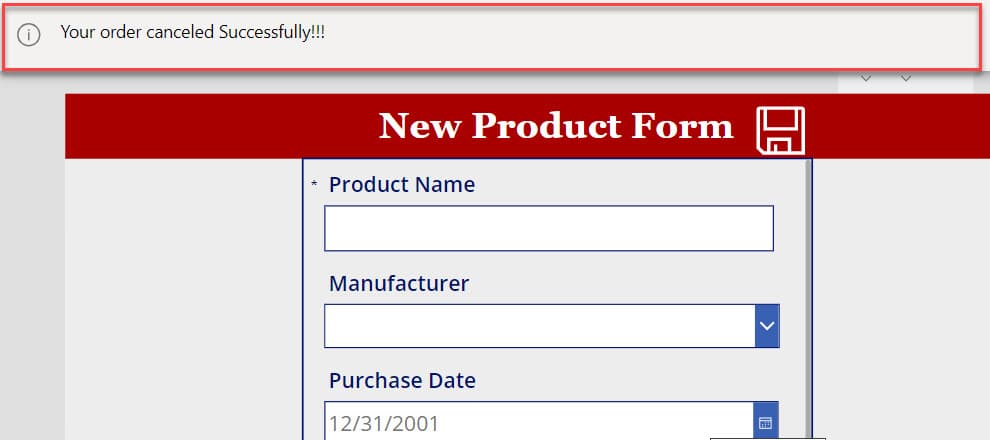
OnSelect = Notify(
    "Your order canceled Successfully!!!",
    NotificationType.Information,
    5000
);
Set(
    VarVisible,
    false
);
ResetForm(frm_NewProduct)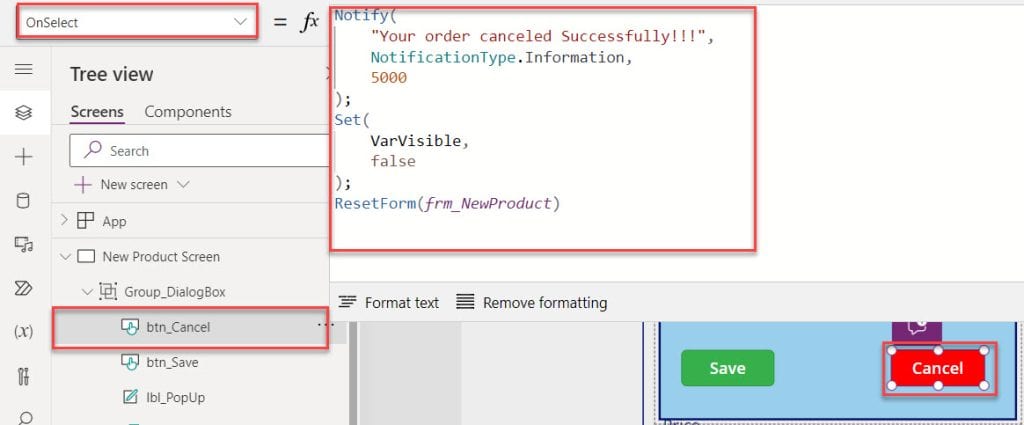
Note:
Whenever you want to submit the new record from the Power Apps form to SharePoint list, make sure to set the Default mode of the edit form as New.
9. Save, Publish, and Preview the app. Provide the new product details in the Power Apps form and select the Save icon to display the message box, as shown below.
10. If we click on the Save button, the data will be submitted in the SharePoint list, and it will display the popup message [“Your Order Submitted Successfully!!!”], as shown below.
11. On the other hand, If we click on the Cancel button, it will display the popup message [“Your order canceled Successfully!!!”], as shown below.
This way, you can work with the Power Apps popup message after submitting the form.
I trust you find this Power Apps tutorial helpful. If you have any requirements related to the PowerApps message box or Power Apps notification popup, you can follow the above real time examples to do it.
Also, you may like:
- Power Apps Set Text input Value Based On Another Field
- Power Apps Attachment Control
- Build Multilingual Apps in Power Apps
- Power Apps Value Function
- Power Apps Update Data Table
- Power Apps Upload File to SharePoint Document Library
I am Bijay a Microsoft MVP (10 times – My MVP Profile) in SharePoint and have more than 17 years of expertise in SharePoint Online Office 365, SharePoint subscription edition, and SharePoint 2019/2016/2013. Currently working in my own venture TSInfo Technologies a SharePoint development, consulting, and training company. I also run the popular SharePoint website EnjoySharePoint.com
how do I save the comment to a SharePoint List item?
This is not a solution. A component means reusable piece, something like plug and play.
Whatever mentioned here, imagine if you have 20+ screens and each screen needed a popup.