Recently, I was working on the Power Apps attachment control to send an email with an attachment. So I thought to share a complete post on this.
This article explains everything about PowerApps attachment control and its properties. Also, we will see how to add Power Apps attachment to SharePoint List and many more like:
- Power Apps Send Email with Attachment
- How to Reset Attachment Control in Power Apps
- Power Apps Attachment Control Limitations
Attachment Control in Power Apps
PowerApps Attachment Control helps users upload and delete files from the SharePoint list or a Common Data Service entity.
Power Apps attachment control allows users to upload, view, and manage attachments within their apps. Also, it provides a convenient way to handle files such as images, documents, or any other type of files.
Power Apps Attachment Control Properties
Next, I will show the PowerApps attachment control properties. Have a look at the table below.
| Property | Description |
| Items | This property specifies the files that can be downloaded |
| MaxAttachments | The control will accept the maximum number of files |
| MaxAttachmentSize | Currently, the maximum attachment file size limit is 1 MB here is 1,000,000 bytes (106 B) or 1,000 KB |
| OnAddFile | When a user adds a new file attachment, it specifies how the app responds |
| OnRemoveFile | When a user deletes an existing attachment, it specifies how the app responds |
| OnUndoRemoveFile | When a user restores a deleted attachment, it specifies how the app responds |
| AddAttachmentText | This property specifies the label text for the link used to add a new attachment |
| DisplayMode | It specifies whether the control allows adding and deleting files (Edit), only displays data (View), or is disabled (Disabled) |
| MaxAttachmentsText | When the control contains the maximum number of files allowed, the text that replaces the “Attach file” link |
| NoAttachmentsText | If there are no files attached in the attachment control, then an informational text is shown to the user |
| TabIndex | It specifies the Keyboard navigation order in relation to other controls |
| Visible | This property specifies whether the attachment control is visible or hidden |
Add Power Apps Attachment to SharePoint List
To add the Power Apps attachment control to the SharePoint list, follow the below-mentioned steps. Such as:
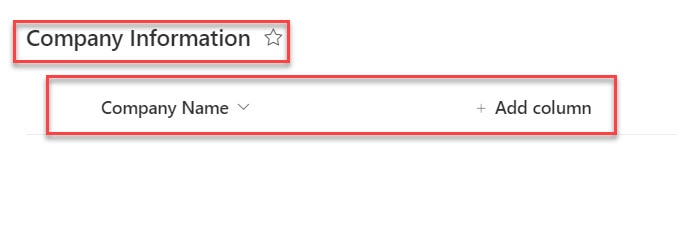
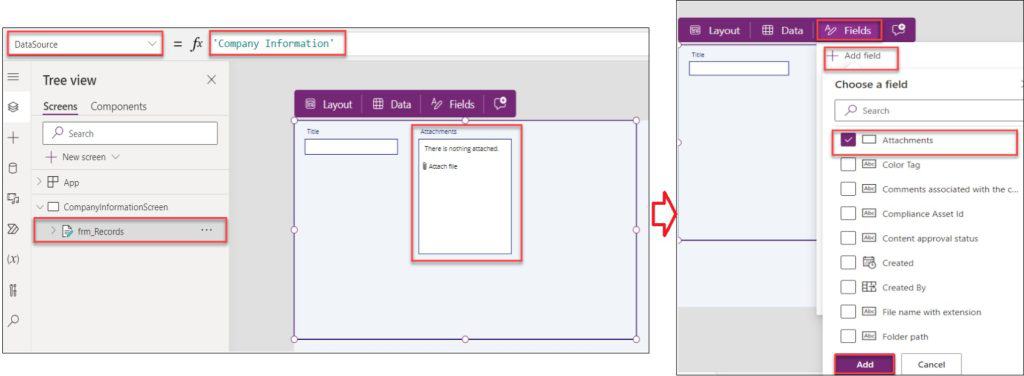
1. On the Power Apps Screen -> Insert an Edit form control and connect it to the SharePoint Online list [Company Information].
2. When you add the SharePoint List to the Edit form, by default, an Attachment file is also added. On the other hand, click on the Fields option, choose the Attachments field, and click on the Add button.
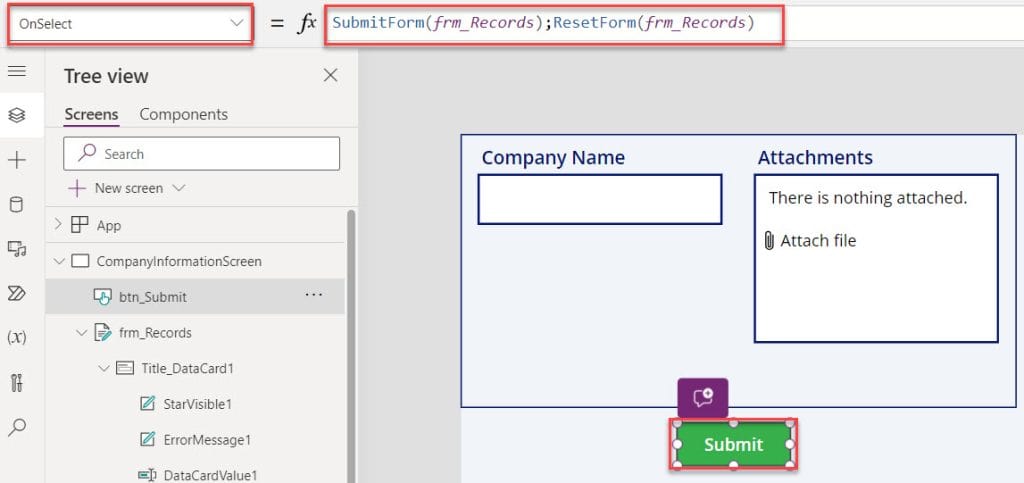
3. Now, insert the Button control [Submit] and set its OnSelect property to the code below.
OnSelect = SubmitForm(frm_Records);
ResetForm(frm_Records)
Where,
- frm_Records = Power Apps Edit form control name
NOTE:
Whenever you want to add a new record from Power Apps form to the SharePoint list, you should make the Form’s control Display mode property as “New.”
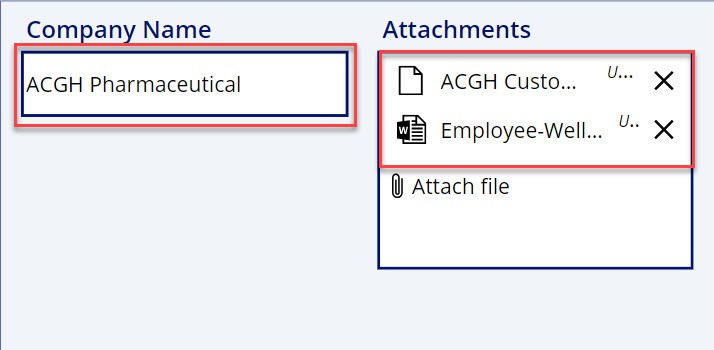
4. Once your app is ready, Save, Publish, and Preview the app. Whenever the user adds a new record with respective attachments, it will be saved on the SharePoint list, as shown below.
This way, you can add Power Apps attachment control to the SharePoint list.

Power Apps Send Email with Attachment
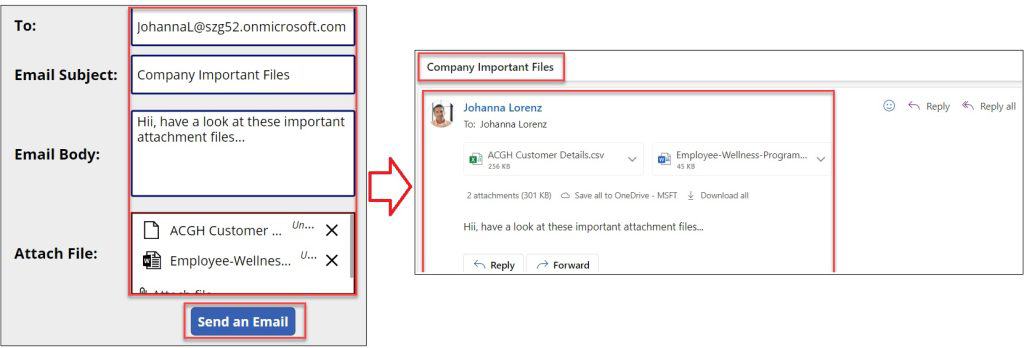
Suppose you want to send a single or multiple Email attachment files to any user in your organization. In this case, you can use the Powerapps Office 365 Connector.
Have a look at the below screenshot for the output.
To work around this, follow the below steps. Such as:
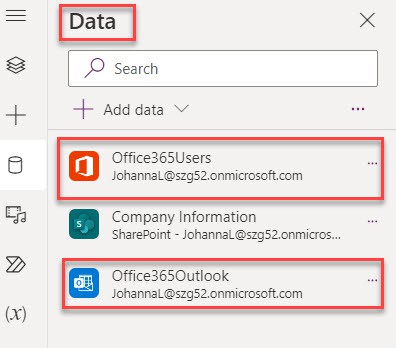
1. First, connect the Office356Users and Office365Outlook data sources to the Power Apps Canvas app, as in the screenshot below.
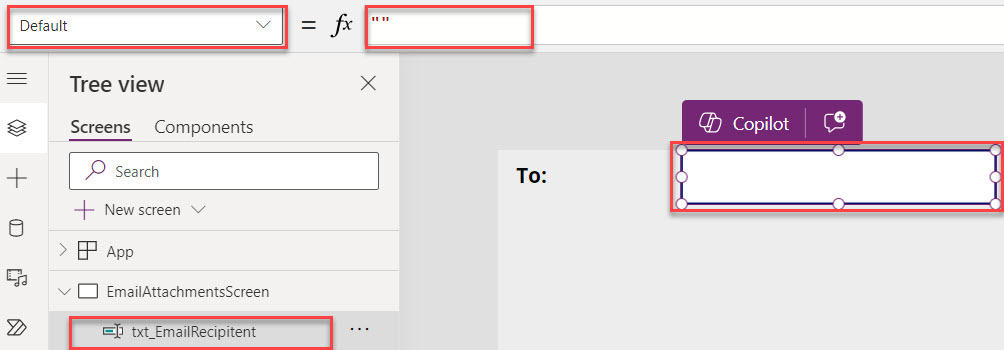
2. Next, on the Power Apps Screen -> To send an email to the specific user, insert a Text input control and set its Default property as blank.
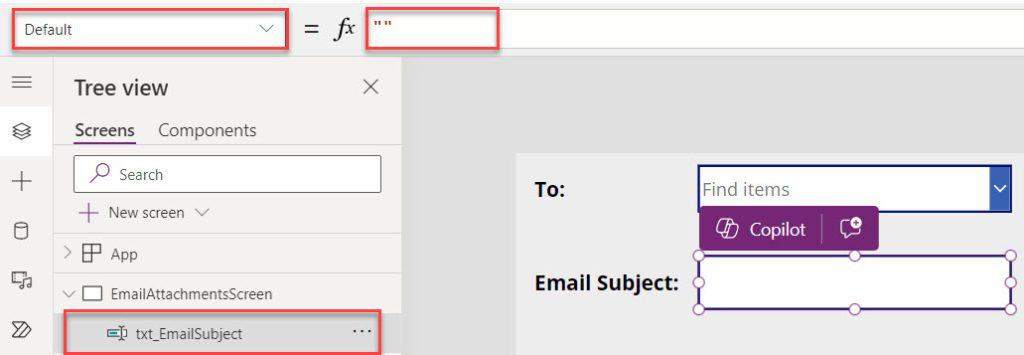
3. For Email Subject, insert a Text input control and set its Default property to Blank(“”).
4. For the Email body, insert a Text input control, set its Mode property as “TextMode.MultiLine, “ and set its Default property as Blank.

5. For the Attachment file, connect the SharePoint Online list [Company Information] and add an Edit form control.
6. When you add the SharePoint List to the Edit form, by default, an Attachment file is also added. Unlock the Attachments Data card -> Cut (Ctrl+X) and paste (Ctrl+V) the Attachment Data card outside of the Edit Form.
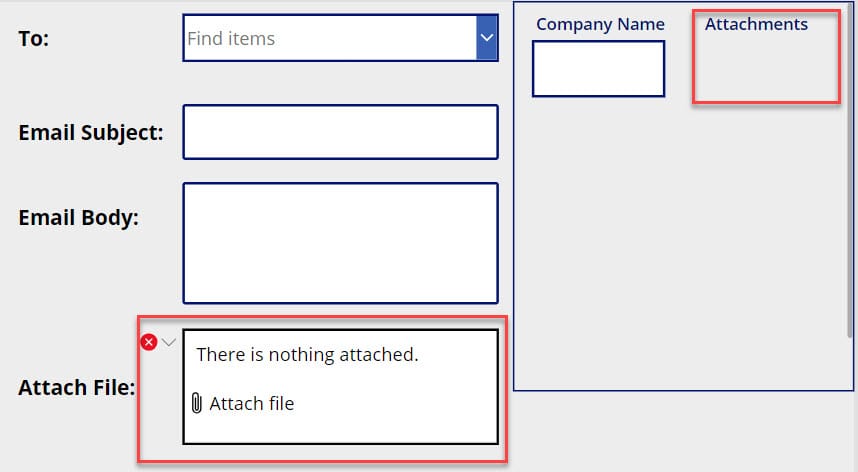
7. When you move the Attachment data card to the outside, then some error will appear on the data card properties, as you can see in the above screenshot. Select the Attachment control and fix the below issues, such as:
- BorderColor: RGBA(89,0,0,1)
- Items: Remove it and make it Blank
- Tooltip: Remove it and make it Blank
- DisplayMode: DisplayMode.Edit
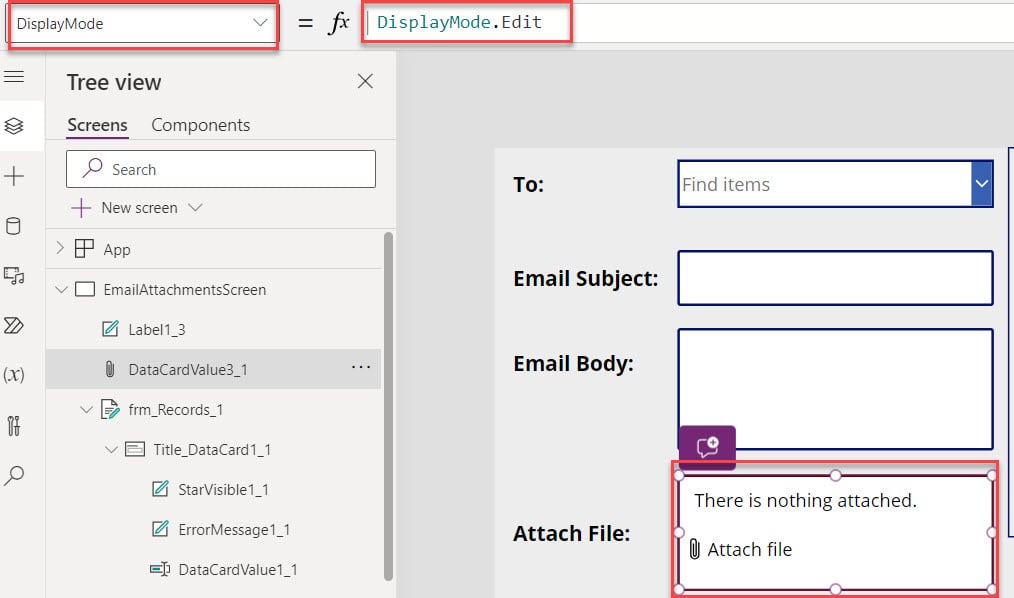
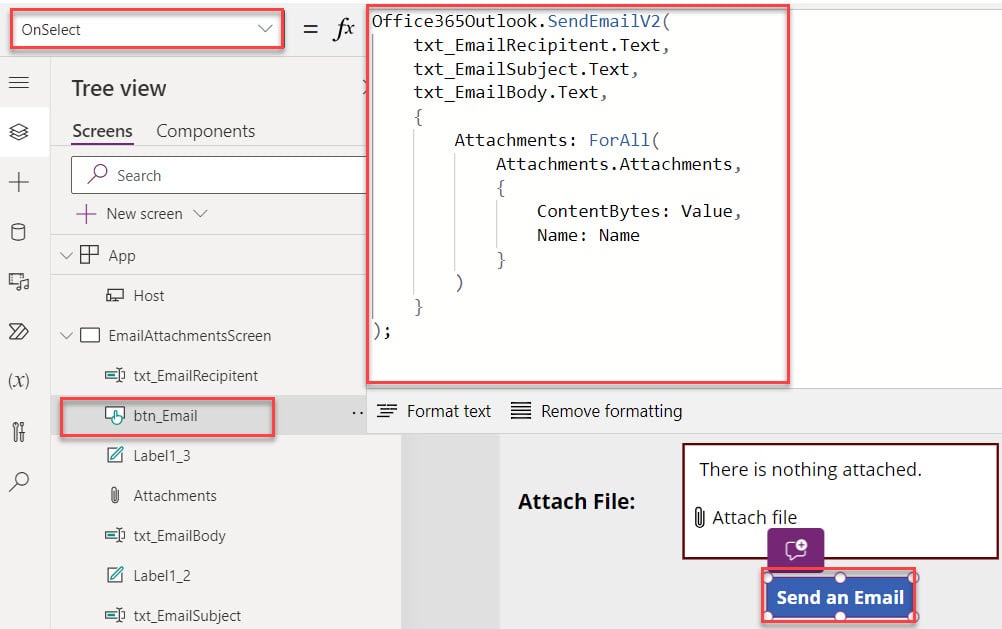
8. Finally, insert a Button control [Send an Email] and set its OnSelect property to the code below.
Items = Office365Outlook.SendEmailV2(
    txt_EmailRecipitent.Text,
    txt_EmailSubject.Text,
    txt_EmailBody.Text,
    {
        Attachments: ForAll(
            Attachments.Attachments,
            {
                ContentBytes: Value,
                Name: Name
            }
        )
    }
)
Where,
- txt_EmailRecipitent = Text input control name (To)
- txt_EmailSubject = Text input control name (Email Subject)
- txt_EmailBody = Text input control name (Email Body)
- Attachments = Attachment control name
8. Save, Publish, and Preview the app. Enter the To field, Email Subject, and Email Body field value. Also, attach some files from your desktop by using the Attach file option [You can attach only those files whose size limit is 10 MB.] and click on the Send an Email button.
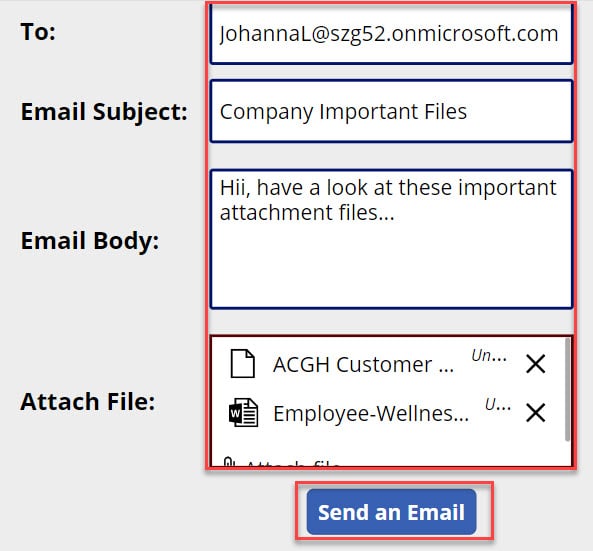
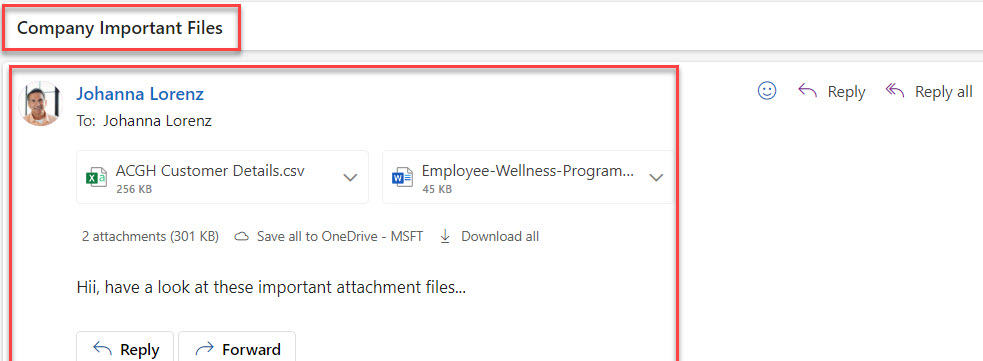
10. Now, the specific user [Johanna Lorenz] will get the Powerapps Email attachments, as shown in the screenshot below.
This way, you can add the PowerApps send email with an attachment.
Reset Attachment Control in Power Apps
To reset the Power Apps attachment control, follow the below steps.
1. I will also take the above Power Apps form control [frm_Records] for this reset attachment control.
2. Now, insert another button control [Reset] under the Power Apps form and set its OnSelect property to the code below.
OnSelect = ResetForm(frm_Records);NewForm(frm_Records)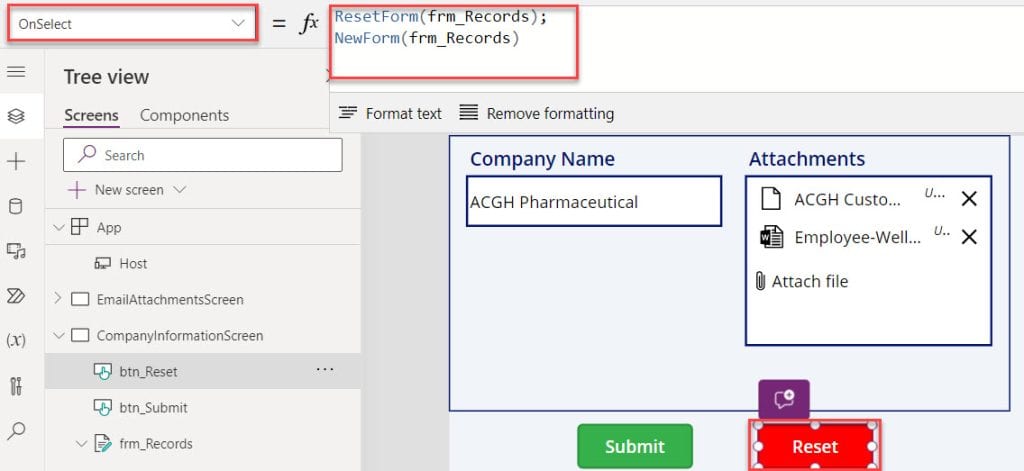
3. Preview the app and click on the Reset button. Then, you can see all the attachment files will clear from the attachment control at a time.
This is how we can reset or clear the Power Apps attachment control.

Power Apps Attachment Control Limitations
Let’s see what are the limitations of the PowerApps attachment control. Such as:
- The attachment control exclusively supports SharePoint lists and Dataverse tables as data sources. It does not support expressions that convert these sources into tables, such as the “ForAll function.”
- The upload and delete functions operate solely within a Power Apps form. In Edit mode, the Attachment control appears disabled outside a form.
- To keep file modifications, the form must be saved by the user. Therefore, the Power Apps Attachment control is not accessible from the Insert tab but is visible within a form once the Attachment field is clicked.
- When using the Attachments control on a web browser, multiple files can be selected, and drag-and-drop functionality is enabled.
This Power Apps tutorial explains in detail what the Power Apps attachment control is and its properties, as well as how to Add It to a SharePoint List.
Also, we covered the topics below. Such as:
- Power Apps Send Email with Attachment
- How to Reset Attachment Control in Power Apps
- Power Apps Attachment Control Limitations
Some more Power Apps articles you may like:
- 4 Various Ways to Build Multilingual Apps in Power Apps
- Power Apps Barcode Scanner
- Power Apps Lower, Upper, and Proper Function
- Power Apps Pen input
- Power Apps Set Text input Value Based On Another Field
I am Bijay a Microsoft MVP (10 times – My MVP Profile) in SharePoint and have more than 17 years of expertise in SharePoint Online Office 365, SharePoint subscription edition, and SharePoint 2019/2016/2013. Currently working in my own venture TSInfo Technologies a SharePoint development, consulting, and training company. I also run the popular SharePoint website EnjoySharePoint.com
How to get the File Size value saved into Label.
nice one. May i know how do we pass the attachment to the dynamics crm timeline/notes ?
I can’t seem to make the patch code patch. I put Attachments in as the column, the data card name and .Attachments. I know I’m selecting the right name because it even suggests putting Attachments after the dot.
It then gives a re line stating, “The type of this argument ‘{Attachments}’ does not match the expected type ‘Attachment’. Found type ‘Table’. The function ‘Patch’ has some invalid arguments”
So, then I changed the column name to Attachment (singular) to see if that made a difference and, of course, it states that column doesn’t exist and the most similar name is ‘Attachments’
Any thoughts?
Hello Bijay. Can we set Attachment control(outside of form control) to display a document from sharepoint doc lib? I tried to set its items property but it does not download the file. Any suggestions on this ?
Hi what do i do if I don’t have an attachment field after adding my SharePoint list in the adds fields section. I have everything else but not attachment
I’m receiving an error and I’m not sure what I’m missing “On Select” for my send email icon – any tips would be greatly appreciated.
Invalid number of arguements: Received 5; Expected 3 – 4.
Set(_emailRecipientString, Concat(MyPeople, Mail & “;”));
Office365Outlook.SendEmail (_emailRecipientString, TextEmailSubject1.Text, TextEmailMessage1.Text, {Importance:”Normal”},{Attachments:AddColumns(
RenameColumns(
EmailAttachment.Attachments,
“Value”,
“ContentBytes”
),
“@odata.type”,
“”
)
};
Reset(TextEmailSubject1);
Reset(TextEmailMessage1);
Clear(MyPeople)