When working with pen input control in PowerApps, we usually need to save the PowerApps signature to the SharePoint Online list.
Follow this Power Apps tutorial to learn about the PowerApps pen input, including what the PowerApps pen input control is and its properties.
Also, I will show you how to use Power Apps pen input with a simple example and how to save the Power Apps pen input signature to the SharePoint list.
Pen input in Power Apps
The Pen Input control enables users to draw or write their signature within the Power Apps Canvas app and save it to the SharePoint list or library.
It’s particularly useful for capturing signatures, sketches, or other handwritten inputs. This pen input control supports various functionalities, such as color selection, line thickness adjustment, and erasing.

Power Apps Pen input Properties
Next, we will see the PowerApps pen input properties. Refer to the table below.
| Property | Description |
| Color | It defines the color of input strokes |
| DisplayMode | It specifies whether the input control allows user input (Edit), only displays data (View), or is disabled (Disabled) |
| Fill | It defines the background color of the Pen input control |
| Input | This is Deprecated. It defines whether the input supports mouse, pen, or touch inputs. The Default value is “7,” which supports all three |
| Mode | This property specifies whether the input control is in Draw or Erase mode |
| OnSelect | When the user clicks the pen input control, it specifies how the app responds |
| Size | It represents the text font size that appears on the Pen input control |
| Visible | It specifies whether the Pen input control appears or is in hidden mode |
Power Apps Pen input Example
Now, I will show you how to add and use the pen input in PowerApps with a simple example.
Example:
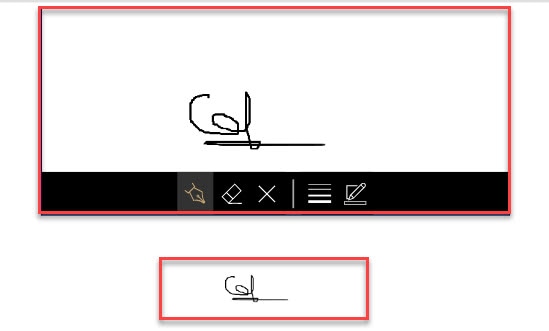
In Power Apps, there is a Pen input control and an Image control. Whenever the users add a signature to the pen input control, it will display on the image control, as in the screenshot below.
Output:
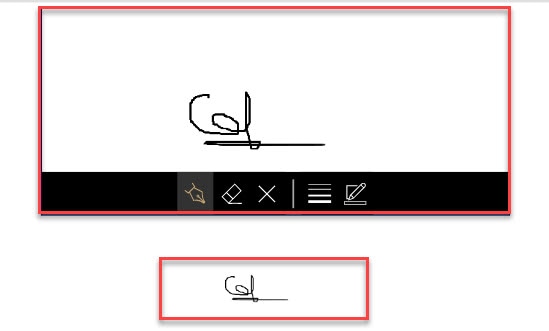
To achieve it, follow the below-mentioned steps. Such as:
1. On the Power Apps Screen, add a Pen input control (Insert -> Input -> Pen input). The control also has some icons (Pen icon, Erase icon, Cancel icon, etc.).

2. If you don’t want to see all these icons, you can set the ShowControls property to false, otherwise true, as shown below.

3. Now, insert an Image control and set its Image property as:
Image = pen_Signature.ImageWhere,
- pen_Signature =Power Apps pen input name
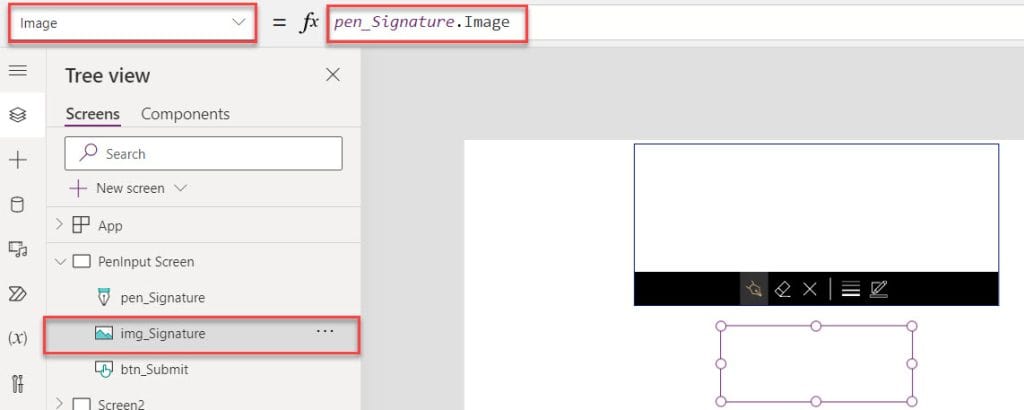
4. Once your app is ready, save, Publish, and Preview the app. When the users add a signature to the pen input, it will display on the image control, as shown below.
Power Apps Check If Pen Input is Empty
To check if the pen input control is empty in Power Apps, follow the below steps.
1. Select the pen input control and set its OnSelect property to the code below.
OnSelect = Set(varPenInput,Self.Image)
2. Insert a Text label and set its Text property as:
Text = If(
    varPenInput = pen_Signature.Image,
    "Pen input is not blank",
    "Pen input is blank"
)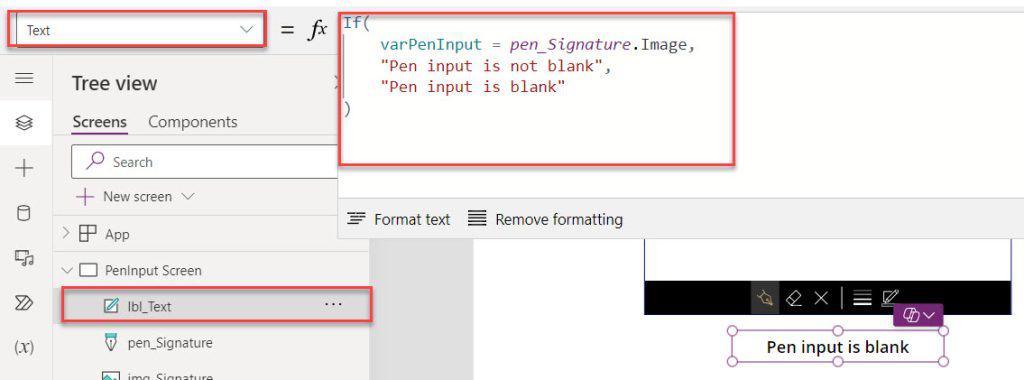
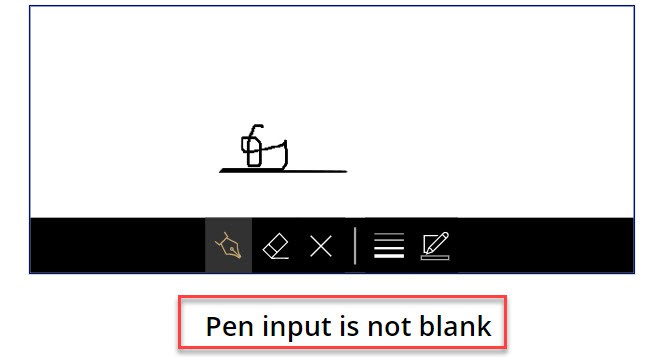
3. Save, Publish, and Preview the app. If the pen input is blank or empty, the text label displays text like; “Pen input is blank,” or if the pen input is not blank, the text label displays text like; “Pen input is not blank.”
Have a look at the below screenshot for the output.
Power Apps Pen Input to SharePoint List
Here, I will show you how to save the pen input signature to the SharePoint list or library using two different ways.
Save Power Apps Signature to SharePoint List Without Using Power Automate
If you want to save the Power Apps pen input signature to the SharePoint list without using Power Automate, you can follow the example below.
Example:
I have a SharePoint Online list named “Hotel Reservations” and this list contains the below fields.
| Column Name | Data Type |
| Name | It is a default single line of text |
| A single line of text | |
| Phone Number | Number |
| Arrival Date | Date and time |
| Departure Date | Date and time |
| Address | Multiple lines of text |
| Payment Type | Choice |
| Attachments | Attachment |

In Power Apps, there is an Edit form control that is connected to the SharePoint list. Now, I need to add data from this new form to the SharePoint list along with a user signature as an attachment file.
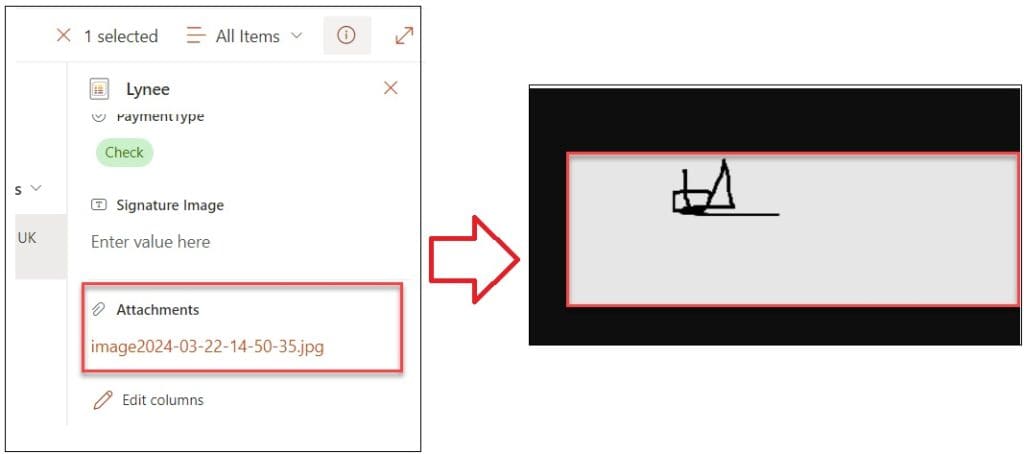
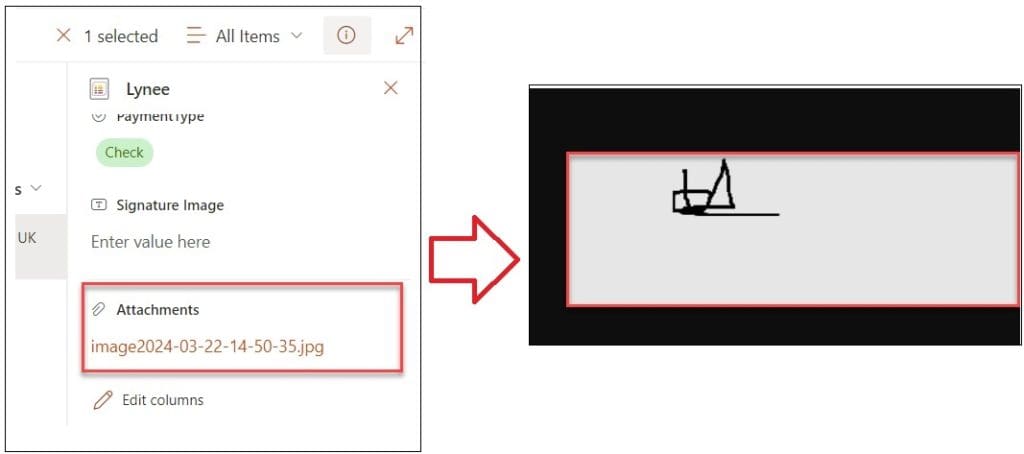
Have a look at the below screenshot for the output.

Whenever the user opens the attachment file, the signature is displayed as an image file, as shown below.
To work around this example, follow the below steps.
1. On the Power Apps Screen -> Insert an Edit form control and connect it to the SharePoint Online list [Hotel Reservations].
Note:
Whenever you want to submit the data from Power Apps Form to SharePoint list, you should make the Form’s Default mode is “New.”
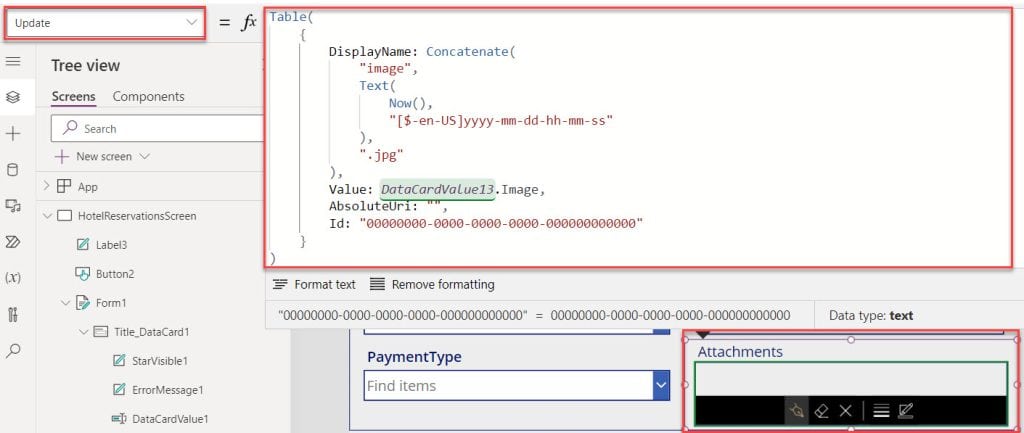
2. Then, select Attachments_DataCard1, copy the name of the attachment data card value, and remove it. Now, insert a Pen input control and rename it using the Attachment data card value name.
Also, select the Attachments_DataCard1 and set its Update property to the code below.
Update = Table(
    {
        DisplayName: Concatenate(
            "image",
            Text(
                Now(),
                "[$-en-US]yyyy-mm-dd-hh-mm-ss"
            ),
            ".jpg"
        ),
        Value: DataCardValue13.Image,
        AbsoluteUri: "",
        Id: "00000000-0000-0000-0000-000000000000"
    }
)
Where,
- DataCardValue13 = Pen input control name
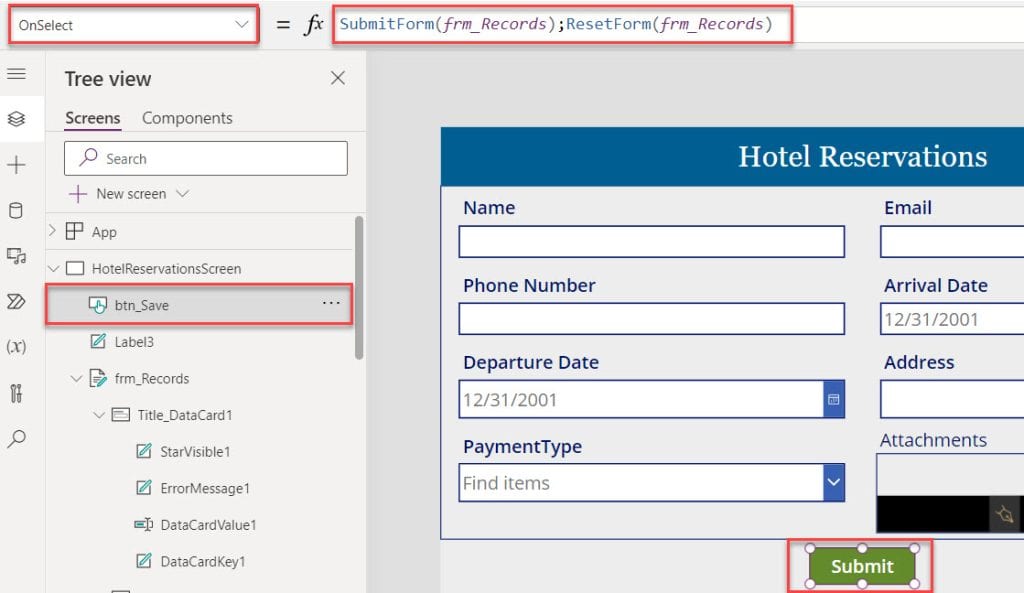
3. Finally, insert a Button control under the form control and set its OnSelect property to the code below.
OnSelect = SubmitForm(frm_Records);
ResetForm(frm_Records)
Where,
- frm_Records = Power Apps form control name
4. Save, Publish, and Preview the app. When a user adds new record details [Including signature] and selects the button control, the new record will be submitted to the SharePoint list.
Once you click on the attachment file, the user’s signature will appear as an image file, as in the screenshot below.
This way, you can save the Power Apps pen input digital signature to the Sharepoint list without using Power Automate.
Save Power Apps Signature to SharePoint List Using Power Automate
This is another way to save the Power Apps pen input signature to the SharePoint list using Power Automate. To get more information, follow the example below.
Example:
I have a SharePoint Document Library named “Customer Signatures“. This library has the below columns (By default, all these columns will be there while creating a SharePoint Document Library). Such as:
- Name
- Modified
- Modified By

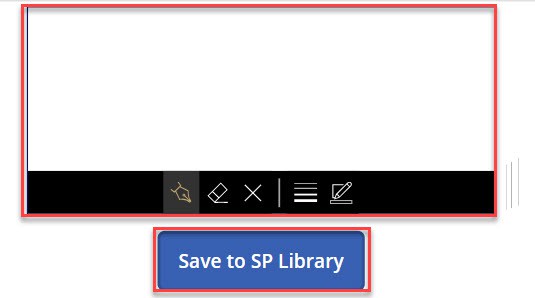
In Power Apps, there is a Pen input control and a button control. Whenever the users add a signature in the pen input control and select or tap the button control, the signature will be saved on the SharePoint document library.
Note:
If you want to save the pen input digital signature to the SharePoint list or library, there is no direct way to do it. You should use Power Automate flow to do these things.
Output:

To achieve it, follow the below steps. Such as:
1. On the Power Apps Screen -> Insert a Pen input control and a Button control like the one below.
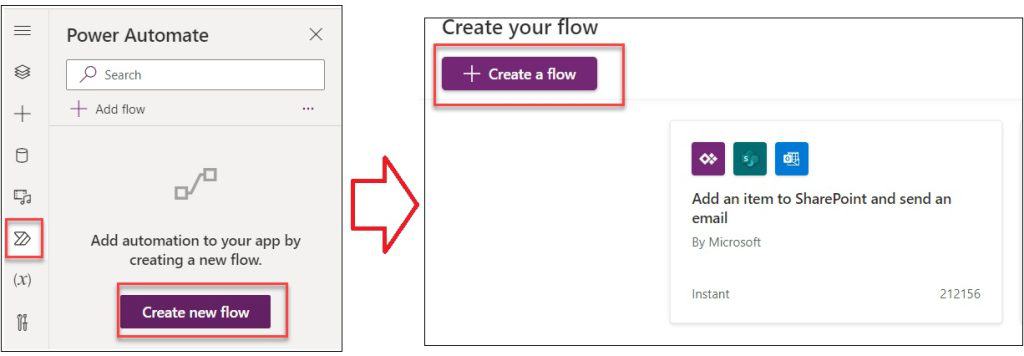
2. Next, click on the Power Automate button -> Select Create new flow button -> Click on the + Create a flow button, as shown below.
3. Once you click on the Create a Flow button, it will create a Power Automate Instant flow with PowerApps (V2) by default. Now, expand the trigger and select the + Add an input button.
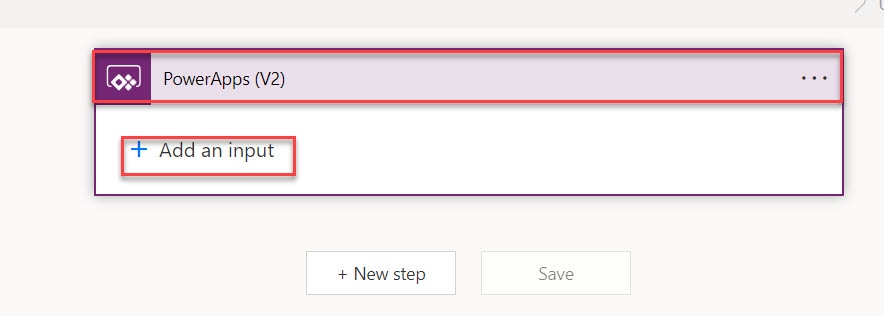
4. Next, choose the type of user input as “File” as per our requirement, and add the name of the file [Signature]. Then, select + New step.

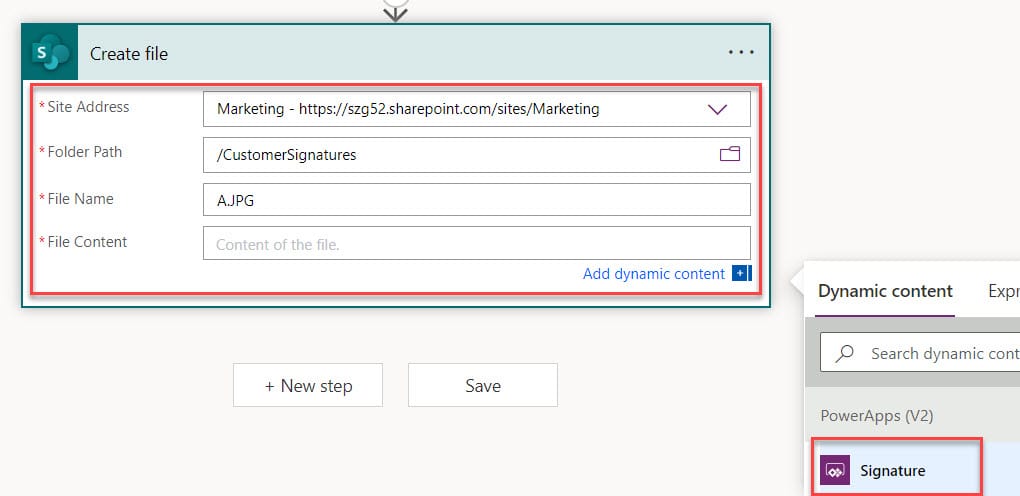
5. In the new step, choose an action as Create file (in SharePoint). Provide the below fields for this action:
- Site Address: Enter your SharePoint Site address URL where you want to save the signature
- Folder Path: Provide your SharePoint Document Library or List name that will store the PowerApps saved signature
- File Name: You can give any static name as of now; in the last, I will show you how to give a file name
- File Content: You should select the dynamic content of the file from PowerApps (Signature)
6. Once your flow is done, give the proper name to the flow and click on the “Save” icon to save the flow.

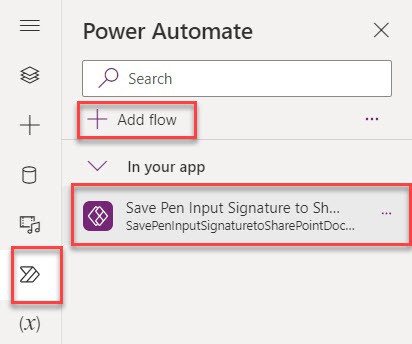
7. Next, go to the Power Apps, where you can check whether the flow has been added. If it has not been added, you can use the + Add flow button to save the flow to the Power Apps.
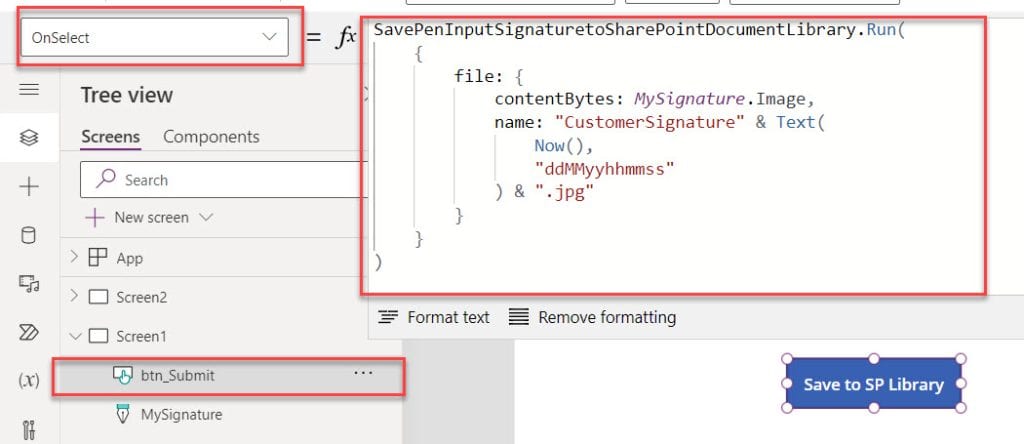
8. Select the Button control and set its Onselect property to the code below.
OnSelect = SavePenInputSignaturetoSharePointDocumentLibrary.Run(
        {file: {
            contentBytes: MySignature.Image,
            name: "CustomerSignature" & Text(
                Now(),
                "ddMMyyhhmmss"
            ) & ".jpg"
        }
    }
)
Where,
- SavePenInputSignaturetoSharePointDocumentLibrary = Power Automate flow name
- MySignature = Power Apps pen input control name
9. In the last, we need to give the proper File name in the flow. For that, follow the “Expression” as shown below.
@{triggerBody()['File']['name']}
10. Once all your updates are done, save the flow. Whenever the user adds a signature in the pen input and selects the button control, the flow will trigger successfully, as shown below.
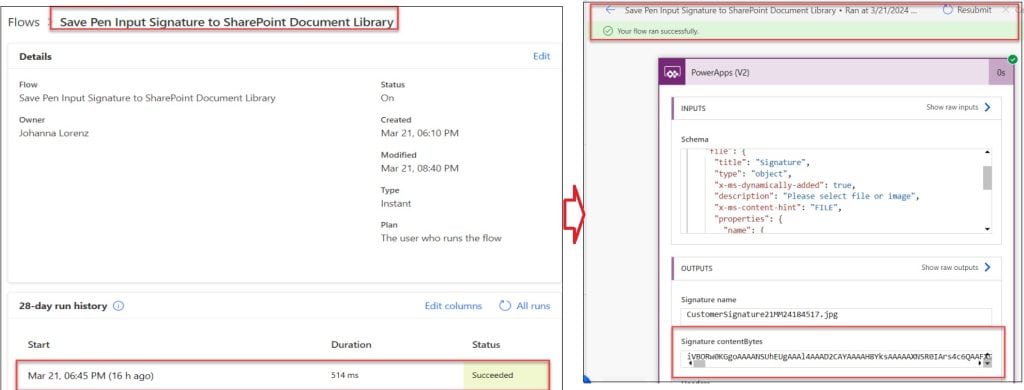
11. Also, the Power Apps pen input signature into the SharePoint document library.

This is how we can save the Power Apps signature to the SharePoint library using Power Automate.
I trust this Power Apps tutorial taught in detail information about the PowerApps pen input control. If you have any requirements related to how to use Power Apps pen input control, you can follow this post to do it.
Also, you may like:
- PowerApps camera control + Save captured image in SharePoint
- Power Apps Employee Directory
- Container in Power Apps
- Power Apps Disable Button
I am Bijay a Microsoft MVP (10 times – My MVP Profile) in SharePoint and have more than 17 years of expertise in SharePoint Online Office 365, SharePoint subscription edition, and SharePoint 2019/2016/2013. Currently working in my own venture TSInfo Technologies a SharePoint development, consulting, and training company. I also run the popular SharePoint website EnjoySharePoint.com