In this PowerApps tutorial, We will discuss how to use PowerApps camera control and how to save the recently captured images in SharePoint List or Library using Powerapps.
Also, We will cover these below topics as:
- What is PowerApps Camera control
- Various Camera control properties in Powerapps
- How to add a picture control in Powerapps
- Save the captured image in SharePoint List without Powerapps flow
- How to upload the image to SharePoint Library using Powerapps
- Powerapps upload image to SharePoint Library using flow
- how to take a picture using Powerapps button
With a few PowerApps examples, I will explain to you how to use PowerApps Camera control and how to save the captured image in SharePoint.
Powerapps Camera control
In PowerApps, the camera control allows the users to capture the images using a Camera on a device (Android or iOS). The device may be either a Phone, Tablet, Laptop, etc and all these devices should have a camera.
By using this Powerapps Camera control, We will take the photos and upload them into the SharePoint List or Library.
Powerapps Camera control Properties
Below are some PowerApps Camera control properties:
- Camera: You need to specify the numeric ID of the camera to use. It is helpful on devices with more than one camera.
- OnStream: When the Stream property is updated, it specifies how the app responds.
- Photo: It helps to capture the image when a user takes a picture.
- Stream: It helps to update the image automatically based on the StreamRate property.
- StreamRate: It specifies how often to update the image on the Stream property, in milliseconds. You can provide the value range from 100 (1/10th of a second) to 3,600,000 (1 hour).
Powerapps add picture control
To add a Picture or Camera control in Powerapps, We need to do these below things as:
- Sign in the PowerApps app with your credentials.
- Create a new Canvas app and choose any one Layout either Tablet or Phone.
- On the Powerapps Blank screen, Insert a Camera control (Insert -> Media -> Camera).
- Select the Camera and set the below formula on its OnSelect property as:
OnSelect = Camera1.PhotoWhere,
Camera1 = Camera control name
- If you want to save the Photo in the collection, then you need to write this below formula on Camera’s OnSelect property as:
OnSelect = Collect( ImageCollection, Camera1.Photo )Where,
- ImageCollection = Collection Name
- Camera1 = Camera control name
Save captured image in SharePoint List without Powerapps flow
As I searched in Powerapps, Lots of people are using the Powerapps with the flow to save the image in a SharePoint List. Also, People may think that, Is there any way to save the image in the SharePoint List without using the Powerapps flow.
To answer this question is, Yes, We can save the image in SharePoint List without using Powerapps Flow. There is the easiest way to upload the image by using only the Powerapps Patch function and Powerapps Collection.
Follow the below steps to save the Powerapps image in a SharePoint list:
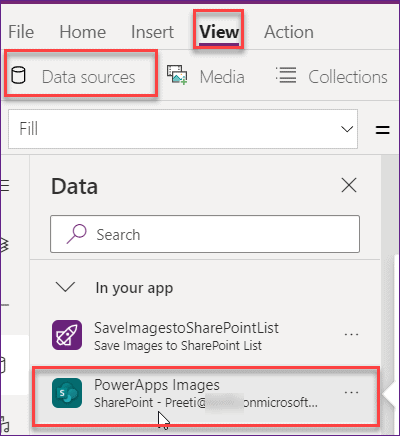
- First of all, Create a SharePoint List (Powerapps Images) and add a Multiple text column named as “Image Info“. The text should be a Plain text (that means it should not be a Rich text or Enhanced rich text).

- Sign in Powerapps in Browser and Create a new Blank canvas app either with a Phone or a Tablet layout (I have used Phone layout).
- Connect the SharePoint list (Powerapps Images) data source to the Powerapps screen.
- On the Powerapps screen (Screen 1), Insert a Camera control (Insert -> Media -> Camera). By default, the camera default property will be 0 (Active mode), I changed it to 1 (Inactive mode) as shown below.

- Select the Camera control and set its OnSelect property as:
OnSelect = ClearCollect(CameraImage,Camera3.Photo); UpdateContext({PhotoDateTime: Now()})Where,
- ClearCollect = It will create a collection that always takes the first image. Also, It will clear the previous images from the collection.
- CameraImage = Powerapps Collection Name
- Camera3 = Camera control name
- UpdateContext = It helps to create a Context variable that holds the current Date Time information.
- PhotoDateTime = Context variable name that contains the Now() function.

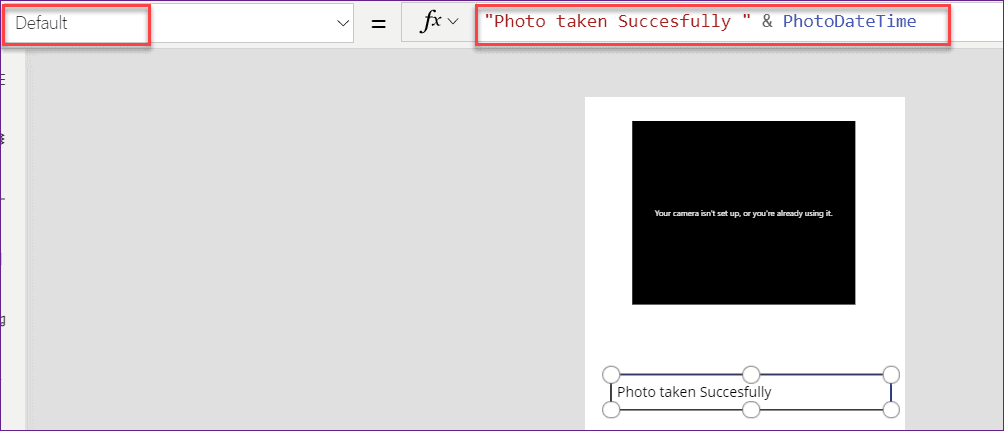
- Under the Image control, Add a Text input control (Insert -> Text -> Text input) and set its Default property as:
Default = "Photo taken Successfully " & PhotoDateTimeWhere,
PhotoDateTime = Context Variable name that holds the current Date time and it will display in the text box with “Photo taken Successfully “
- Add a Button and Rename it to “Upload Image to SharePoint“. This button will help you to save the image in the SharePoint list. Apply this below formula on Button’s OnSelect property as:
OnSelect = Patch('PowerApps Images', Defaults('PowerApps Images'), {Title: TextInput3.Text, 'Image Info': First(CameraImage).Url})Where,
- ‘PowerApps Images’ = SharePoint List name
- Defaults(‘PowerApps Images’) = The Defaults functions helps to create a new item in the SharePoint list
- Title: TextInput3.Text = Text input control name and the text value will store in the Title column
- ‘Image Info’: First(CameraImage).Url = As all the image details stores in the collection, So I want only the first item from the collection with its Url.

- Now just Save and Publish the App. Open the Powerapps app on your phone, Allow the camera and capture the image by clicking on it. Then click on the button (Upload Image to SharePoint) to upload the image in your SharePoint list.

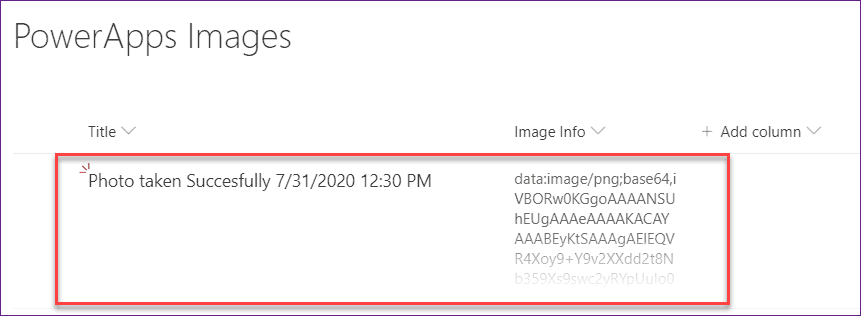
- Go to the SharePoint List (PowerApps Images) and refresh it. You can see the image data will be uploaded on that list. But the Image Data has been saved in the list as Base 64 format (in Image Info column) and you may want to view the captured image.
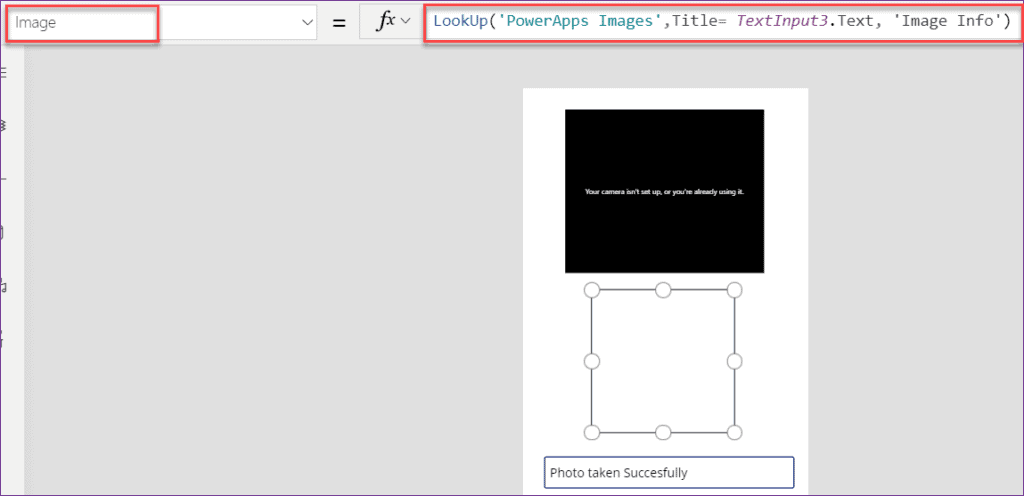
- To view the image on the Powerapps screen, you need to fetch the image in an Image control. For that, add an Image control and apply this below formula on its Image property as:
Image = LookUp('PowerApps Images',Title= TextInput3.Text, 'Image Info')Where,
- LookUp = It helps to get the first row
- ‘PowerApps Images’ = SharePoint List Name
- TextInput3.Text = Text input control name
- ‘Image Info’ = Multiline text column from SharePoint list
- Insert a Next arrow icon (>) to navigate the screen 2. For that, add a new Blank screen (Screen 2). In screen 2, you can see the details of the captured image. Select the Arrow icon (in screen 1) and apply this below formula on its OnSelect property as:
OnSelect = Navigate(Screen2)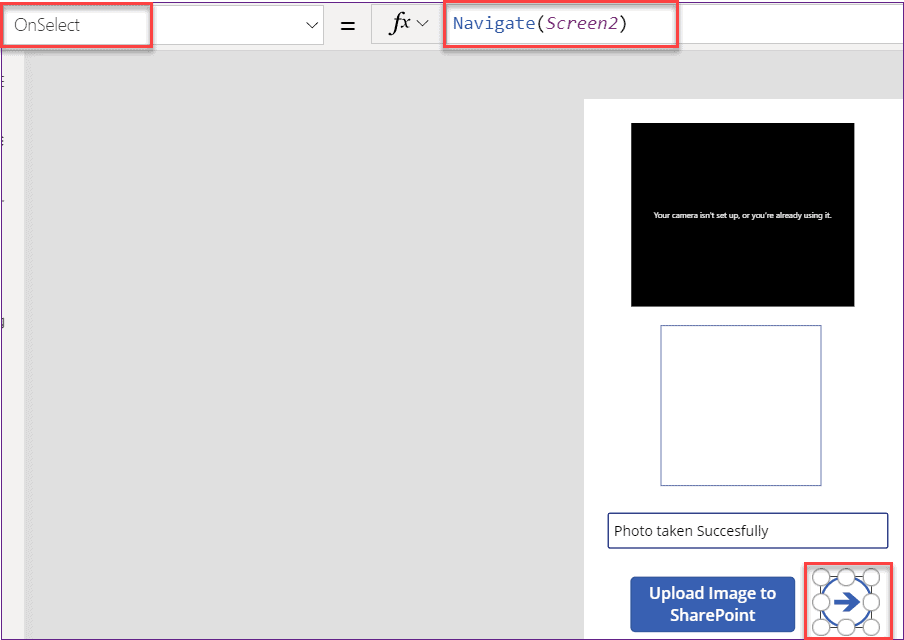
- Go to Screen 2, Add these two icons (Insert -> Icons) on the top of the screen as:
- Back icon(<): This icon helps to go back the Screen 1. For this, set the below formula on its OnSelect property:
OnSelect = Back()2. Refresh icon: This icon helps to refresh the gallery. Set the below formula on its OnSelect property:
OnSelect = Refresh('PowerApps Images')- Suppose, you want to view the count of images that are stored in the SharePoint list. For that, take a Text input control and set its Default property as:
Default = "Total count of Images: "& CountRows('PowerApps Images')
- Insert a Vertical Gallery control (Insert -> Gallery -> Vertical) and add the Data source as SharePoint List (PowerApps Images). Go to Properties pane and make the Layout as Title.
- Select the Gallery control and go to Edit property. Set the below fields as:
- Image: ThisItem.’Image Info’
- Title: ThisItem.Title

- Select the Gallery control, Take a Trash icon beside the image which will help you to remove the image from the Gallery control. Set the below formula on its OnSelect property as:
OnSelect = Remove('PowerApps Images', ThisItem)View the Image Details in SharePoint List
As you can see, in the SharePoint List, the image is appearing with Base 64 format which is unsatisfactory. People also may want to view the image in the SharePoint List itself. So for that, you need to do these below things:
- Go to SharePoint List (PowerApps Images) and Click on the Powerapps tab from the top and then Customize forms.
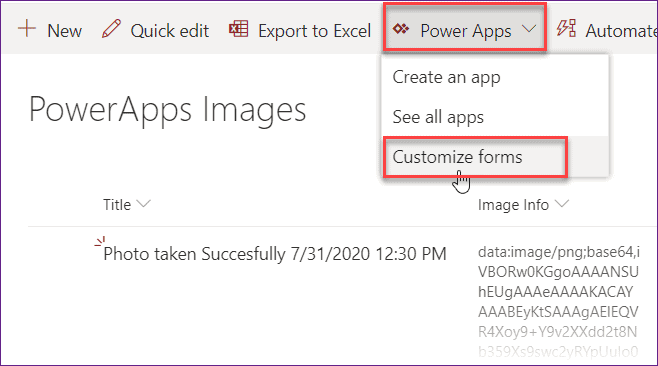
2. Go to the Image Info field Data card and unlock it (Advanced -> Unlock to change properties).

3. Remove the Image Info text box control and increase the size of the data card. Add an Image control over there and set its Image property as:
Image = Parent.Default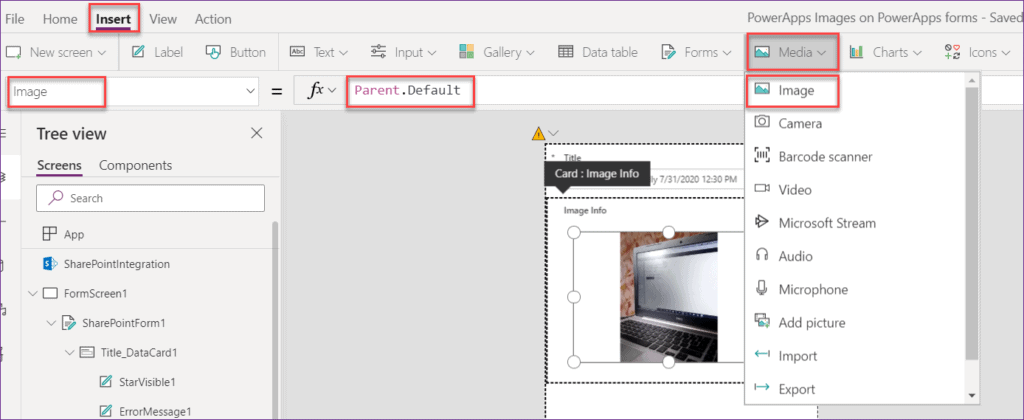
4. Click on the Back to SharePoint option -> Save and Publish to SharePoint button as shown below.
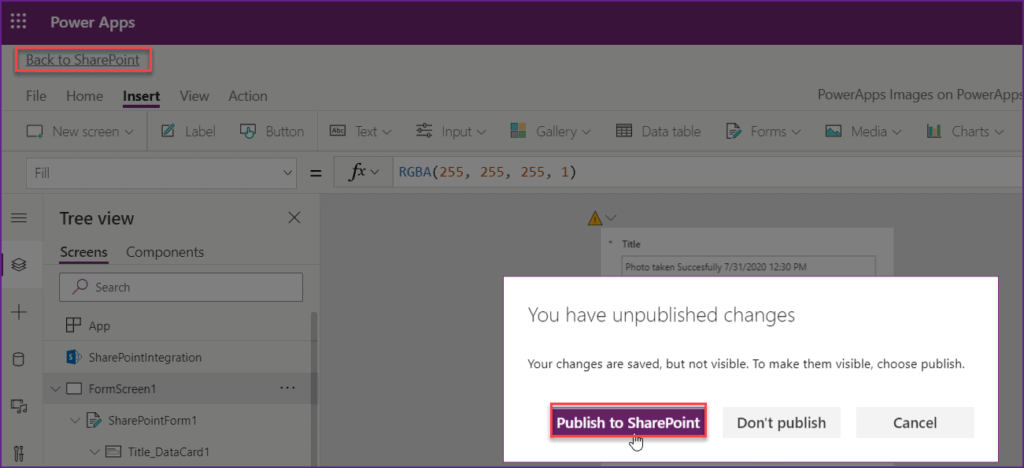
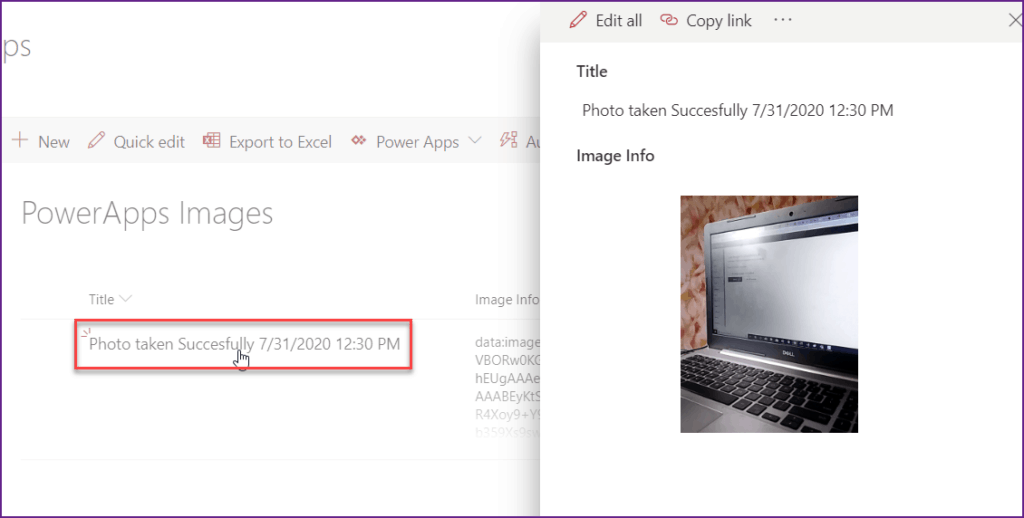
5. Refresh the SharePoint List and then you can see the Title column will appear with a link text. Once you will click on the item (from Title column), then you can see the item details on the existing page only as shown below.
NOTE:
When you will click on the Item link, then the image will not display suddenly. Because it may take some time to reflect on the SharePoint List. After some time you can again refresh your list and click on the item link.
Otherwise, also you can do another thing as: Again open the Customize form from SharePoint list itself and Save and Publish it to SharePoint. Refresh the SharePoint list and then you can see the Image details.
Powerapps upload image to SharePoint Library
Like the SharePoint List, also we can upload the Powerapps saved image to SharePoint Library. In the above scenario, I have saved the captured image in SharePoint List without using Powerapps flow.
Here, I will take another scenario where the captured image will save in a SharePoint Library using the Powerapps flow.
Follow the below steps to save the Powerapps image in a SharePoint Library:
On the Powerapps screen, Take a Camera control and set its OnSelect property as:
OnSelect = ClearCollect(PictureCollection,Camera2.Photo);Where,
- PictureCollection = Collection name
- Camera2 = Camera control name
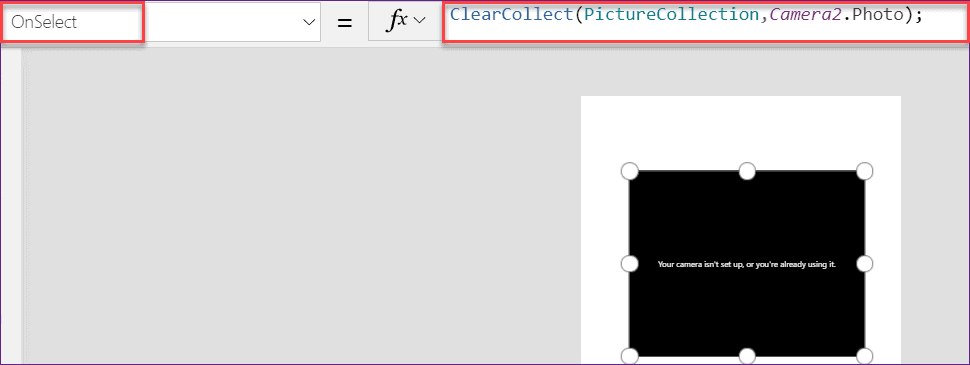
When you will click on the image control, it will take the photo, and store it in a collection named PicureCollection. The ClearCollect function will always be cleared first, having one image only in the collection.
Next what I will do is, I will add a Button named Save Image to SharePoint that will send the image to the SharePoint library via Microsoft Flow. So let’s create a Powerapps flow.
Powerapps upload image to SharePoint Library using flow
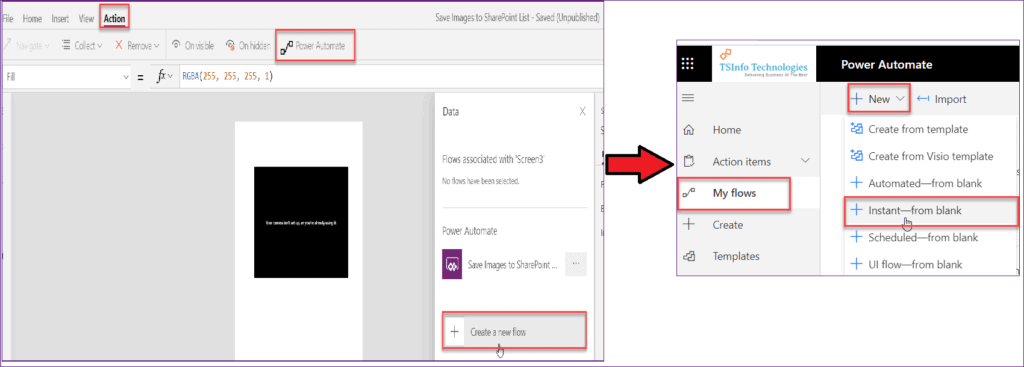
In the Powerapps app, Go to Actions -> Power Automate -> Click on + Create a new flow.
In the Powerapps Automate page, Select My flows (from left navigation) -> + New -> Select + Instant-from blank option as shown in the below screenshot.
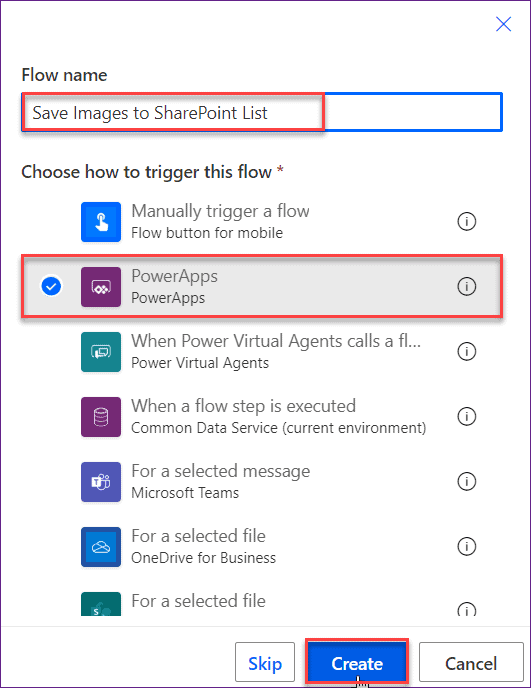
Enter a name for the Flow (Save Images to SharePoint List) and choose PowerApps to trigger the flow. Hit on Create button. Also, you can skip this step, and later you can provide the flow name at the time of flow saving.
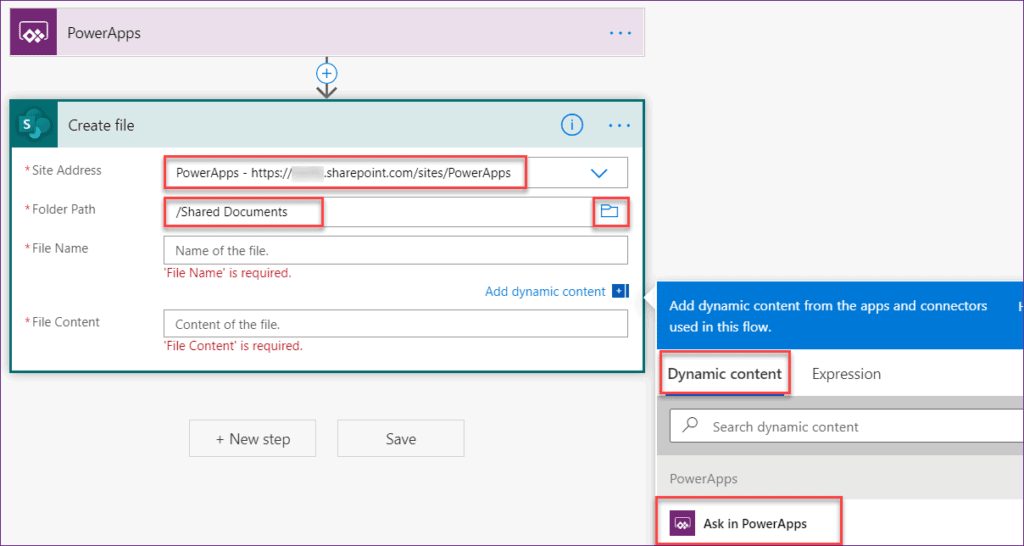
As we chose Powerapps to trigger the flow, so the Powerapps action will be added automatically in the flow. Then add a SharePoint action named “Create file“. Provide the details to below fields as:
- Site Address: Provide the SharePoint Site address Url.
- Folder Path: From the Show picker option, select a folder path where you want to upload the image. It must start with an existing library. Also, you can add folders if needed.
- File Name: For the File Name, Click “Ask in PowerApps” from the Dynamic content. It will generate an input variable named Createfile_FileName. Just add it.
- File Content: Similarly, for the File Content also, Click “Ask in PowerApps” from the Dynamic content and add the variable named “Createfile_FileContent“.
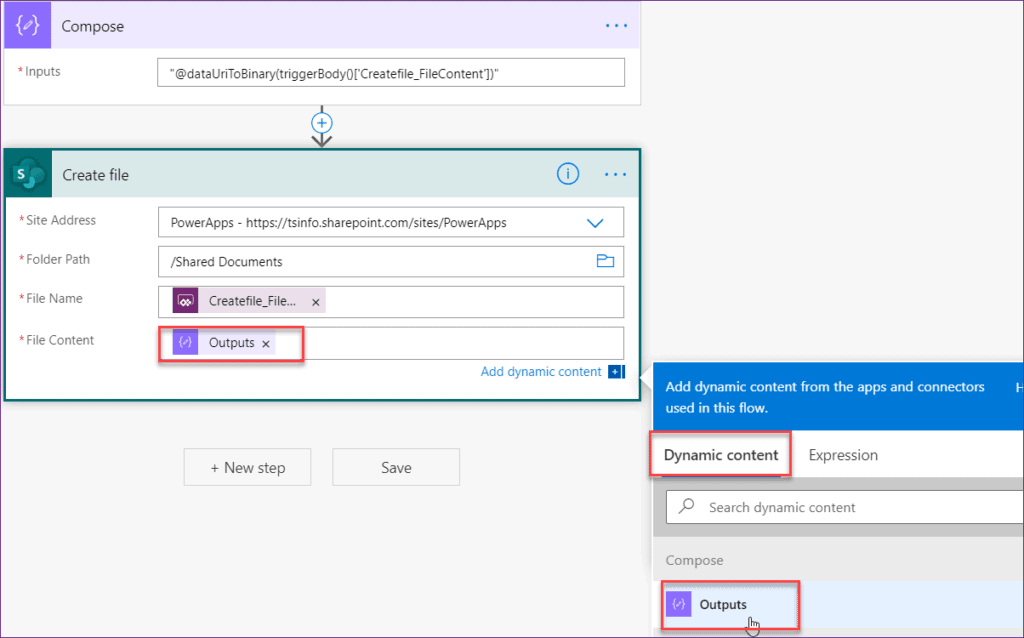
Now add a Compose action (Click on + option-> Add an action -> search Compose in the search box) in between the Powerapps action and Create file action.
This is the step where we will convert the data to binary format. Provide the below formula directly into the Inputs field as:
"@dataUriToBinary(triggerBody()['Createfile_FileContent'])"NOTE:
Do not forget to add the double quotes (““) before and after the expression in the Compose formula, even they don’t show on edit.
Next, you need to change the File Content field in the Create file action. Delete the File content variable and provide the Output from the Compose step as shown below.
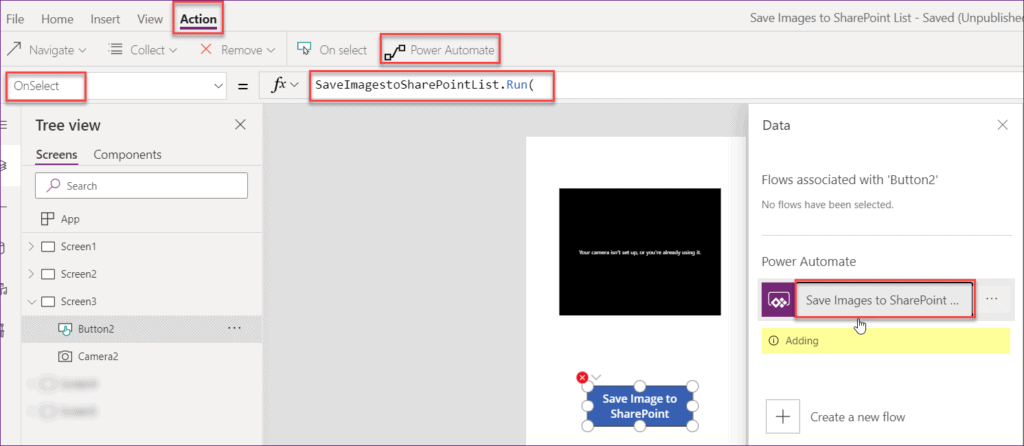
Now save the Powerapps flow and go back to the Powerapps app. Add the flow to the button (Select the Button [Save image to SharePoint] -> Go to Action -> Power Automate -> Add the Flow [Save Images to SharePoint list]. Then the flow will be added to the button.
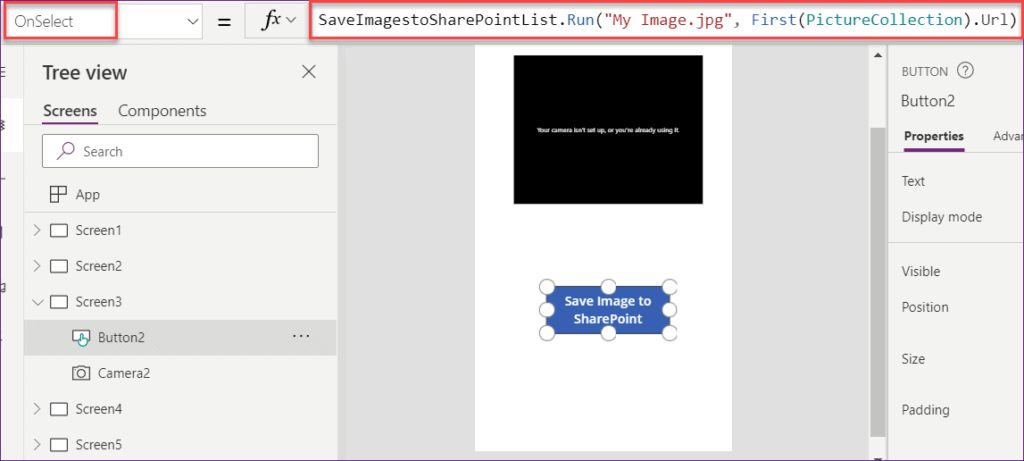
Apply the below formula on Button’s OnSelect property as:
OnSelect = SaveImagestoSharePointList.Run("My Image.jpg", First(PictureCollection).Url)In the above formula, SaveImagestoSharePointList.Run is the name of the Flow that takes two parameters as:
- “My Image.jpg” = Filename
- First(PictureCollection).Url) = It is being the base64 encoded image from the Url parameter of the image.
Preview (F5) the app. Capture a photo by clicking on the Camera and then click on the button to save the image in the SharePoint Library.
Once you go to the SharePoint Document Library, you will see the captured has been stored. You can view the image by clicking on the Name as shown below.

Powerapps take picture button
In most of cases what happens is, People use the Camera controls “OnSelect” to upload the picture. That means they are tapping the screen to take the photo.
But I would like to suggest you have a ”Capture” button at the bottom of the screen to capture the photo. So rather than clicking on the Camera, You can easily use the Capture button. Also, the screen looks like as professional and a simple one.
To do this, follow these below things:
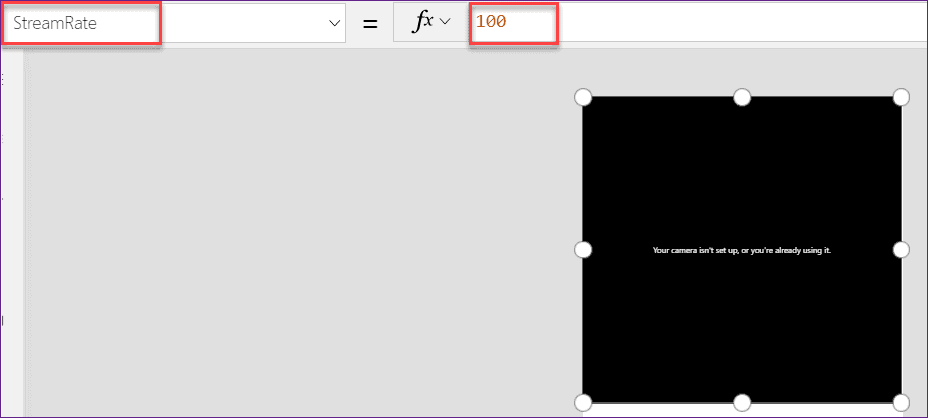
- Take a Camera control and set its StreamRate property as 100 as shown below.
Where, StreamRate property helps to update the image on the Stream property, in milliseconds. You can take this value range from 100 (1/10th of a second) to 3,600,000 (1 hour).
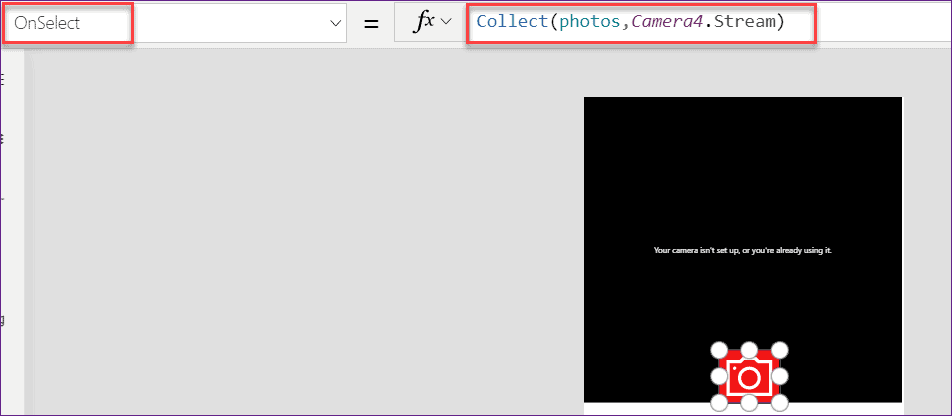
- Insert a Camera icon (Insert -> Icons -> Camera) and apply this below formula on its OnSelect Property as:
OnSelect = Collect(Photos,Camera4.Stream)Where,
- photos = Collection name
- Camera4 = Camera control name
- Now, Select the Camera control and set the Camera property as “0“. Preview the app and take a picture by clicking on the camera button.
- Go to the Collection (View -> Collections) and open with your collection name (photos), you can view the captured image under the Url section.
Also, you may like these below Powerapps Tutorials:
- PowerApps set field value based on another field
- Show hide fields based on dropdown selection PowerApps
- Embed PowerApps in SharePoint modern page
- PowerApps toggle control + How to use with example
- How to use date time picker in PowerApps
- Microsoft flow change true to yes
- PowerApps Timer Control: How to use + start and reset with button
- Create People Picker in PowerApps with Combo Box
- PowerApps Validation: 9 Examples [Required Field, Email, Date, URL, Password, Number, ZIP]
In this Powerapps tutorial, We discussed how to save the recently captured images in SharePoint List or Library using Powerapps.
Also, We learned these below things as:
- What is Powerapps Camera control
- Various Camera control properties in Powerapps
- How to add a picture control in Powerapps
- Save the captured image in SharePoint List without Powerapps flow
- How to upload the image to SharePoint Library using Powerapps
- Powerapps upload image to SharePoint Library using flow
- how to take a picture using Powerapps button
I am Bijay a Microsoft MVP (10 times – My MVP Profile) in SharePoint and have more than 17 years of expertise in SharePoint Online Office 365, SharePoint subscription edition, and SharePoint 2019/2016/2013. Currently working in my own venture TSInfo Technologies a SharePoint development, consulting, and training company. I also run the popular SharePoint website EnjoySharePoint.com
Hello, Bijay Kumar thanks for your detailed guide over camera can you please create a guide for the Add Picture Control of PowerApps.
Thanks
Great post! Thanks a lot 🙂
Very detailed and comprehensive post. Thank you!
I am really happy for the clear steps that i didn’t find in other sites once i search in google. thanks for this. Let me know your email address for the help of some of the power app features guidance.
Hello,
Thanks for your article.
I encounter a problem. When I take a photo, it does not return ‘data/image;png…’
it returns as /SessionStorage/PApp…. and saved into SharePoint list.
It used to work to give me the ‘data/image…’ but today it gives me this.
I am so confused.
Any ideas?
Hi,
The OnSelect = SaveImagestoSharePointList.Run(“My Image.jpg”, First(PictureCollection).Url) seems to require 3 variables, but only 2 are provided in this guide, are you able to update it or suggest a fix?
A bit stuck!
Thanks a lot
Luke
I as well am struggling with this!?!?!?!?!
how to save the collection of Gallery Images after capturing image using Camera Control how to save them into dataverse ?
Thankyou for clear explanation of camera control. I have few doubts that is how to add multiple action camera in powerapp gallery.and the data in gallery has to be updated in sharepoint list.
Do you have an example of blurring the background when taking a picture with the camera?
getting error when i am using flow. SaveimagestoSPLibrary.Run(“Myimage.jpg”,First(Colimages).Value).
Url name is not recognized.
Invalid Arguments