Most individuals would believe that we can use Power Apps to save items in two or more SharePoint Lists.
Yes, we can quickly use the Power Apps Patch Function to insert and save many records to multiple SharePoint Lists.
In this Power Apps tutorial, I will explain to you how to join two SharePoint lists in Power Apps and how to save data to multiple SharePoint lists in Power Apps canvas app with various examples like:
- Submit data to multiple SharePoint lists without using the Power Apps Form.
- Save data to multiple SharePoint lists using the Power Apps Edit form.
How to Save Data to Multiple SharePoint Lists in Power Apps
So let’s proceed working with PowerApps patch multiple records in multiple SharePoint lists step by step.
Example-1: Save data to multiple SharePoint lists without using Power Apps Form
Here, we will see how to submit data to multiple SharePoint lists without using any Power Apps form.
- Below are two SharePoint lists named Project Details and Client Details.
List-1: [Project Details]
This list has these many columns:
| Column | Data types |
|---|---|
| Project Name | Title – Single line of text |
| Employee Name | Single line of text |
| Employment Types | Choice [Permanent, Temporary, Contract] |

List-2: [Client Details]
This list has these many columns:
| Column | Data types |
|---|---|
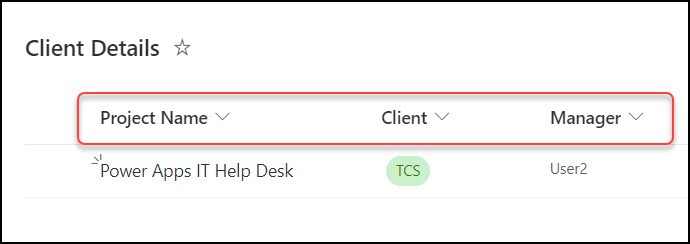
| Project Name | Title – Single line of text |
| Client | Choice [Conros, TCS, Shell, Amgen] |
| Manager | Person |
Refer to the image below:
- In the Power Apps screen, add the controls and set their formula to specific properties as below:
| Name | Control | Property & Formula |
|---|---|---|
| Project Name | Text input | Default = “” |
| Employee Name | Text input | Default = “” |
| Employee Types | Radio | Items = Choices(‘Project Details’.EmploymentTypes) |
| Client | Dropdown | Items = Choices(‘Client Details’.Client) |
| Manager | Combo box | Items = Office365Users.SearchUser({searchTerm:””,top:30}) // need to connect Office365Users connector |
| SAVE | Button | Text = “SAVE” |
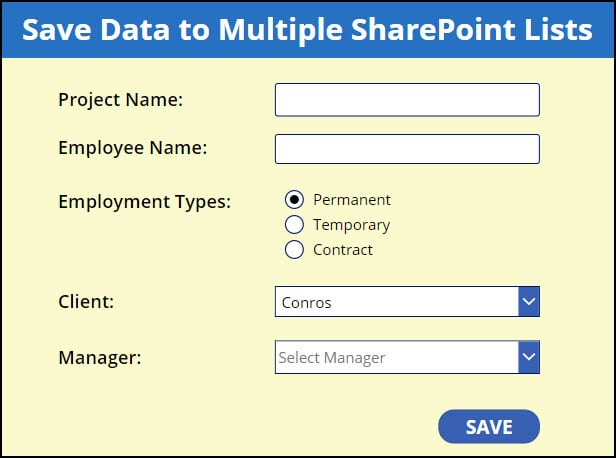
- Once you add all the formulas, the app will look like the screen below. Here, you can see that the first three fields are retrieved from the 1st list [Project Details], and the last two are retrieved from the 2nd list [Client Details].
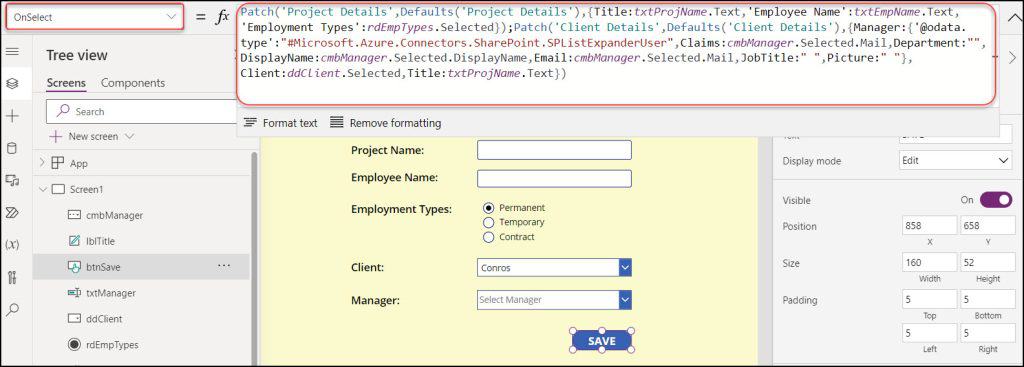
- Next, select the button [SAVE] and apply the code below on its OnSelect property:
OnSelect = Patch(
    'Project Details',
    Defaults('Project Details'),
    {
        Title: txtProjName.Text,
        'Employee Name': txtEmpName.Text,
        'Employment Types': rdEmpTypes.Selected
    }
);
Patch(
    'Client Details',
    Defaults('Client Details'),
    {
        Manager: {
            '@odata.type': "#Microsoft.Azure.Connectors.SharePoint.SPListExpanderUser",
            Claims: cmbManager.Selected.Mail,
            Department: "",
            DisplayName: cmbManager.Selected.DisplayName,
            Email: cmbManager.Selected.Mail,
            JobTitle: " ",
            Picture: " "
        },
        Client: ddClient.Selected,
        Title: txtProjName.Text
    }
)
Where,
- txtProjName = Project name text input control name
- txtEmpName = Employee name text input control name
- rdEmpTypes = Radio button control name
- cmbManager = Combo box control name for manager
- ddClient = Dropdown control name for the client
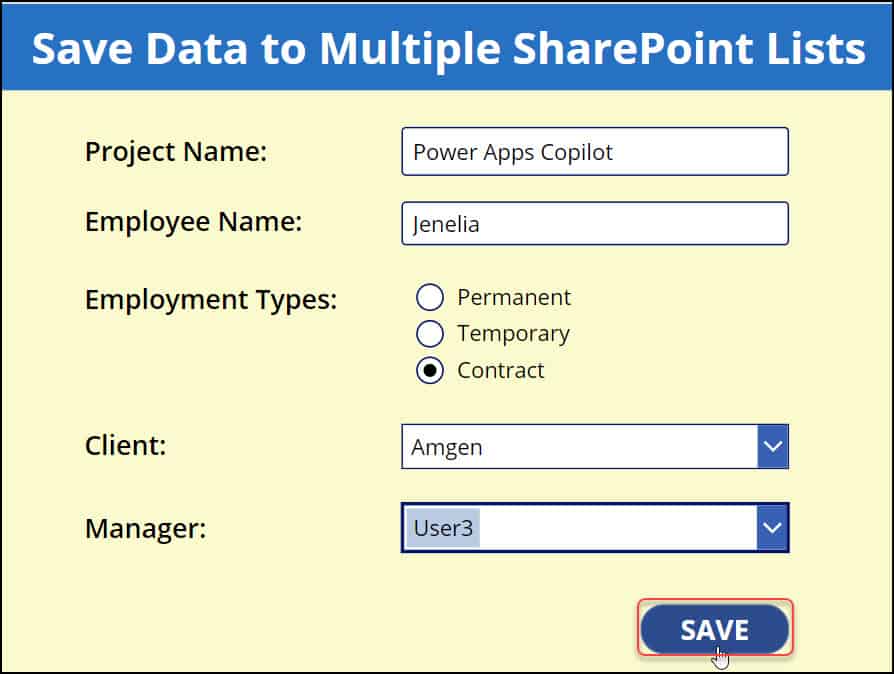
- It’s done. Just save, publish, and preview the app. Enter all the field records and tap on the SAVE button.
- Finally, refresh both of the SharePoint lists, and you can see the new record has been added to both lists, as shown in the image below.

This way, we can save data to multiple SharePoint lists in Power Apps.
Power Apps Join Two SharePoint Lists
Let’s discuss another approach to submit data to multiple SharePoint lists using the Power Apps form.
- There are two SharePoint lists. Such as:
List-1: [Car Rental Services]
This list contains the columns below:
| Column | Data type |
|---|---|
| Car Name | Title – Single line of text |
| Car Type | Choice [Manual Transmission, Automatic Transmission, Continuously Variable Transmission, Semi-Automatic Transmission] |
| Seats | Number |

List-2: [Car Gears]
In this SharePoint list, create the same columns as the first one. You can change the column name but create one with the same data type as the first list.
| Column | Data type |
|---|---|
| Name | Title – Single line of text |
| Gear Type | Choice [Manual Transmission, Automatic Transmission, Continuously Variable Transmission, Semi-Automatic Transmission] |
| Seats | Number |

- In the Power Apps screen, insert an Edit form and a Save icon on the top right corner of the form.
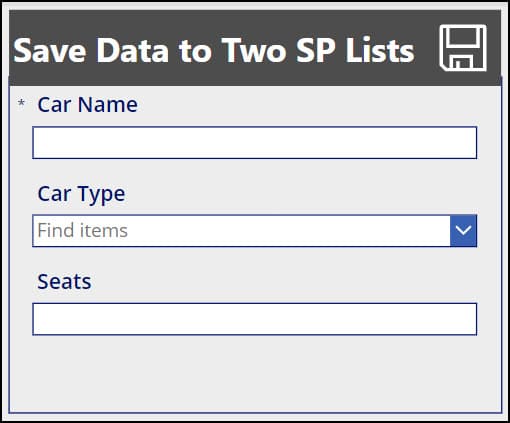
- Next, connect the first SharePoint list to the edit form as:
DataSource = 'Car Rental Services'
- Select the Save icon and apply the code below on its OnSelect property as:
OnSelect = Patch(
    'Car Gears',
    Defaults('Car Gears'),
    {
        Title: DataCardValue1.Text,
        GearType: {Value: DataCardValue2.Selected.Value},
        Seats: Value(DataCardValue14.Text)
    }
);
SubmitForm(Form1);
ResetForm(Form1)
Where,
- DataCardValue1 = Data card value of title [Text type]
- DataCardValue2 = Data card value of gear type [Choice type]
- DataCardValue14 = Data card value of seats [Number type]
- Form1 = Edit form name

- At last, save, publish, and preview the app. Enter all the field values and tap on the Save icon button.
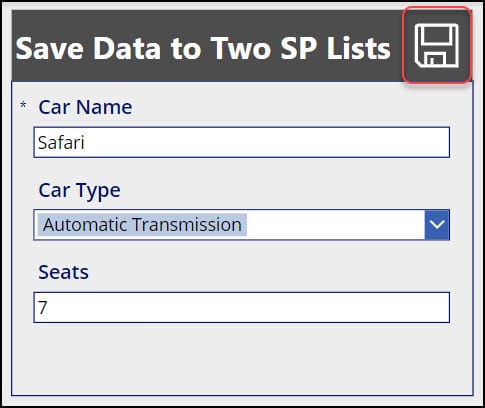
- The image below shows that the new record has been added when you reload both SharePoint lists.

This way, we can save data to SharePoint lists using the Power Apps edit form.
Conclusion
Power Apps saving data to a single SharePoint list is a basic thing that users can achieve easily. However, submitting Power Apps data to multiple SharePoint lists is tricky.
From this article, I hope you got an overall idea of how to save data to multiple SharePoint lists in Power Apps with various scenarios like:
- Save data to multiple SharePoint lists without using the Power Apps Form
- Submit Power Apps forms data to multiple SharePoint lists
Additionally, you may like some more Power Apps tutorials:
- Power Apps Data Table
- Export Data from Data Table to Excel in Power Apps
- Create Multiple Tabs in Power Apps Form
I am Bijay a Microsoft MVP (10 times – My MVP Profile) in SharePoint and have more than 17 years of expertise in SharePoint Online Office 365, SharePoint subscription edition, and SharePoint 2019/2016/2013. Currently working in my own venture TSInfo Technologies a SharePoint development, consulting, and training company. I also run the popular SharePoint website EnjoySharePoint.com
Hi Bijay,
thanks for your great blog, i found it very useful to learn basics and also more advanced staff in the power platform.
im dealing now with scenario similar to what you described in this post, except that it is in a gallery and i need my ‘Save’ button to update the records that were updated by the user in the gallery.
1. how the solution change to accommodate it?
2. how can i update only the changed items rather than the whole?
as for the comment from Ibrahim Ersoy, is this mean you dont recommand to use patch for update gallery records?
will apprecuite your reply.
Eyal P
Hello, how do you extract the data from a boolean? Since I have the Sharepoint list column as Yes/No, I need the value to be a boolean too.
Hi Jaen,
For the SharePoint boolean value, you can use a Power Apps Toggle control.
You can refer to this link: https://www.spguides.com/powerapps-toggle-control/#PowerApps_toggle_sharepoint_list