You know, a Copilot control was recently added to the Power Apps Canvas app. Indeed, it’s simply a good feature in Power Apps.
In this Power Apps tutorial, we will discuss everything related to Power Apps Copilot control and how to add Copilot to Power Apps Canvas app.
Additionally, I will show you how to enable Copilot for your environment, enabling Copilot for the Power Apps Canvas app, and adding a Copilot control to the app with a simple example.
Power Apps Copilot Control
A next-generation AI assistant called Copilot Control is available for developers to integrate into their canvas apps for end users.
With natural language interaction and artificial intelligence, app users can now gain information on the data within their apps.
Power Apps Developers can insert this control into the canvas app and choose what information he/she wants from the chatbot control, which will respond according to their needs.
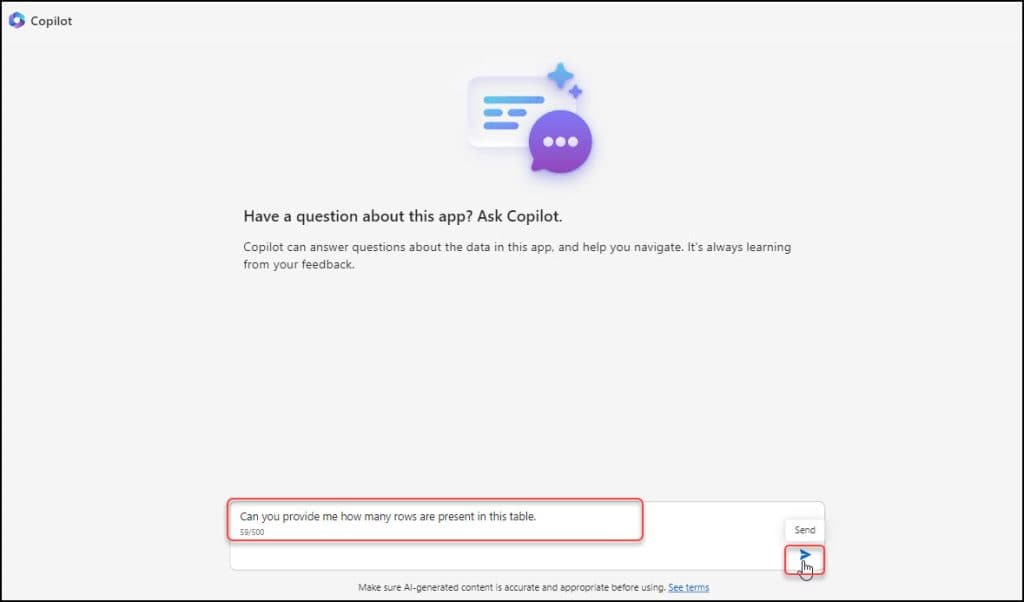
The image below represents how Copilot control looks like in the Power Apps canvas app:
Important Notes:
- Your environment needs to be in the US region to utilize this feature.
- Copilot control is incompatible with or functional in environments using lockboxes or customer-managed keys (CMK).
- Preview features may have limited functionality and aren’t intended for use in production.
- Using copilots in Power Apps requires allowing data flow across regions for generative AI features. This step is crucial if the environment and your organization are located in different regions.
This is the overview of Power Apps Copilot.
How to Add Copilot to Power Apps
Next, we will see how to add a copilot to the Power Apps Canvas app. For this, we need to follow the steps below:
- Enable Copilot for your Power Platform environment.
- Enable the Copilot Component for a Power Apps Canvas application.
- Add Copilot control to your Power Apps Canvas app.
- Choose data for Copilot in Power Apps.
Enable Copilot for Power Platform environment
A canvas app’s admin must activate the feature before end users can access the Copilot chat experience.
It also permits users to use model-driven apps (preview) and an AI-powered chat experience in Canvas to analyze data in the environment.
Refer to the instructions below to enable the Copilot feature in your environment:
1. Log in to the Power Platform admin center.
2. Go to the Environments [from the left nav] -> Select the Developer environment that you want to enable the feature -> Click on ellipses (…) -> Settings.
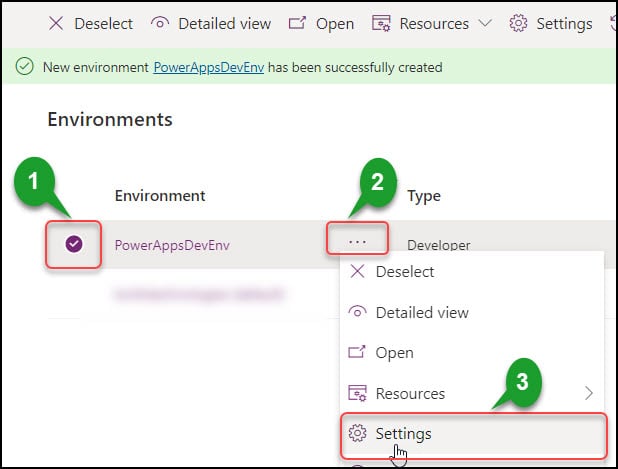
3. On the Settings page, expand the Product settings -> Click Features. Under the Copilot category, enable the features below:
1. Allow canvas editors to get AI-powered answers to how-to questions and AI Builder GPT experiences currently in preview.

2. Allow users to analyze data using an AI-powered chat experience in canvas and model-driven apps.
Click on the Save button at the bottom of the page.
Refer to the screenshot below.
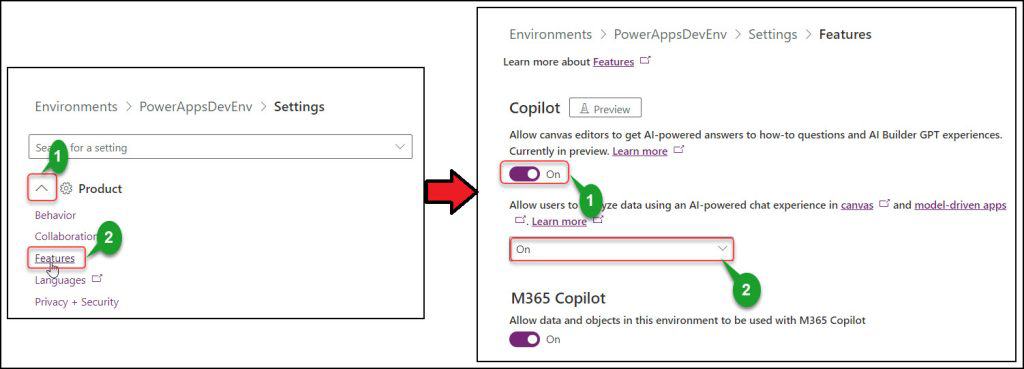
After turning on the feature setting, an app developer can add the Copilot control to the app and enable the Copilot component from Power Apps Studio’s app settings, enabling end users to enjoy the AI-powered chat feature.
This is how we can enable the Copilot for the Power Platform environment.
Enable the Copilot Component for a Power Apps Canvas Application
Next, we must enable the Copilot component for a specific Power Apps canvas application. Then, the user can view and use the Copilot control option in the app.
1. Sign in to Power Apps with valid Microsoft 365 credentials and open your Power Apps Canvas app.
2. In the app, click on the top horizontal ellipses (…) -> Settings as shown below.
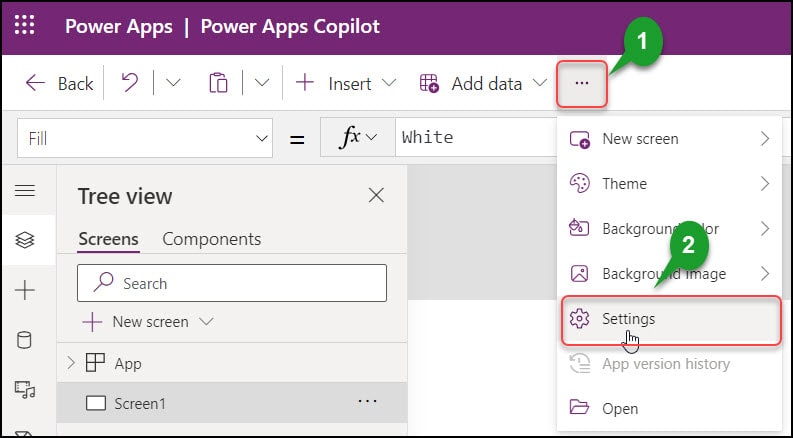
3. Go to the Upcoming features -> Click on Preview -> Enable the Copilot component (by default, it will be in enable mode; if not, make it on).
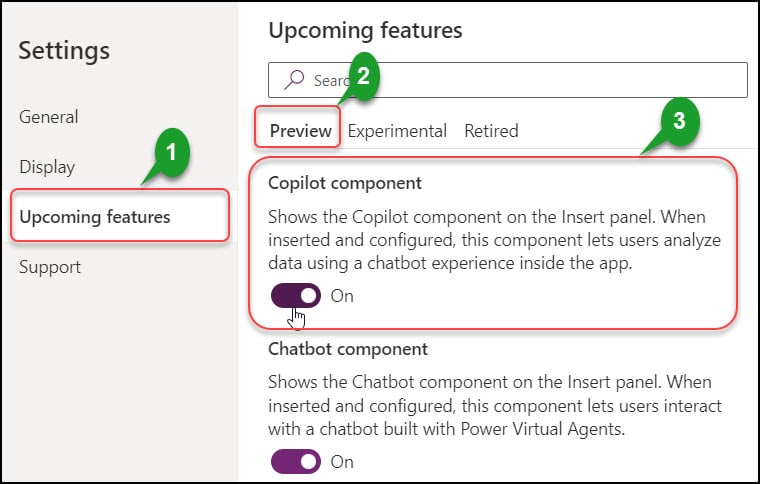
NOTE:
Ensure that your browser’s language is set to English (United States).
This is how to enable the Copilot component in the Power Apps Canvas application.
Add Copilot Control to Power Apps Canvas app
Now it’s time to add the Power Apps Copilot control to the canvas application.
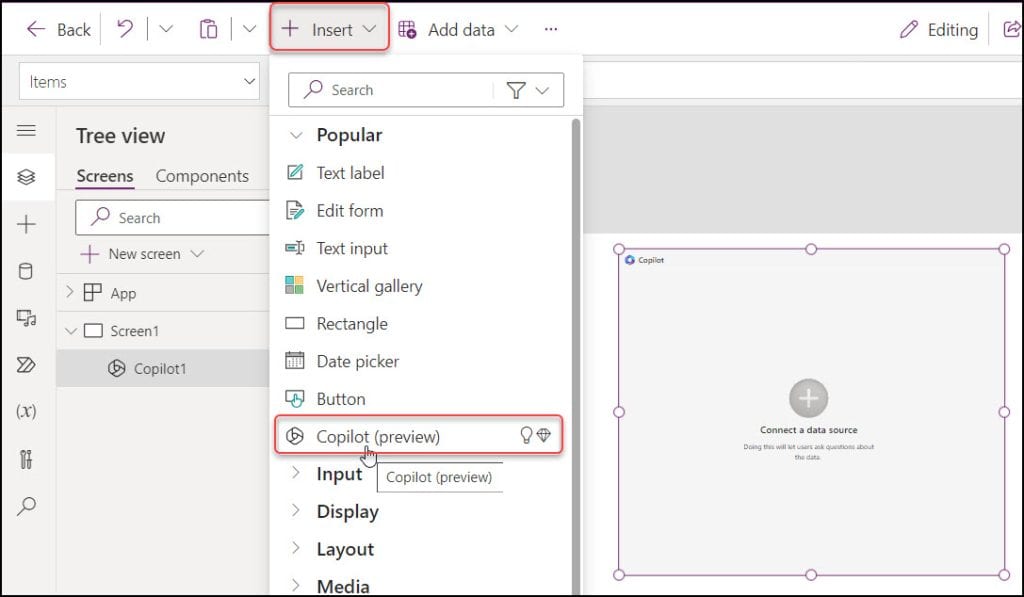
1. Go to the + Insert tab -> Click Copilot (preview) control.
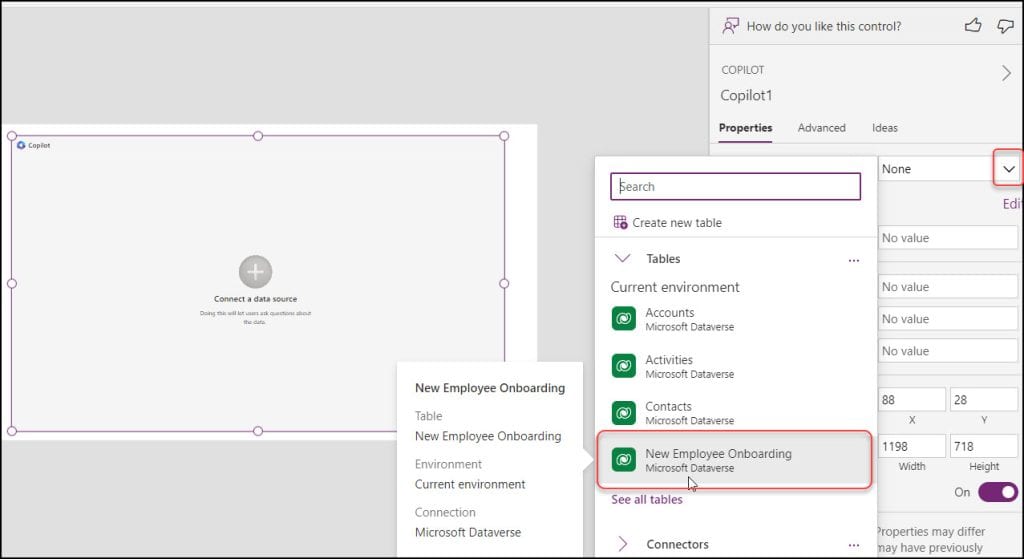
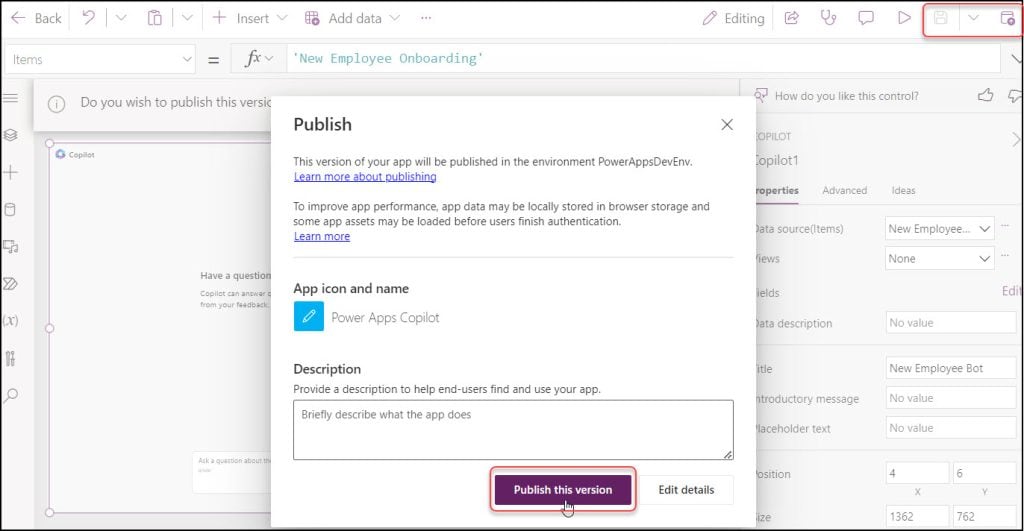
2. Select the Copilot control -> Set its Data source(Items) property to any Dataverse table. Here, I have chosen a Custom Dataverse table named New Employee Onboarding.
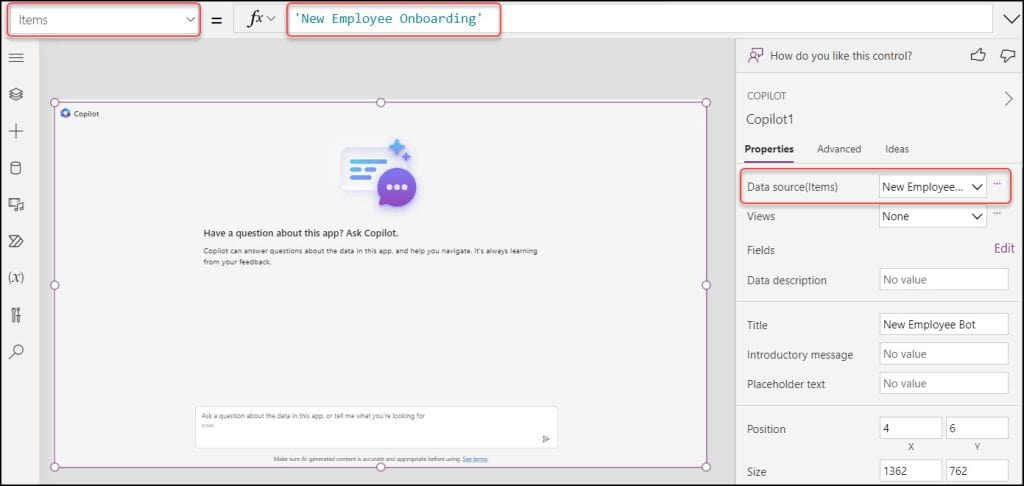
3. Once you choose the Datasource, the Items property of the Copilot control will be the Dataverse table name:
Items = 'New Employee Onboarding'Also, you can select any Views from the Properties pane.
4. Save and Publish the app. Click on the Publish this version.
5. Now, preview the app.

Ask a question about your app or related to the specific table. Click on the Send button.

6. Next, it will take some time to respond. After a while, it will give the result according to your question, as shown in the figure below.
NOTE:
Copilot can only answer questions for smaller datasets in a canvas app. The only exception to the dataset limit is when a Dataverse table is selected as the data source.
If the user question is not related to the app, then it will send a message:
Sorry, I don’t know that one yet. but I’m always learning.

This way, we can add a Copilot control to the Power Apps Canvas app.
Conclusion
I hope that this Power Apps guide covered everything there is to know about adding Copilot to the Power Apps Canvas app and using Power Apps Copilot control.
I also showed you how to enable Copilot for the Power Apps Canvas app, enable Copilot for your environment, and add a Copilot control to an app using a basic example.
Additionally, you may like some more Power Apps tutorials:
- Get First Item in Power Apps Collection
- Embed Power Apps in SharePoint
- Power Apps Save Collection to SharePoint List
I am Bijay a Microsoft MVP (10 times – My MVP Profile) in SharePoint and have more than 17 years of expertise in SharePoint Online Office 365, SharePoint subscription edition, and SharePoint 2019/2016/2013. Currently working in my own venture TSInfo Technologies a SharePoint development, consulting, and training company. I also run the popular SharePoint website EnjoySharePoint.com