While working with Power Automate flows, a lot of times you will get a requirement of how to get manager details in Power Automate. In this Power Automate tutorial, I will explain in detail, how to get the manager details of a user in Power Automate.
I will also go through how to add a manager to a user in Azure Active Directory. Then we will walk through the steps and actions (Power Automate get manager v2) to get the user Manager details in Power Automate.
For some of the workflows in Power Automate, we need the Manager display name, email, and other details.
Here are some of the workflows, you can think of:
- In many organizations, employees need to apply for leave for various reasons, such as vacation, sick leave, or personal time off. These leave requests usually require approval from the employee’s manager. We can automate this leave request and approval process using Power Automate. And in this case, we need to get the employee’s manager’s email address in the flow.
- In many organizations, employees must submit expense reports for reimbursement. These reports often require approval from the employee’s manager, and it will forwarded to the Finance team. We can automate the expense reimbursement and approval process using Power Automate.
Now let’s see how to add a manager to the User/ Employee in Azure Active Directory.
Assigning Manager Details to a User in Azure Active Directory
If you are new to Azure AD and not sure how to assign a manager for a user in an active directory, Here we will see how to assign Manager details to the User In Azure Active Directory.
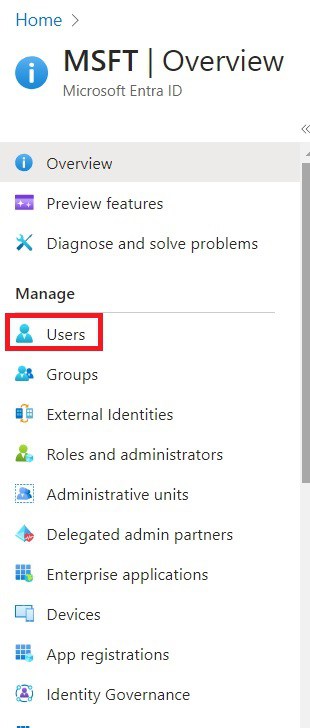
1. Open Azure Active Directory, and then in the Left navigation under ‘Manage‘ select the ‘Users‘ option.
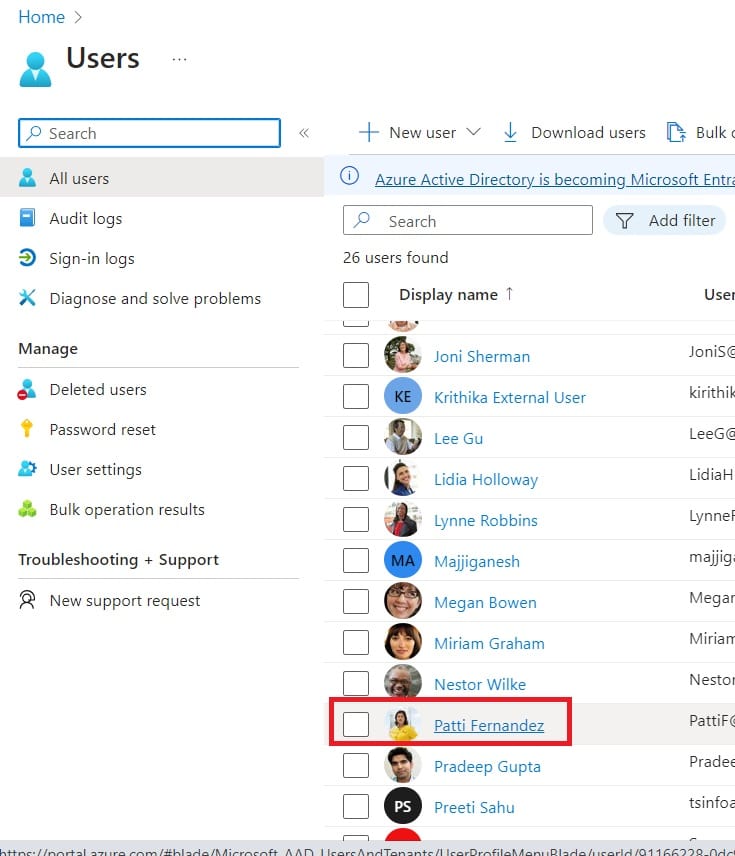
2. From the All users page, select the particular user as I have selected ‘Patti Farendez’
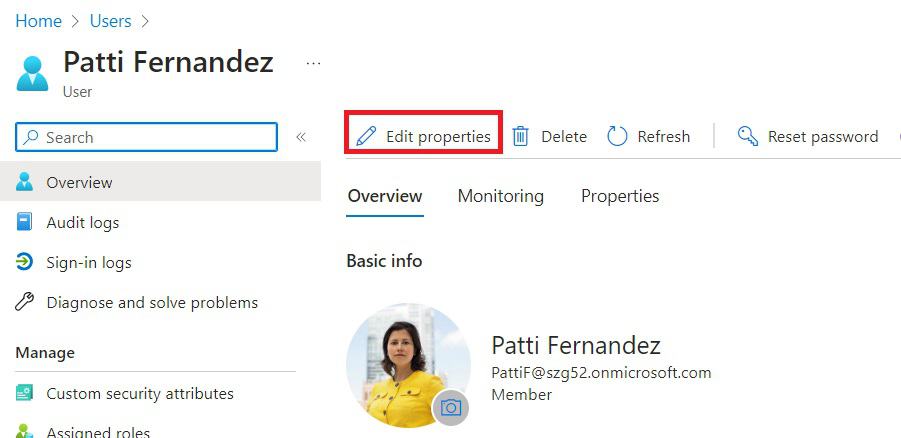
3. Next, click on the Edit properties icon to edit the user profile and add manager to it.
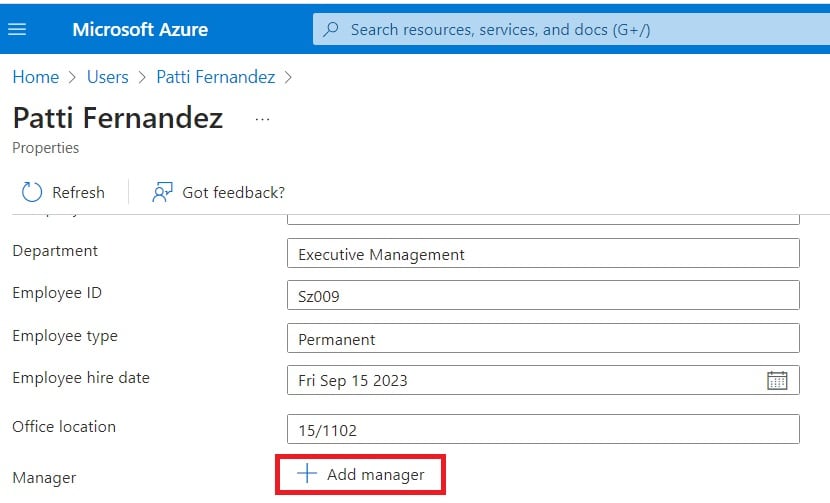
4. Now you can see the properties related to the user, so if you scroll down, you can see the Manager properties. By clicking on the +Add manager icon, we will add the Manager.
5. Now select the Manager details, and then click on the Select button.
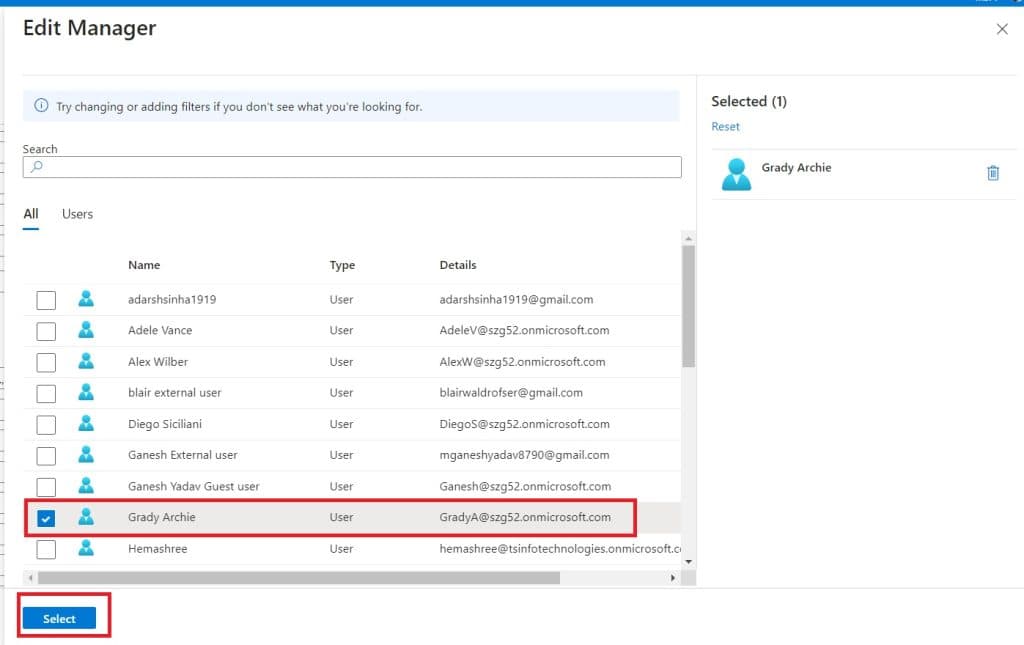
You can see the Manager is added and click on Save.
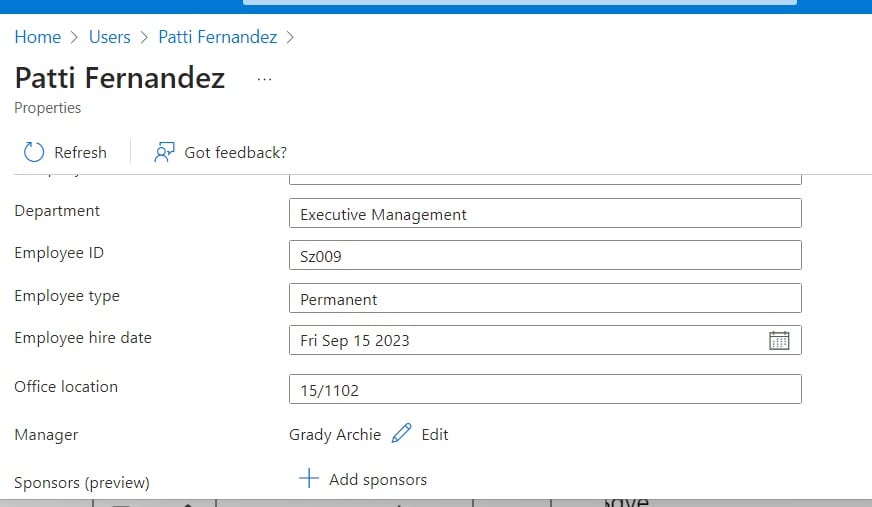
This is how to add Manager details to a user in Azure Active Directory. Next, we will see how we can access the Manager details using Power Automate.
How to Get Manager Details in Power Automate using Office 365 user connectors
Here we will see how to get the manager details in Power Automate by using Office 365 user connectors.
Example 1: (get manager v2 in Power Automate)
For this I have created an Instant Cloud flow, that will trigger manually, take the user email as input, and get the manager details in Power Automate. Then we will send the Manager details via email.
1. Open Power Automate Cloud, and then click on the +Create button -> select Instant Cloud Flow.
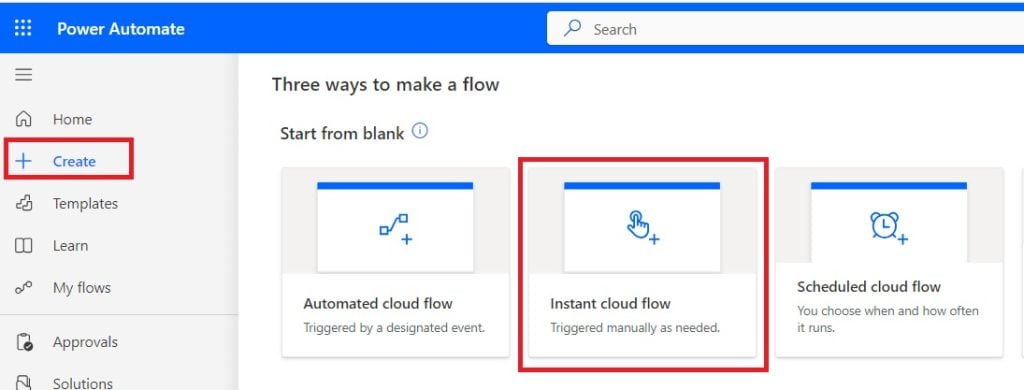
Then provide the flow name, select Manually trigger a flow action, and then click on the Create button.
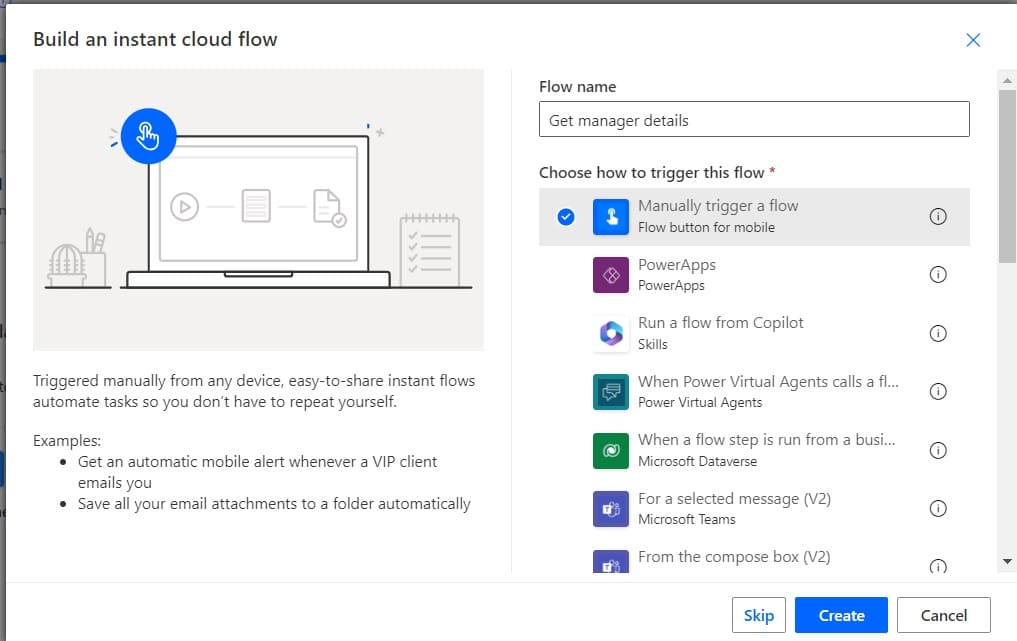
2. Next you can see that Manually triggered flow is added to the flow page. Here, click on +Add an input icon, then select the Email button, and the email field is added.
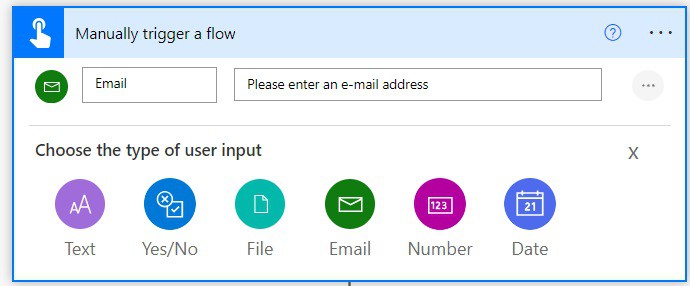
3. Next click on the +New step -> select ‘Get manager(V2)‘ action in Power automate. Then in the User(UPN), provide the email from dynamic content.

4. Next we will send the manager details with email in Power Automate. For this click on the +New step -> select ‘Send an email V2‘ action. Then provide the To, subject, and body like below to get the details of the manager like name, mail, and department.
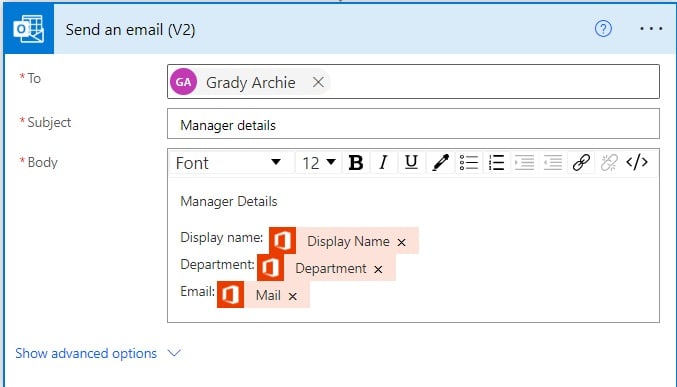
5. Now run the flow manually and provide the user email, to get the manager details in Power Automate.
Once you run the flow, you can see the below email, which contains manager details.
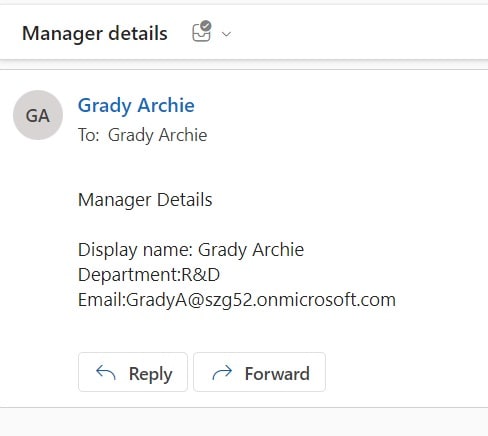
This is one way to get manager details in Power Automate.
Example 2: (Search for users v2 in Power Automate)
We will create an instant cloud flow, which will get the manager of the employee. For this, we will get the user’s UPN or email ID and then pass it to the Get Manager (V2) action, which will return the manager of the employee.
1. Open Power Automate Cloud, and then click on the +Create button -> select Instant Cloud Flow.
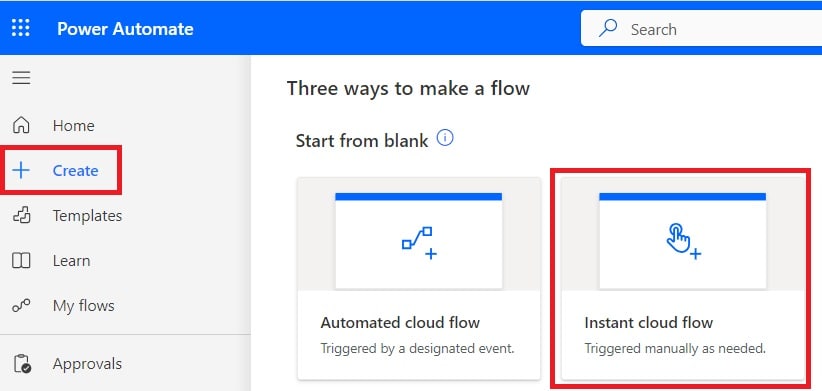
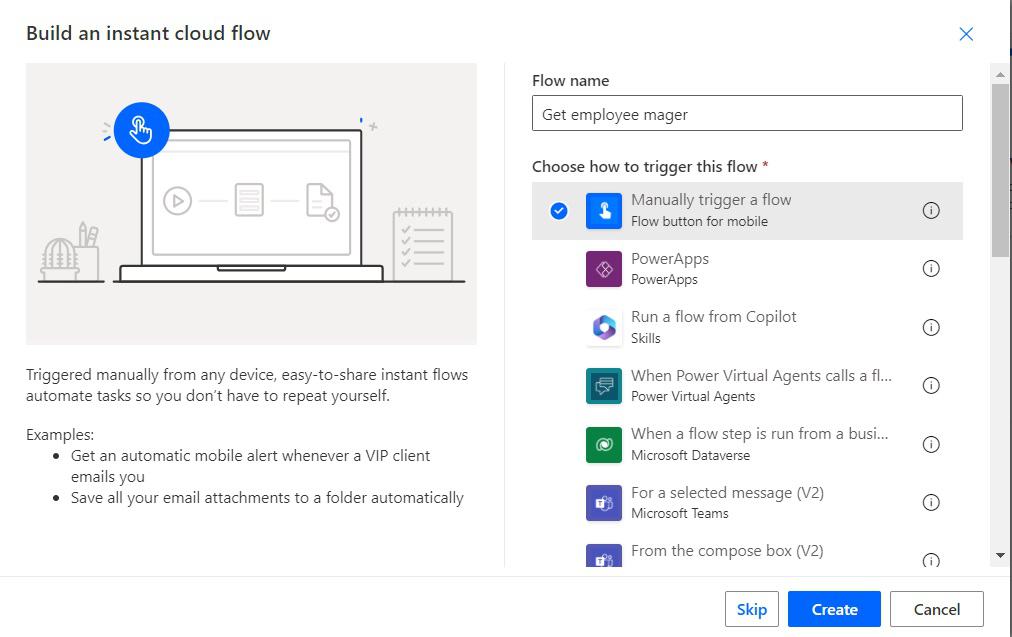
2. Provide the flow manage and select manually trigger a flow action. Then click on the Create button.
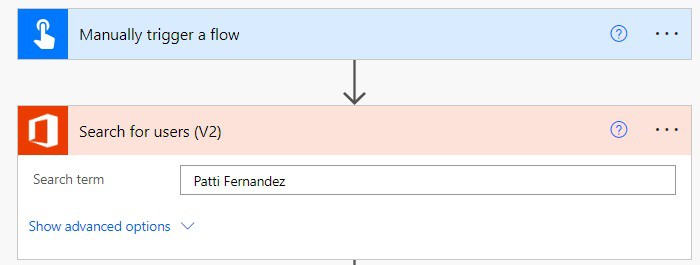
3. Now you can see that Manually triggered flow is added to the flow page. We will get the user UPN or email ID; for this, click on the +New step -> select ‘Search for user(V2) action. Then provide the Search term like Patti Farnendaz.
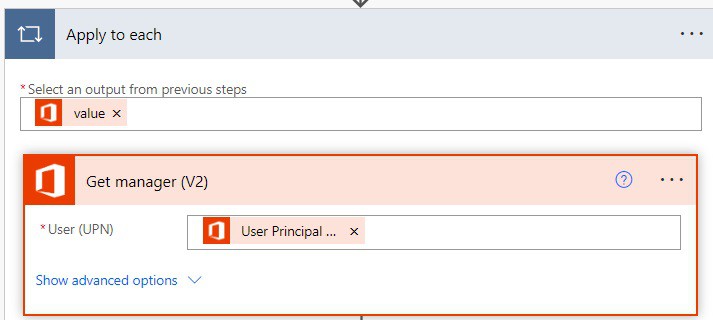
4. Next we will get the employee manager, for this click on the +New step, select ‘Get manager(V2) action. Provide the UPN, and select the UPN from dynamic content like below. This will add Apply to each action to the flow.
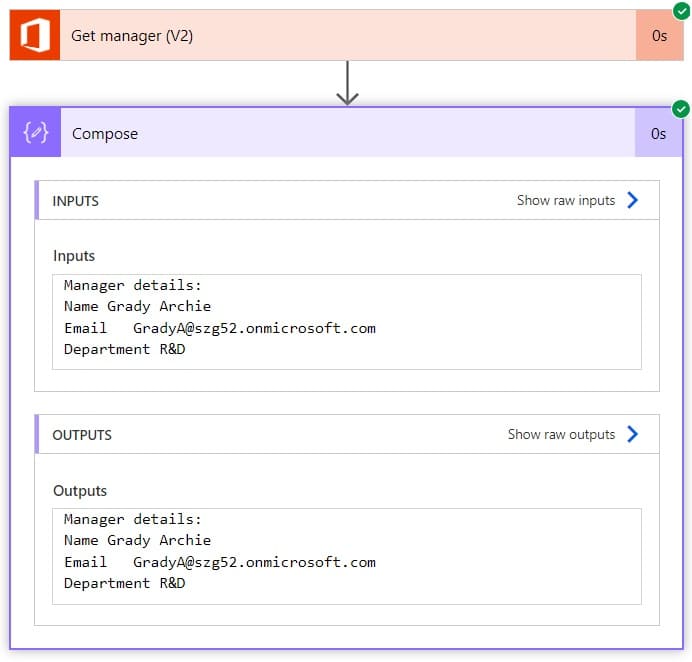
5. To display the result I have added a compose action; provide the details below in the input field:
Manager details:
Name@{outputs('Get_manager_(V2)')?['body/displayName']}
Name   @{outputs('Get_manager_(V2)')?['body/mail']}
Department @{outputs('Get_manager_(V2)')?['body/department']}
6. Now run the flow manually, and you can see the Patti Fernandez manager details in Power Automate.
Conclusion
In this Power Automate tutorial, we saw how to assign a manager to an Employee in Azure Active Directory. Also, we saw how to get the manager details in Power Automate using the action ‘Get Manager (V2). I have explained, how to get manager details like email, id, and display name in Power Automate. This is how to get manager in Power Automate.
You may also like:
- Power Automate delete emails older than
- How to check if a file exists in the SharePoint document library in Power Automate?
- Create SharePoint List Views using Power Automate
- Update SharePoint List Field with today’s date in Power Automate
I am Bijay a Microsoft MVP (10 times – My MVP Profile) in SharePoint and have more than 17 years of expertise in SharePoint Online Office 365, SharePoint subscription edition, and SharePoint 2019/2016/2013. Currently working in my own venture TSInfo Technologies a SharePoint development, consulting, and training company. I also run the popular SharePoint website EnjoySharePoint.com
Hi, Thanks for the article.
I have a question to which I have troubles to reply.
The flow you designed works under a user account, and if the account is blocked, or MFA is required, that may cause issue. Even worse if the user is no more in the organization, the flow is not usable.
Are you aware of any combination of solution like https://docs.microsoft.com/en-us/sharepoint/dev/solution-guidance/security-apponly-azureacs that would allow us to create flows (or Azure Logic Apps) without relying on a username and password?