In this SharePoint tutorial, I will show you how to use the modern and attractive hero web part in SharePoint Online. I will show how to customize a SharePoint Online hero web part to display images, texts, documents, etc.
- SharePoint hero web part more tiles/SharePoint hero more than 5 tiles
- SharePoint online hero image size
- SharePoint online hero web part opens in a new tab
- SharePoint online hero web part full-width
- SharePoint hero web part audience targeting
SharePoint Online Hero Web Part
- The SharePoint hero web part is one of the most commonly used web parts that allow us to display five items like documents, images, texts, etc.,
- By default, whenever the user creates a SharePoint site, it displays the site page with the hero web part configured with default links, images, and text.
- We can also change the default values that are configured in the SharePoint Online hero web part.
How to add Hero Web Part in SharePoint online
Let us see how to add a hero web part to the SharePoint Online site page,
- Open the SharePoint site page in edit mode and Select Edit Page in the top right corner of the SharePoint site page.
- Add a new Section layout. Select the Hero web part by clicking the plus sign (+) in the circle.
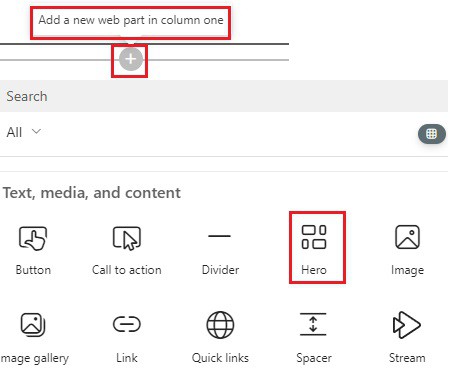
Once the hero web part is added, by default, it displays the web part in the tiles layout categories with five tiles layout options as shown below:
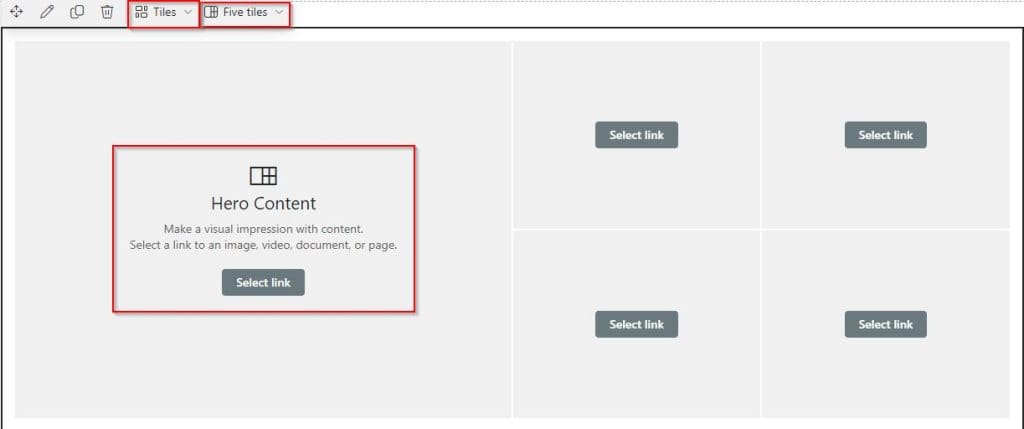
For each tile, a select link option is presented. Click on the select link, and it will redirect to the page where we can see the various options below:
- Recent -> Displays the recently opened files on the SharePoint site page.
- Stock images -> We can also add stock images provided by Microsoft to the hero web part.
- Web search-> Using the web search option, we can search images from Bing search or web search to the hero web part presented on the SharePoint site page.
- One Drive -> Also, we can choose the image or document from OneDrive.
- Site -> We can add documents and images from a SharePoint Site to the hero web part.
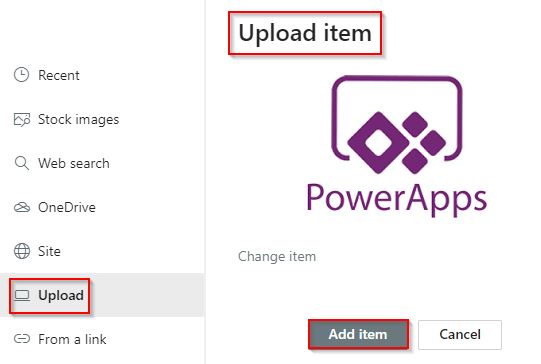
- Upload -> Upload an image document or page to a Hero web part from the Local system.
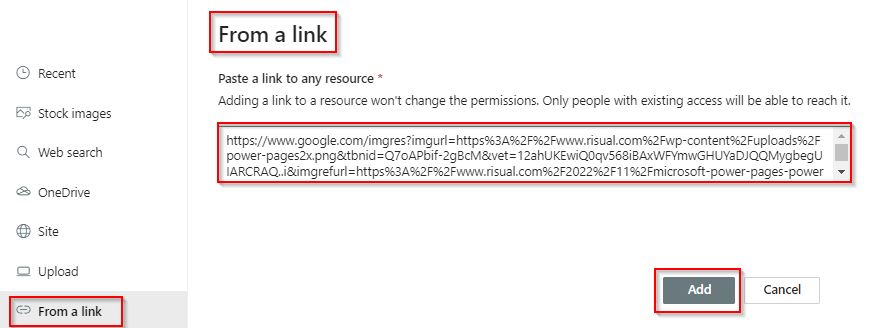
- From a link -> Paste the link for an image or page to display it into the hero web part.
In this example, I have selected an upload option and uploaded the image from my local system; once the image has been added, select Add item. It will be automatically added to the selected tile.
Similarly, choose the select link option and upload images for the other four tiles presented in the hero web part.
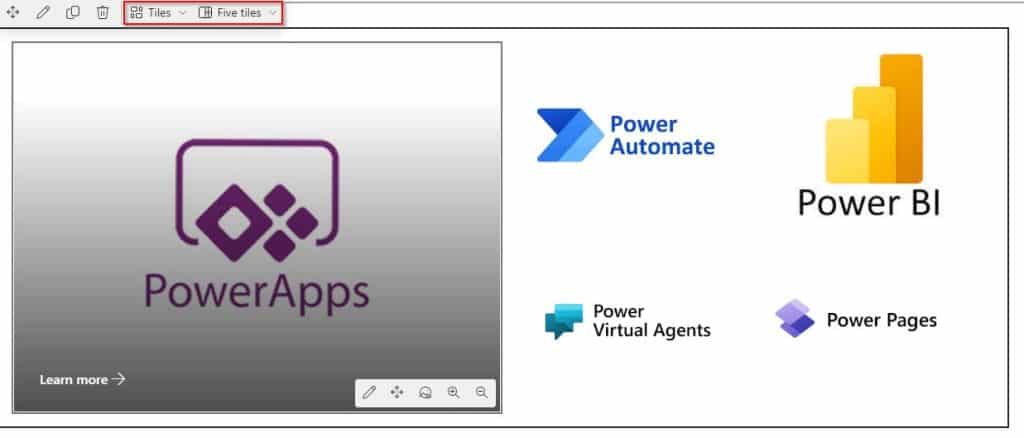
By clicking on the edit icon presented in each tile, we can add and change the Title of the tile, Background Image, Options, and Accessibility.
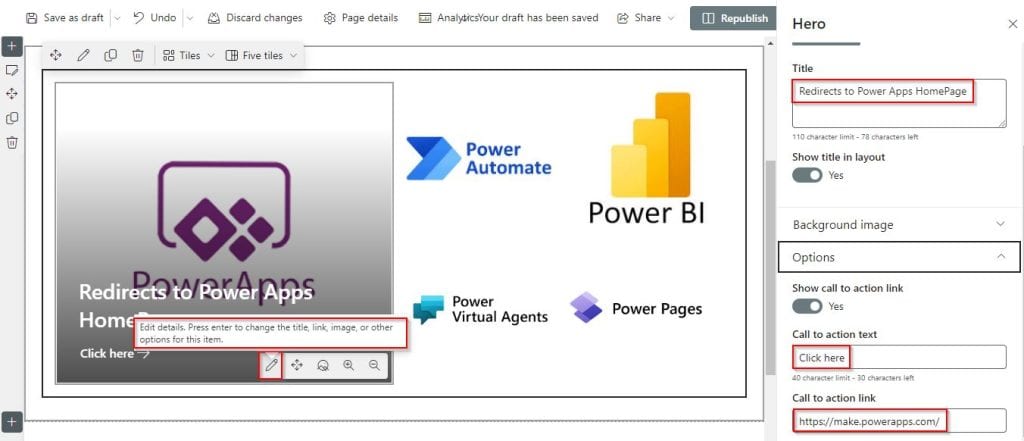
In the same way, choose the edit icon option and add the title for the remaining four tiles presented in the hero web part.
We can view the call to action link for the first tiles presented in the hero web part. Click on the Save as a draft mode to save the changes and select the Republish option.

If we want to view the hero web part in the layers layout category, we can edit the hero web part, and from the dropdown, we can choose the layout category as layers.
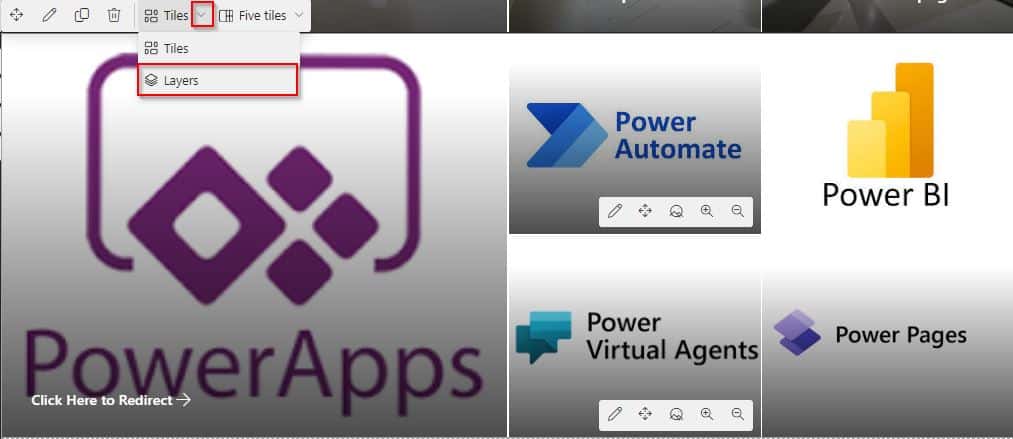
In the screenshot below, we can see that the modern SharePoint hero web part displays the content in the layers layout category.

This is how to add a hero web part to the SharePoint Online site page.
SharePoint hero web part more tiles
- In the SharePoint Online hero web part, By default, the hero web part provides five tiles; we can select up to 5 tiles in the hero web part.
- Adding more than 5 tiles in a SharePoint Online hero web part is impossible.
SharePoint online hero image size
We will discuss the SharePoint Online hero web part image sizing and scaling based on the selected layout and device access to the SharePoint page.
- The hero web component is designed with a full-bleed layout to fit the screen’s width.
- Videos can be added or uploaded to the hero web part. But cannot play within the hero web part.
- The user can select the video or the video source URL to play a video.
| Layout categories(Tiles) | Layout categories(Layers) |
| Height of the layout tiles is scaled as a ratio of 8:3, and the images inside within the hero web part title layout is a ratio of 4:3. | Images used in the carousel layout for the hero web part Tile in mobile devices is at 16:9. |
| The height of the layout tiles is scaled as a ratio of 8:3, and the images inside within the hero web part title layout is a ratio of 4:3. | Each layer in the layers layout scales is a ratio of 8:3, and images within the hero web part for every layer scale a ratio of 9:16. |
SharePoint online hero web part opens in a new tab
Let us see how to open the Hero web part images and links in a new Modern SharePoint site page tab.
Yes, opening the image content in a new tab is possible. Also, by default, it allows the External URLs to open in the new tab in the SharePoint Online hero web part.
Hero web part – (Internal content)
In the hero web part, if we want to view the content in a new tab. Then, for the internal site, we have right click on the image -> select opens image in a new tab.
Select the Published page, and from the Hero web part, select any image tile and choose open image in a new tab.

Hero web part – (External Link)
External links automatically open the image content or links in the new tab.
I have shown you how to add an external image URL to the hero web part tile.
- Click on the Edit Page button at the top right of the SharePoint site page.
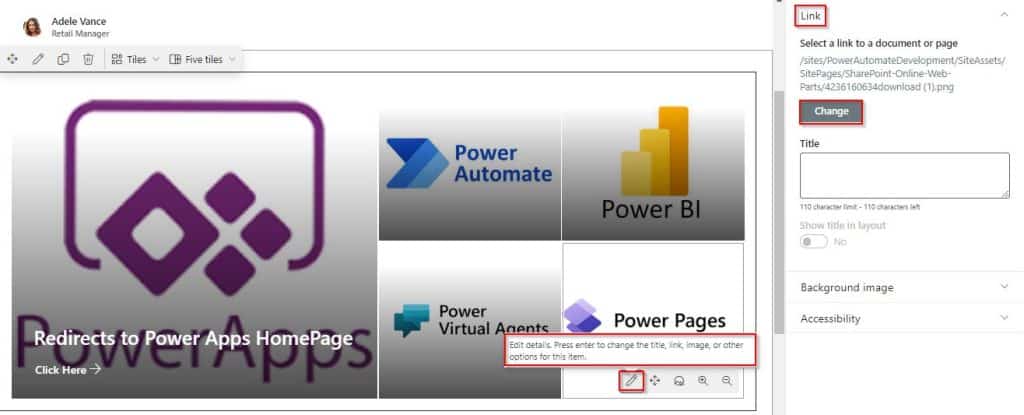
- Select the hero web part, choose any tile, and click on the change option as highlighted below:
Provide the external image URL, and choose the Add option.
- Select republish. Once the page has been published, click on the hero web part and select the highlighted (Power Pages tile), which has an external link. When you select the link, it automatically opens the image in a new tab.

This is how to open the Hero web part images and links in a new tab on the Modern SharePoint site page.
SharePoint online hero web part full-width
Let us see, how to create a SharePoint hero web part full-width column layout.
We can use the hero web part in a full-width section only on the SharePoint Modern Communication Site Page. Because in the SharePoint Online Team site page, the Full-width column layout is not supported for the hero web part.
Hero webpart Layout options are only available for an appropriate window size and screen resolution.
Follow the below steps to add a hero web part with a full-width layout
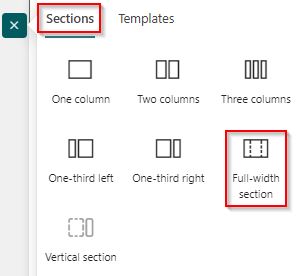
1. Open the SharePoint Online communication site page in Edit Mode, Add a new section, and select the Full-width column layout
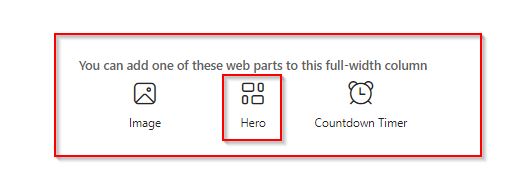
2. From the below different web part options, choose the hero web part, and it will be added to the full-width column layout.
3. Click on the select link, and upload images for all the tiles presented in the hero web part.

Once the images have been added, the hero web part displays images in a full-width column layout.

This is how to create a SharePoint hero web part full-width column layout.
SharePoint hero web part audience targeting
No, Audience targeting is not supported in a Modern SharePoint hero web part. We cannot Restrict or hide the tiles or layers from the users in the modern SharePoint hero web part.
Conclusion
I hope you get an idea of the hero web part and how to add the hero web to a SharePoint site page. And also we have covered the following points:
- SharePoint hero web part more tiles/SharePoint hero more than 5 tiles
- SharePoint online hero image size
- SharePoint online hero web part opens in a new tab
- SharePoint online hero web part full-width
- SharePoint hero web part audience targeting
You may also like:
- SharePoint Online Highlighted Content Web Part
- SharePoint Page Viewer Web Part
- SharePoint online quick links web part
- Embed Power BI report in SharePoint Online (Power BI Web Part)
I am Bijay a Microsoft MVP (10 times – My MVP Profile) in SharePoint and have more than 17 years of expertise in SharePoint Online Office 365, SharePoint subscription edition, and SharePoint 2019/2016/2013. Currently working in my own venture TSInfo Technologies a SharePoint development, consulting, and training company. I also run the popular SharePoint website EnjoySharePoint.com
how to export hero webpart?
The color of the titles on my hero images has turn gray and is now hard to read. I don’t know how this happened and there is no option to change the title color back to white.
Is there any way of having more than five tiles in a hero format? Thank you for your kind support. I have in total 6 graphics/topics that I want to show up on my landing page.