As a SharePoint beginner, you should learn all the list of customized web parts in SharePoint Online. Apart from that, the Quick Links web part is a crucial web part that can be used to display useful links so that users can navigate to the resource with just one click.
To get more details about the SharePoint Quick links web part, you can follow this tutorial, where I will explain what the SharePoint Quick links web part, how to add a Quick links web part in SharePoint Online.
Also, I will show you how to customize the SharePoint Quick links web part [Image size, Add links, Add icons, etc.] and the SharePoint Quick links web part audience targeting.
Quick Links Web Part in SharePoint Online
In SharePoint Online, we can use the Quick Links web part to pin the links on the site’s home page for easy access. When the user clicks on a specific link, it will navigate or redirect to the respective source place.
This Quick Links web part can be used in a modern SharePoint Communication or Team site. However, it is not available on the Classic SharePoint site.
The Quick Links web part allows us to display documents, files, videos, images, pages, etc., on the SharePoint Home page.
How to Add Quick Links Web Part in SharePoint Online
To add a quick links web part in SharePoint Online, follow the below-mentioned steps. Such as:
1. On the SharePoint Home Edit Page [Home -> Edit], select the Circled + icon to add a new web part, as shown below.

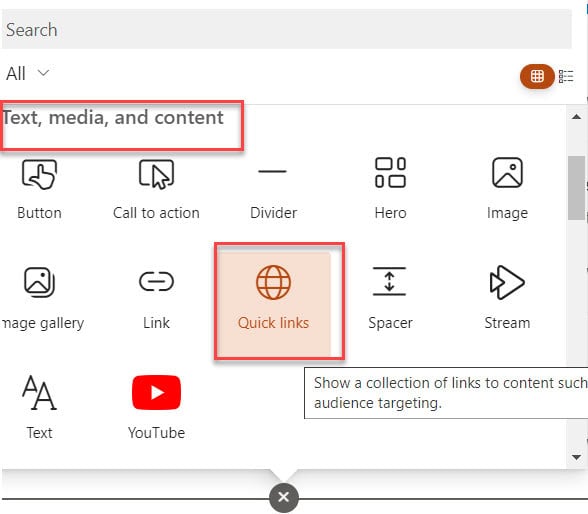
2. Now, select the Quick links web part under the Text, media, and content section, as shown below.
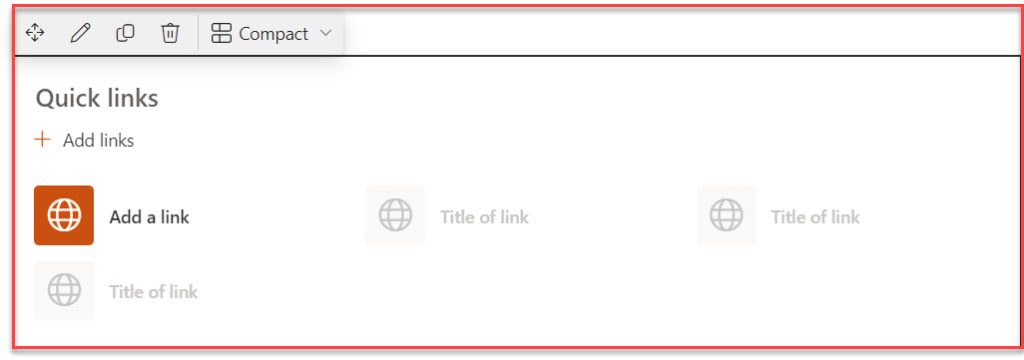
3. Once it is added, it will look like the screenshot below, where you can add a web part title and a link.
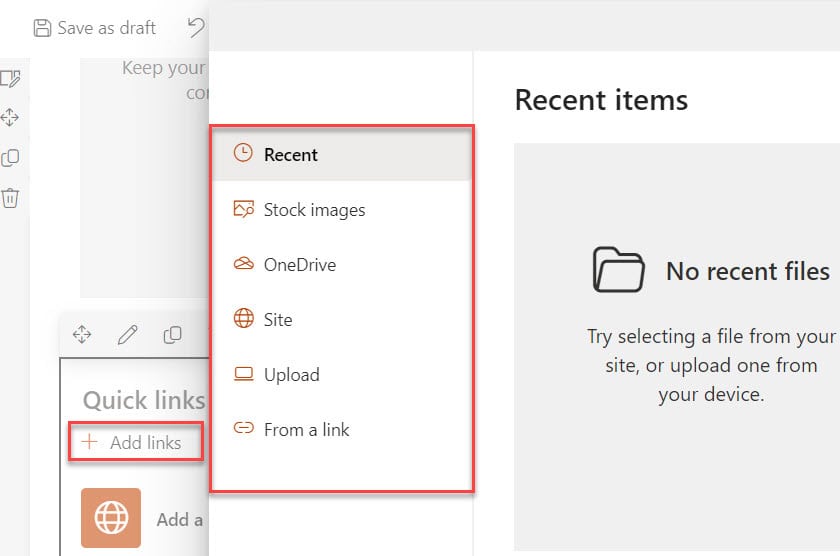
4. Now, click on the + Add links button or Add a link button to add links. Once click on the add links option, it will give a new window where you will get the list of options to add a link. Such as:
- Recent = By default, recent files, images, or documents will be displayed for selection and addition to the Quick Links web part in SharePoint Online
- Stock images = You can select any images from the stock images
- One Drive = Select file links stored in your OneDrive
- Site = Provide a link for a page, image, or document from the SharePoint site
- Upload = Obtain a link for a document, image, or page from a SharePoint site
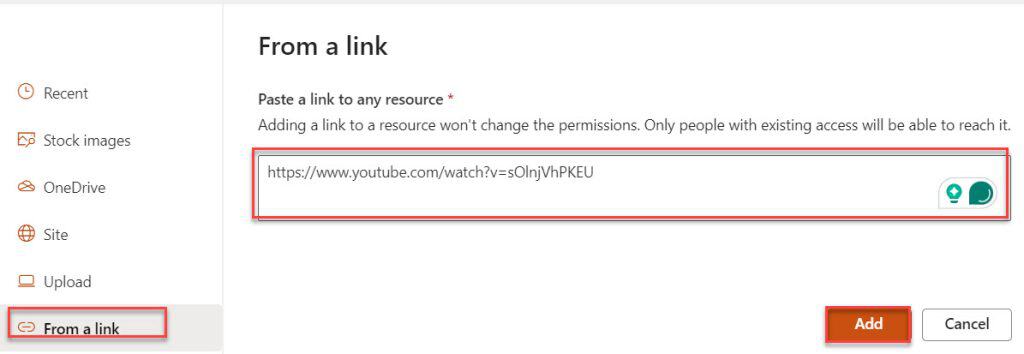
- From a link = You can share the link to your document, images, or any third-party URL
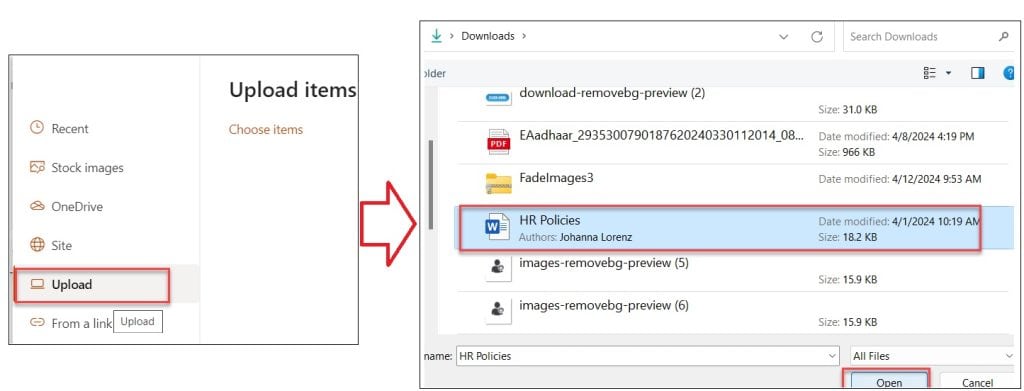
5. Suppose you want to add links or documents from the local device; you can use the Upload option. Now, select the file from the local device and select the Open button, as shown below.
6. Then, you can also add more items using the Add additional items option, like below.
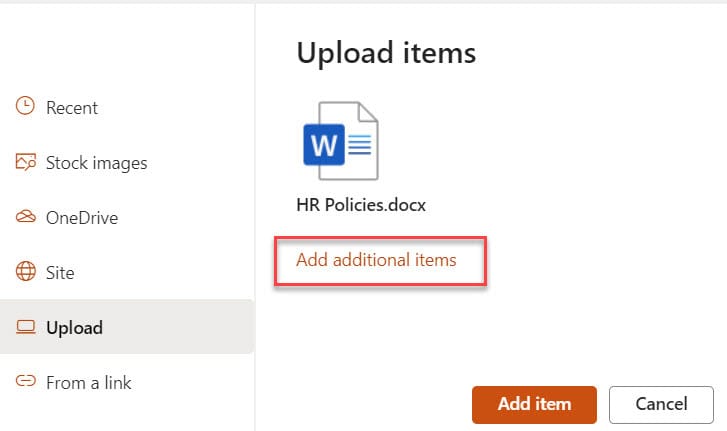
7. After selecting respective items, click on the Add 3 items button, as shown below.
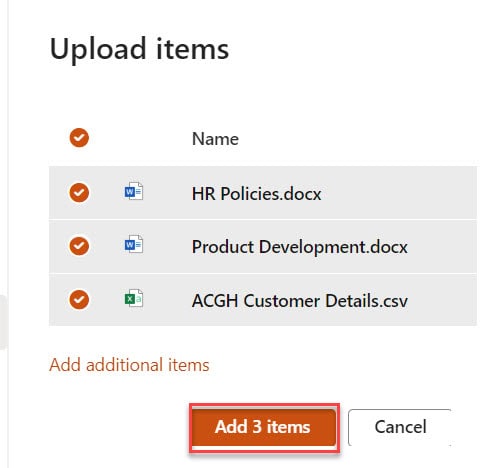
8. Once all your updates are done, have a look at the screenshot below for the output [How Quick Links web parts look like].
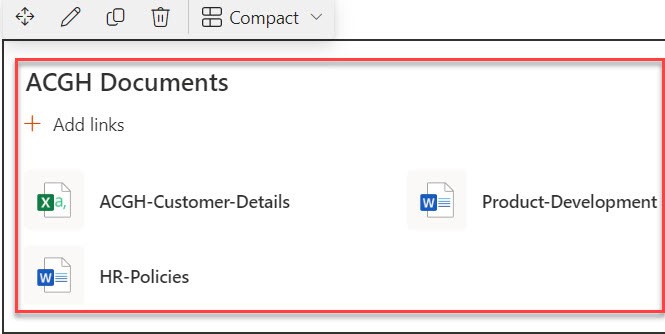
This is how we can add a Quick links web part in SharePoint Online.
How to Add Link to SharePoint Quick Links Web Part
Suppose you want to add a link to the SharePoint Online Quick links web part; follow the below steps. Such as:
1. To add a link to the Quick links web part, select the From a link option, provide a link, and click on the Add button, as shown below.
2. Once you add a specific link to the Quick links web part, it will appear like the one below.
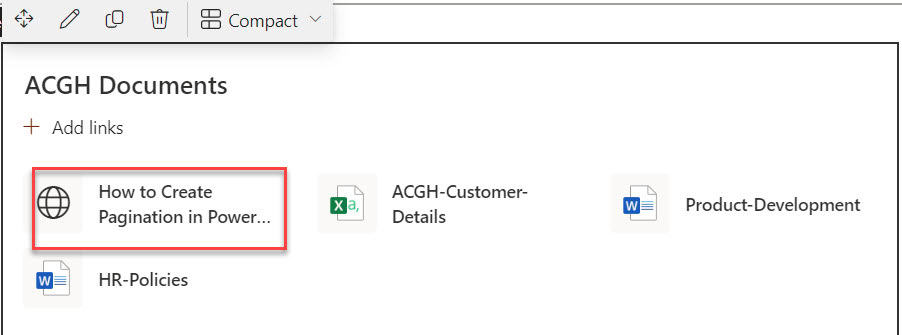
SharePoint Quick Links Web Part Customization
Now, I will show you how to customize the SharePoint Online Quick links web part. To do that, follow the below steps.
1. To customize the Quick links web part, click on the Edit icon. Once you click on the edit icon, it will give you two options. Such as:
- Layout options
- Filter
Layout options
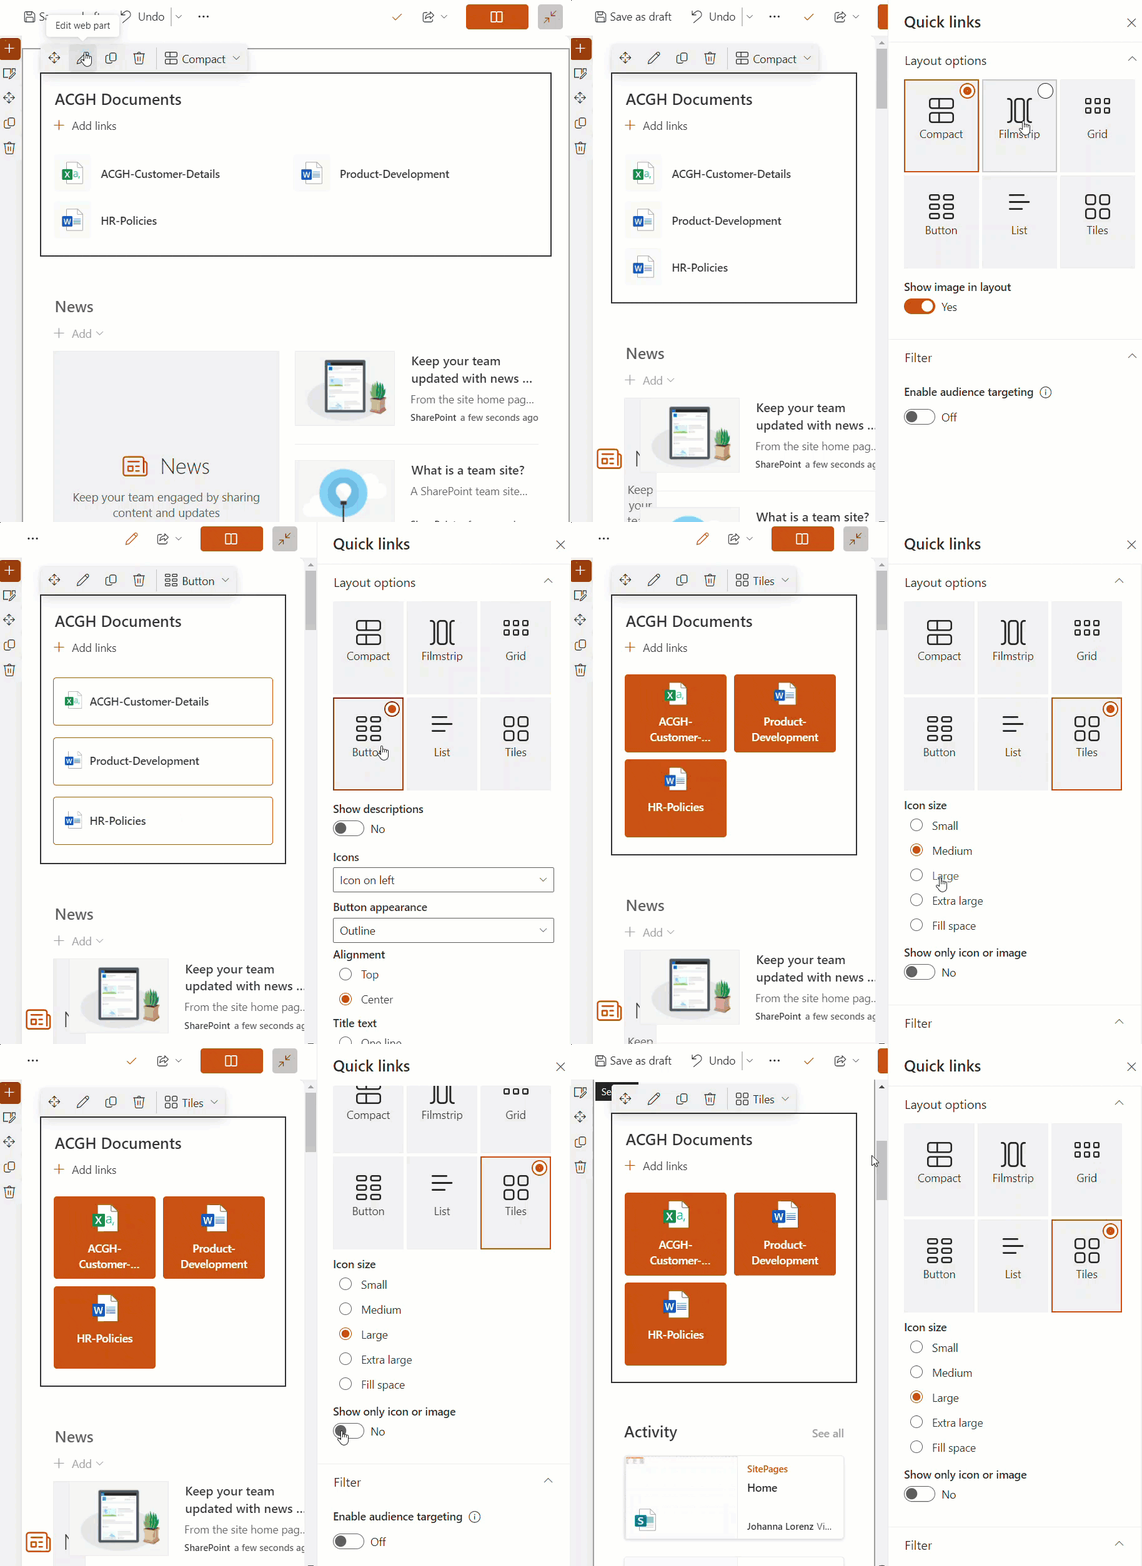
There are six various layout options available to make quick links web part more attractive. Such as:
Follow the below table:
| Layout Option | Description |
| Compact | The compact layout is designed for icons at a size of 48 x 48 pixels |
| Filmstrip | The Filmstrip layout is used for displaying images that are 212 to 286 pixels in width, with an aspect ratio of 9:16 where the height is 9 and the width is 16 |
| Grid | This layout is only useful for SharePoint Online |
| Button | We can use this button layout to select more options, such as Title text, Alignment, Icon position, etc. |
| List | This list layout is also useful for SharePoint Online |
| Tiles | This Tiles layout is also used to select more options, such as Icon size and Tiles layouts |
Filter
We can use a filter section to enable audience targeting. This audience targeting option is useful to target the audience or group of people for specific links.
Output:
SharePoint Quick Links Grid Image Size
Likewise, if you want to set the SharePoint Quick links grid image size, follow the below steps. Such as:
1. On the Quick links web part, select the Grid option under the Layout options, as shown below.
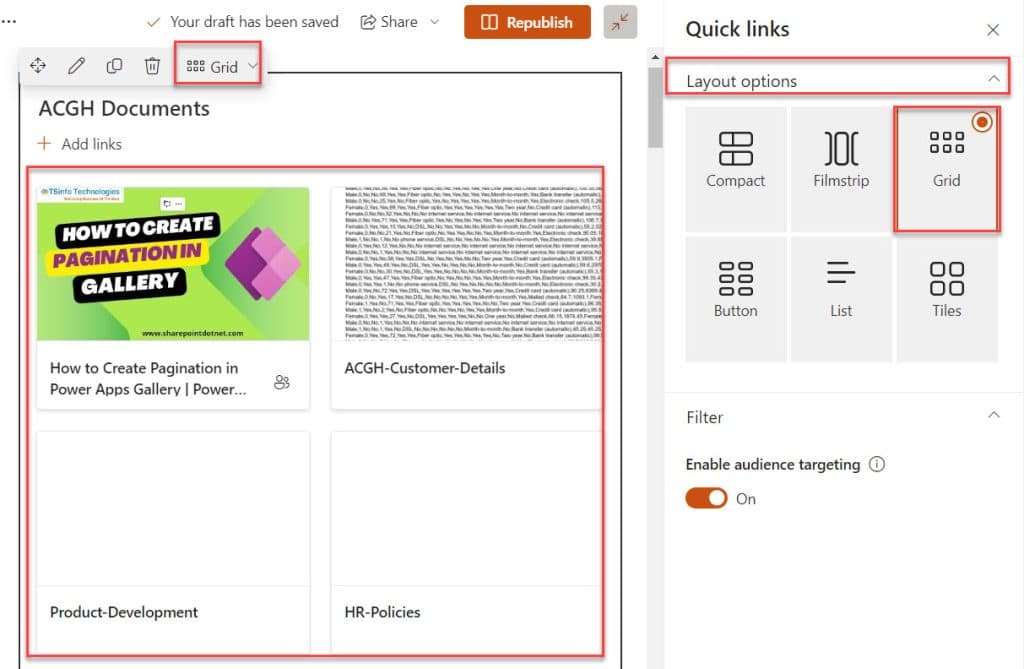
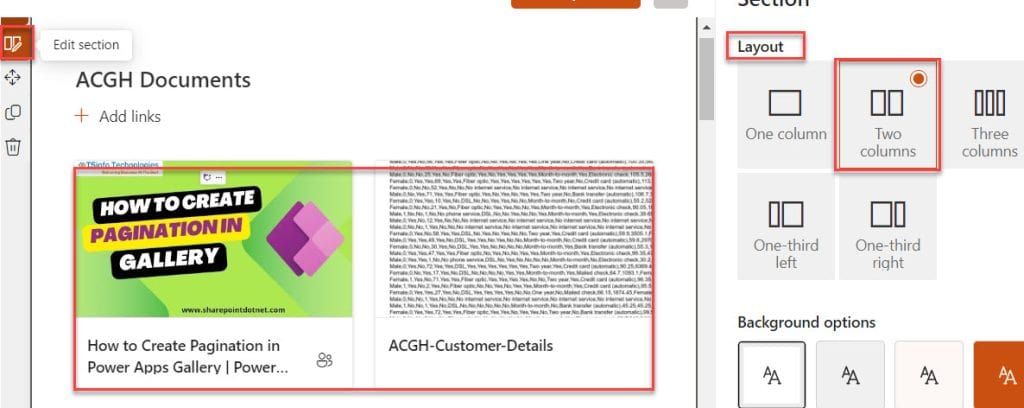
2. To set the Quick links web part Grid image size, select the Edit section option and change the Layout option as per the needs.
How to Edit a Link in SharePoint Quick Links Web Part
Lastly, we will see how to edit or customize a specific link in the SharePoint Quick links web part. In this case, follow the below steps.
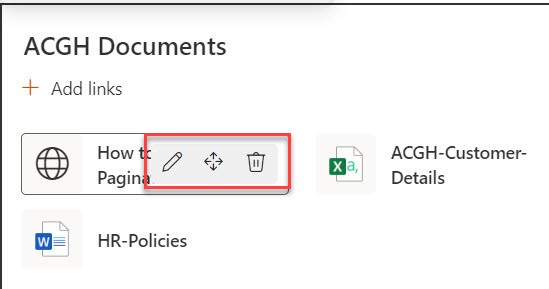
1. Select the specific link on the Quick links web part, where you will get three options Such as:
- Edit icon = To customize the specific link
- Move icon = To drag and drop the link from one place to another place
- Delete = You can delete the selected link by clicking the trash icon
2. When you click on the Edit icon, it will give the below options to customize the selected link. Such as:
- Change the link = You can change the link from this option
- Open link in a new tab = We can open a specific link in a new tab
- Title = We can also change the link title
- Thumbnail = You can use three options: Auto-selected, Custom image, and Library, to change the thumbnail
- Filter = Use the option to target the audience for the link
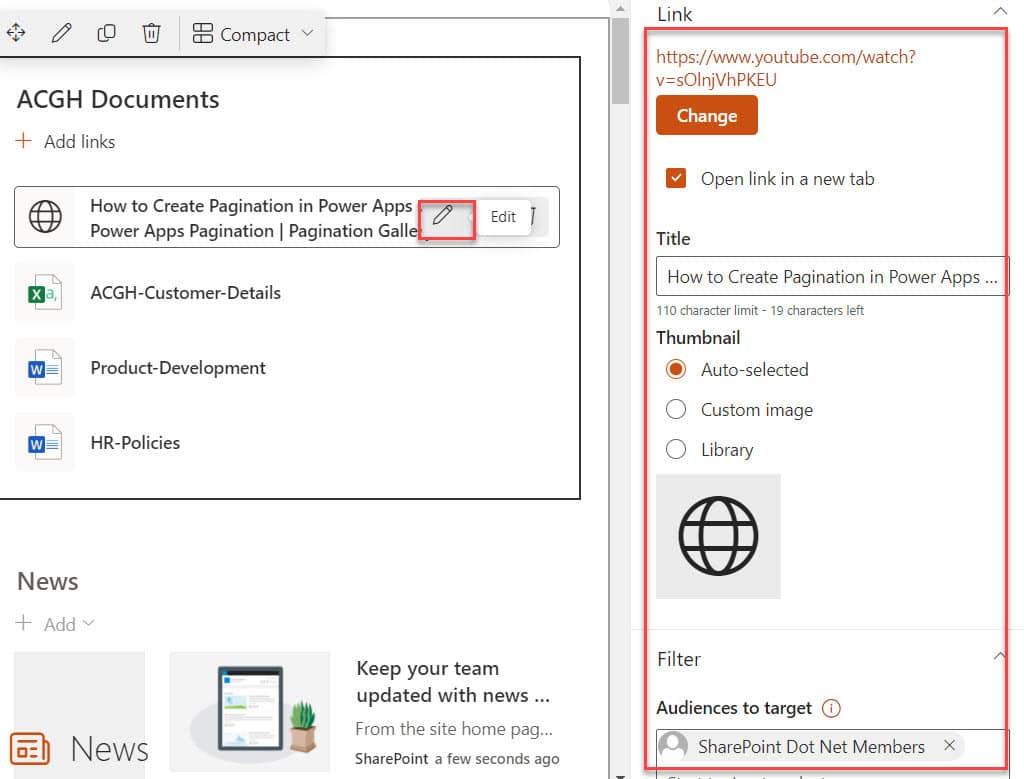
This is how we can work with how to edit or customize a specific link in the SharePoint Quick links web part.
I trust this SharePoint Online tutorial is useful. If you have any requirements on the SharePoint Quick Links web part, you can follow this post till the end to get all the information about the Quick Links web part.
You may also like the following tutorials:
- Highlighted Content Web Part in SharePoint
- SharePoint Site Left Navigation or Quick Launch
- SharePoint Online Hero Web Part
- SharePoint Page Viewer Web Part
- SharePoint Group Calendar Web Part
I am Bijay a Microsoft MVP (10 times – My MVP Profile) in SharePoint and have more than 17 years of expertise in SharePoint Online Office 365, SharePoint subscription edition, and SharePoint 2019/2016/2013. Currently working in my own venture TSInfo Technologies a SharePoint development, consulting, and training company. I also run the popular SharePoint website EnjoySharePoint.com