Recently, I worked on the Highlighted content web part in SharePoint Online, which highlights content on the SharePoint home page such as Documents, News, Pages, Images, Videos, etc.
In this SharePoint Online tutorial, I will explain what the SharePoint Highlighted content is and how to add the Highlighted content web part in SharePoint Online.
Also, we will discuss how to customize the SharePoint Online Highlighted content web part, like:
- How to Filter Highlighted Content Web Part in SharePoint Online
- SharePoint Online Highlighted Content Web Part Custom Query Examples
- SharePoint Online Highlighted Content Web Part Audience Targeting
Highlighted Content Web Part in SharePoint Online
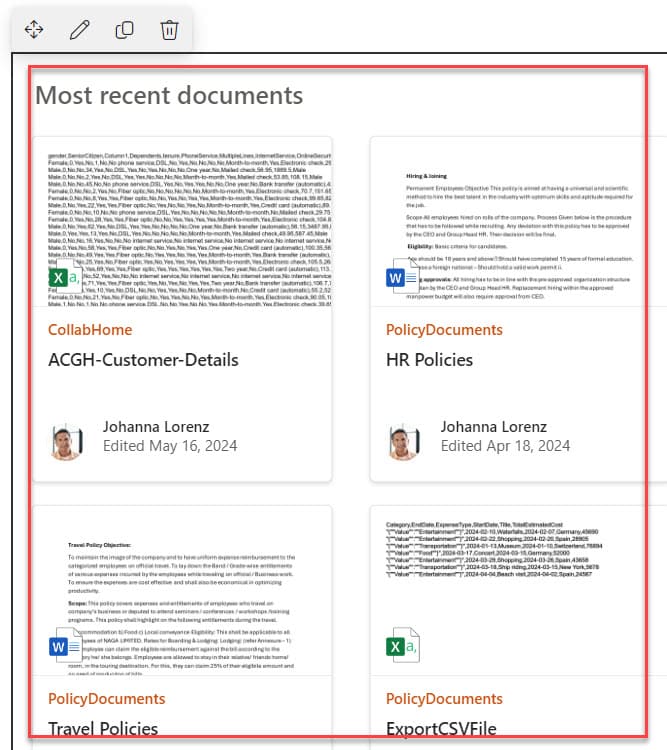
In SharePoint Online, we can use the Highlighted content web part to get the most recent documents and display the content that we want to highlight.
This SharePoint Online Highlighted content web part helps to display the basic filter and custom query with CAML or KQL code.
Note:
Before enabling the audience targeting in the Highlighted content web part, you should enable the audience targeting in the SharePoint Online document library or list.
Add SharePoint Online Highlighted Content Web Part
Suppose you want to add the SharePoint Online Highlighted content web part, follow the below steps. Such as:
1. On the SharePoint Home Edit Page [Home -> Edit], select the Circled + icon to add a new web part, as shown below.

2. Search the Highlighted content web part under the Search box -> Select the Highlighted content web part like below:
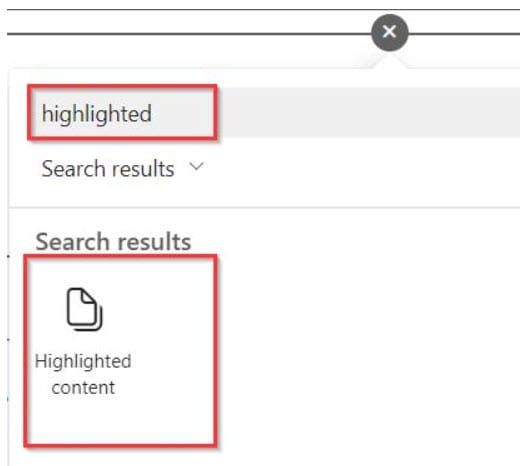
3. Once the Highlighted content web part is added, by default, we get the “Most recent documents,” as shown below.
How to Filter Highlighted Content Web Part in SharePoint Online
Now, I will show you how to filter the Highlighted content web part in SharePoint Online. For that, follow the below steps.
1. On the Highlighted content web part, click on the Edit icon, as shown below.
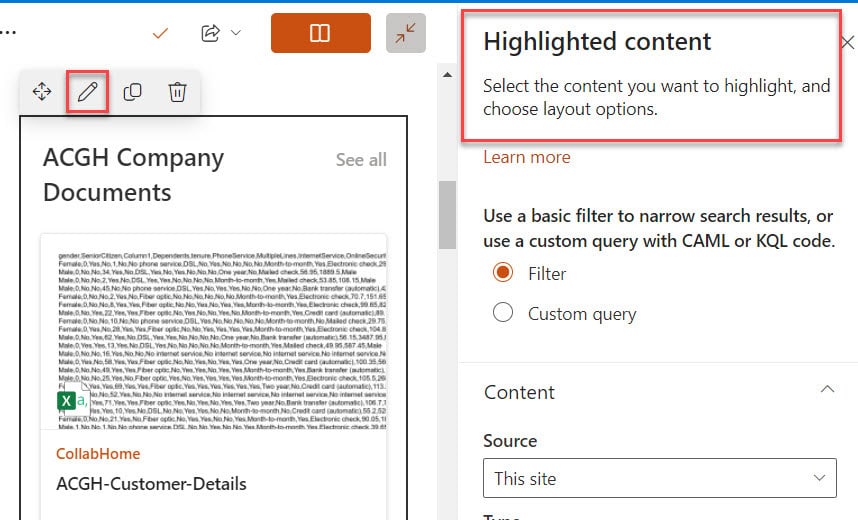
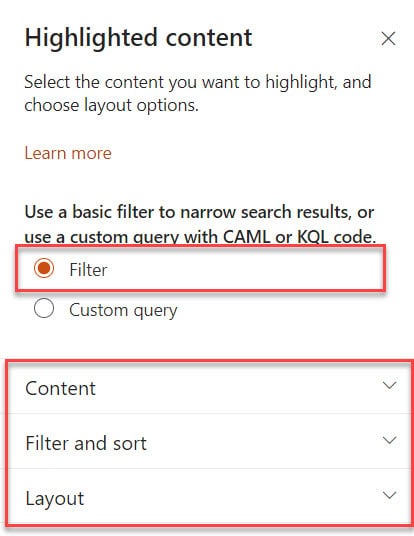
2. Once you click on the edit icon, it will give the three filter options. Such as:
- Content
- Filter and sort
- Layout
1. Content
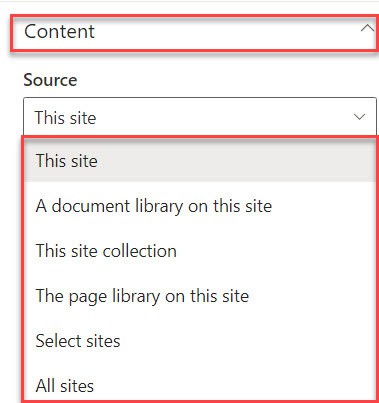
Once you expand this Content drop-down, by default, the Source will be selected by This site. And, also we can choose various sources such as:
- A document library on this site
- This site collection
- This page library on this site
- Select sites
- All sites
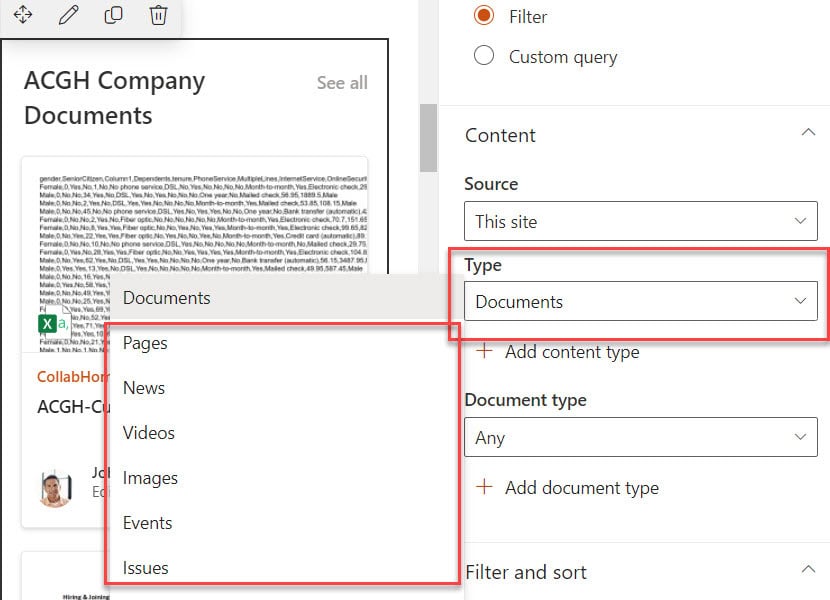
Next, expand the Type drop-down menu, where we can choose different formats, such as Documents, Pages, News, Videos, etc.
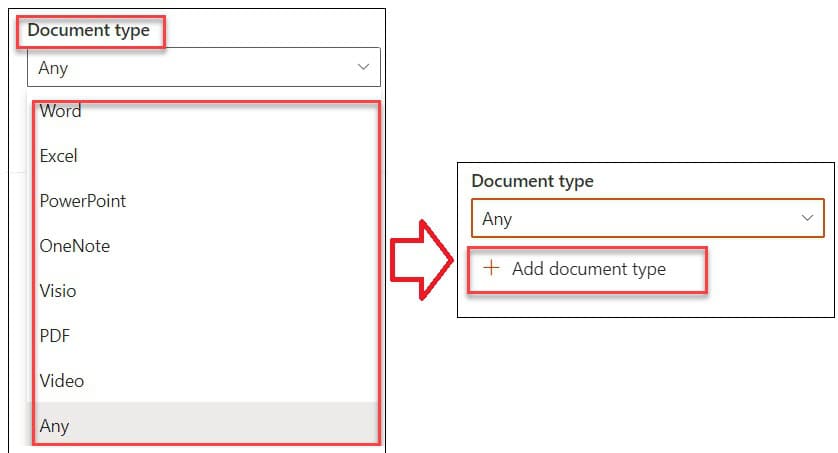
Finally, expand the Document type drop-down menu, where we can choose different formats, such as Word, Excel, PowerPoint, Onenote, PDF, or Any.
Also, select the +Add document type to add a new document type.
2. Filter and sort
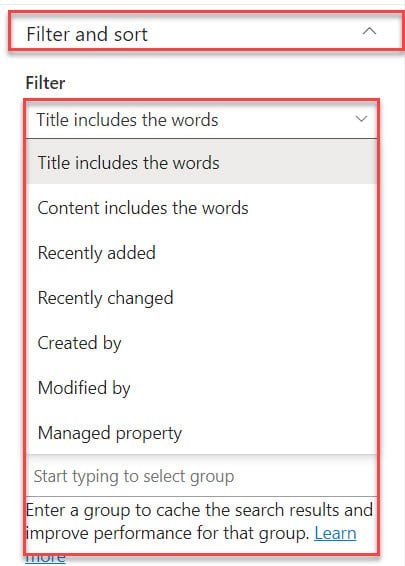
Next, select the Filter and sort drop-down where, by default, we get Title, which includes the word option. Also, we choose any of the below options:
- Content includes the words
- Recently added
- Recently changed
- Created by
- Modified by
- Managed property
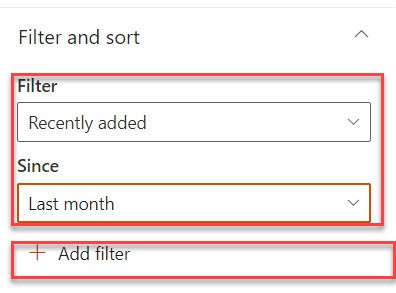
For example, we can filter the Recently added documents and Search the keywords by using the Since drop-down (Last month). Also, we can add a new filter by using the +Add filter option, as shown below:
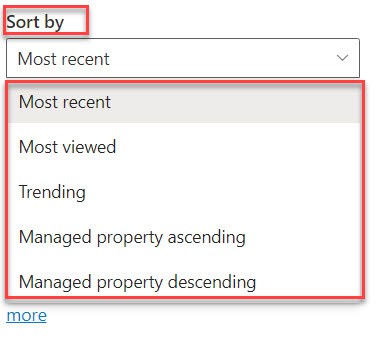
In the same way, click on the Sort by drop-down to select the “Most recent” option from all available options to retrieve recent documents.
3. Layout
Now, we will see how to choose different types of layouts available in the highlighted content web part. To do so, follow the steps are:
Click on the Layout drop-down and turn on the Show title and commands toggle. By default, it will be a Grid layout. If we want to change the layout, then choose the below options such as:
- List
- Carousel
- Compact
- Filmstrip
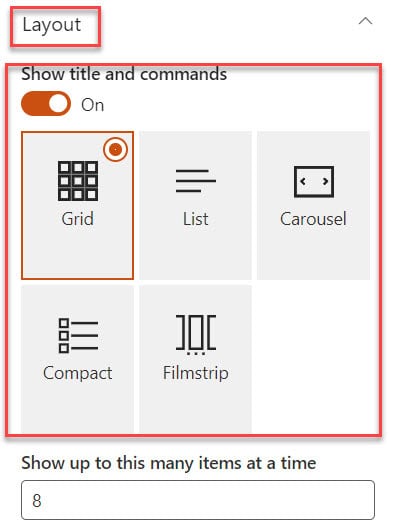
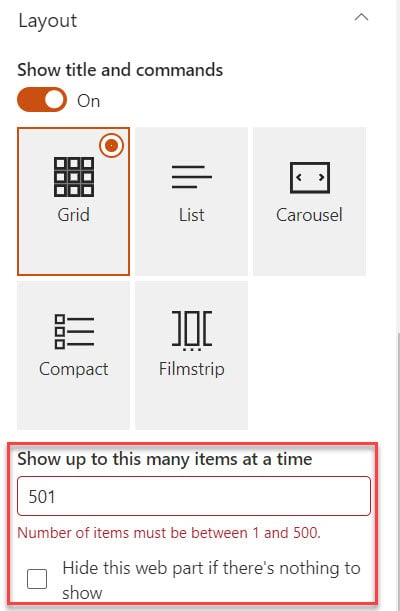
Then, enter one item at a time (the number of items must be between 1 and 500) in the Highlighted content web part.
Also, suppose you want to hide this web part (Highlighted content), then click on the Check box, as shown below:
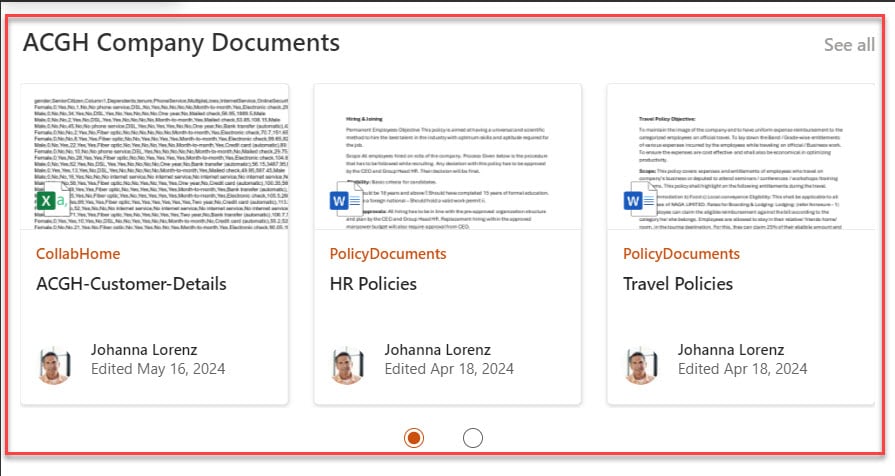
Once you complete all the updates in the Highlighted content web part, it will look like the screenshot below.
This way we can filter the SharePoint Online Highlighted content web part.
SharePoint Online Highlighted Content Web Part Custom Query Examples
In this section, we will discuss how to add a custom query in the highlighted content web part in SharePoint Online. Mainly, we can use two different query languages. Such as:
- KQL (Keyword Query Language)
- CAML (Collaborative Application Markup Language)
To work around this, follow the below-mentioned steps. Such as:
KQL (Keyword Query Language)
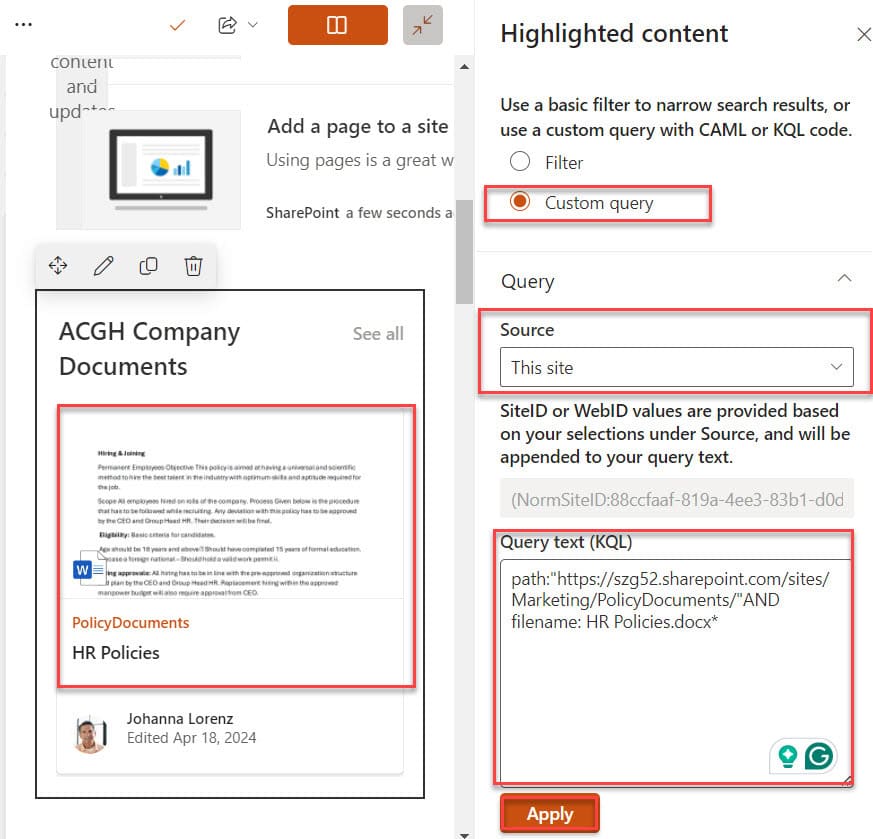
1. Select the Custom query button -> Click on the Query drop-down -> Select the Source drop-down.
2. Next, select Source (This site) -> Enter the KQL query in the Query box -> Click on the Apply button, as shown below.
path: "https://szg52.sharepoint.com/sites/Marketing/PolicyDocuments/"AND filename: HR Policies.docx*Where,
- Marketing = SharePoint Online Site
- PolicyDocuments = SharePoint Document Library
- HR Policies.docx = Document File Name
CAML (Collaborative Application Markup Language)
3. Likewise, Select the Source (A document library on this site) -> Click on the Policy Documents under the Document library.
Next, provide the CAML query code [To get documents modified in the last 30 days] in the Query box. Then, click on the Apply button.
<Query>
  <Where>
    <Geq>
      <FieldRef Name="Modified" />
      <Value Type="DateTime">
        <Today OffsetDays="-30" />
      </Value>
    </Geq>
  </Where>
</Query>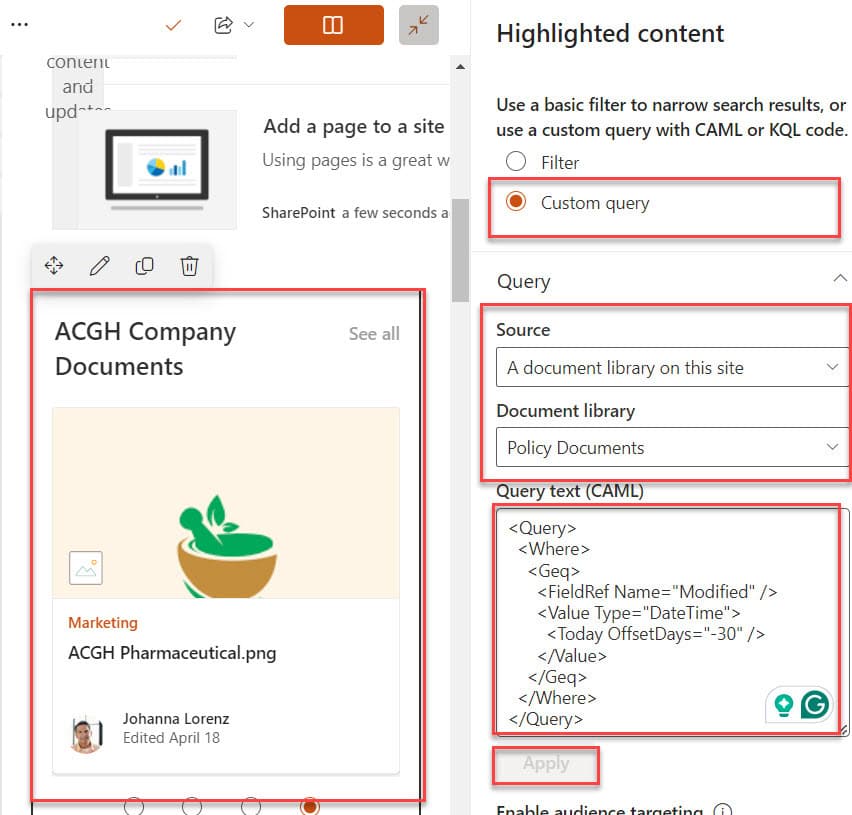
This is how we can work with the SharePoint Online Highlighted content web part custom query languages.
SharePoint Online Highlighted Content Web Part Audience Targeting
Audience targeting is the process of selecting a particular group of people who can see the content in SharePoint Online. By using audience targeting, we can share specific content that is relevant to specific people.
Note:
Before enabling the audience targeting in the Highlighted content web part, you should enable the audience targeting in the SharePoint Online document library or list
To enable the audience targeting in the SharePoint Online document library, follow the below steps. Such as:
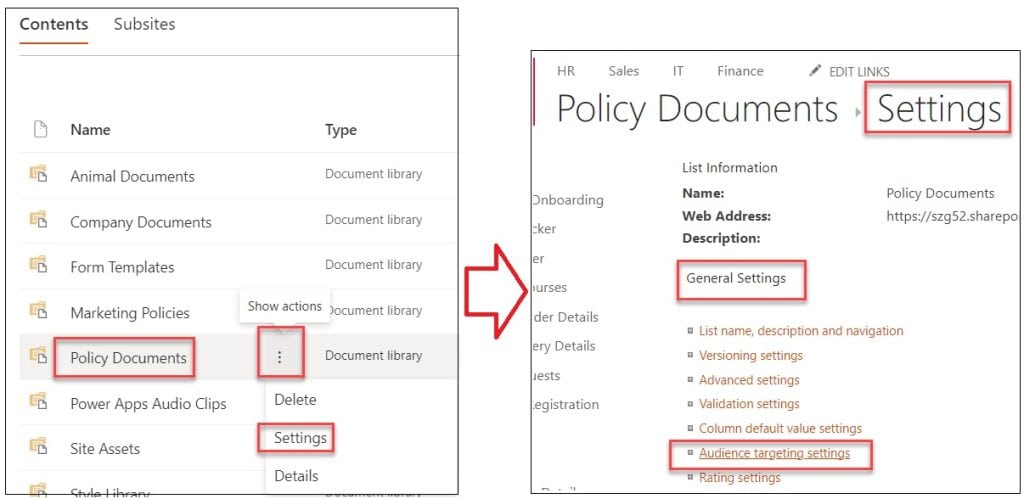
1. Open the SharePoint Site contents page -> Click on the specific document library [Policy Documents] -> Select ellipses (…) to Show actions -> Click on Settings.
2. On the Settings page -> Click on the Audience targeting settings under the General Settings section, as shown below.
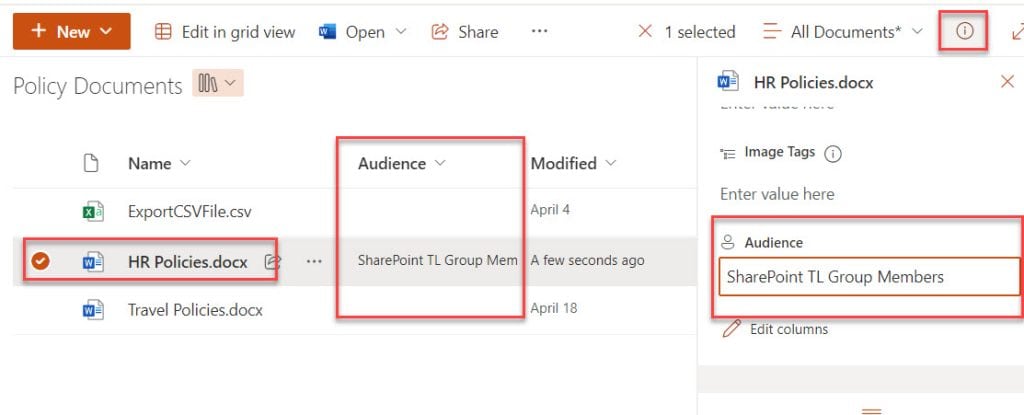
3. Select the check box to Enable the audience targeting, then click on the OK button. Then, back to the Document library, where we get an Audience column.

4. Now, select the specific file -> Click on the Details pane (i) -> Select the Audience (Enter up to 50 audiences) option -> Enter the name or email address of the group (SharePoint TL Group Members) -> Click on the Save button.
5. Finally, go to the Highlighted Content web part -> Click on the Edit icon -> Select Filter section -> Turn on Enable audience targeting, as shown below:
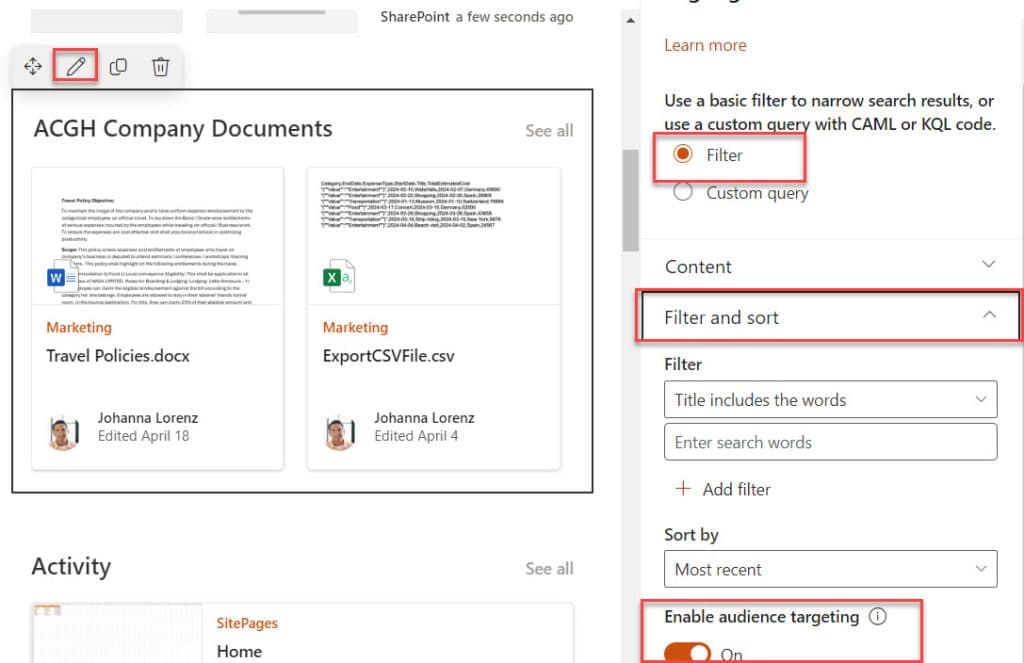
This is how we can work with the audience targeting in sharepoint highlighted content web part.
This SharePoint tutorial taught us all about the Highlighted content web part and how to add it to SharePoint Online.
Also, we discussed how to filter the Highlighted content web part in SharePoint Online, including Audience targeting. Finally, we covered the SharePoint Highlighted content web part custom query examples.
You may also like the following tutorials:
- SharePoint Page Viewer Web Part
- SharePoint Group Calendar Web Part
- SharePoint Online Hero Web Part
- SharePoint online quick links web part
I am Bijay a Microsoft MVP (10 times – My MVP Profile) in SharePoint and have more than 17 years of expertise in SharePoint Online Office 365, SharePoint subscription edition, and SharePoint 2019/2016/2013. Currently working in my own venture TSInfo Technologies a SharePoint development, consulting, and training company. I also run the popular SharePoint website EnjoySharePoint.com
How to replace default coulmns with our custom coulmns to dsiplay in UI Tile. Is there any way?
Thanks for this article. Is it possible to build a CAML / KQL query depending the current page managed property value ?
I would like to lookup contents which have the same managed property value.
Thanks !
Is there any way to display the Documents “Document Library” source in the document tile grid?
how to filter News (which reside in SitePage library) with User Profile property. Support I have site column in News where is store the Department. And when user search it should compare with User Profile Department and show only those item with that department ?
I tried Department: {User.Department} but did not work.
How to hide author name and site pages title name and icon(word/site pages/excel).