Do you need to download files from SharePoint to a local drive automatically using Power Automate? In this Power Automate tutorial, we will see how to copy or download files from SharePoint to a local drive using Power Automate.
Local drives are the drives that are physically connected to the systems such as hard drives. These drives can be accessed by using the allocated letter such as C: and D:.
To connect the Local drive with the Cloud application we need a gateway, so both services can communicate with each other, for this we will use an On-premises data gateway.
Now let’s see how we can copy files from SharePoint to the PC using Power Automate.
For example, the finance department in an organization gets invoices from vendors via SharePoint folder and then they store them in the local drive. They want to automate this process and make sure record-keeping properly.
For this, we will create an Automate cloud Flow which will trigger when a user uploads a file in the SharePoint library called Invoices and then the file gets downloaded to the defined local drive in your system.
Download files from SharePoint to a local drive using Power Automate
Here we will see how to download files from SharePoint to the PC using Power Automate.
From this link, you can download an On-premises data gateway on your local system and then follow the below steps to install and configure:
1. Open the downloaded file, then select the path and check the box Terms and Use. Click on Install.
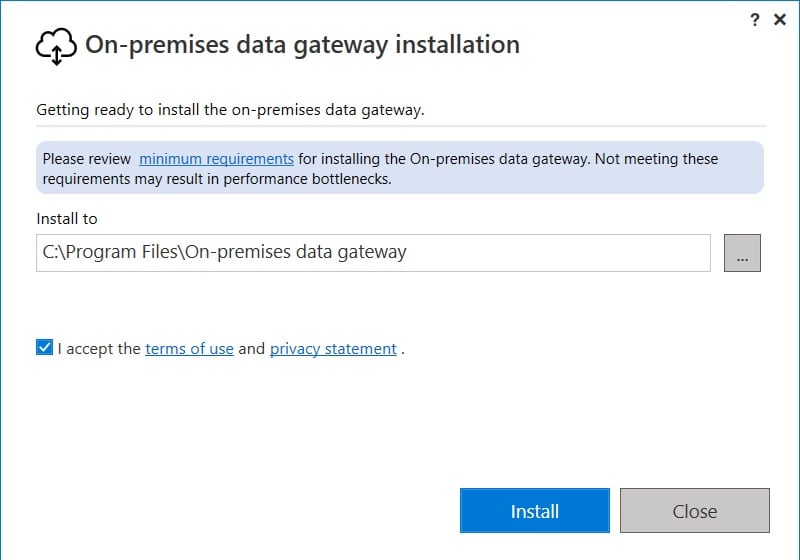
2. It will ask you ‘Do you want this app to make changes on your device’, then click on the Yes option.
3. Once the Installation is successful, it will ask you Email address to use with this gateway, here provide the Microsoft credential. Then click on Sign in.
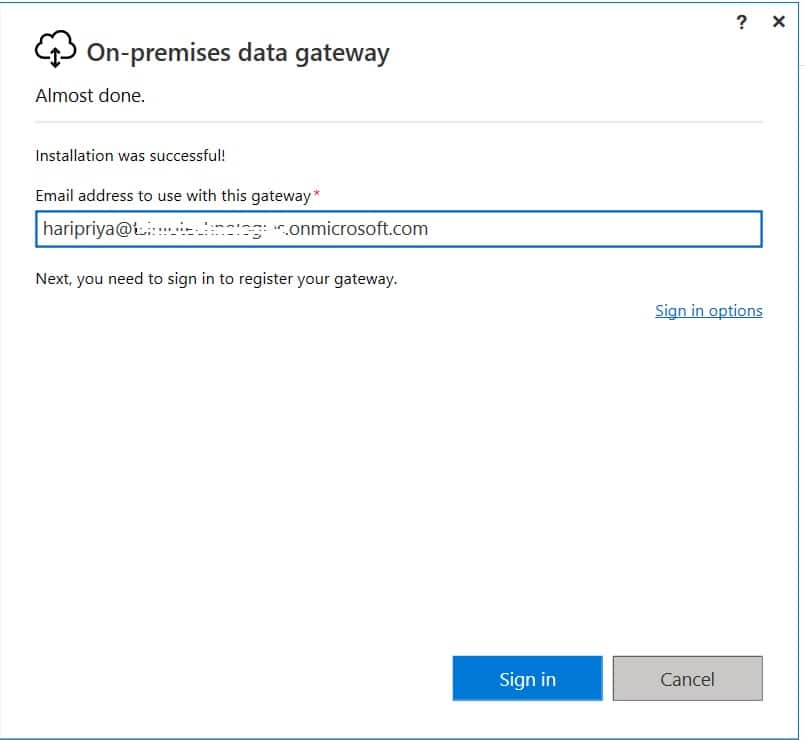
4. Once you sign in with credentials select ‘Register a new gateway‘ or you can choose ‘Migrate, restore or takeover an existing gateway.
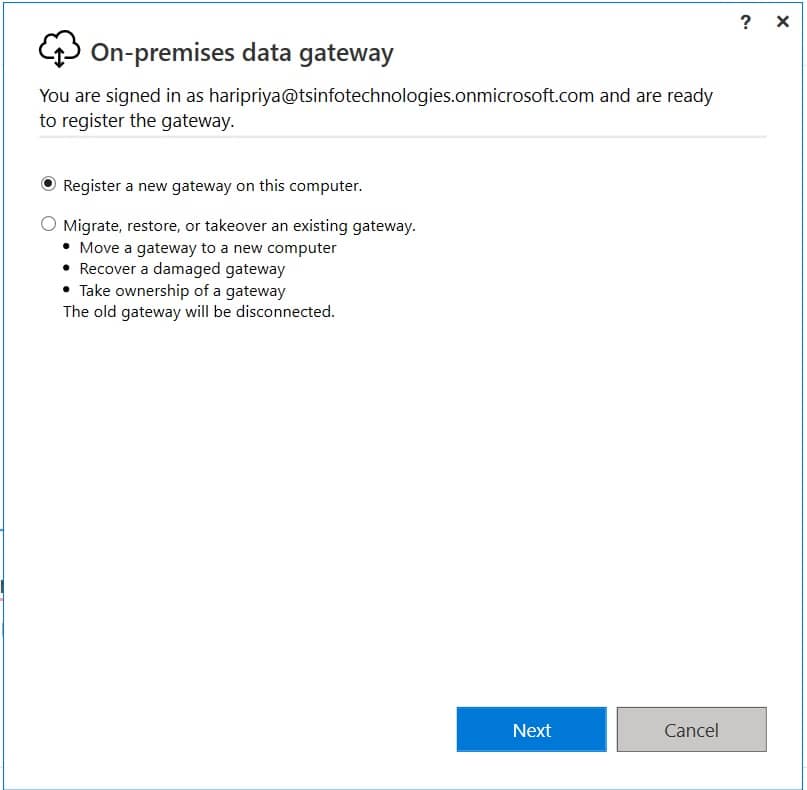
5. If you select the ‘Register a new gateway on this computer ‘option, then in the next page, provide the gateway name, and recovery key, and confirm the recovery key. Then click on Configure.
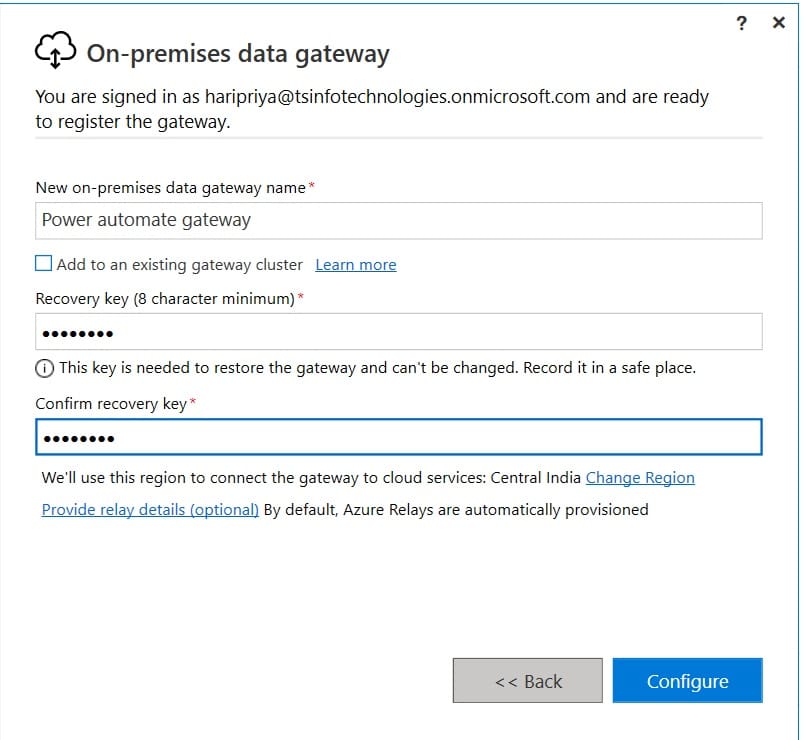
6. Once you configure it will show you the below status, as I have already configured the gateway so for me status is like the below:
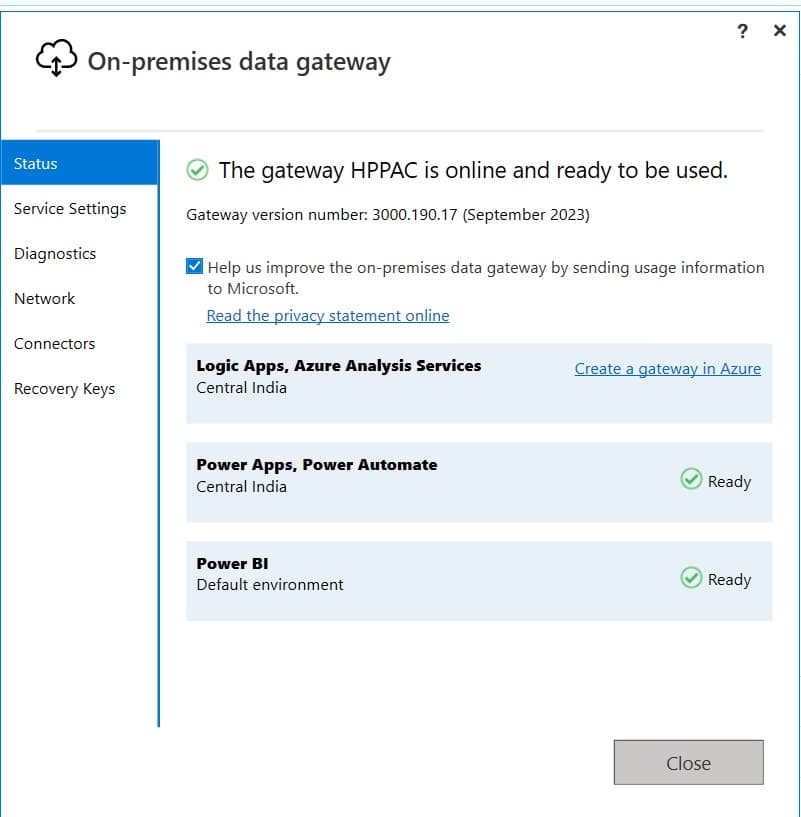
Once your Power Automate on-premise data gateway is installed successfully, we can see how to copy files from sharepoint to your pc using Power Automate.
Now let’s create the flow that will copy files from a SharePoint document library to a PC using Power Automate.
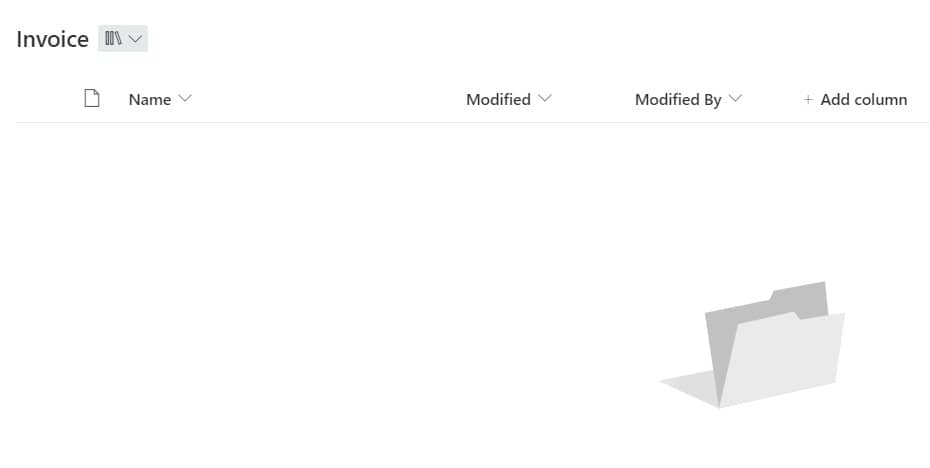
Also, moving forward in this flow we will set up the connection for the File System connectors.
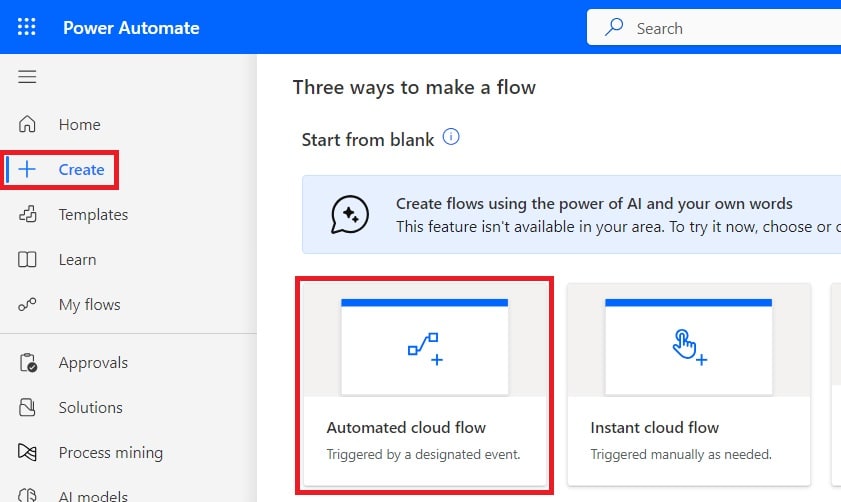
1. Open Power Automate Cloud, click on +Create, and, select Automated Cloud Flow.
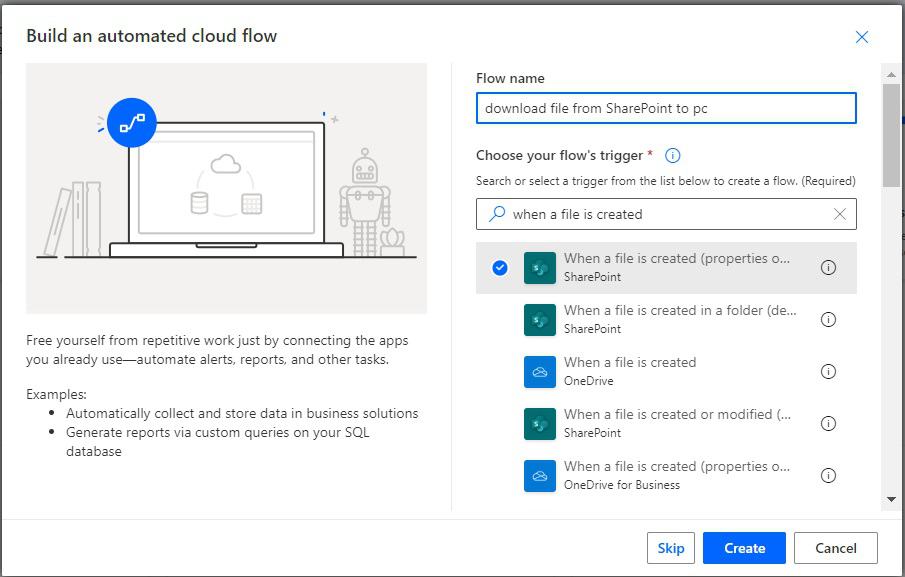
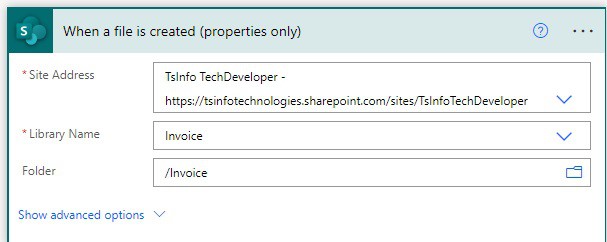
2. Then provide the flow name, and select the ‘When a file is created (properties only)’ action. Then click on Create.
3. Now you can see When a file is created (properties only) is added to the flow. Provide the below information:
- Site address: Select the SharePoint site address.
- Library name: Provide the Library name.
- Folder: Provide the SharePoint folder
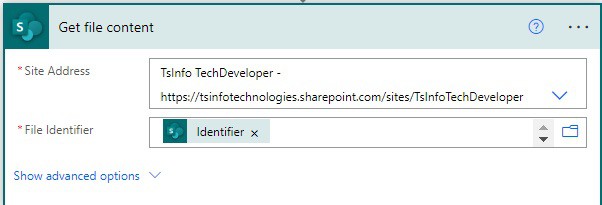
4. Next we will get the file content of the file, for this click on the +New step and select the ‘Get File content‘ action. Then provide the below information:
- Site address: Select the SharePoint site address
- File identifier: Provide the Identifier from dynamic content.
5. Next we will create a file in the local drive, for this click on the +New step -> select Create file action. Then it will ask you to set up the connection for the file system.
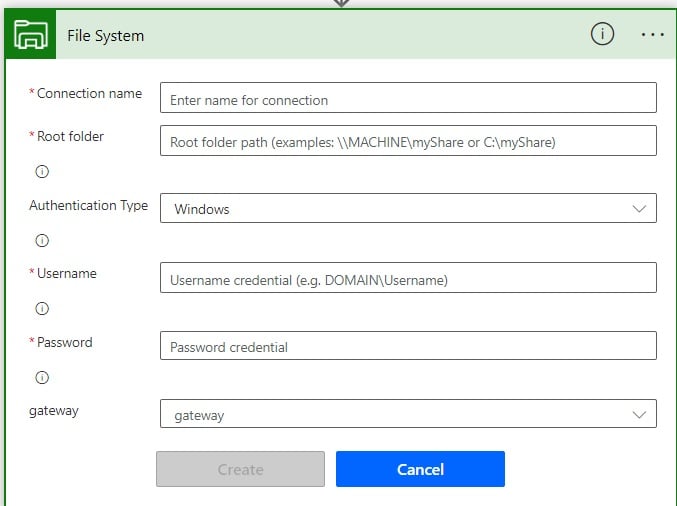
For this provide the below information:
- Connection name: Provide the Connection name
- Root folder: Provide the root folder path where you want to store the file. For example C:\Invoice
- Username: Provide the username. To get the username, open the command prompt as Administrator. Then, write the command as whoami, and you will get the Domain\username.
- Password: Provide the password in which you logged in to your desktop.
- Gateway: Select the gateway you have configured
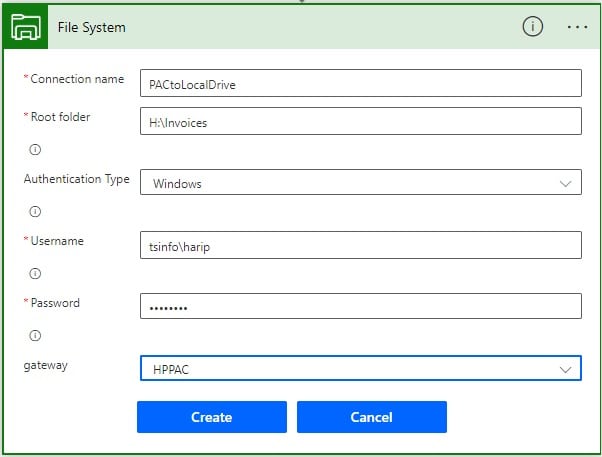
Once the connection is created, provide the below information:
- Folder path: Select the folder path as the root folder
- File name: Select the File name and extension from dynamic content
- File content: Select the File content from dynamic content.

6. Now run the flow Manually, then upload the file in the folder and you can see the file is downloaded in the local drive from SharePoint.

This is how to download a file from SharePoint to the Local drive using Power Automate.
Conclusion
We can use Microsoft Power Automate to copy a file from SharePoint to a local drive easily after installing an on-premise data gateway. In this tutorial, I have explained, how to copy or download files from SharePoint using Power Automate to a local drive.
You may also like:
- How to Send an email with options in Power Automate?
- Create a Word Document from HTML using Power Automate
- How to format a number as currency in Power Automate?
- Get and Delete a SharePoint list view using Power Automate
I am Bijay a Microsoft MVP (10 times – My MVP Profile) in SharePoint and have more than 17 years of expertise in SharePoint Online Office 365, SharePoint subscription edition, and SharePoint 2019/2016/2013. Currently working in my own venture TSInfo Technologies a SharePoint development, consulting, and training company. I also run the popular SharePoint website EnjoySharePoint.com
Many thanks for this! Are there any licensing implications/additional costs to a standard E3 tenancy?