In this Power Automate tutorial, we will see how to send an email with options in Power Automate.
Scenario: We have a below SharePoint list ‘Session Feedback’ which collects the feedback for sessions from attendees for a particular batch.
The SharePoint list contains the below column:
- Batch Id(Title)- Single line of text
- Attendees name: Person
- Date: Date/Time
- Session on: Choice
- Feedback: Single line of text
- Comments: Multiple lines of text

For this, we will create an Instant cloud flow, where we will pass the Batch id. Based on the Batch id it will get the items and send an email to the Attendees. Once the attendees give the feedback, it will be updated on the SharePoint list.
Now let’s create the flow that will send an email and collect the feedback using Power Automate.
How to send an email with options using Power Automate
Here we will see an example of how to send emails with options using Power Automate.
Before creating the flow in Power Automate, just set up the SharePoint list with the above columns.
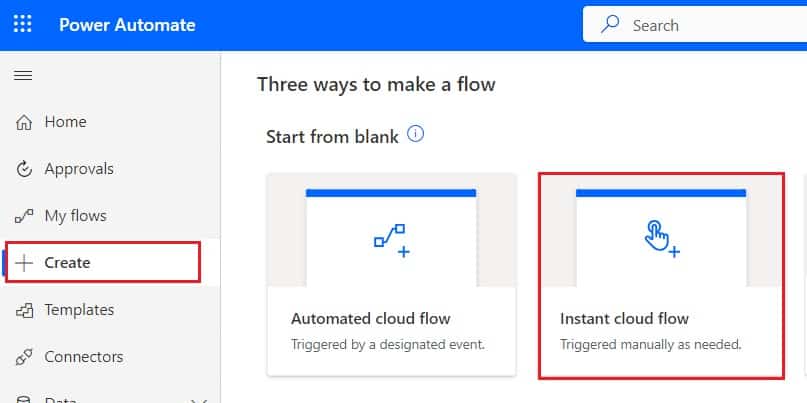
Step 1: Log in to Power Automate and click +Create -> select Instant Cloud flow.
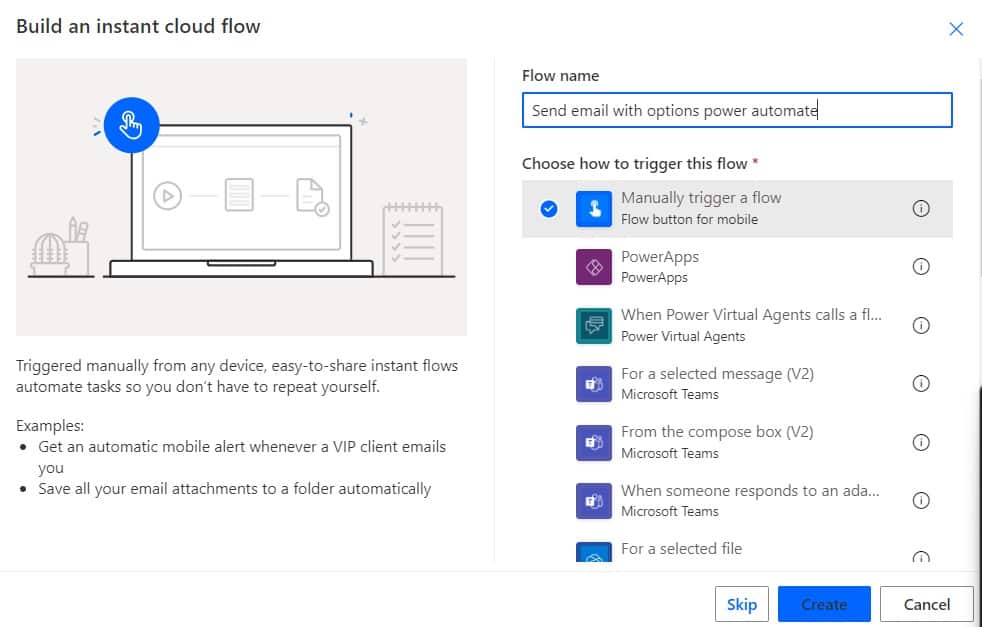
Then provide the flow name and select the Manually trigger a flow. Then click on Create.
Now you can see Manually trigger a action is added to the flow. Expand the action and click on +Add an Input. Select the Input type as Text. Provide the field name as Batch Id.

Step 2: Now we will get items from the list, so click on the +New step -> select Get items action.
Then provide the below information:
- Site address: Select or Provide the SharePoint site address.
- List name: Select the list.
Then click on Show Advanced options
- Filter query: Select or provide the filter query:
Title eq '@{triggerBody()['text']}'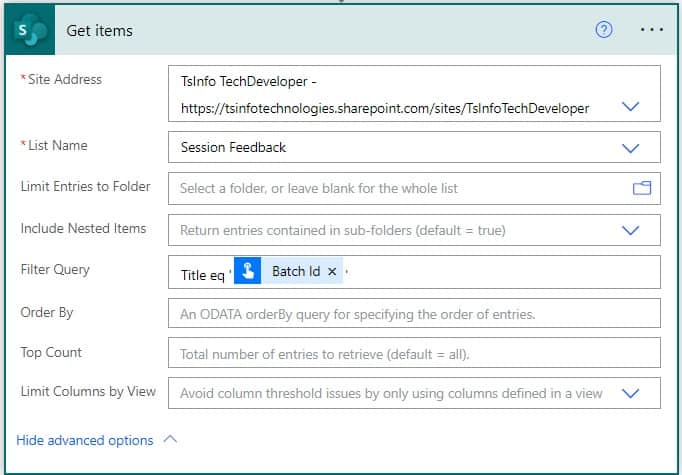
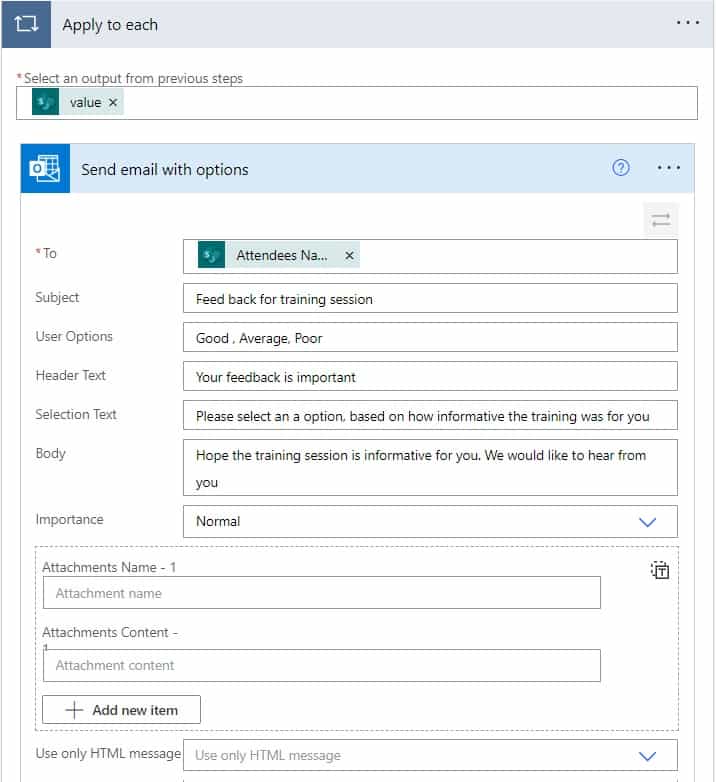
Step 3: Next, we will send an email to attendees with the option, so, click on the +New step -> select ‘Send email with options’ action. Then provide the below information:
- To: Select the Attendee’s email from the dynamic content. That will automatically add Apply to each action.
- Subject: Select or provide the subject
- User options: Provide the options ‘Good, Average, Poor’
- Header Text: Provide the Header text.
- Selection Text: Provide the selection text
- Body: Provide the body of the email.
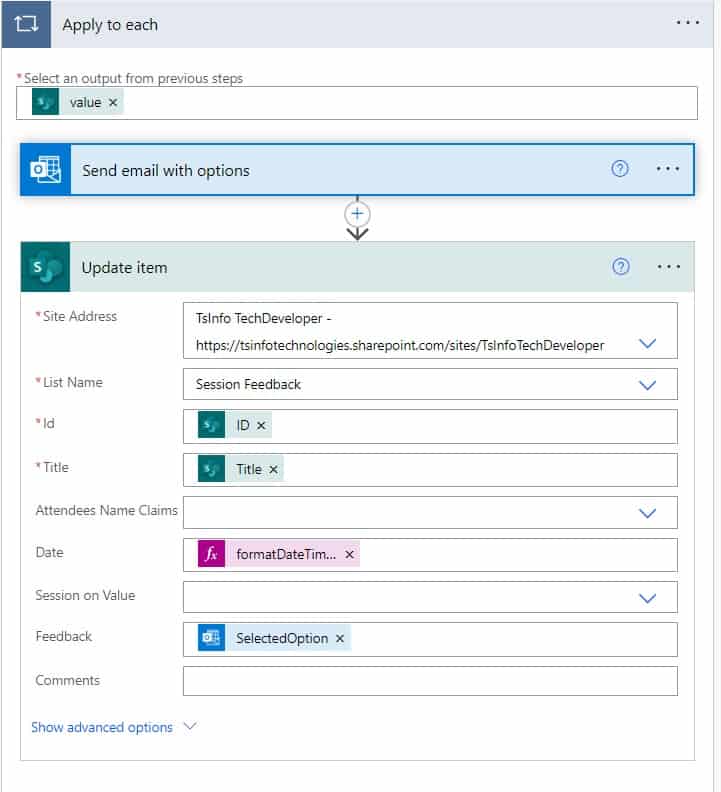
Step 4: Next, we will update the feedback in the SharePoint list. So, click on Add an action -> select Update item action. Then provide the below information.
- Site address: Select or Provide the SharePoint site address.
- List name: Provide the SharePoint list name.
- Id: Provide the Id from dynamic content
- Title: Provide the title from dynamic content.
- Date: Provide the current date, so for this, provide the below expression:
formatDateTime(utcNow(),'yyyy-MM-dd')- Feedback: Provide the Selected options from dynamic content.
Step 5: Now save the flow and run the flow manually. For this, click on the test button -> select manually and click on Test. Then provide the Batch Id like below. Click on Run Flow.

After that, you can see the email send to the corresponding attendees. In this case, I get the below email. Once I select the feedback options, we can see the success screen. You can see your flow run successfully.

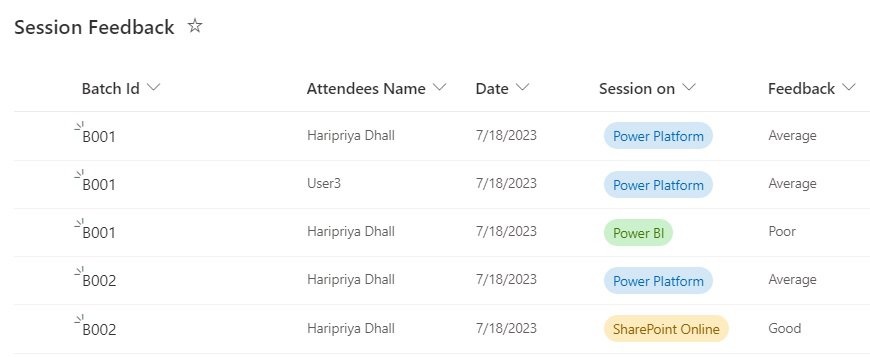
At last, you can see the feedback is updated in the SharePoint list.
Conclusion
In this Power Automate tutorial, we saw an example of sending an email with options using Power Automate.
You may also like:
- Create a Word Document from HTML using Power Automate
- check if a file exists in the SharePoint document library in Power Automate
- Create SharePoint List Views using Power Automate
- How to Apply Filter Between Dates in Power Automate?
- How to Send an Email with Attachments in Power Automate?
- Create Multiple Sites in SharePoint Online using Power Automate from Excel
I am Bijay a Microsoft MVP (10 times – My MVP Profile) in SharePoint and have more than 17 years of expertise in SharePoint Online Office 365, SharePoint subscription edition, and SharePoint 2019/2016/2013. Currently working in my own venture TSInfo Technologies a SharePoint development, consulting, and training company. I also run the popular SharePoint website EnjoySharePoint.com