In this Power Automate tutorial, we will see how to convert XML to SharePoint list using Power Automate.
For example, we will take the XML file, and then we will parse the content of the XML file. With the parse data, we will create an array of product details. We will create an item in the SharePoint list with the list of Product details.
Whereas our SharePoint list i.e. Product details, I have created contains the below columns:
- Title -Single line of text
- Name- Single line of text
- Description- Multiple lines of text
- Price: Currency
- Quantity: Number
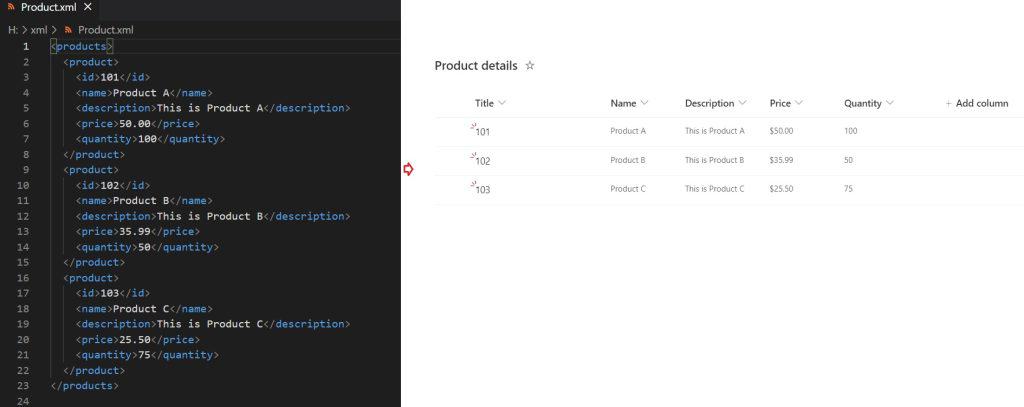
For this, we will create an instant cloud flow, then it will trigger manually and take the file input from the user. After that, we will convert the file content to base 64 to string. Use this XML string content for parsing. Once parsed, we will create an array of Product details. At last, we will loop the array of Product details and create an item in the SharePoint list.
How to convert XML to SharePoint list using Power Automate
Here we will see how to convert XML to a SharePoint list using Power Automate.
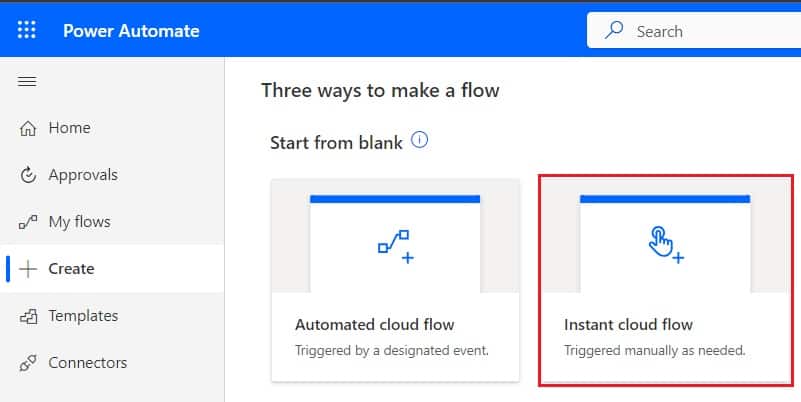
Step 1: Log in to Power Automate and click +Create -> select Instant Cloud Flow.
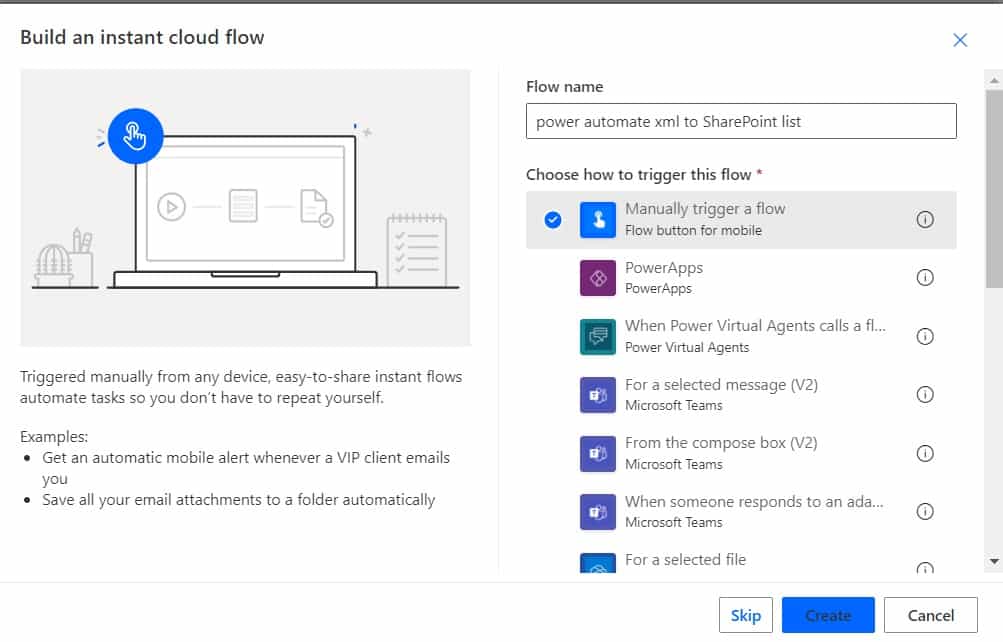
Then provide the flow name, and select the Manually trigger a flow. Then click on Create.
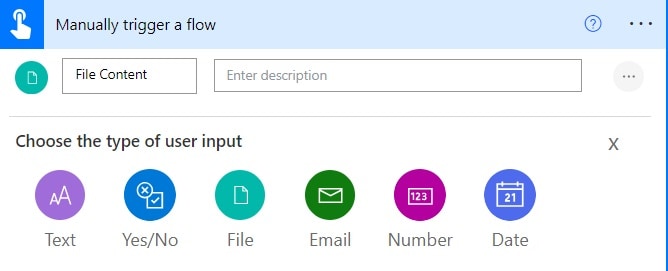
Now, you can see the Manually trigger flow action is added to the flow page. Now expand the action -> click on Add an input ->select File inputs.
Step 2: Now we will convert the base64 to string using Power Automate, so, click on the +New step -> select Compose action. Then provide the below information:
- Inputs: Provide the below expression:
base64ToString(triggerBody()['file']['contentBytes'])
Step 3: Next, click on the +New step, and select Initialize variable action. Then provide the below information:
- Name: Provide the variable name.
- Type: Select the type as an array.

Step 4: Now, we will parse the XML data, so, click on the +New step -> select Compose action. Then provide the below information.
- Inputs: Provide the below information:
xpath(xml(outputs('Compose')), '/products/product')
Step 5: Next, we will loop through person nodes to get the details, so click on the +New step -> select Apply to each action. Provide the below information:
- Select an output from previous steps: Select the output, from the dynamic content.
Next, we will Add an action -> select Compose action, then provide the below information:
- Inputs: Provide the below expression
items('Apply_to_each')?['$content']After that, click on Add an action -> select Compose action to convert base64 to string, then provide the below information:
- Inputs: Provide the below expression:
base64ToString(outputs('Compose_4'))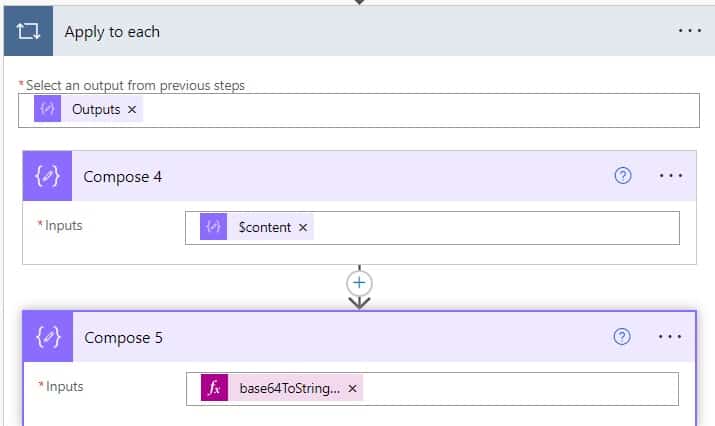
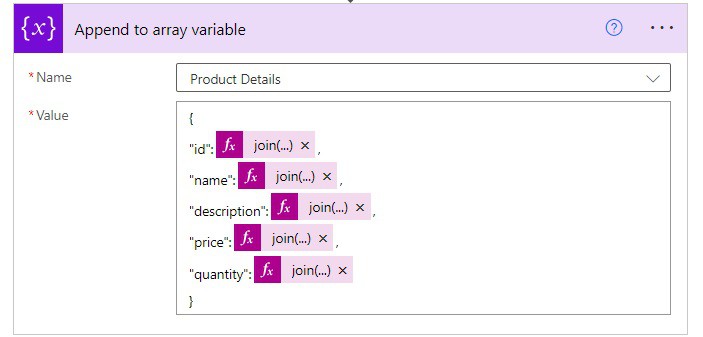
Step 6: Now, click on the +New step -> select Append to array variable action. Then provide the below information:
- Name: Select the variable name.
- Value: Provide the below information:
{
"id":@{join(xpath(xml(outputs('Compose_5')), '/product/id/text()'),'')},
"name":@{join(xpath(xml(outputs('Compose_5')), '/product/name/text()'),'')},
"description":@{join(xpath(xml(outputs('Compose_5')), '/product/description/text()'),'')},
"price":@{join(xpath(xml(outputs('Compose_5')), '/product/price/text()'),'')},
"quantity":@{join(xpath(xml(outputs('Compose_5')), '/product/quantity/text()'),'')}
}
Step 7: Next, we will add Apply to each action, then provide the below information:
- Select an output from previous steps: Provide the array variable from dynamic content.
Next, click on Add an action -> select Create item action. Then provide the below information:
- Site address: Provide or select the site address.
- List name: Provide or select the list name.
- Title: Provide the below expression:
items('Apply_to_each_2')?['id']- Name: Provide the below expressions:
items('Apply_to_each_2')?['name']- Description: Provide the below expressions:
items('Apply_to_each_2')?['description']- Price: Provide the below expressions:
items('Apply_to_each_2')?['price']- Quantity: Provide the below expressions:
items('Apply_to_each_2')?['quantity']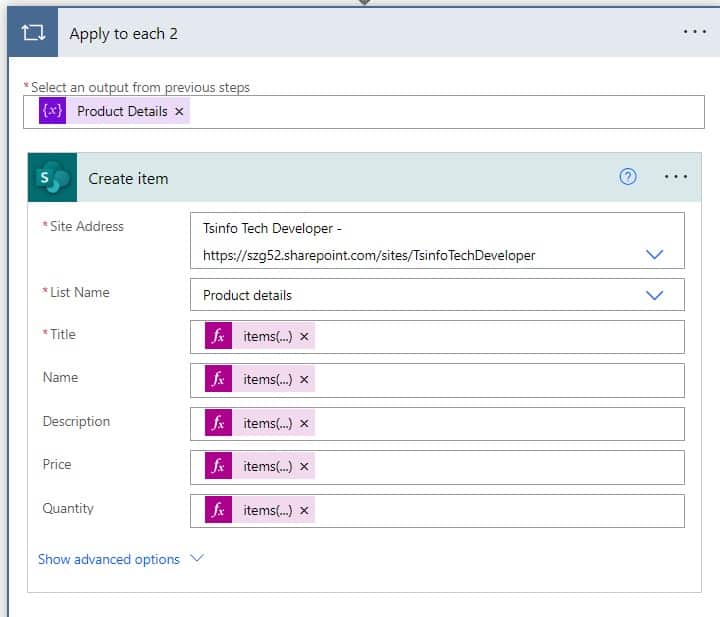
Step 8: Now run the flow manually; for this, save the flow, click on the Test icon ->select the Manually option -> click on the Test button. Then click Import and select the XML file -> click on Run flow. You can see your flow run successfully.
Also, items get created in the SharePoint list successfully, like below.

Conclusion
In this Power Automate tutorial, we saw how to create a SharePoint list item from XML using Power Automate.
You may also like:
- Convert XML to JSON using Power Automate
- How to loop through XML data and insert into Excel using Power Automate?
- Send email from excel using Power automate
- Convert XML to string in Power Automate
I am Bijay a Microsoft MVP (10 times – My MVP Profile) in SharePoint and have more than 17 years of expertise in SharePoint Online Office 365, SharePoint subscription edition, and SharePoint 2019/2016/2013. Currently working in my own venture TSInfo Technologies a SharePoint development, consulting, and training company. I also run the popular SharePoint website EnjoySharePoint.com