In this Power Automate tutorial, we will see how to loop through XML data and insert into Excel using Power Automate.
For example, we will create a flow that will loop through the below XML data and insert it into the Excel file.
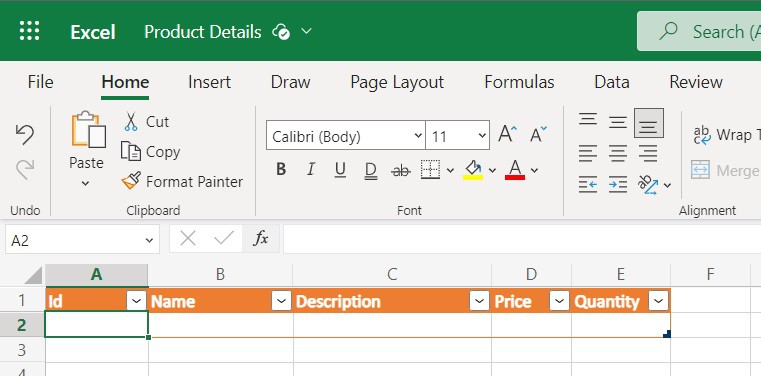
For this, create an Excel file with the below columns and formatted as a table. The columns are:
- Id
- Name
- Description
- Price
- Quantity
So, we will create an Instant cloud flow, that will trigger manually. And it will take the user input as a file. Then it will convert the file content from base64 to string.
Once XML is converted to a string, it is parsed to get all the product nodes. Then we will loop through the Product nodes and get the product details like id, name, description, price, and quantity and create an array of Product details.
Then we will loop through Product details and insert them into the Excel.
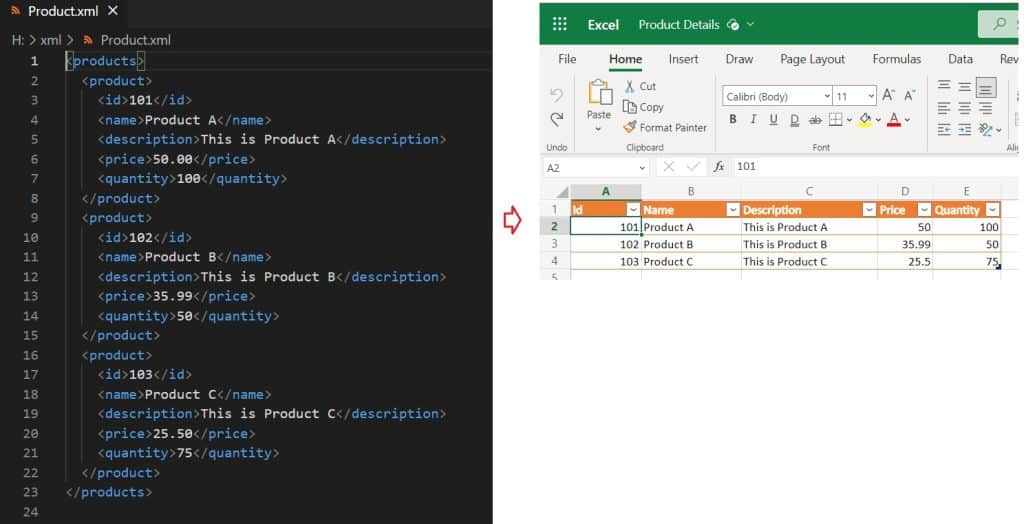
Now, let’s see how to loop through XML and insert data into Excel using Power Automate.
Power automate loop through XML data insert into excel
Here we will see how to loop through XML data and insert into an Excel using Power Automate.
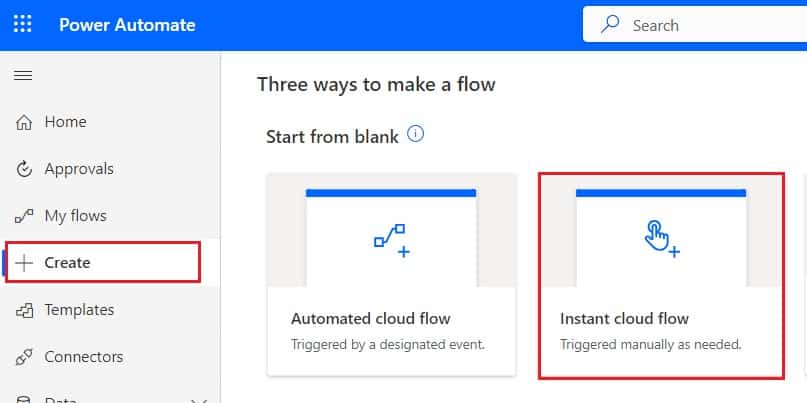
Step 1: Log in to Power Automate and click +Create -> select Instant cloud flow.
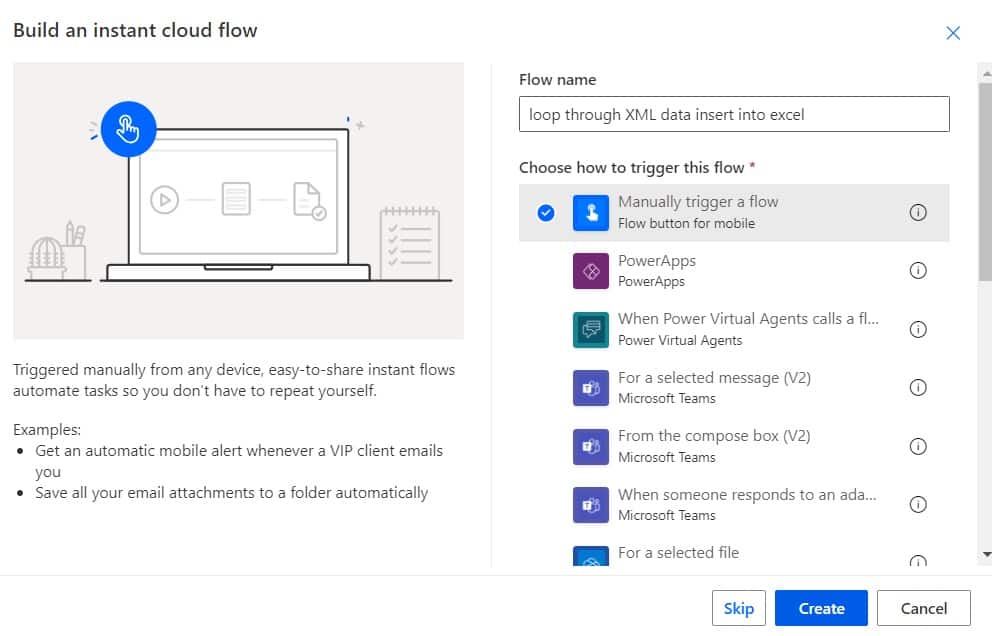
Then provide the flow name and select Manually trigger a flow action. Then click on Create.
Now, you can see the Manually trigger a flow action is added to the flow page. Now expand the action -> click on Add an input ->select File inputs.

Step 2: Now we will convert the base64 to string using Power Automate, so click on the +New step -> select Compose action. Then provide the below information:
- Inputs: Provide the below expression:
base64ToString(triggerBody()['file']['contentBytes'])
Step 3: Next, click the +New step, and select Initialize variable action. Then provide the below information:
- Name: Provide the variable name.
- Type: Select the type as an array.

Step 4: Now, we will parse the XML data, so click on the +New step -> select Compose action. Then provide the below information.
- Inputs: Provide the below information:
xpath(xml(outputs('Compose')), '/products/product')
Step 5: Next, we will loop through person nodes to get the details, so click on the +New step -> select Apply to each action. Provide the below information:
- Select an output from previous steps: Select the output from the dynamic content.
Next, we will Add an action -> select Compose action, then provide the below information:
- Inputs: Provide the below expression
items('Apply_to_each')?['$content']After that, click on Add an action -> select Compose action to convert base64 to string, then provide the below information:
- Inputs: Provide the below expression:
base64ToString(outputs('Compose_4'))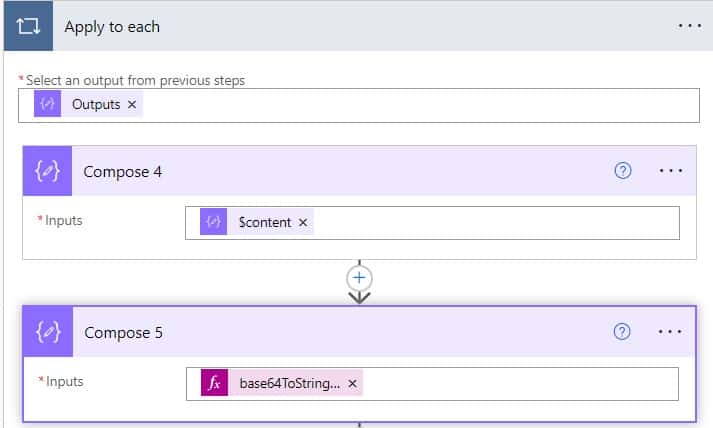
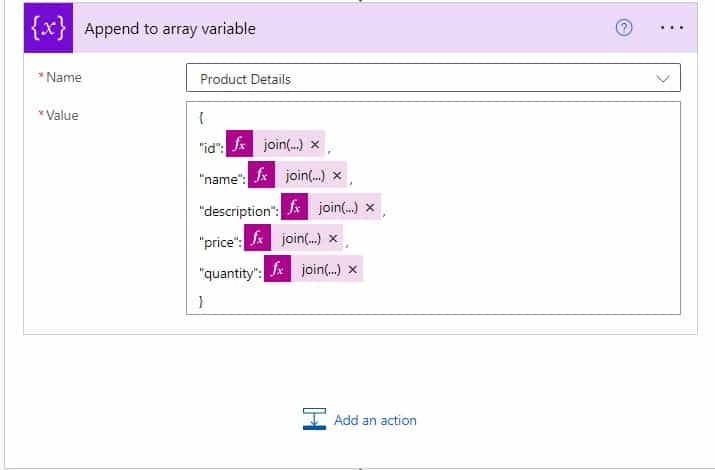
Step 6: Now, click the +New step -> select Append to array variable action. Then provide the below information:
- Name: Select the variable name.
- Value: Provide the below information:
{
"id":@{join(xpath(xml(outputs('Compose_5')), '/product/id/text()'),'')},
"name":@{join(xpath(xml(outputs('Compose_5')), '/product/name/text()'),'')},
"description":@{join(xpath(xml(outputs('Compose_5')), '/product/description/text()'),'')},
"price":@{join(xpath(xml(outputs('Compose_5')), '/product/price/text()'),'')},
"quantity":@{join(xpath(xml(outputs('Compose_5')), '/product/quantity/text()'),'')}
}
Step 7: Next, we will add Apply to each action, then provide the below information:
- Select an output from previous steps: Provide the array variable from dynamic content.
Now we will insert data to Excel, so click on Add an action -> select Add a row into a table action. Then provide the below information:
- Location: Provide the location of an Excel
- Document Library: Select or provide the document library.
- File: Select the Excel file
- Table: Select the table of Excel
- Id: Provide the below expression:
items('Apply_to_each_2')?['id']- Name: Provide the below expression:
items('Apply_to_each_2')?['name']- Description: Provide the below expression:
items('Apply_to_each_2')?['description']- Price: Provide the below expression:
items('Apply_to_each_2')?['price']- Quantity: Provide the below expression:
items('Apply_to_each_2')?['quantity']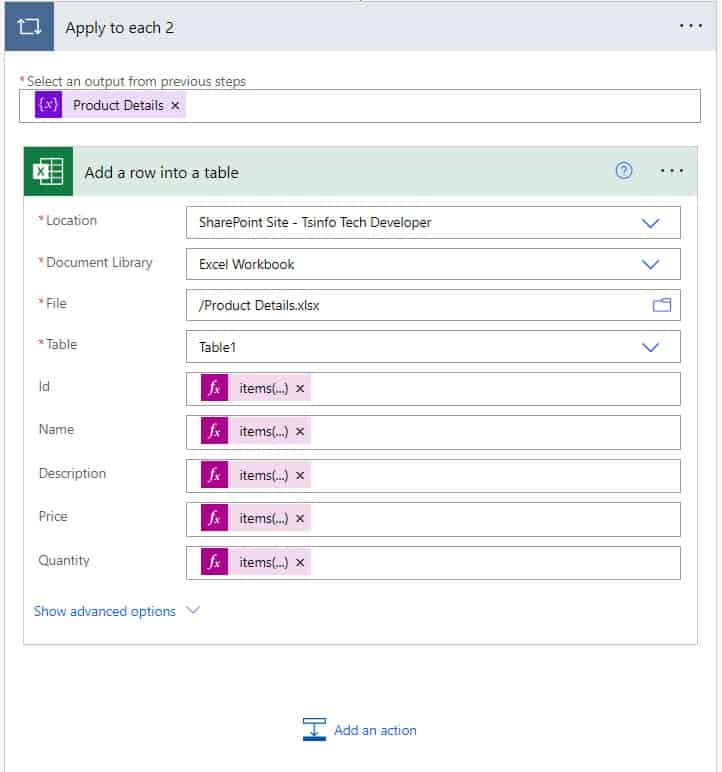
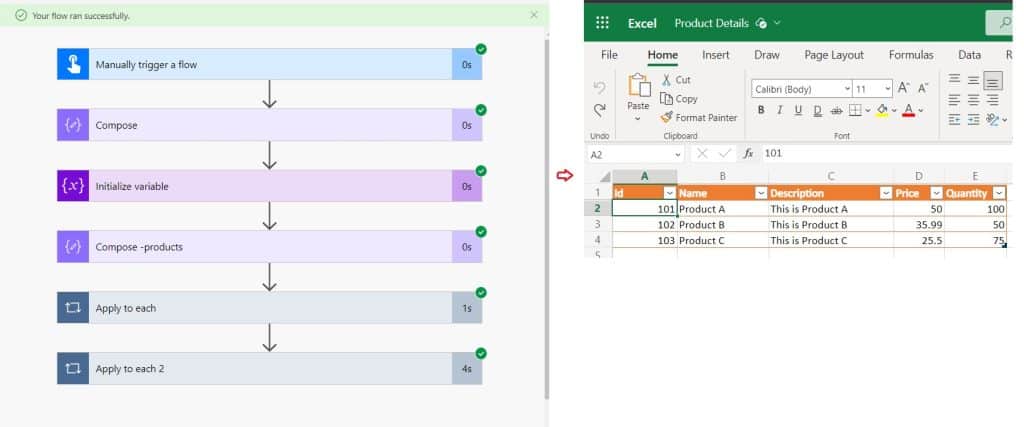
Step 8: Now run the flow manually; for this, save the flow, click on the Test icon -> select the Manually option, -> click on the Test button. Then click Import and select the XML file -> click on Run flow. You can see your flow run successfully.
The data is inserted into Excel successfully from XML using Power Automate.
Conclusion
In this Power Automate tutorial, we saw how to loop through XML data and inserted it into Excel using Power Automate.
You may like the following Power Automate tutorials:
- How to send email from excel using Power automate?
- How to replace text in a Word document in Power Automate?
- Get and Delete a SharePoint list view using Power Automate
- Copy Data from One Excel to Another Excel in Power Automate
- Convert XML to JSON using Power Automate
I am Bijay a Microsoft MVP (10 times – My MVP Profile) in SharePoint and have more than 17 years of expertise in SharePoint Online Office 365, SharePoint subscription edition, and SharePoint 2019/2016/2013. Currently working in my own venture TSInfo Technologies a SharePoint development, consulting, and training company. I also run the popular SharePoint website EnjoySharePoint.com