In this Power Automate tutorial, we will see how to replace text in a Word document in Power Automate. In the example, I will show you, how to replace text with another text in a Word document in Power Automate.
For example, we have a below Word document file in the SharePoint library, so, here we will search the text ‘Power Automate’ and we will replace it with ‘Microsoft Flow’ using Power Automate.

To perform this task, we will use the 3rd party action ‘Search and Replace text‘ action from Encodian in the Power Automate flow. To use the action, we need API Key, you will get this by filling out the form to set up the free trial. When you will add the action to the flow, use the API Key and configure it.
Now, let’s create the flow, that will search and replace the text in Word document using Power Automate.
How to replace text in Word document using Power Automate
Here we will see how to replace text from a Word document using Power Automate.
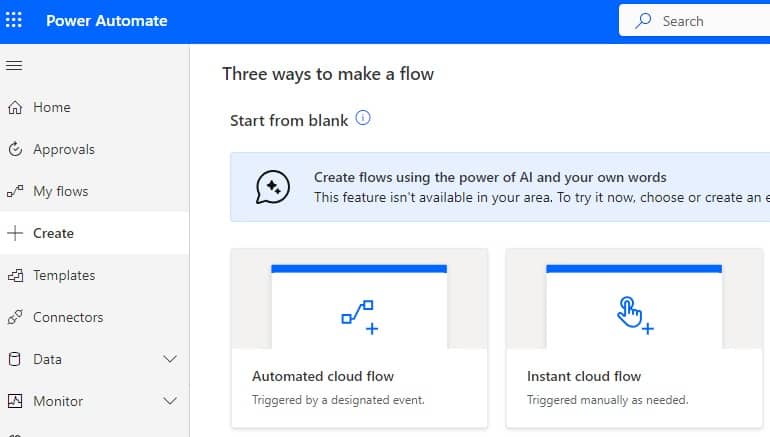
Step 1: Log in to Power Automate -> click on the +Create icon -> select Instant Cloud Flow.
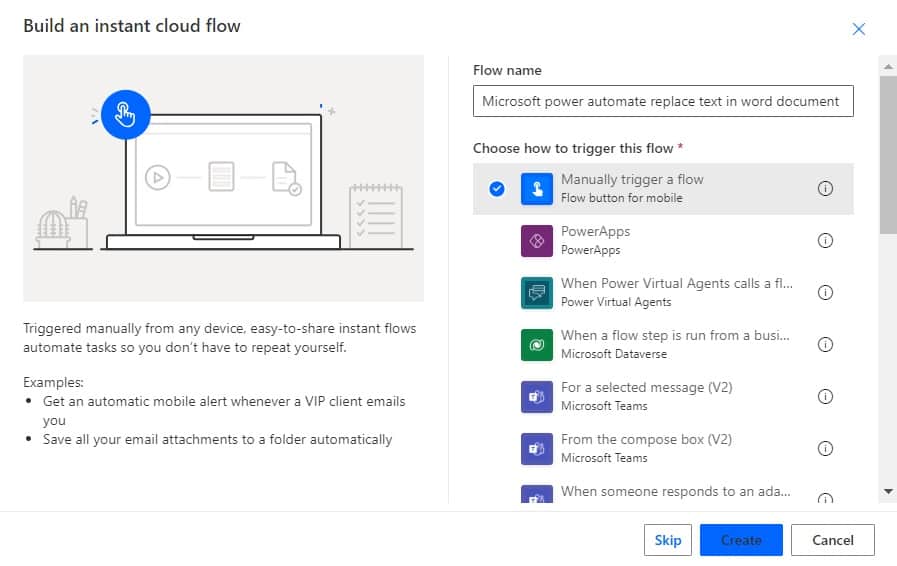
Then Provide the flow name, and select Manually trigger a flow action. Then click on Create.
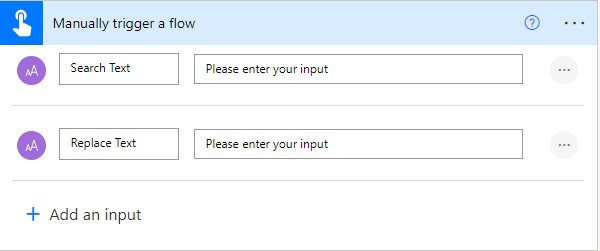
Next, you can see Manually trigger a flow is added to the flow page. We will add two fields that will take user inputs i.e. Search text and replace text respectively.
So, click on the +Add an input icon -> then add 2 Text input fields, and give the field name as Search Text and Replace text.
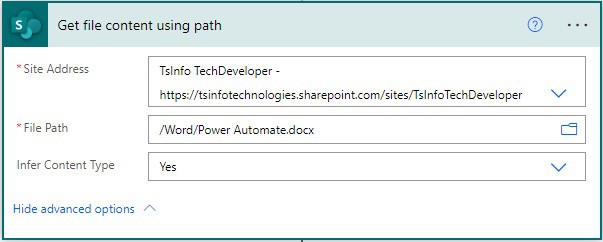
Step 2: Next, we will fetch the file content, so click on the +New step -> select Get file content using the path action. Then provide the below information:
- Site address: Select or Provide the SharePoint site address.
- File path: Select the File path.
Next, click on the ‘Show advanced options’ link.
- Infer Content type: Select Yes.
Step 3: Now we will search and replace the text from the Word document, so, click on the +New step -> select the ‘Search and replace text‘ action by Encodian. Then provide the below information.
- File type: Select DOCX as the file type.
- File name: Provide the file name with an extension.
- File Content: Select the File content from dynamic content
- Phrases Search Text – 1: Select ‘Search Text’ from dynamic content.
- Phrases Replacement: Select the ‘Replace text’ from dynamic content.
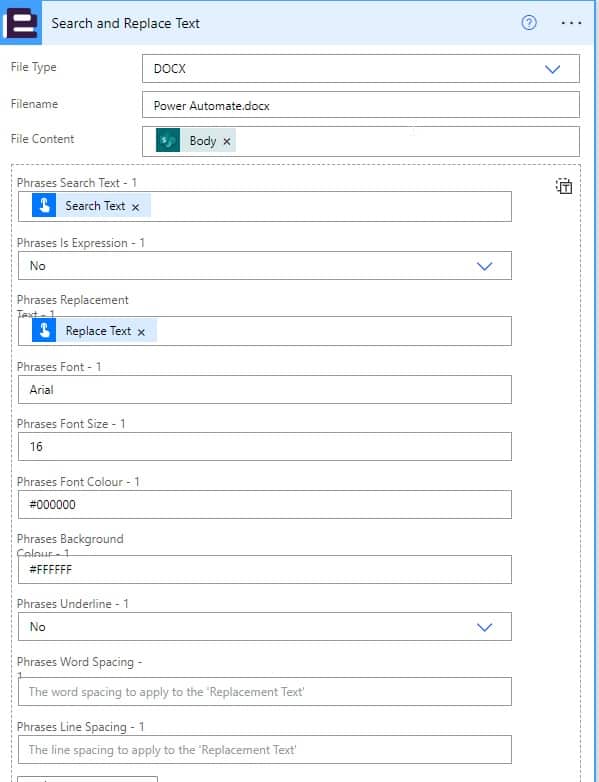
Step 4: Now we will send the final Word file to Outlook to check the output. So, click on the +New step -> select Send an email (V2) action. Then provide the below information:
- To: Provide the email. In this case, i am providing my email.
- Subject: Provide the subject of an email
- Body: Provide the body of an email.
Next, click on the Show Advanced options link.
- Attachment Name 1: Provide the Attachment name from dynamic content.
- Attachments Content: Provide the Attachments content from dynamic content.
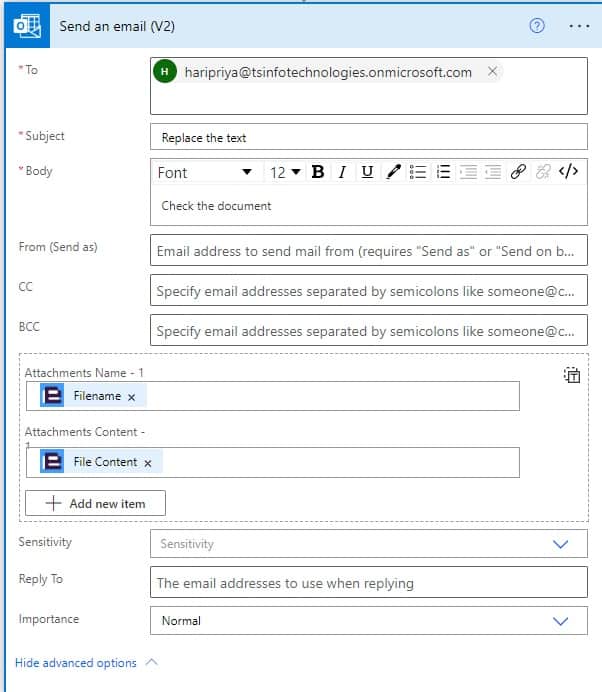
Step 5: Now, run the flow manually, so save the flow, then click on the Test icon, click on the Test icon-> select Manually -> click on Test -> configure the action with connectors, then click on Run flow -> Then click on Done.
Once your flow runs successfully. You can check email in Outlook, by clicking on Preview icon, and you can see the document. So here the text ‘Power Automate’ is replaced with Microsoft Flow in the whole document.

This is how we can replace text in Word documents using Power Automate.
Conclusion
In this Power Automate tutorial, we saw how to replace text in a Word document using Power Automate.
You may also like:
- Power Automate delete emails older than
- Power Automate check if file exists in document library
- Copy Data from One Excel to Another Excel in Power Automate
- Create a Word Document from HTML using Power Automate
I am Bijay a Microsoft MVP (10 times – My MVP Profile) in SharePoint and have more than 17 years of expertise in SharePoint Online Office 365, SharePoint subscription edition, and SharePoint 2019/2016/2013. Currently working in my own venture TSInfo Technologies a SharePoint development, consulting, and training company. I also run the popular SharePoint website EnjoySharePoint.com