Do you want to install PnP PowerShell? I will explain in detail how to install PnP PowerShell for SharePoint Online.
Let us first understand what is PnP PowerShell and what we can do using this?
PnP PowerShell
PnP PowerShell is an open-source and community-provided library containing more than 650 cmdlets to work with various Microsoft 365 environments like SharePoint Online, Microsoft Teams, Security, Microsoft Entra ID, etc. This library is based on .NET Core 3.1 / .NET Framework 4.6.1.
SharePointPnPPowerShellOnline vs. PnP.PowerShell
Before installing PnP PowerShell, let us understand the difference between sharepointpnppowershellonline vs pnp.powershell.
To understand in simple ways, SharePointPnPPowerShellOnline is the legacy version to work with SharePoint Online. PnP PowerShell is the new open source community-driven library for various Microsoft 365 environments like SharePoint Online.
So, if you want to work with PnP PowerShell, then you should install PnP PowerShell for SharePoint Online.
Install PnP PowerShell
Now, let us see how to install the pnp module in PowerShell, especially to work with SharePoint Online with PnP PowerShell.
PnP PowerShell version check
Before you install PnP PowerShell, you may need to check if pnp PowerShell is installed. Here is the command you can use.
Get-InstalledModule -Name "PnP.PowerShell"This is how to check the pnp PowerShell version.
Update PnP PowerShell
If you are not sure which version of PnP PowerShell you are using, you can run the below cmdlet to update PnP PowerShell to the latest version.
Update-Module PnP.PowerShell
or
Update-Module PnP.PowerShell -Scope CurrentUser
Uninstall PnP PowerShell
If you want to remove PnP PowerShell, you can run the command below.
Uninstall-Module PnP.PowerShell -AllVersionsUpgrade from the Legacy version (SharePointPnPPowerShellOnline) to PnP PowerShell
If you have installed the legacy version of PnP PowerShell for SharePoint Online, which is SharePointPnPPowerShellOnline, then you need to first uninstall SharePointPnPPowerShellOnline and then install PnP PowerShell.
For this, run the below commands.
First, run the below command to uninstall sharepointpnppowershellonline.
Uninstall-Module -Name "SharePointPnPPowerShellOnline" -AllVersions -ForceThen, run the below command.
Install-Module -Name "PnP.PowerShell"Install PnP PowerShell for SharePoint Online
To work with SharePoint Online using PnP PowerShell, follow the below step:
Step-1:
Note: To use PnP PowerShell, You need PowerShell 7.2 or later version. And if you do not have this version, then you can download (64-bit and 32-bit) and install it. You can get more information on this.
You can run the below command to check the current PowerShell version.
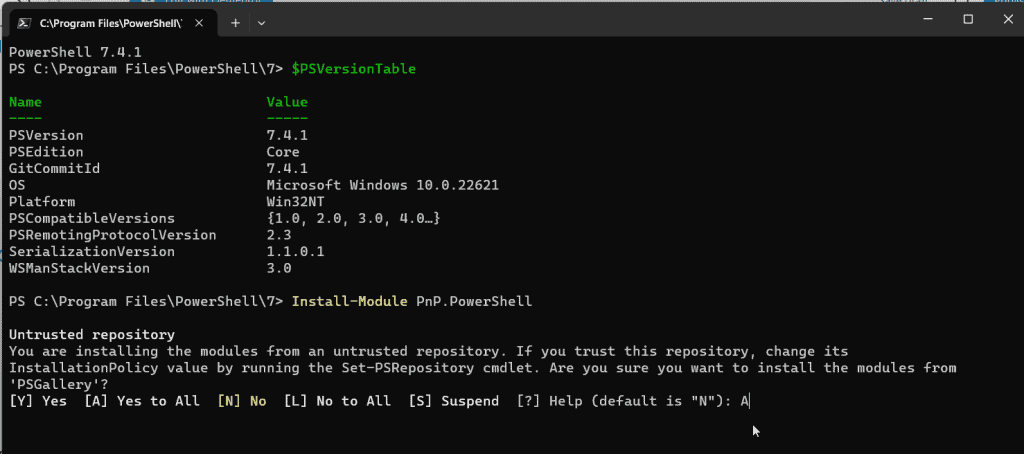
$PSVersionTableAfter this, you can run the below command to install pnp powershell for sharepoint online.
Install-Module PnP.PowerShell
or
Install-Module -Name "PnP.PowerShell"
If you want to install it for the current user, run the below command:
Install-Module PnP.PowerShell -Scope CurrentUser
or
Install-Module -Name "PnP.PowerShell" -Scope CurrentUser
You can see the output in the screenshot below:

Step-2:
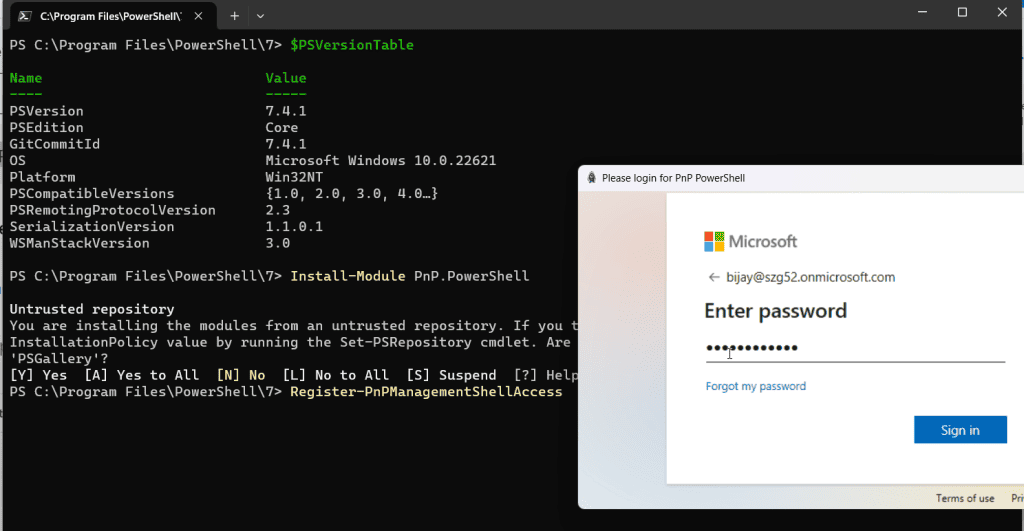
Before connecting to SharePoint Online from PnP PowerShell, you need to do a one-time action. You must be a global or tenant admin to run this command.
Register-PnPManagementShellAccess
or
Register-PnPManagementShellAccess -ShowConsentUrl
or
Register-PnPManagementShellAccess -ShowConsentUrl -TenantName yourtenant.sharepoint.com
In case you get an error, check out here Register-PnPManagementShellAccess is not recognized.

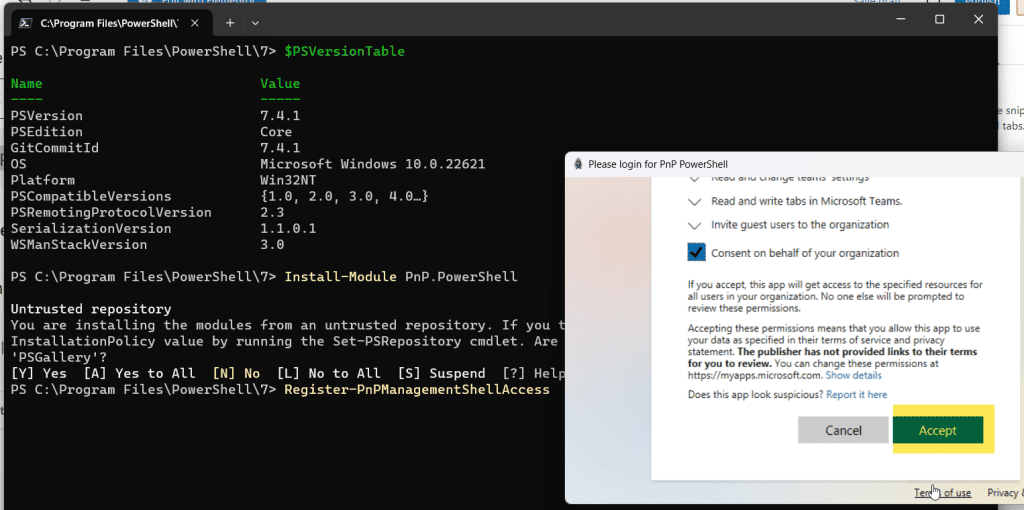
Once you sign in, it will show you to give the consent on behalf of your organization. Click on Accept.

Step-3:
Then, you can connect to a SharePoint site by running the below command.
Connect-PnPOnline -Url "https://szg52.sharepoint.com/sites/SPGuides/" -Credential (Get-Credential)
or
Connect-PnPOnline -Url "https://tenantname.sharepoint.com" -UseWebLogin
or
Connect-PnPOnline -Url https://tenant-admin.sharepoint.com/
or
//Connect to a SharePoint Online Site
Connect-PnPOnline -Url "https://tenantname.sharepoint.com/sites/sitename/" -Interactive
It will ask you to provide the username and password below.

Now, you have been connected to SharePoint Online from your PnP PowerShell.
To check it out, you can run the below command to give you the sites in your tenant.
Get-PnPTenantSiteYou can see the output in the screenshot below:

This is how to install pnp powershell for sharepoint online.
Conclusion
If you want to work in pnp powershell for sharepoint online, I hope this tutorial will help you install pnp PowerShell and work with SharePoint Online.
I have explained how to update from legacy PowerShell SharePoint Online to the new PnP PowerShell to work with SharePoint Online.
You may also like:
- SharePoint download multiple files
- SharePoint PnP PowerShell examples
- Delete all items from a SharePoint Online list using PnP PowerShell
I am Bijay a Microsoft MVP (10 times – My MVP Profile) in SharePoint and have more than 17 years of expertise in SharePoint Online Office 365, SharePoint subscription edition, and SharePoint 2019/2016/2013. Currently working in my own venture TSInfo Technologies a SharePoint development, consulting, and training company. I also run the popular SharePoint website EnjoySharePoint.com
The commands are not working as expected.
When I tried
Connect-PnPOnline –Url https://xxx.sharepoint.com –Credentials (Get-Credential)
It asked me to uninstall all previous versions of “SharePointPnPPowerShellOnline” and install “PnP.PowerShell” like below
Uninstall-Module -Name SharePointPnPPowerShellOnline -AllVersions -Force
Install-Module -Name PnP.PowerShell
Then I again tried
Connect-PnPOnline –Url https://xxx.sharepoint.com –Credentials (Get-Credential)
Connect-PnPOnline : AADSTS65001: The user or administrator has not consented to use the application with ID ‘31359c7f-bd7e-475c-86db-fdb8c937548e’
named ‘PnP Management Shell’. Send an interactive authorization request for this user and resource.
Thank You. It worked for me
Great content! Keep up the good work!