Do you know about the Board view in the SharePoint Online list? This SharePoint Online tutorial will discuss the SharePoint List Board view and how to create a board view in a SharePoint Online list.
Also, I will explain to you how to use a board view in the SharePoint Online list.
Moreover, I will explore the limitations and properties of the board view in the SharePoint List.
SharePoint List Board View
SharePoint List Board view, similar to a Kanban board in appearance, was added to Microsoft/SharePoint Lists in January last year. It allows users to view list items on a board with swim lanes showing their progress.
Users of the view can also drag and drop things inside the board view and set the columns shown in the cards.
How to Create a Board View in a SharePoint Online List
To create a board view in a SharePoint Online list, follow the instructions below:
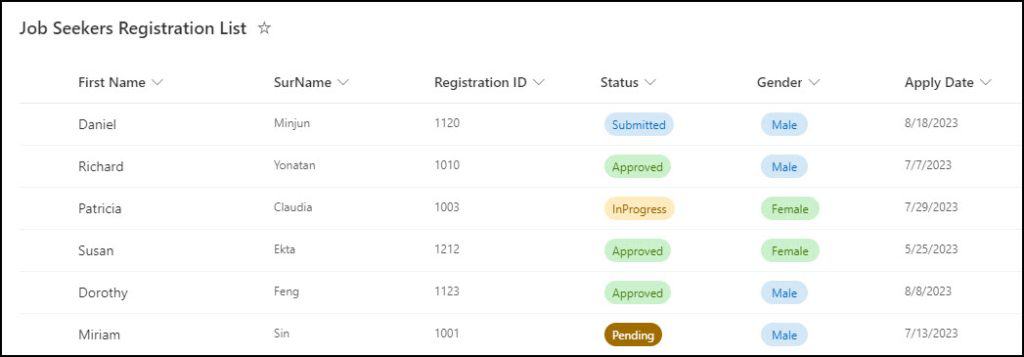
- Below is a SharePoint Online list [Job Seekers Registration List] where I will create a board view. This list has many various columns as well as some records.
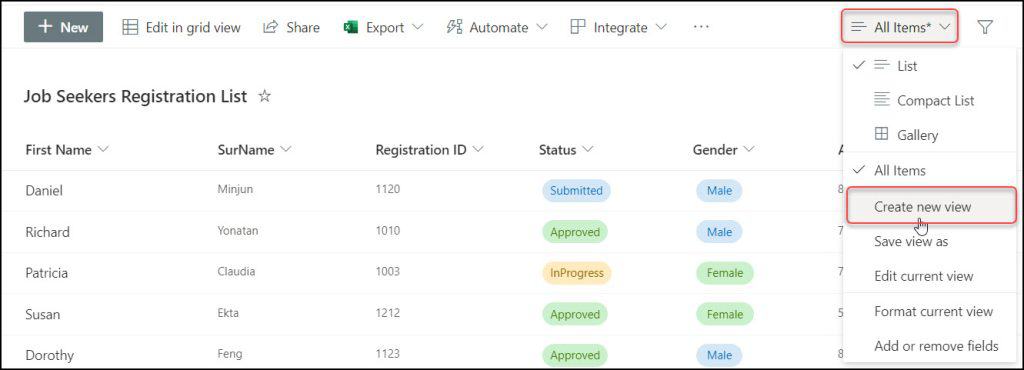
- Go to the All Items view option -> Click the Create new view.
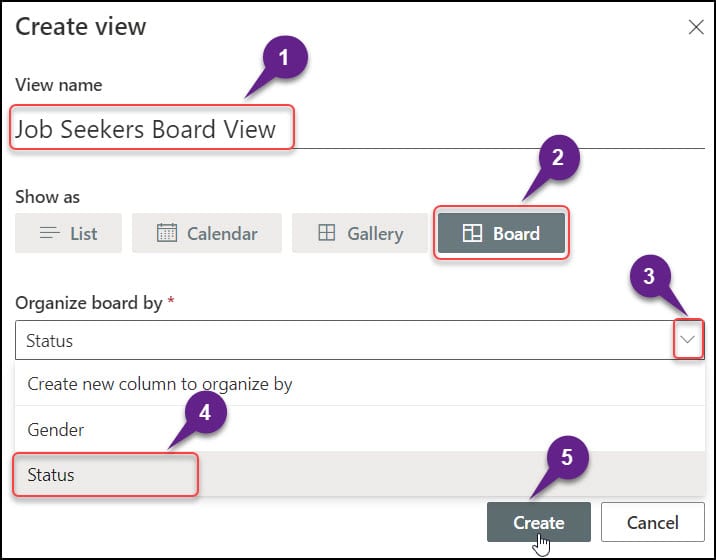
- In the Create view window, provide the below details:
- View name: Provide a unique name for the new view.
- Show as: Select Board.
- Organize board by: Choose the column that will be used to arrange the cards on the board. Consider them similar to Planner’s buckets. In my scenario, I want the cards arranged according to Status. Click on Create.
- Make this a public view: If you want to make the created view public, enable this option. By default, it will be enabled only.
- Click on Create.
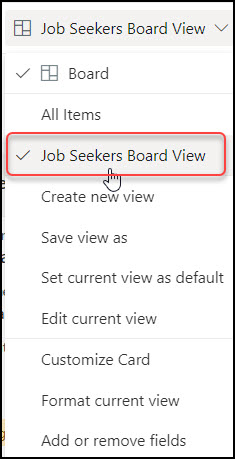
- The board view has been created and added to the Views dropdown menu.
- The new board view will display like the below image.
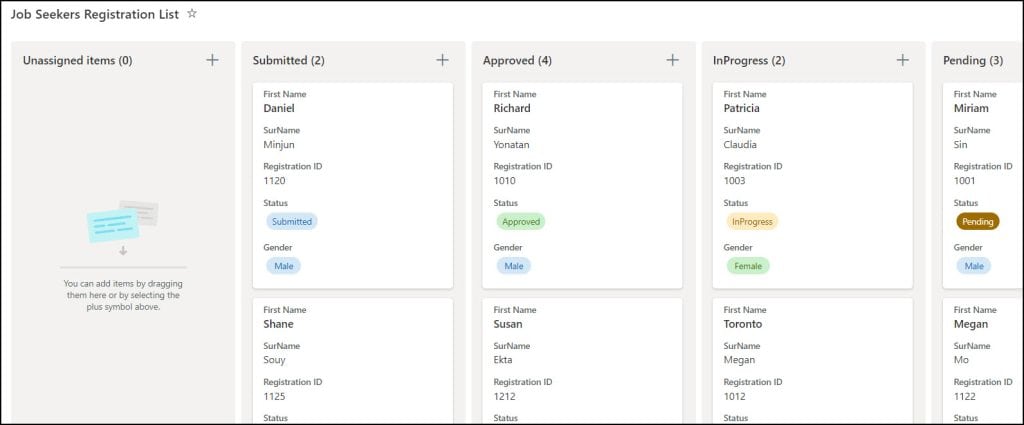
This is how to create a board view in a SharePoint Online list.
How to Use SharePoint List Board View
Next, we will see how to use the board view in SharePoint List.
Move the card from one bucket to another
- The cards can be moved (dragged and dropped) from one bucket to another. This will automatically change the column value of a “group by column” (bucket).
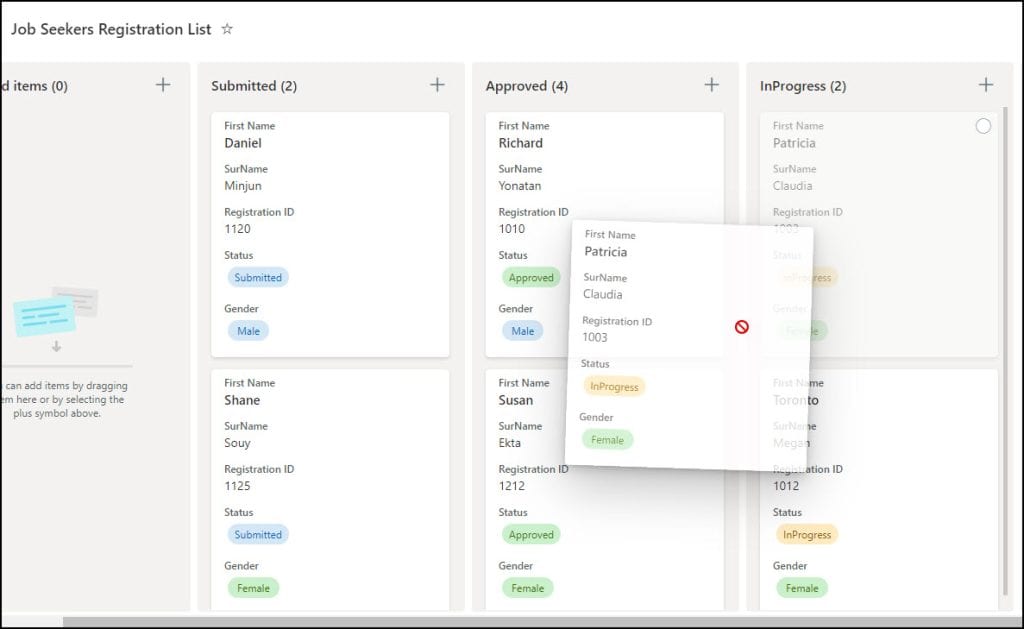
- Select, drag, and drop the card to where you want to move.
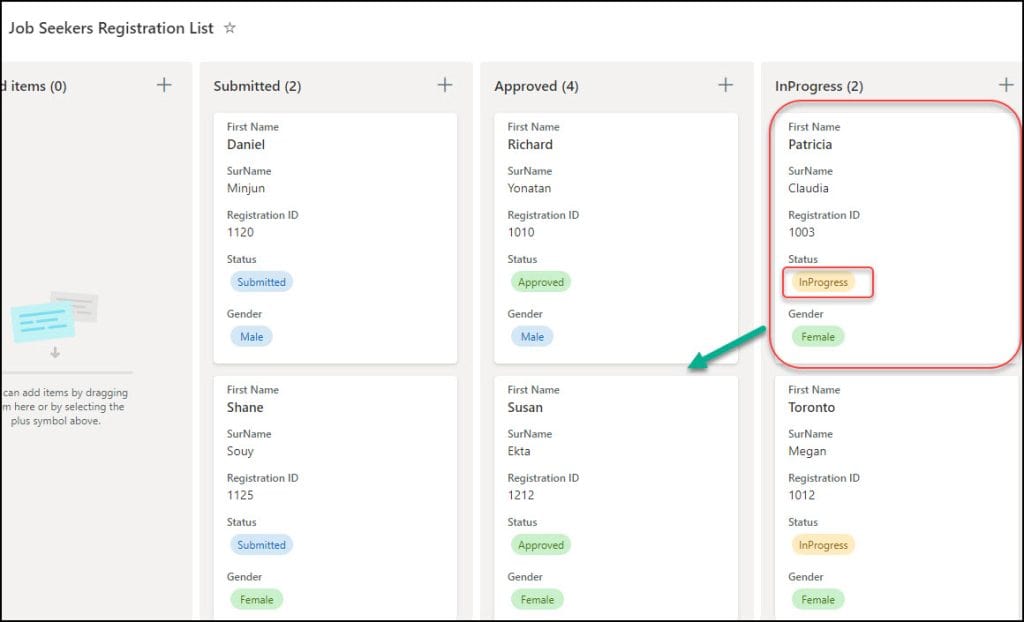
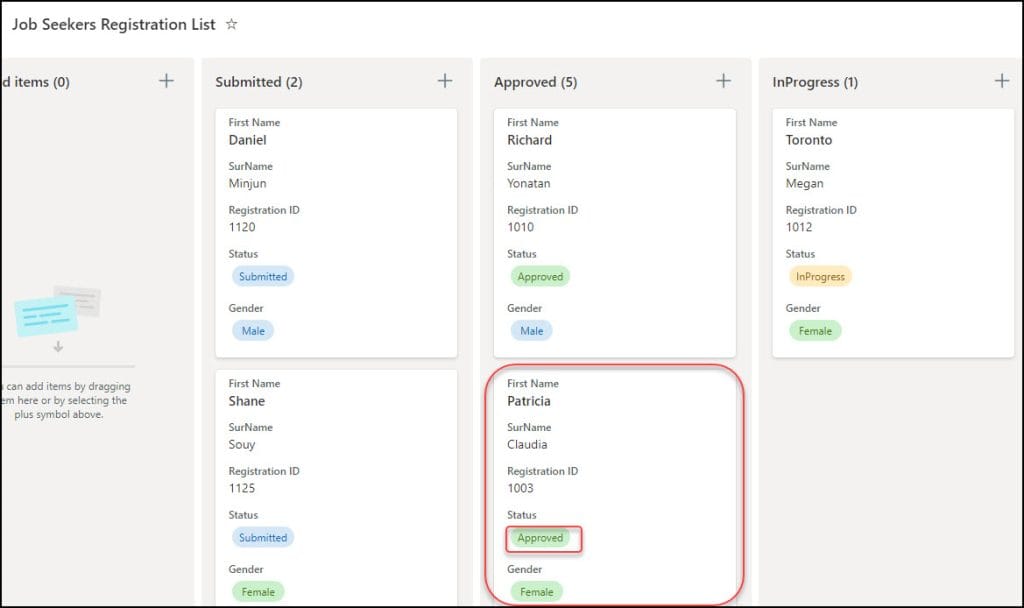
- Once the card has been moved to the desired place, the Status value will be changed according to the selected category.
- The card Status value has been changed to Approved, as shown below.
Edit the item by selecting the card
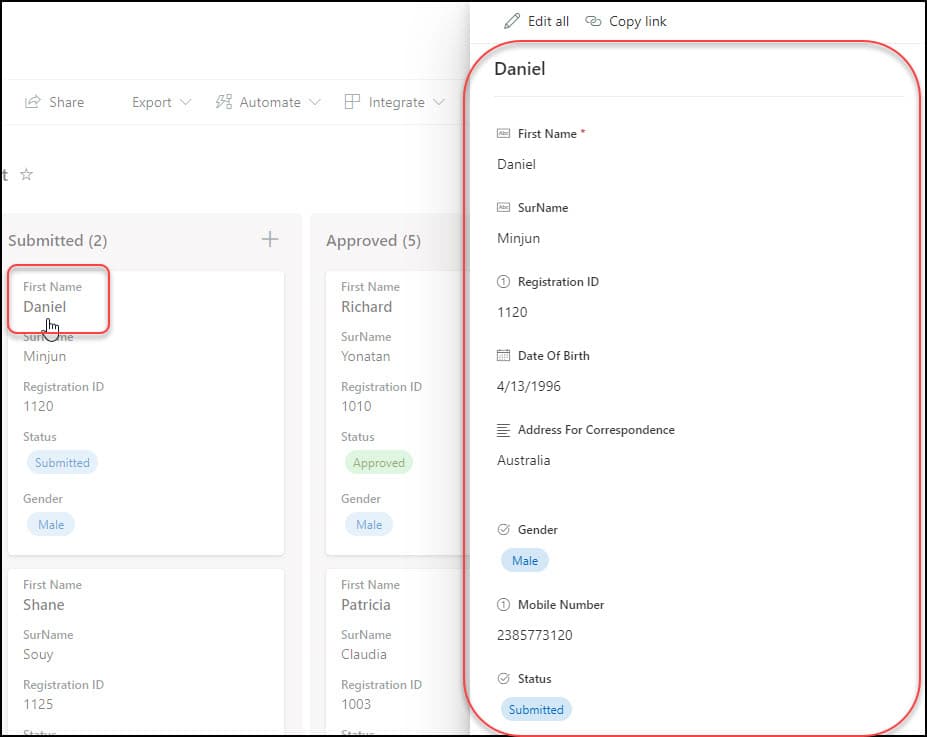
- You can directly edit the specific item by selecting the particular card.
- Just click the card that you want to modify. On the right side, the field pane will appear. Modify all the changes by tapping on the Edit all option.
Other Card Properties of the Board view
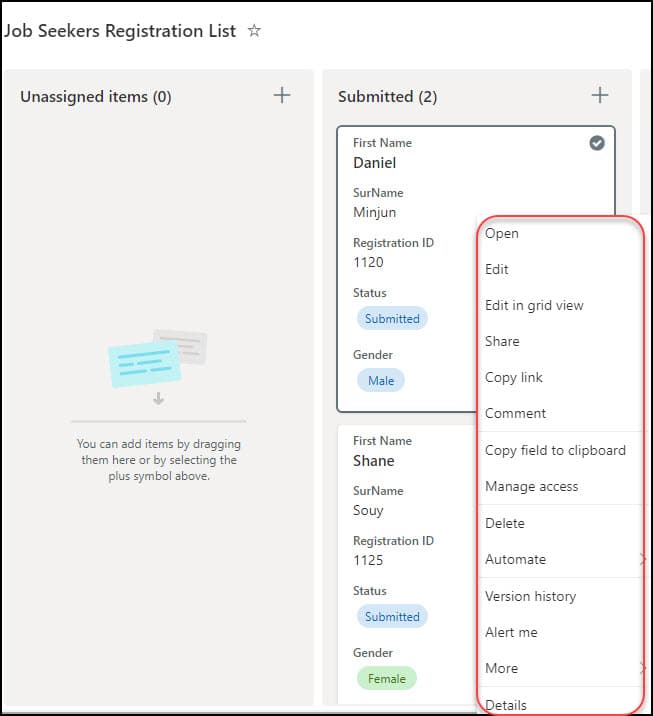
- Also, there are various SharePoint board view card properties like Share, Copy link, Comment, Manage access, Delete, etc.
- Select the card from the board view and right-click on the mouse. You will get all the specific card properties as shown below.
Customize Card in Board view
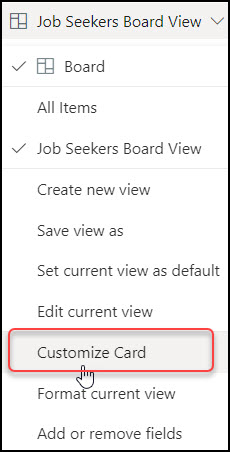
- You can also customize the SharePoint list Board view. To do so, click the dropdown View option and choose Customize Card.
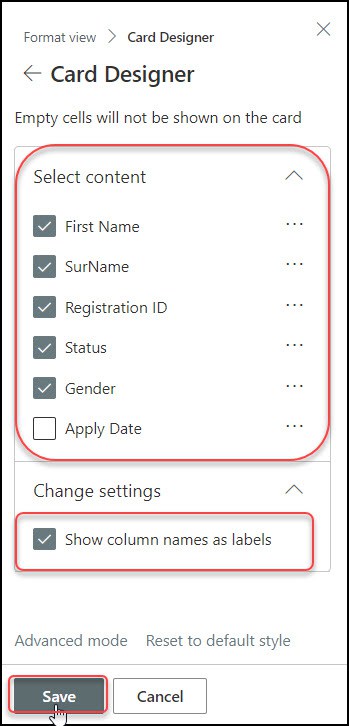
- In the Card Designer pane, you can specify which columns should be displayed on the card.
Show column names as labels
- Additionally, the card can display the column name as the label above the column value at the very bottom. If you want to show column names as labels, check on this.
- Finally, click on Save. Refer to the screenshot below for your reference.

Show Image Column in Board Card
- If your SharePoint list has an Image column, you can easily display that image in the board view card.
- Also, you can Move up or Move down the specific image within the particular card.
- Moreover, you can preview the image by enabling the Show preview option.
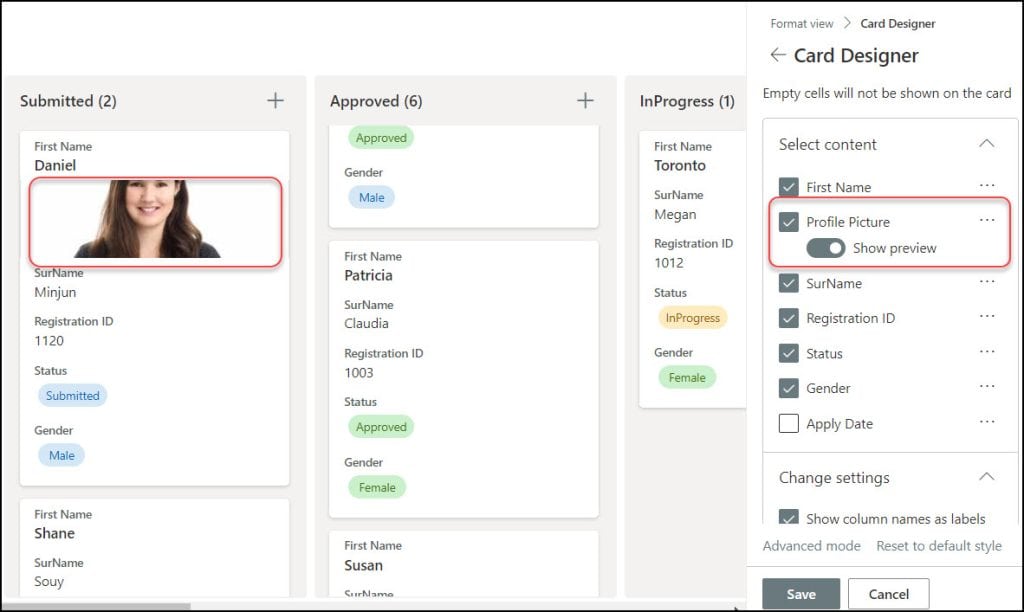
This is how to use the board view in the SharePoint Online list.
SharePoint List Board View Limitations
These are the certain limitations of the SharePoint list board view.
| Limitations | Description |
|---|---|
| Empty cells will not be shown on the card | The columns are hidden from the cards in the board view if your list item contains empty values. This can be confusing since, depending on whether your list items have data, the field order of each card changes. |
| The card designer doesn’t display any new columns | The card designer or the cards themselves will not, by default, display any new columns you add to your list. The board view must be recreated in order for additional columns to show. |
| Organize by limitations | You’ve probably realized by now that you may use only a few columns to arrange your board. The board view’s first significant restriction is that you can only organize by the types of columns listed below: -> Yes/ no -> Choice |
| No sort features | The card designer or the cards themselves will not, by default, display any new columns you add to your list. The board view must be recreated in order for additional columns to show. |
These are some of the restrictions of the SharePoint list board view.
Conclusion
This SharePoint Online tutorial covered the SharePoint List Board view and how to create a board view in a SharePoint Online list.
Also, I explained to you how to use a board view in the SharePoint Online list with various examples.
Moreover, I explored the various restrictions and properties of the board view in the SharePoint List.
You may also like:
- SharePoint List View Filter By Current User Email
- Create Indexed Column in SharePoint List
- Create SharePoint List Views using Power Automate
- SharePoint list view threshold
I am Bijay a Microsoft MVP (10 times – My MVP Profile) in SharePoint and have more than 17 years of expertise in SharePoint Online Office 365, SharePoint subscription edition, and SharePoint 2019/2016/2013. Currently working in my own venture TSInfo Technologies a SharePoint development, consulting, and training company. I also run the popular SharePoint website EnjoySharePoint.com