Power Apps dropdown controls and radio buttons are mostly used for selection purposes like, “If you want to bind the SharePoint choice field values, you can easily use these controls to retrieve the values.
Recently, I got the requirement to work with the Power Apps dropdown control where I need to change or convert the dropdown control to a radio button.
In this Power Apps tutorial, I will show you how to change Power Apps dropdown to Radio button with a simple scenario.
How to Change Power Apps Dropdown to Radio button
Let’s take a Simple scenario.
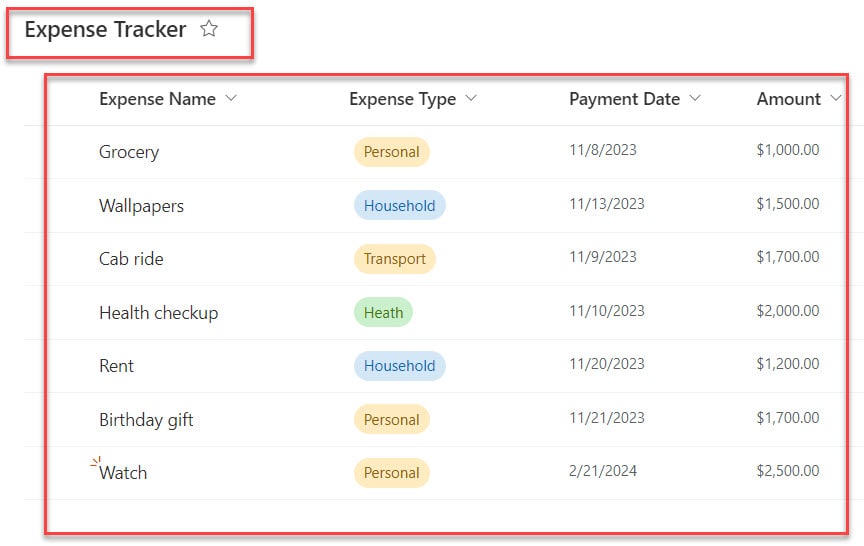
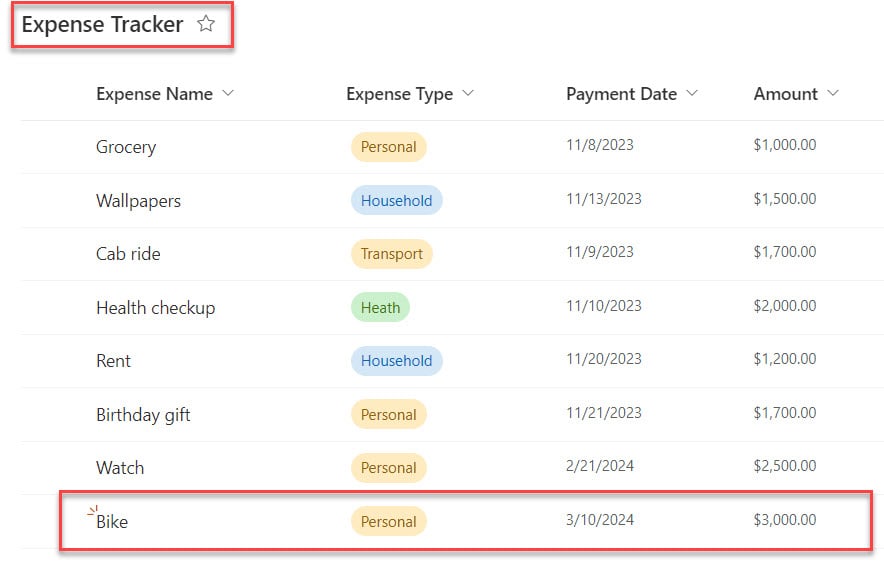
I have a Power Apps Edit form [Data is retrieved from a SharePoint list named “Expense Tracker“].
While adding the data to the edit form, the choices [Expense Type] are displayed in a Power Apps Dropdown control. But I want to change this dropdown control to a Radio button, as in the screenshot below.
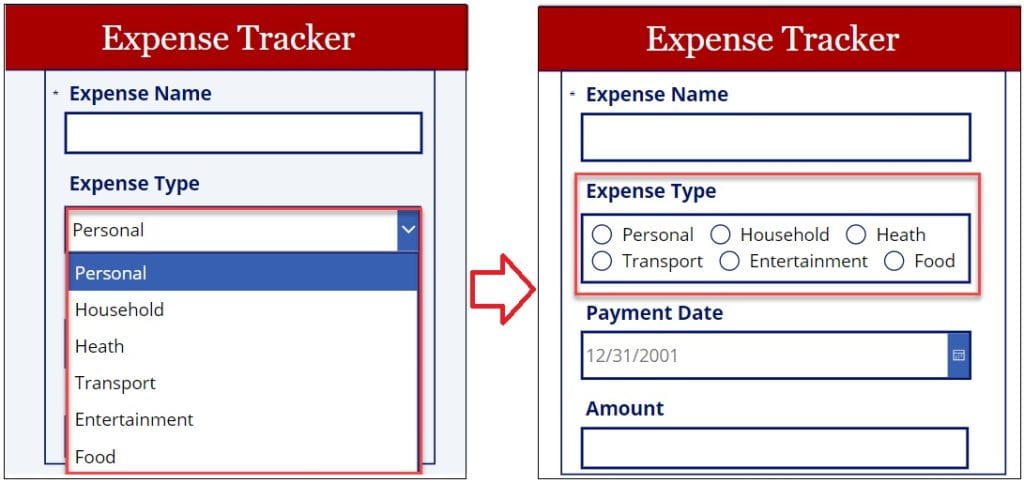
To work around this, follow the below-mentioned steps. Such as:
1. Create a Blank Canvas app and connect to the specific SharePoint list -> Insert an Edit form control and set its DataSource property as:
DataSource = 'Expense Tracker'Where,
- ‘Expense Tracker’ = SharePoint Online list
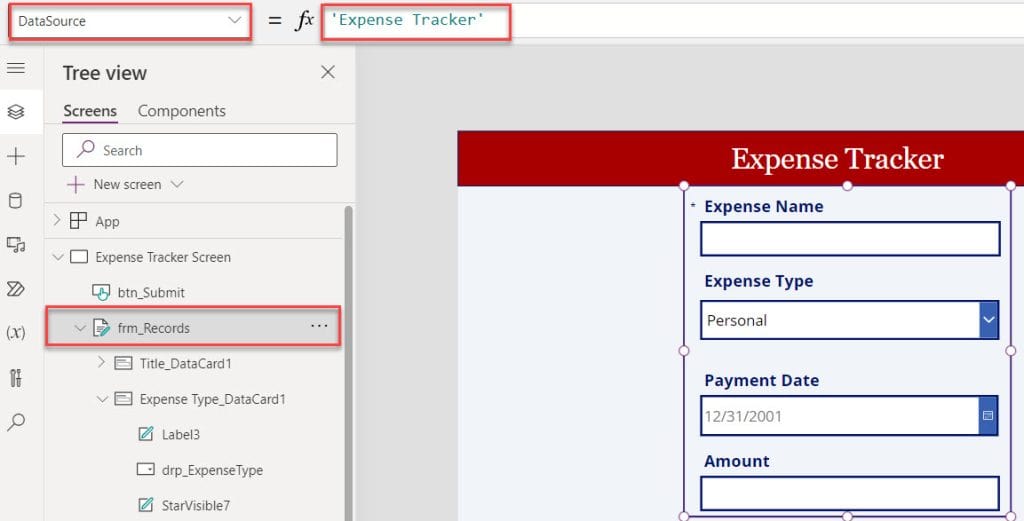
2. Here, you can see that the SharePoint choice field values are displayed on the Dropdown control.
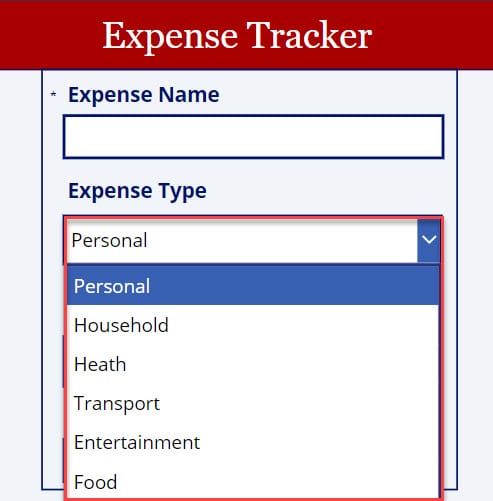
3. I don’t want to display the choice field in the Dropdown control. I want to display the choice field values on the Radio button control.
4. To do so, select the “Expense Type_DataCard1” -> Select the Dropdown control -> Copy the DataCardValue and Items property -> Remove the Dropdown control.
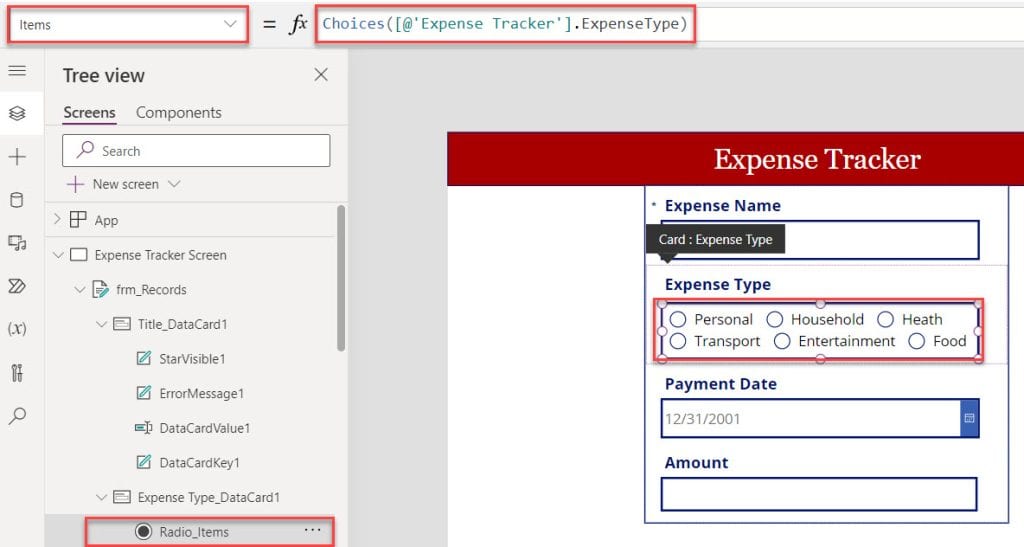
5. Next, insert a Radio button control -> Set its DataCardValue and Items property from the Dropdown control as in the screenshot below.
Items = Choices([@'Expense Tracker'].ExpenseType)Where,
ExpenseType = SharePoint Choice field
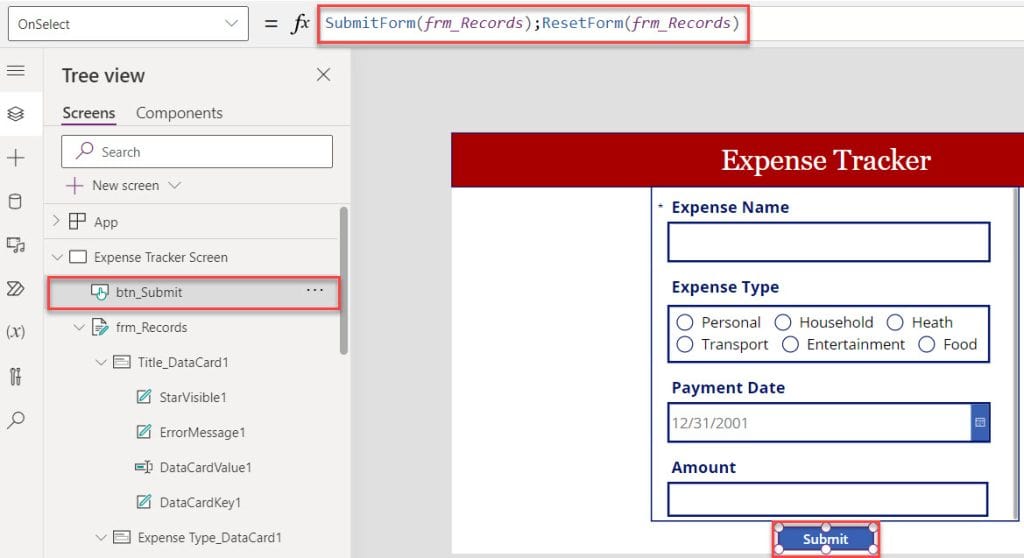
6. In the last, insert a Save button and set its OnSelect property as:
OnSelect = SubmitForm(frm_Records);
ResetForm(frm_Records)
Where,
- frm_Records = Power Apps Form Name
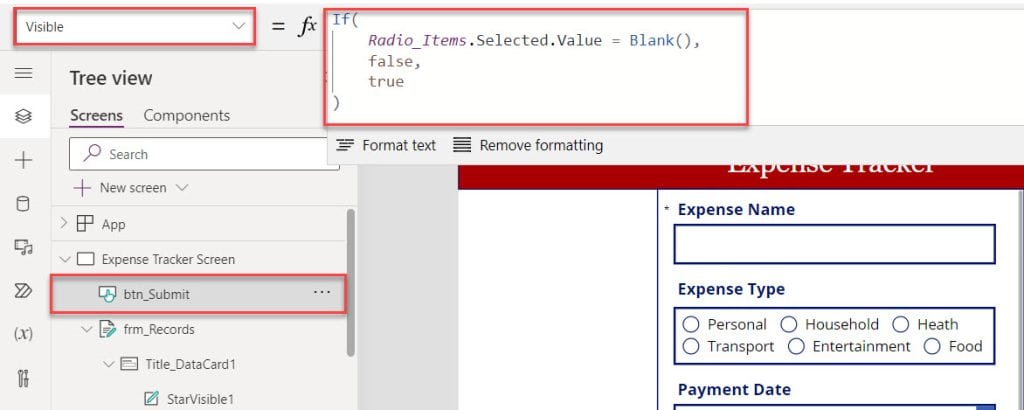
7. Also, set the Save button’s Visible property code to the below.
Visible = If(
    Radio_Items.Selected.Value = Blank(),
    false,
    true
)
Where,
- Radio_Items = Power Apps Radio Button Name
8. Once your Power Apps app is ready, Save, Publish, and Preview the app.
9. Whenever a user enters a new record, make sure he/she selects any value from the Power Apps Radio button control. Then, only the user will get the Save button; otherwise, it will disappear.
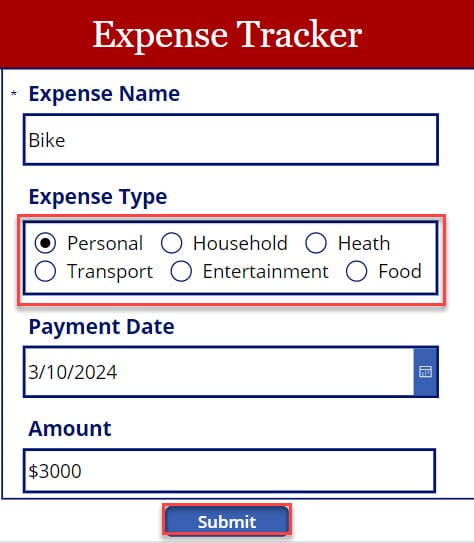
10. The new record will be added to the SharePoint list once you click on the Save button, as in the screenshot below.
This way, you can change the Power Apps dropdown control to a radio button.
I trust this Power Apps tutorial helps you get all the information about changing the Power Apps dropdown to a radio button. If you have any requirements related to this change, you can follow the above steps to do it.
Some more Power Apps articles you may like:
- Power Apps Currency Format
- Change Date Format in Power Apps Data Table
- Save Data to Multiple SharePoint Lists in Power Apps
- Filter Power Apps Gallery By SharePoint Lookup Column
I am Bijay a Microsoft MVP (10 times – My MVP Profile) in SharePoint and have more than 17 years of expertise in SharePoint Online Office 365, SharePoint subscription edition, and SharePoint 2019/2016/2013. Currently working in my own venture TSInfo Technologies a SharePoint development, consulting, and training company. I also run the popular SharePoint website EnjoySharePoint.com