Content editor web parts are very useful if you want to add HTML, text, or script content to a SharePoint web part page. In this SharePoint Online tutorial, I will show you how to use the content editor web part in SharePoint Online.
Content editor webpart in SharePoint Online
Microsoft introduced the content editor web part in SharePoint and popularly used it in various SharePoint versions. You can use the content editor web part in SharePoint to add text, HTML, tables, images, and videos, and you can also format text to a SharePoint web part page.
In SharePoint, we can use content editor web parts to display rich content, HTML, javascript, CSS, etc. We can add content directly to a content editor web part in SharePoint. Also, we can refer to external HTML or JS files in SharePoint using the content editor web part.
Add content editor web part to SharePoint web part page
Now, we will see how to add a content editor web part to a SharePoint web part page.
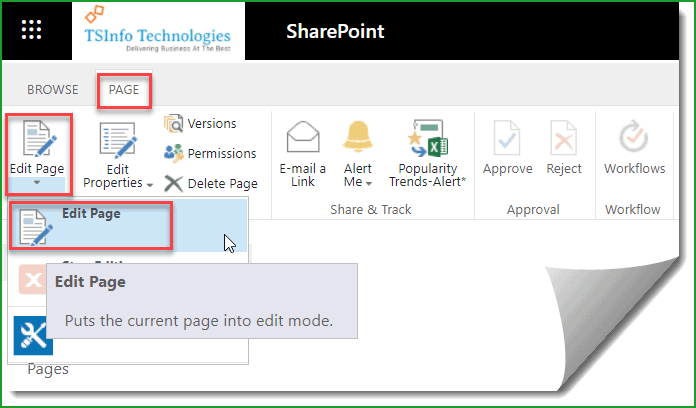
- Once you open the SharePoint web part page, click on Page -> Edit page in the ribbon, like below:
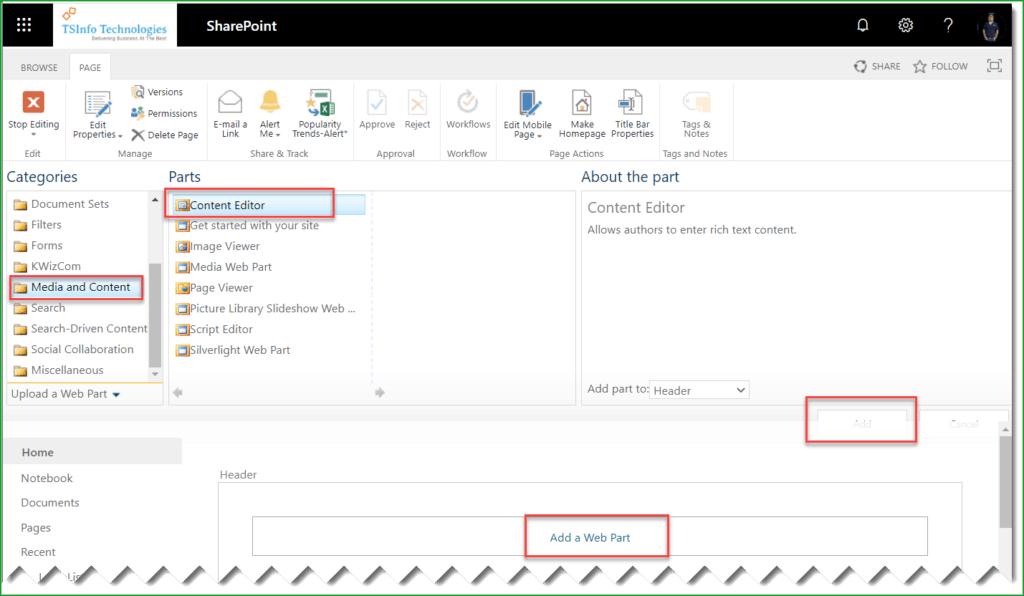
- Then, in the edit mode, click on Add a web part, and then from the list of web part categories, select “Media and Content” -> then select Content Editor web part like below:
- Once you add a content editor web part to a SharePoint web part page, it looks like below:
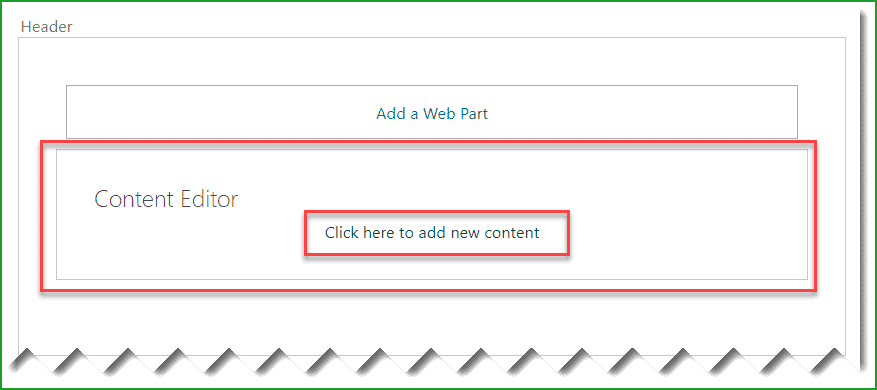
- You can click on Click here to add new content link in the content editor web part to add content directly to the page. This will basically open a rich text editor where you can add or format content.
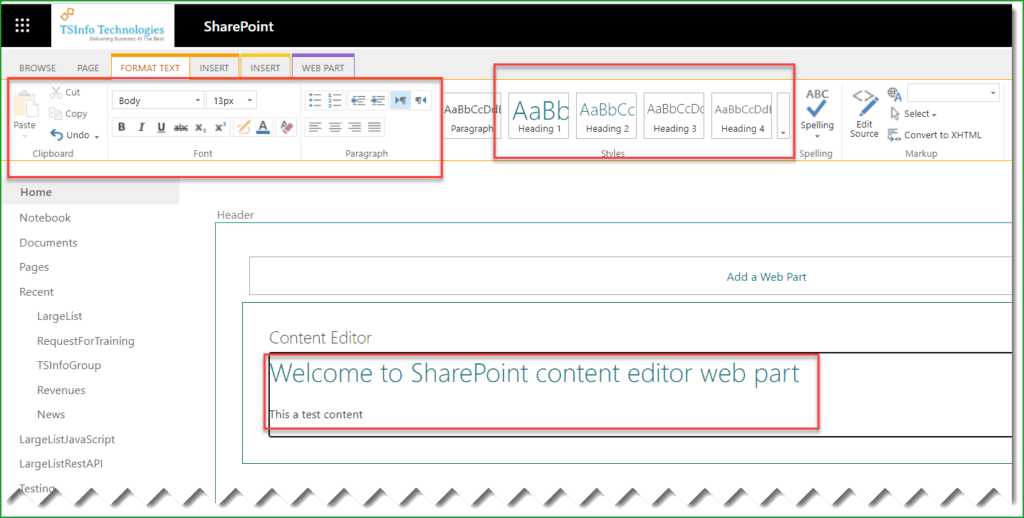
- Here, you can see the rich text editor, where you can format text and add headings like h1, h2, h3, etc. To add HTML or JavaScript code inside the content editor web part, Click on FORMAT TEXT from the ribbon and then click on Edit Source like below:

- This will open a dialog box called HTML Source, where we can insert the HTML and JavaScript code.
<h2>SharePoint Content Editor WebPart<br/></h2>
<br/>
<script>
function myFunction() {
alert('Hello, yes executing from a SharePoint content editor web part!');
}
</script>
<input type="button" value="Submit" onclick="myFunction();"/><br/>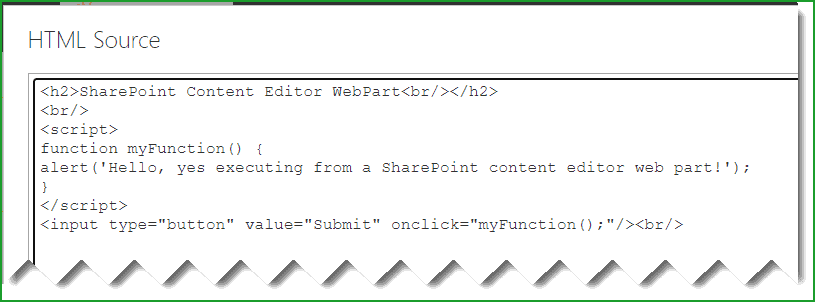
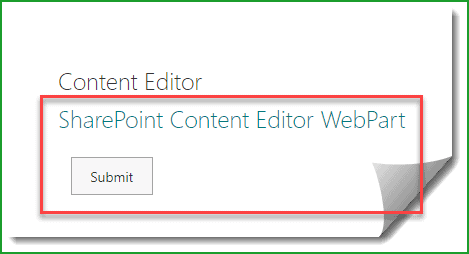
- Once you Save the page, the output will appear like below:
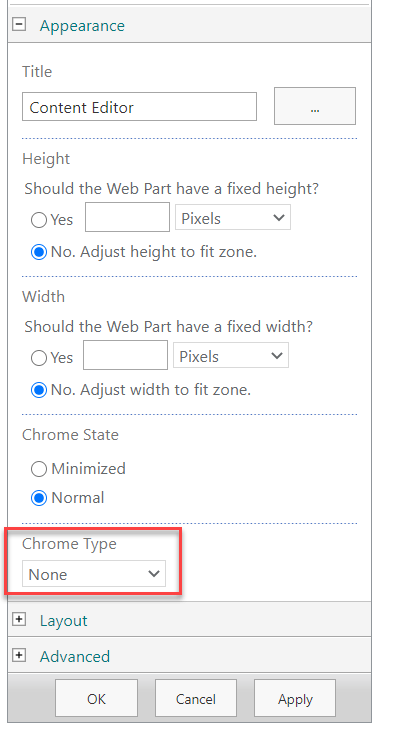
- If you want to hide the content editor web part Title, Edit it, go to Appearance, and select Chrome Type to None.
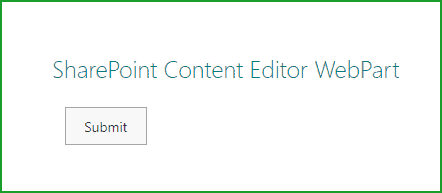
Once you Save the page you can see the content editor web part title is hidden.
This is how to use a content editor web part in SharePoint Online.
Add External HTML and JavaScript File in Content Editor Web Part
Now, we will see how to add external HTML and JavaScript (.JS) files in the content editor web part in SharePoint Online.
Here, first, we will create a .js file. Put the below code in a text file and Save the File with .js extension.
You do not need to write the <script></script> tag. You can directly write the JavaScript function inside the .js file.
function myFunction() {
alert('Hello, yes executing from a SharePoint content editor web part!');
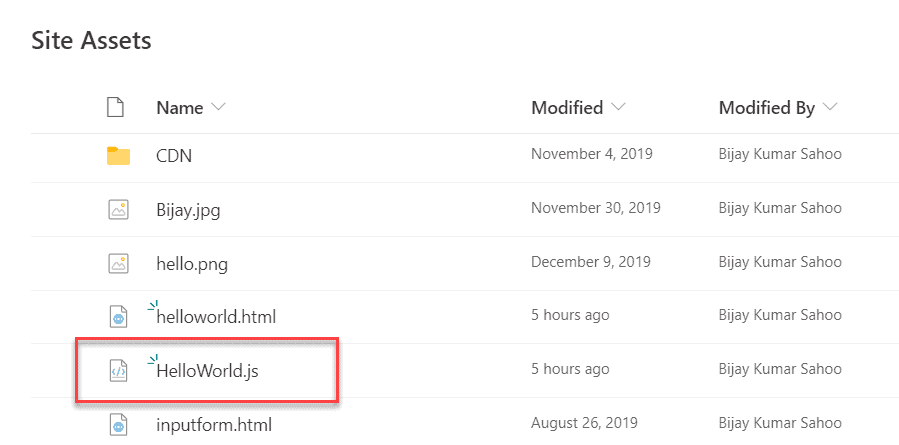
}Once you save the file, upload the file to the SharePoint Online Site Assets library. It should look like below:
Then, create an HTML file that will have the HTML code, and a reference to the .js file. The HTML code looks like below:
<!DOCTYPE html>
<html lang="en" xmlns="http://www.w3.org/1999/xhtml">
<head>
<script src="https://tsinfo.sharepoint.com/sites/TSInfoClassic/SiteAssets/Helloworld.js"></script>
<meta charset="utf-8" />
<title>SharePoint Content Editor Example</title>
</head>
<body>
<input type='button' value='Submit' onclick="myFunction();"/>
</body>
</html>
In the above file, I have given the .js file reference in a script tag like the below:
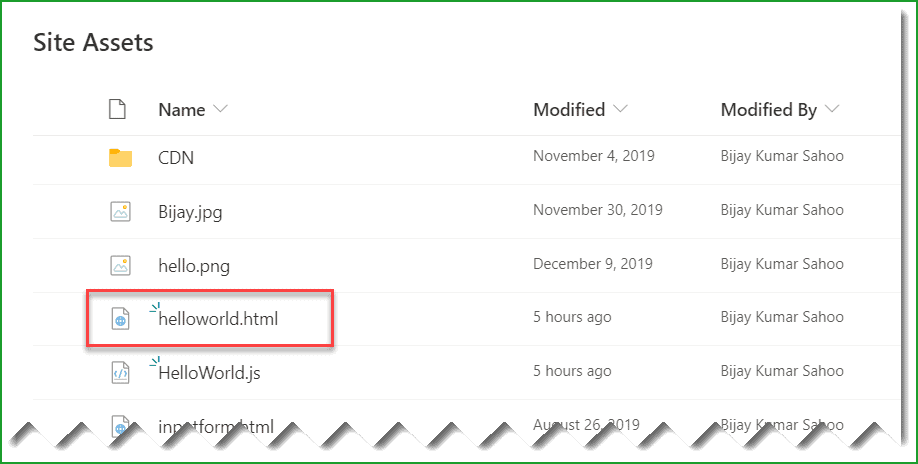
<script src="https://tsinfo.sharepoint.com/sites/TSInfoClassic/SiteAssets/Helloworld.js"></script>Now, Save the file with .html extension and Save to the Site Assets library. It looks like below:
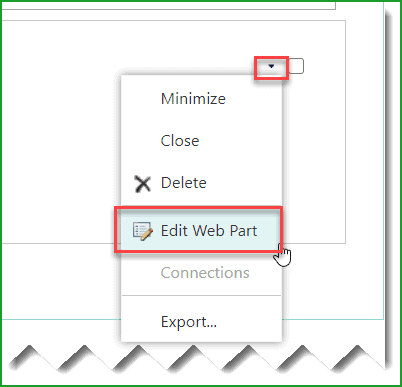
Once you save the .html and .js file, we need to refer to the HTML file in the content editor web part.
Now, open the content editor web part.
Then, in the Content link, provide the HTML file path; it will be like below:
https://tsinfo.sharepoint.com/sites/TSInfoClassic/SiteAssets/Helloworld.html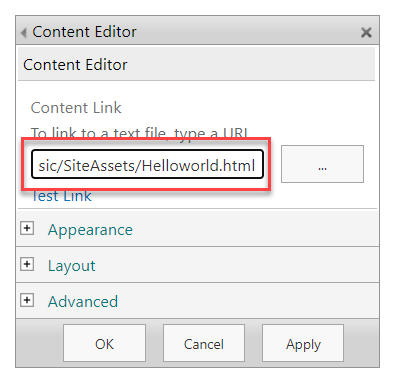
Now, Save the page and you can see the output of the content editor file. Once you click on the button, the alert message will appear.
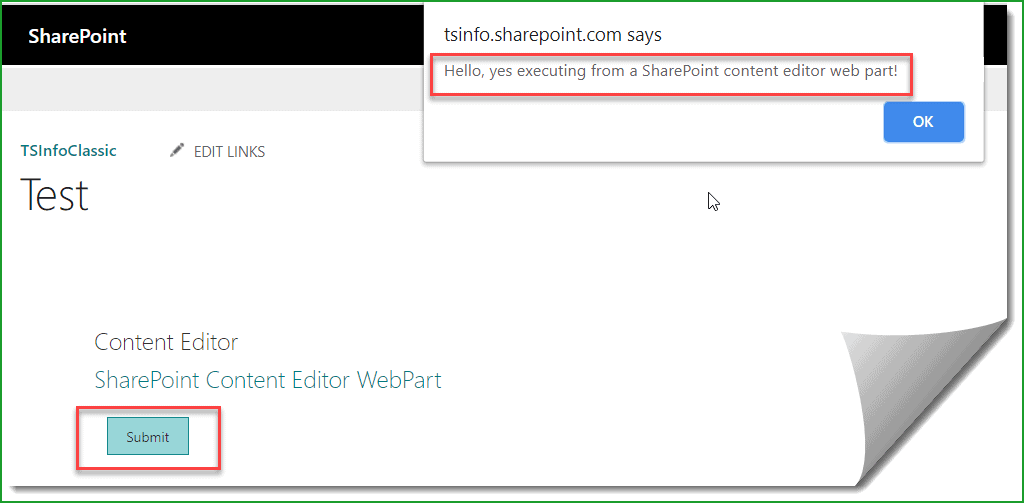
In the classic SharePoint site, we use the content editor web part or script to put the jsom code in a web part page.
Conclusion
In this SharePoint tutorial, I have explained how to use the SharePoint content editor web part.
You may like the following tutorials:
- SharePoint Script Editor Web Part
- Content Type Hub in SharePoint Online
- Quick Links Web Part in SharePoint Online
- SharePoint List Form Formatting JSON Examples
- SharePoint Storage Limit
I am Bijay a Microsoft MVP (10 times – My MVP Profile) in SharePoint and have more than 17 years of expertise in SharePoint Online Office 365, SharePoint subscription edition, and SharePoint 2019/2016/2013. Currently working in my own venture TSInfo Technologies a SharePoint development, consulting, and training company. I also run the popular SharePoint website EnjoySharePoint.com
Thank you for the post. quick question does SP Online have a built in workflow feature other than Flow something similar to the workflow feature in SP2010 and 2013. However that feature will go away in June 2021.
I hope this tutorial helps you to know about the SharePoint content editor web part. How to use sharepoint content editor web part to add JavaScript or HTML to a SharePoint web part page. Also, we saw how to fix the content editor web part missing in sharepoint online issue.