Do you know how to use the Power Apps list box control? Keep reading…
Here, in this Power Apps tutorial, I will explain what PowerApps list box control means and the key properties of the Power Apps list box control.
Then, we will see how to add the list box control in Power Apps and the Power Apps list box control examples.
Moreover, we will discuss the Power Apps list box multiple columns and the Power Apps list box selected items.
Power Apps List Box Control
- A list box control is an interface element that allows users to select one or more items.
- In Power Apps, the “List Box” control fulfills this function by displaying all choices and enabling the user to select multiple items simultaneously, unlike the Dropdown control, which only allows selecting one option, or the Radio control, which permits only one selection.
- In this list box control, you can add the items by using its Items property.
Power Apps List Box Control Properties
Here, we will discuss the key properties of the Power Apps list box control.
Refer to the below table:
| Property | Description |
| DisplayMode | This property can either accept user input (Edit), display data only (View), or be disabled (Disabled) |
| Fill | specify the desired background color of the control |
| OnChange | Here are some actions that could be performed when a user changes the value of a control, such as adjusting a slider |
| OnSelect | Actions to be performed when the user taps or clicks a control |
| Reset | Determining whether a control returns to its default value |
| Selected | This refers to the data record that corresponds to the chosen item |
| SelectMultiple | Determining whether a user can select multiple items within a listbox |
| Size | Determining whether a user can select multiple items within a listbox |
| Visible | Whether a control is visible or hidden |
These are the key properties of the Power Apps list box control.
Add Power Apps List Box Control
Here, we will discuss how to add the powerapps listbox control. To do so, follow the below-mentioned steps. Such as:
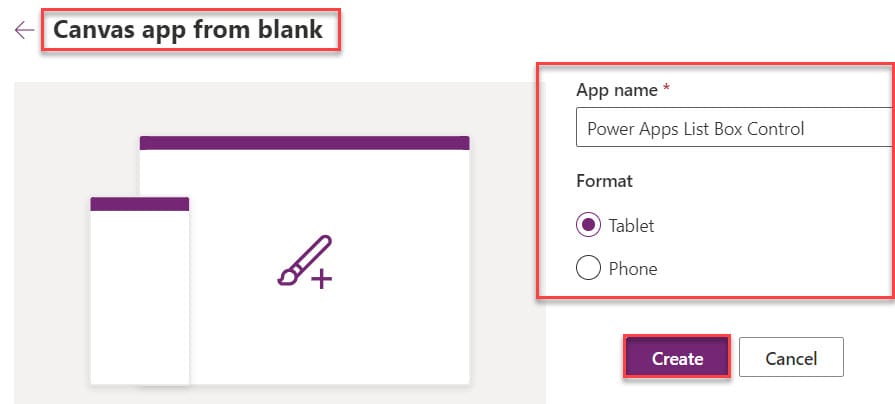
1. Open Power Apps with your respective Microsoft credentials -> Create a Blank canvas app as shown below.
2. On the Power Apps Screen -> Insert a List box control under the Input dropdown. Whenever the user adds a list box control by default, the Items property contains “ListboxSample values” [1,2,3] and the control name is “ListBox1“.
Refer to the below image:
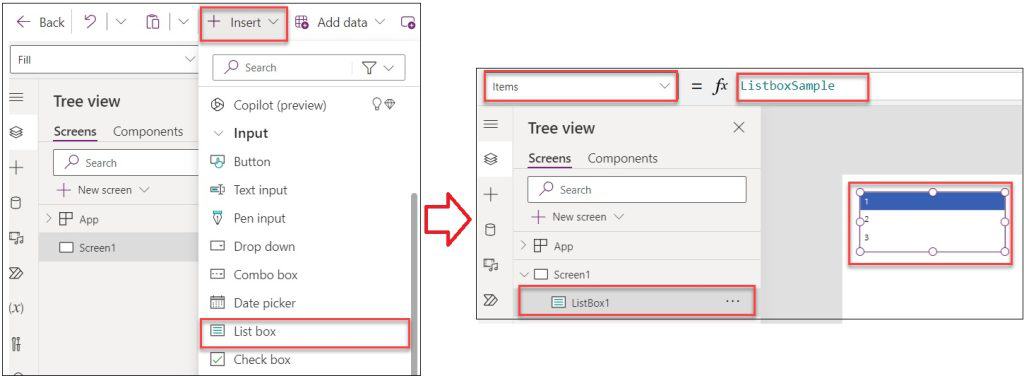
This is how to add a list box control in the Power Apps.
Power Apps List Box Control Examples
This section will discuss the PowerApps list box control with two examples. Such as:
- powerapps list box add items manually
- powerapps list box add items from sharepoint list
Power Apps list box add items manually
Let’s see how to work with powerapps list box to add items manually with a simple example.
Example:
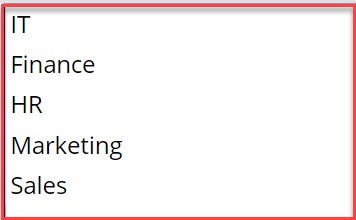
In Power Apps, there is a list box control. Now, I would like to add “Department Items/Records” manually as in the screenshot below.
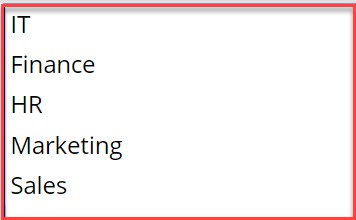
To do so, follow the below-mentioned steps. Such as:
1. In Power Apps Screen -> Insert a List box control and set its Items property to the code below.
Items = [
    "IT",
    "Finance",
    "HR",
    "Marketing",
    "Sales"
]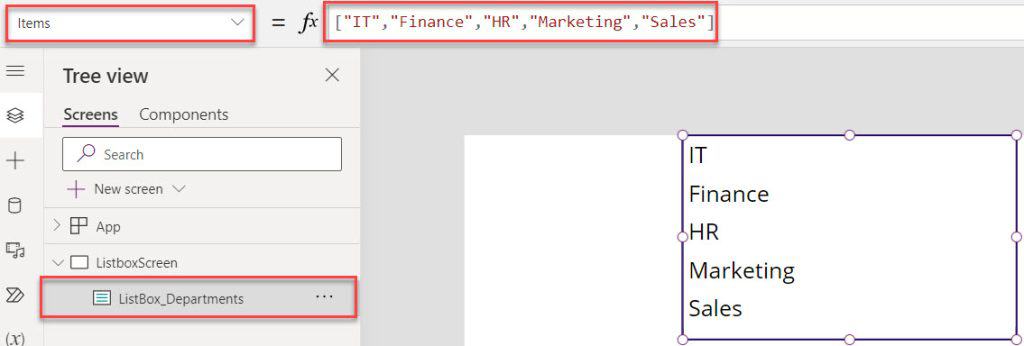
2. Once your app is ready, Save, Publish, and Preview the app. The list box control displays items/records as in the screenshot below.
This is how to work with the Power Apps list box to add items manually.
Power Apps List Box Add Items from SharePoint List
Next, we will see the Power Apps list box add items from the SharePoint list with a simple scenario:
Scenario:
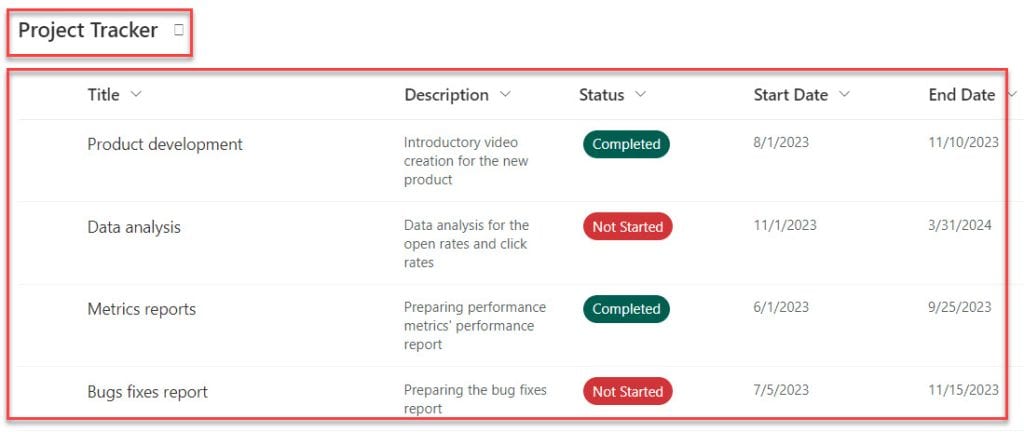
I have a SharePoint list named “Project Tracker” and inside this list, I have added the below fields.
| Column Name | Data Type |
| Title | It is a default single line of text |
| Description | Multiple lines of text |
| Status | Choice |
| Start Date | Date and time |
| End Date | Date and time |
Refer to the below screenshot:
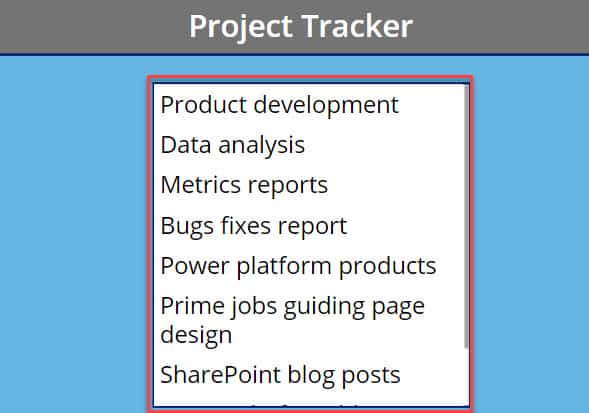
In Power Apps, there is a list box control. This list control retrieves the Title column items/records from a SharePoint list as shown below.
To achieve it, follow the below steps. Such as:
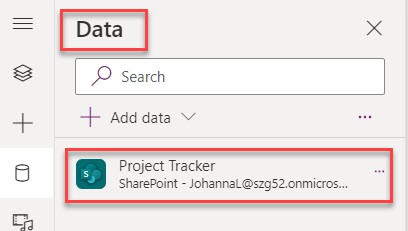
1. On the Power Apps -> Connect the respective SharePoint Online list [Project Tracker] as shown below.
2. Then, select the Power Apps Screen -> Insert a List box control and set its Items property as:
Items = 'Project Tracker'.TitleWhere,
- ‘Project Tracker’ = SharePoint Online List
- Title = SharePoint List Title Field
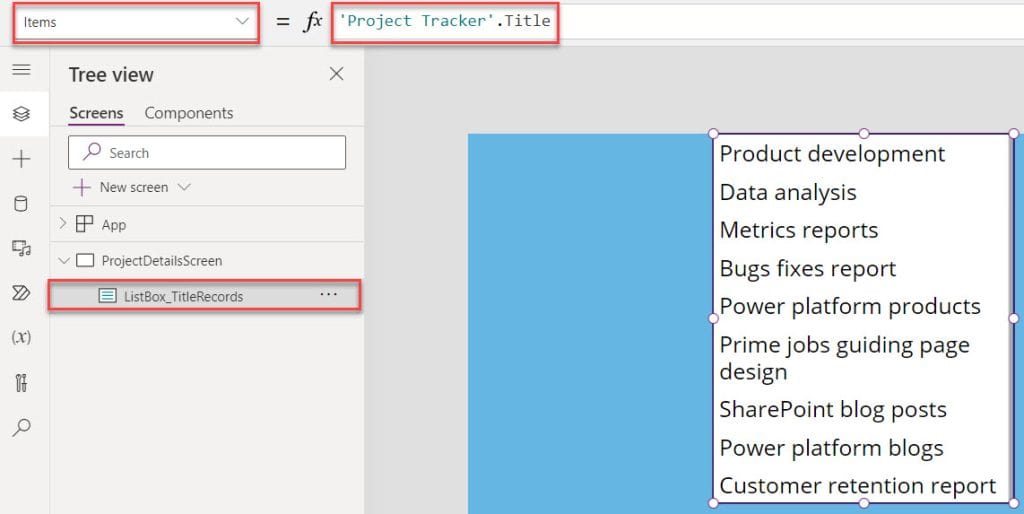
3. Save, Publish, and Preview the app. The list box control displays each record from a SharePoint list as shown below.
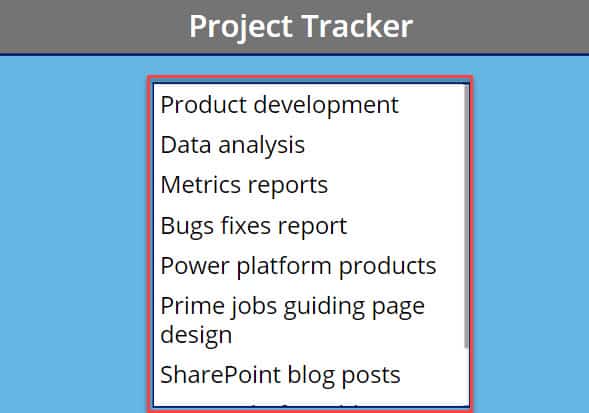
This is all about the Power Apps list box add items from the SharePoint list.
Power Apps List Box Multiple Columns
Next, we will see the powerapps listbox multiple columns with a simple example.
Example:
I will also take the above SharePoint list [Project Tracker] for this example.
In Power Apps, there is a List box control, which displays two text columns [Title and Description] from the SharePoint Online list as in the screenshot below.
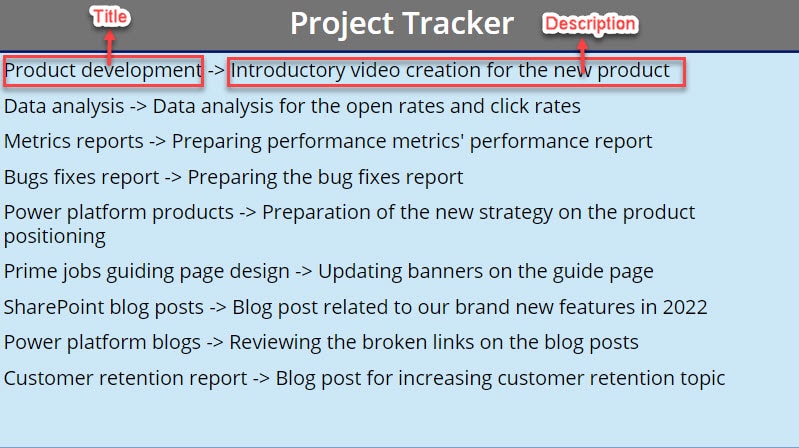
To do so, follow the below steps. Such as:
1. On the Power Apps Screen -> Insert a List box control and set its Items property to the code below.
Items = Items = Concatenate(
    'Project Tracker'.Title,
    " -> ",
    'Project Tracker'.Description
)
Where,
- Concatenate() = This function concatenates a mix of individual strings and a single-column table of strings
- ‘Project Tracker’.Title, ‘Project Tracker’.Description = SharePoint Text Fields
Refer to the below image:
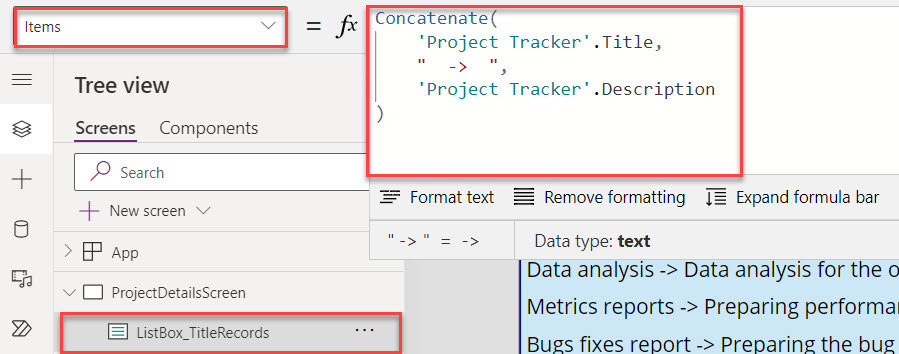
2. Save, Publish, and Preview the app. The List box control will display the two columns from the SharePoint list as shown below.
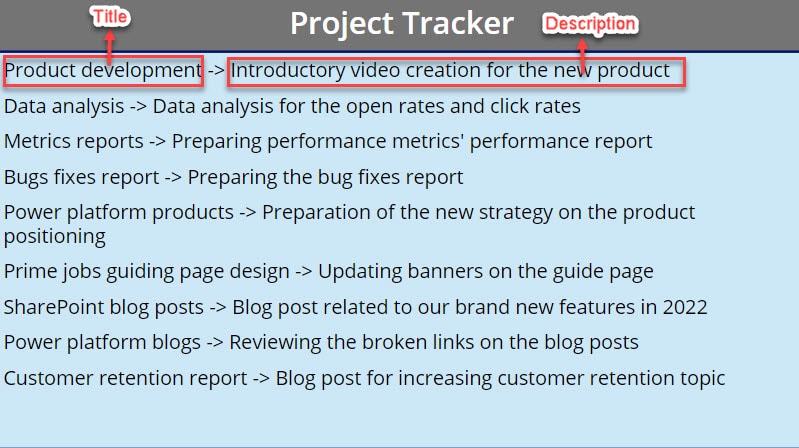
This is how to add multiple columns in the Power Apps list box control.
Power Apps List Box Selected Items
In the last, I will show the powerapps listbox selected items with a simple example.
Example:
I will also take the above List box manual values [ListBox_Departements] for this example. Now, I would like to select a single or multiple values from the list box, that selected value will display on the Text input control.
Refer to the below image:
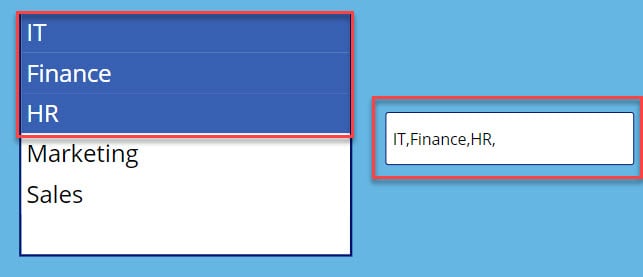
To achieve it, follow the below steps. Such as:
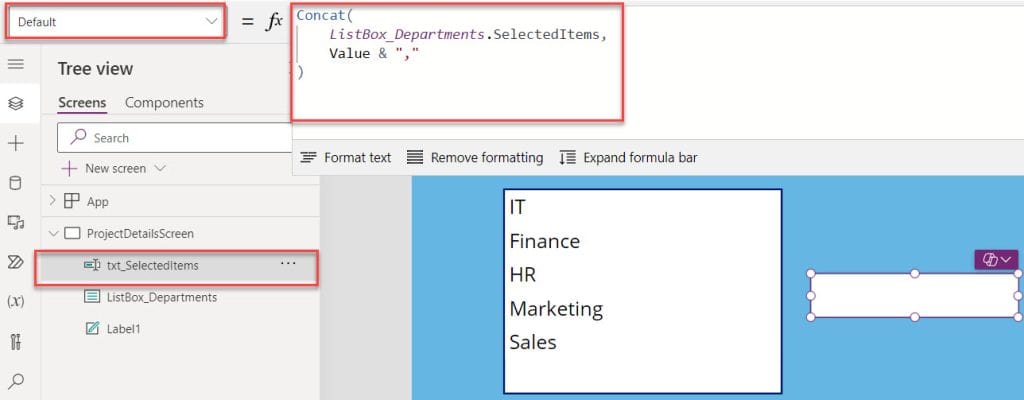
1. On the Power Apps Screen -> Insert a Text input control and set its Default property to the code below.
Default = Concat(
    ListBox_Departments.SelectedItems,
    Value & ","
)
Where,
- Concat() = When you use this function with individual strings, it’s equivalent to using the & operator
- ListBox_Departments = Power Apps List box control name
2. Save, Publish, and Preview the app. Whenever the user selects multiple values from the list box control, those selected values will be displayed on the text input control like below.
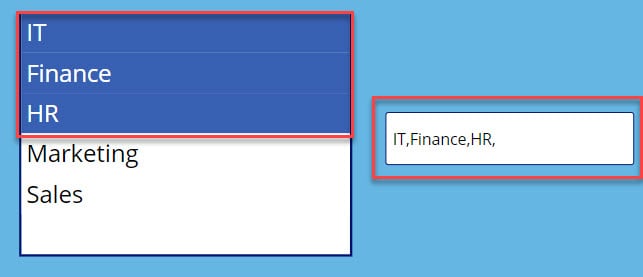
This is all about the Power Apps list box selected items.
Conclusion
This Power Apps tutorial taught in detail information about the PowerApps list box control, including:
- Power Apps List Box Control Properties
- Add Power Apps List Box Control
- Power Apps List Box Control Examples
- Power Apps list box add items manually
- Power Apps List Box Add Items from SharePoint
- Power Apps List Box Multiple Columns
- Power Apps List Box Selected Items
You may also like:
I am Bijay a Microsoft MVP (10 times – My MVP Profile) in SharePoint and have more than 17 years of expertise in SharePoint Online Office 365, SharePoint subscription edition, and SharePoint 2019/2016/2013. Currently working in my own venture TSInfo Technologies a SharePoint development, consulting, and training company. I also run the popular SharePoint website EnjoySharePoint.com