Filtering data and displaying the results in controls such as galleries and data tables is a regular task when dealing with Power Apps.
I was recently working with Power Apps List box control, where I needed to filter the SharePoint list data and display the result in a gallery control.
In this article, I will explain to you how to filter list box in Power Apps, including various examples like:
- Power Apps filter list box using the SharePoint Choice field
- Power Apps filter list box using the SharePoint Date field
- Power Apps filter list box and search
How to Filter List Box in Power Apps
So, let’s start with filtering the Power Apps list box control with the scenarios below.
Power Apps filter list box using SharePoint Choice column
I have a SharePoint Online List named “Project Tracker“. This list contains the below fields.
| Column Name | Data Type |
| Project Name | This is a Title column with a single line of text. I just renamed it to “Project Name” |
| Description | Multiple lines of text |
| Project Status | Choice |
| Start Date | Date and time |
| End Date | Date and time |
Refer to the below screenshot:
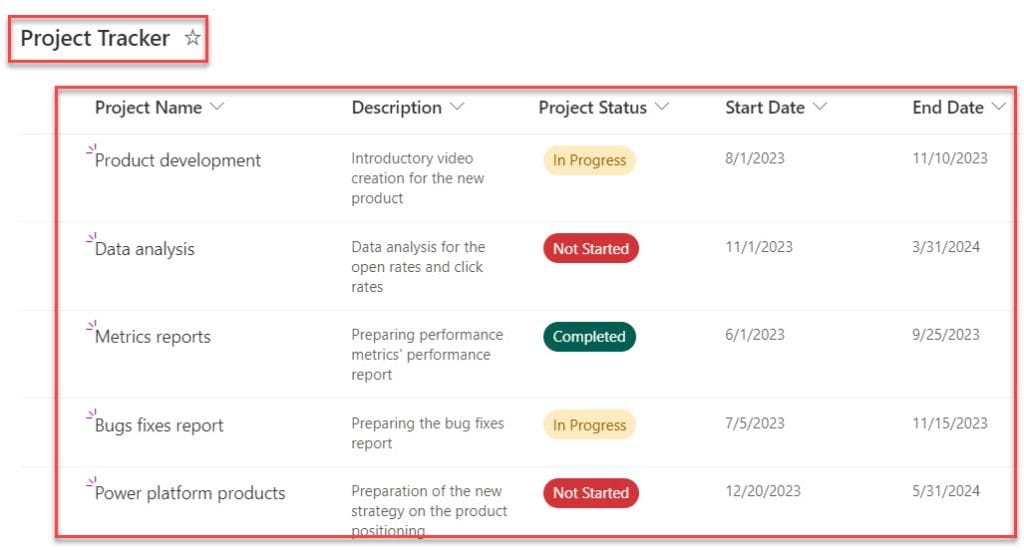
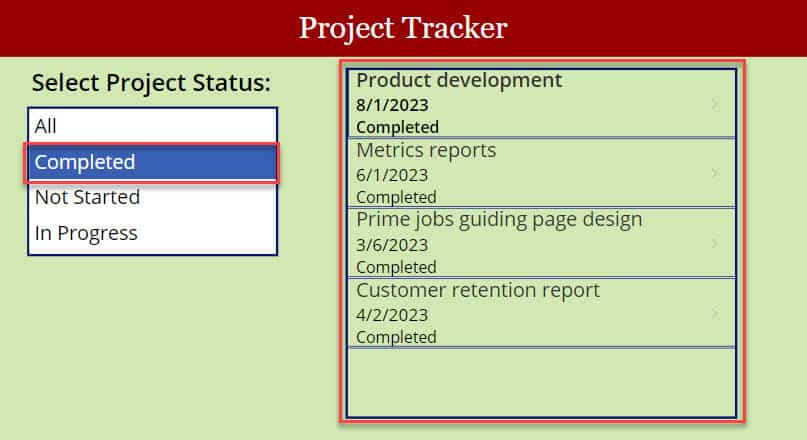
In Power Apps, there is a List box control and a Gallery control. The List box control has all the list choice values like All, In Progress, Not Started, and Completed.
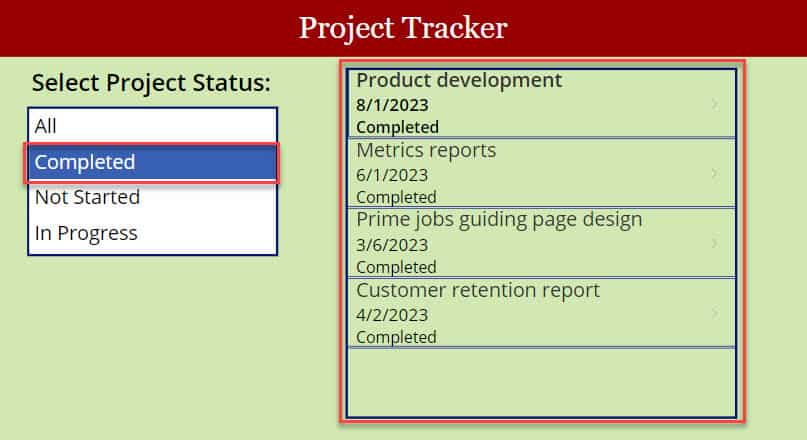
The gallery will filter and show all records from the SharePoint list based on the user’s selections when they choose any value from the List box control.
Refer to the below image:
To achieve this, follow the instructions below:
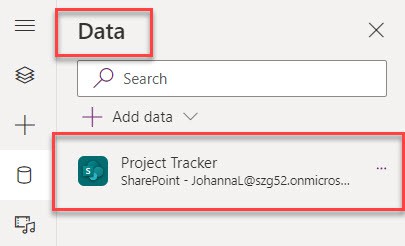
1. Open Power Apps -> Create Power Apps canvas app -> Connect the SharePoint list [Project Tracker] to the app. Once you connect, it will look like the screenshot below.
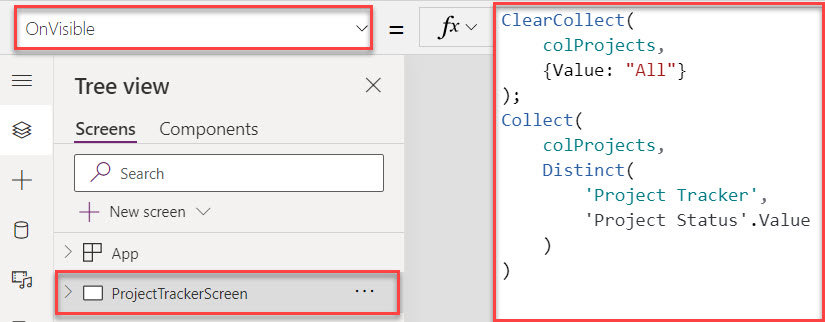
2. Select the Power Apps Screen [ProjectTrackerScreen] -> Set its OnVisible property to the code below.
OnVisible = ClearCollect(
    colProjects,
    {Value: "All"}
);
Collect(
    colProjects,
    Distinct(
        'Project Tracker',
        'Project Status'.Value
    )
)
Where,
- colProjects = Power Apps Collection
- {Value: “All”} = Collection Item
- Distinct() = This function can remove duplicate values from a data source
- ‘Project Tracker’ = SharePoint Online List
- ‘Project Status’.Value = SharePoint Choice Field Column Values
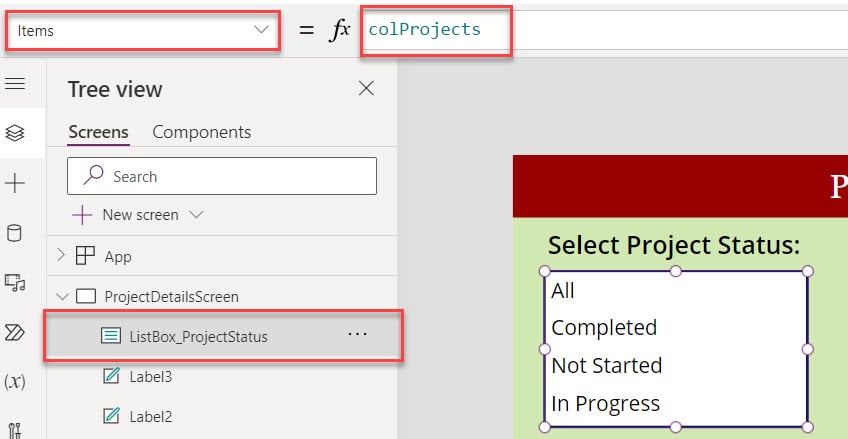
3. Next, insert a List box control [ListBox_ProjectStatus] -> Set its Items property as:
Items = colProjectsWhere,
- colProjects = Power Apps Collection
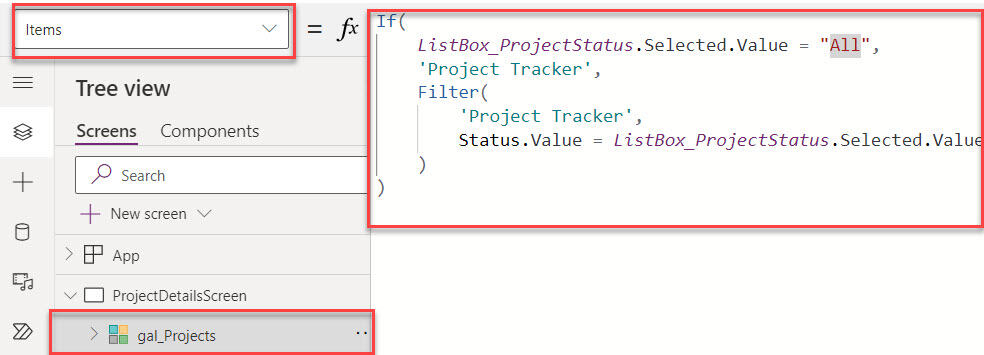
4. Insert a Gallery control and set its Items property as shown below:
Items = If(
    ListBox_ProjectStatus.Selected.Value = "All",
    'Project Tracker',
    Filter(
        'Project Tracker',
        'Project Status'.Value = ListBox_ProjectStatus.Selected.Value
    )
)
Where,
- If() = This function helps us to evaluate multiple unrelated conditions
- ListBox_ProjectStatus.Selected.Value = “All” = Power Apps List box name, and “All” is the collection item value
5. Save, Publish, Reload, and Preview the app. The gallery will show all completed records if the user selects the status Completed from the list box.
This is how to filter the Power Apps List box control using a SharePoint choice field.
Power Apps filter list box using SharePoint Date column
Next, we will discuss how to filter a Power Apps List box selected date with a simple example.
Example:
1. I have a SharePoint Online list named “Training Courses“. This list contains the below fields.
| Column Name | Data Type |
| Course Name | This is a Title column with a single line of text. I just renamed it to “Course Name” |
| Description | Multiple lines of text |
| Course Start Date | Date and time |
| Course End Date | Date and time |
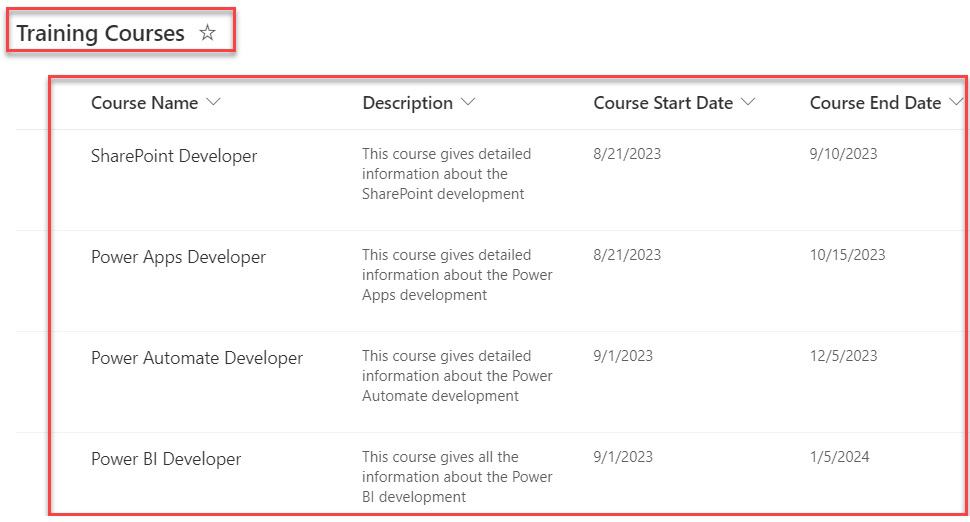
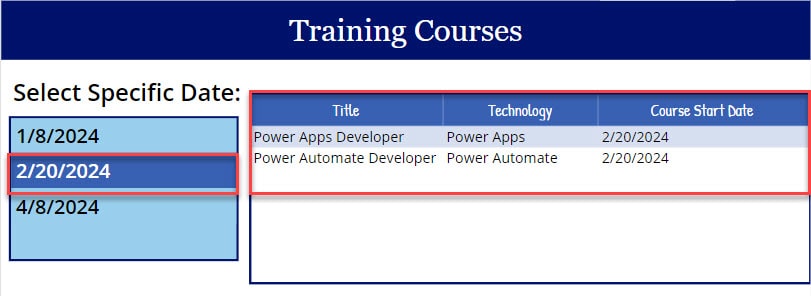
In Power Apps, there is a List box control and a Data table control. The Data table control displays each record from the SharePoint list based on the List box selected date.
Refer to the below screenshot:
To work around the above example, follow the below steps.
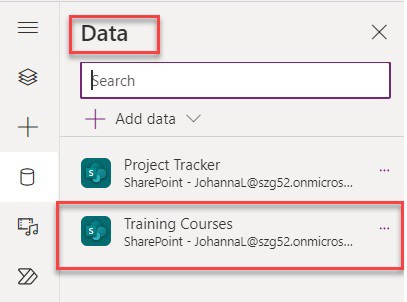
1. On the Power Apps -> Connect the SharePoint list, i.e., [Training Courses] to the app. Once you connect, it will look like the screenshot below.
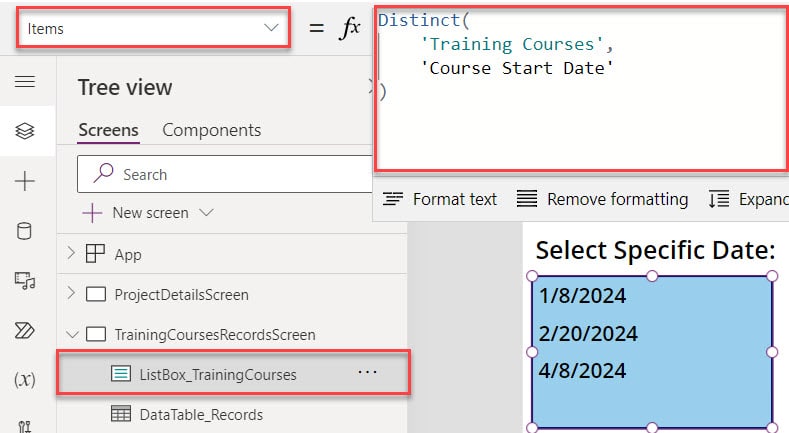
2. Insert a List box control and set its Items property to the code below.
Items = Distinct(
    'Training Courses',
    'Course Start Date'
)
Where,
- ‘Training Courses’ = SharePoint Online List
- ‘Course Start Date’ = SharePoint Date Field
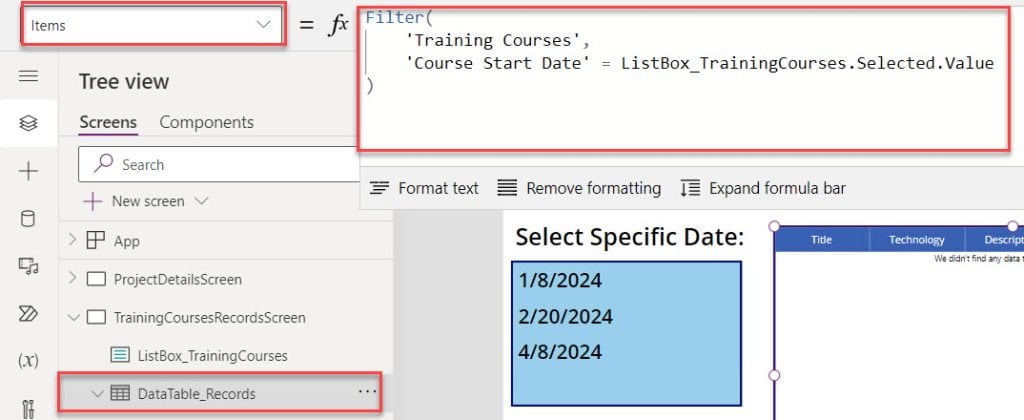
3. Then, insert a Data table control and set its Items property as:
Items = Filter(
    'Training Courses',
    'Course Start Date' = ListBox_TrainingCourses.Selected.Value
)
Where,
- ‘Training Courses’ = SharePoint Online List
- ListBox_TrainingCourses = Power Apps List Box Name
4. Save, Publish, and Preview the app. Select any particular date from the List box control, the Data table displays the records based on the List box selected date.
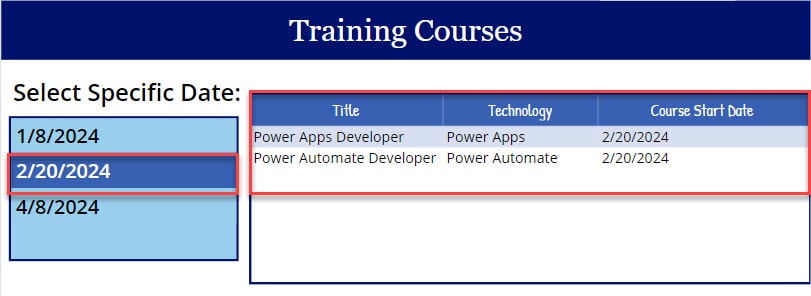
This is all about the Power Apps Filter List box selected date.
Power Apps filter list box and search
Last, we will see how to filter a Power Apps list box and display records on the data table based on search.
Example:
I will also take the same SharePoint Online list [Training Courses] for this example. In Power Apps, there is a List box control, a Text input, and a Data table control.
This Data table displays each record from the SharePoint list based on the List box control and search results.
Also, I faced a delegation warning [Yellow triangle], as in the screenshot below. The warning message appears as “Delegation warning. This formula’s “Search” part might not work correctly on large data sets.“
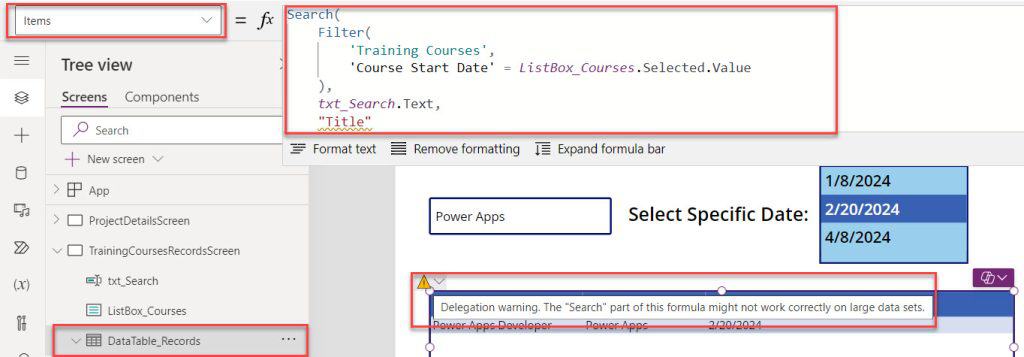
I have created a Power Apps collection [colCourses] using my SharePoint list to overcome this Power Apps delegation warning. Then, I filter a Power Apps data table by the List box control without delegation warning like below.
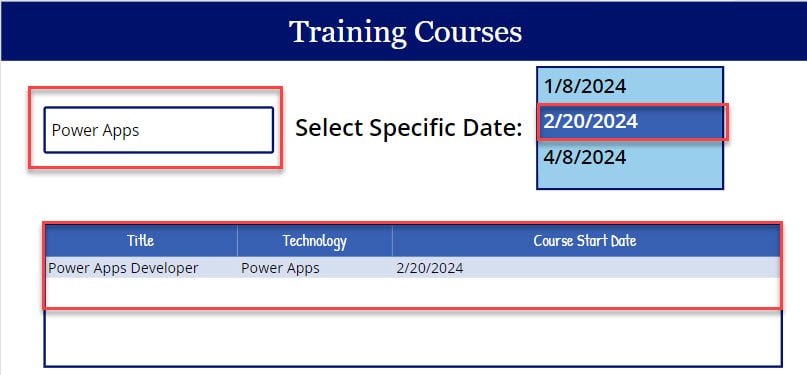
To do so, follow the below steps. Such as:
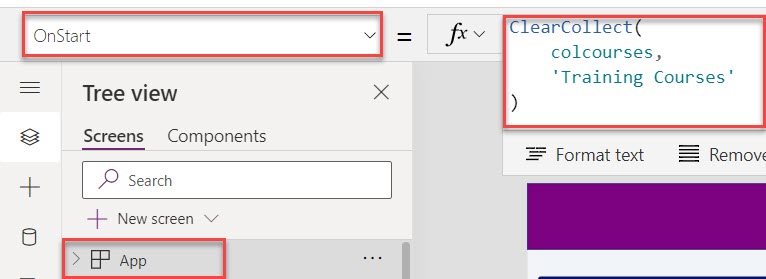
1. On the Power Apps canvas app -> Select the App object and set its OnStart property to the code below.
OnStart = ClearCollect(
    colcourses,
    'Training Courses'
)
Where,
- colcourses = Power Apps Collection Name
- ‘Training Courses’ = SharePoint Online List
2. Insert a Text input, make its Default property blank [“”], and set its Hint text property as “Search Course Name” like below.

3. Then, insert a List box control and set its Items property as:
Items = Distinct(
    colcourses,
    'Course Start Date'
)
Where,
- colcourses = Power Apps Collection
- ‘Course Start Date’ = SharePoint Date Field

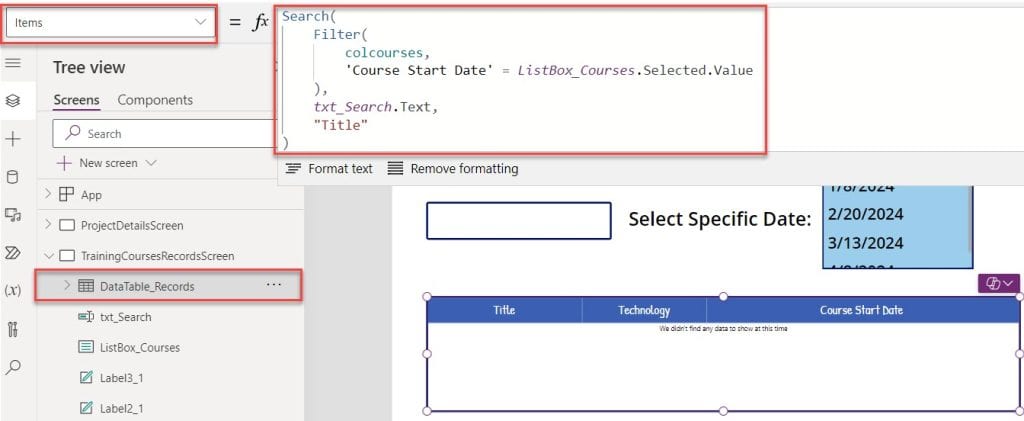
4. Next, insert a Data table control and set its Items property to the code below:
Items = Search(
    Filter(
        colcourses,
        'Course Start Date' = ListBox_Courses.Selected.Value
    ),
    txt_Search.Text,
    "Title"
)
Where,
- Search() = This function allows users to search for and filter items in a Power Apps gallery
- ListBox_Courses = Power Apps List Box
- txt_Search.Text = Power Apps Text input
- “Title” = SharePoint Text column
5. Save, Publish, Run OnStart, and preview the app. This data table will display the filtered records based on the search results and selected List box value, as in the screenshot below.
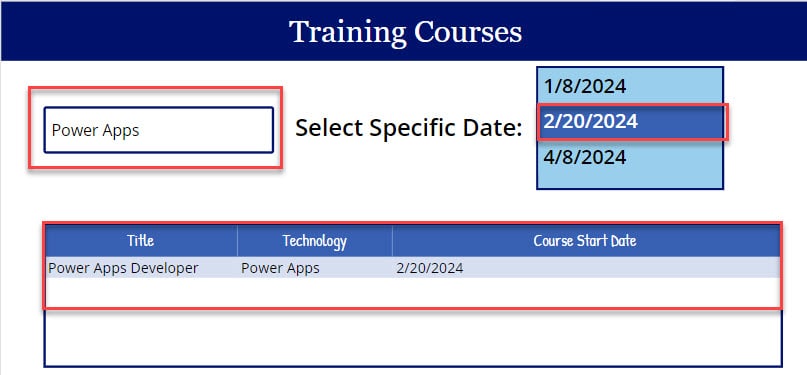
This is how to filter a Power Apps List box and search.
I hope you got an overall idea to filter the Power Apps list box control using various SharePoint fields like Choice, Date, etc.
Also, we saw how to search and filter the Power Apps list box together with a simple example.
You may like some more Power Apps articles:
- Set Power Apps List Box Default Value
- Filter Data table in Power Apps
- Filter Multiple Person Column in Power Apps
I am Bijay a Microsoft MVP (10 times – My MVP Profile) in SharePoint and have more than 17 years of expertise in SharePoint Online Office 365, SharePoint subscription edition, and SharePoint 2019/2016/2013. Currently working in my own venture TSInfo Technologies a SharePoint development, consulting, and training company. I also run the popular SharePoint website EnjoySharePoint.com