This Power Apps tutorial will teach you how to use Power Apps gallery control OnSelect. Then, we will discuss the Power Apps gallery OnSelect navigate Screen and how to get selected gallery record details on a Display form/Edit form using the OnSelct property.
Additionally, we will see how to set a variable in the gallery control using the OnSelct property.
Power Apps Gallery OnSelect
- When inserting a button into a Power Apps gallery control, the ‘OnSelect’ property of the button input automatically defaults to ‘Select (Parent)’. However, including a button for every row of a vertical gallery is unnecessary.
- Instead of the button control, we can set Gallery’s OnSelect property to navigate the other screens.
- Whenever a user clicks or taps the specific gallery item, it will redirect to the next screen to display the selected gallery item details.
Power Apps Gallery OnSelect Navigate Screen
Here, we will discuss how to navigate the details form’s screen using the Power Apps gallery OnSlect property with a simple scenario.
Scenario:
I have a SharePoint Online list named “Employee Registration” and inside this, I have added records based on the different columns, as shown below.
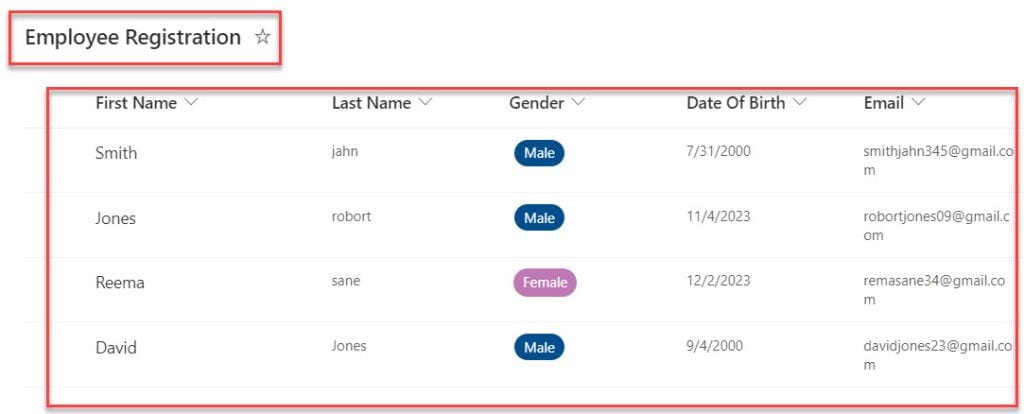
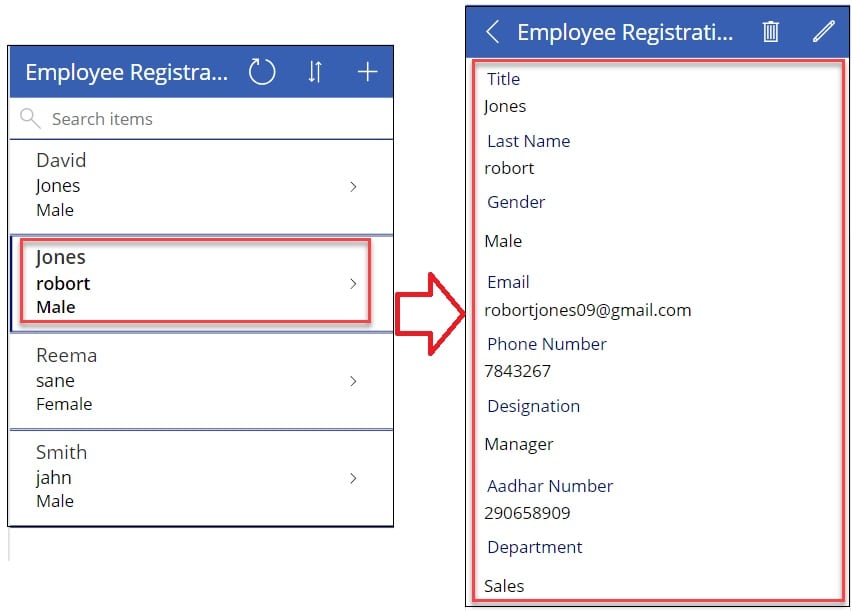
Now, I want to display these records on the Power Apps gallery, and I would like to get gallery-selected record details in the display form control on the other screen, as in the screenshot below.
To work around this, follow the below steps.
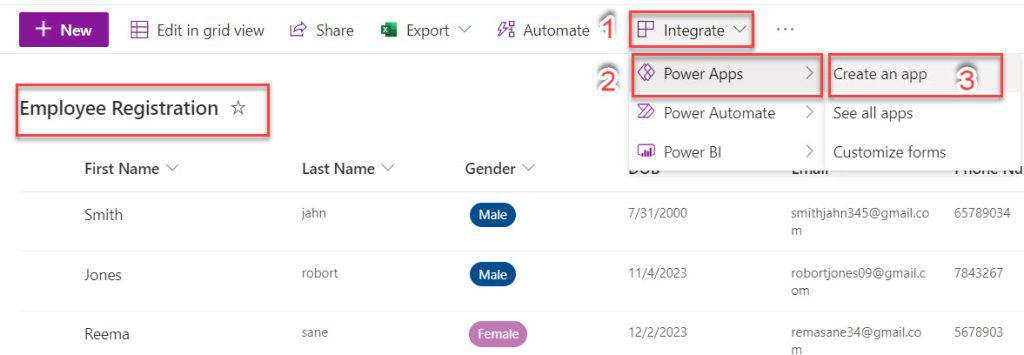
1. Select SharePoint Online List [Employee Registration] -> Click on the Integrate dropdown -> Select Power Apps -> Click on the Create an app as shown below.
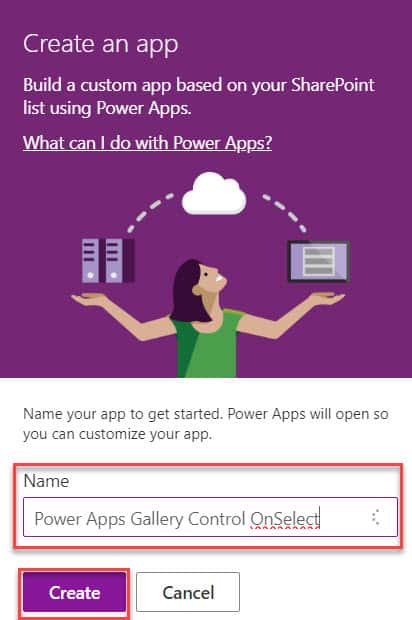
2. Then, provide a “Name” for the app -> Click on the Create button.
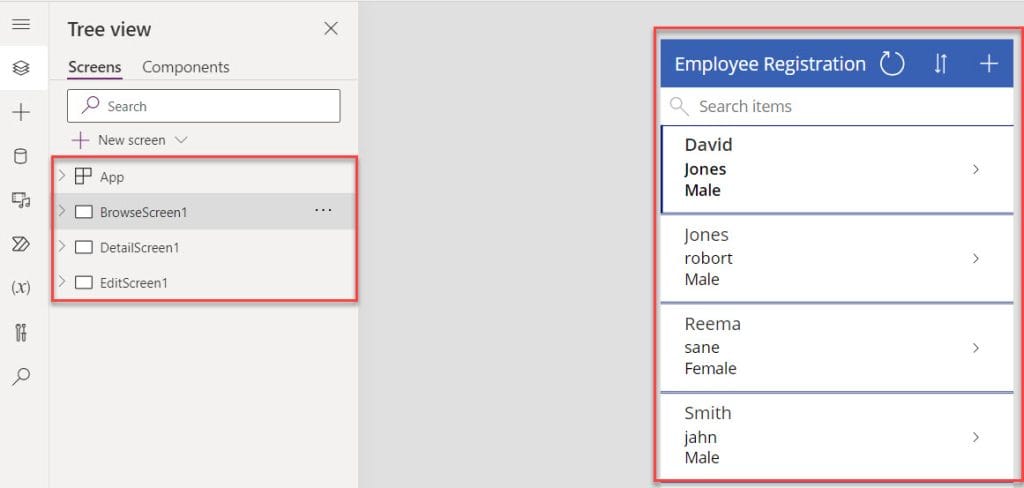
3. Now, we will get a custom Canvas app based on the SharePoint list with three different screens. Such as:
- BrowseScreen1
- DetailsScreen1
- EditScreen1
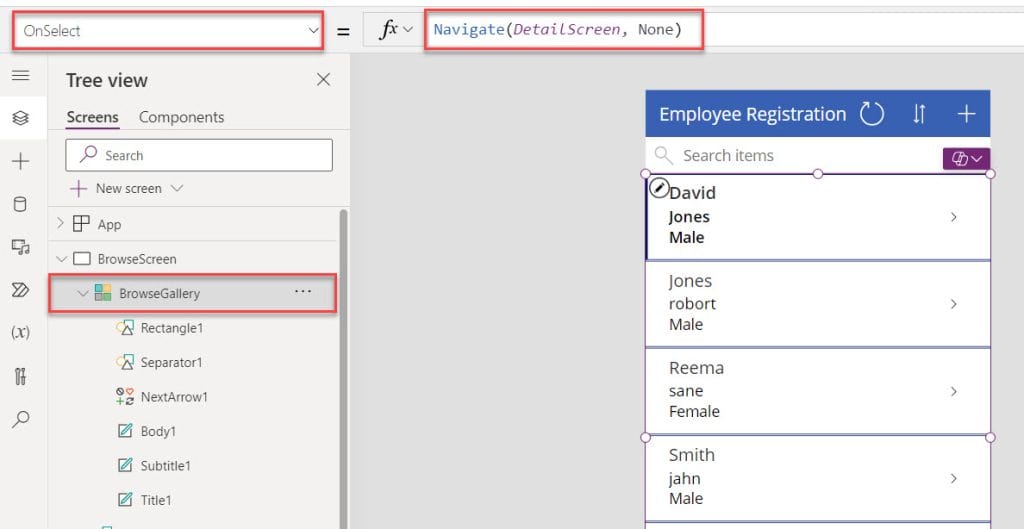
4. Select a BrowseScreen -> Click on the Gallery control and see the custom OnSelct property code as:
OnSelect = Navigate(
    DetailScreen,
    ScreenTransition.None
)
Where,
- Navigate() = This function is used to redirect the other screens
- DetailScreen = Power Apps 2nd Screen
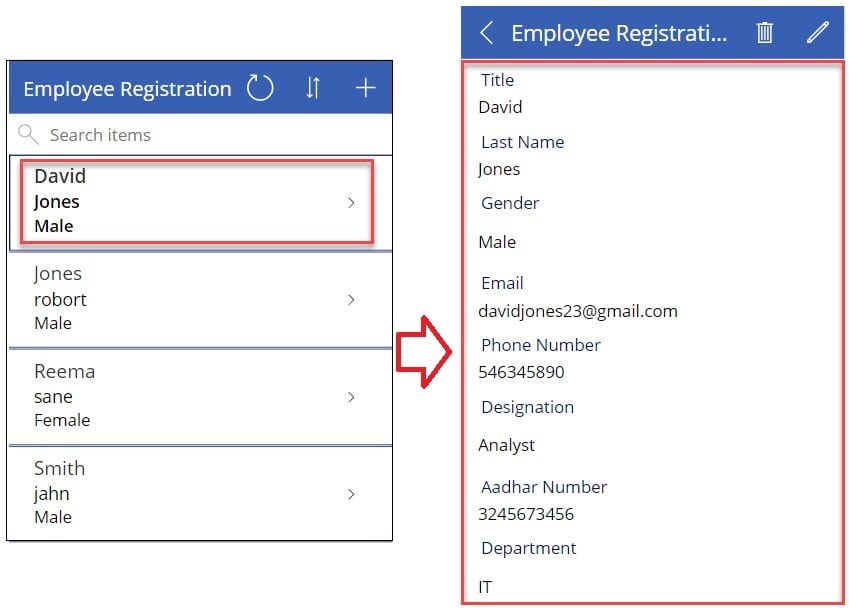
5. Click on the Preview button and select a specific gallery item, and it will navigate to the browse screen where we will get the selected record details on the display form like below.
OR
Similarly, When a user selects any item from the gallery and taps on the button on the browse screen, it will navigate to the edit screen where he/she will get an edit form that will help to display all the details of the selected gallery item from the first screen.
Refer to the below screenshot:
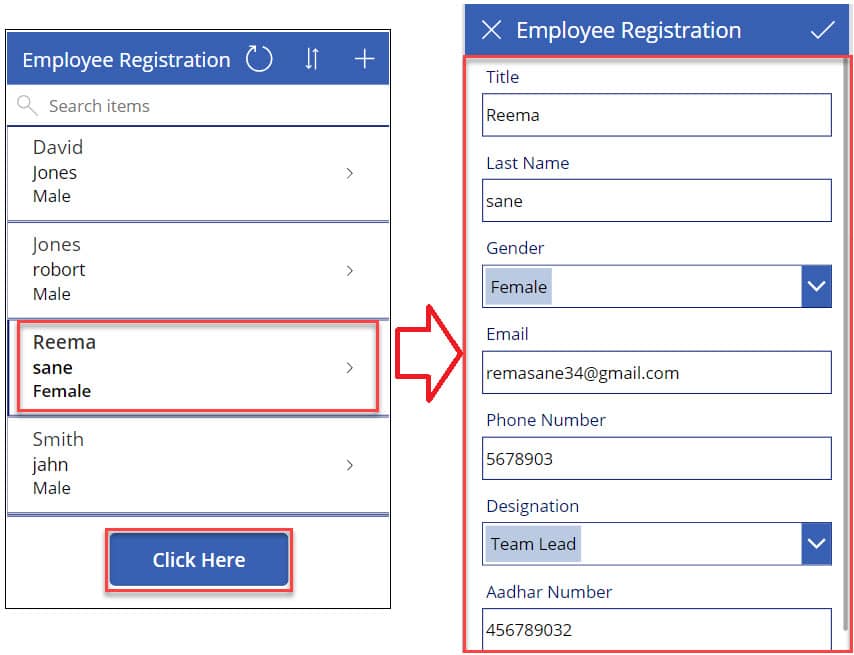
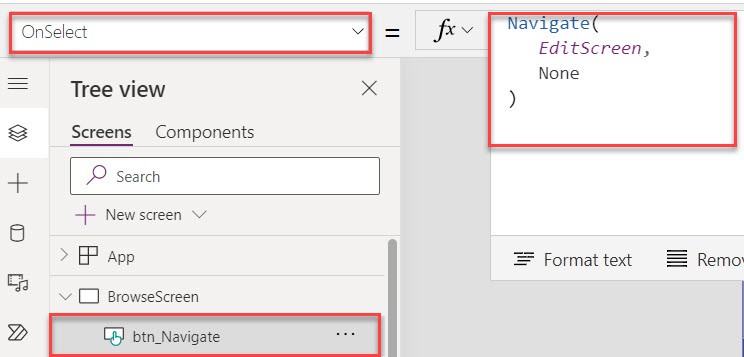
To do so, Select a Browse Screen -> Insert a Button control and set Its OnSelect property as:
OnSelect =  Navigate(
    EditScreen,
    ScreenTransition.None
 )
Now, once the user selects any record from the gallery and then clicks on the button, it will navigate to the edit screens, where we will get the edit form to update the selected gallery record.
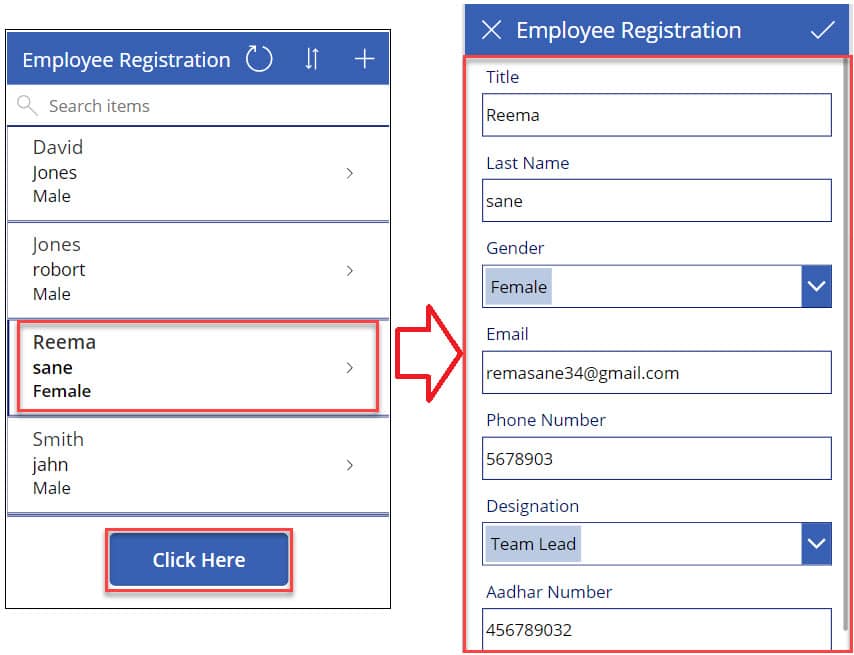
This is how to use the OnSelect property in a Power Apps gallery control.
Power Apps Gallery OnSelect Set Variable
Next, we will see how to use the Power Apps gallery OnSelect set variable with a simple example.
Example:
I have a SharePoint Online list, i.e., [Employee Onboarding] and this list contains the below fields.
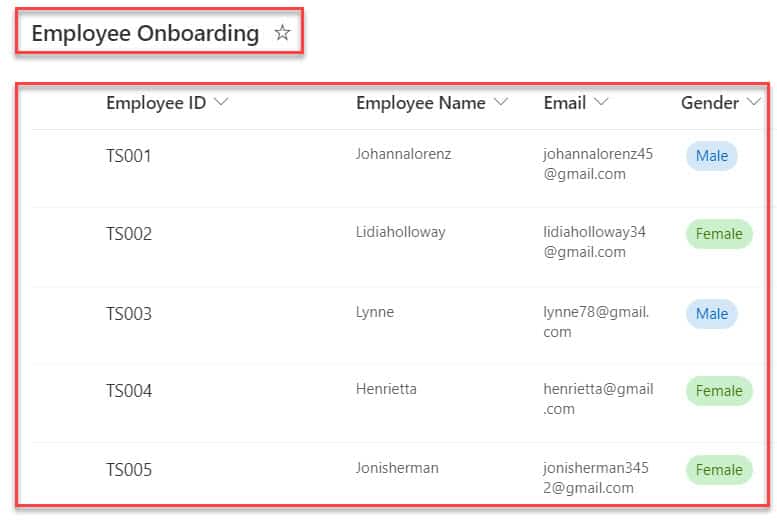
In Power Apps, there is a Gallery control and a Display form. When the user selects any record from the gallery control, it will navigate to the ‘EmployeeDetailsScreen’ where we will get selected record details on the display form as shown below.

To achieve the above example, follow the below steps. Such as:
1. Open Power Apps Canvas app -> Connect it to respective SharePoint list [Employee Onboarding] -> Insert a Gallery control and set its Items property -> Select Layout design as “Blank” as in the screenshot below.
Items = 'Employee Onboarding'
2. To display the SharePoint list records, insert Text labels inside the gallery control and set their Text properties like below.
Text = ThisItem.Title

Text = ThisItem.'Employee Name'

Text = ThisItem.Email

Text = ThisItem.Gender.Value

Text = ThisItem.'Employee Department'.Value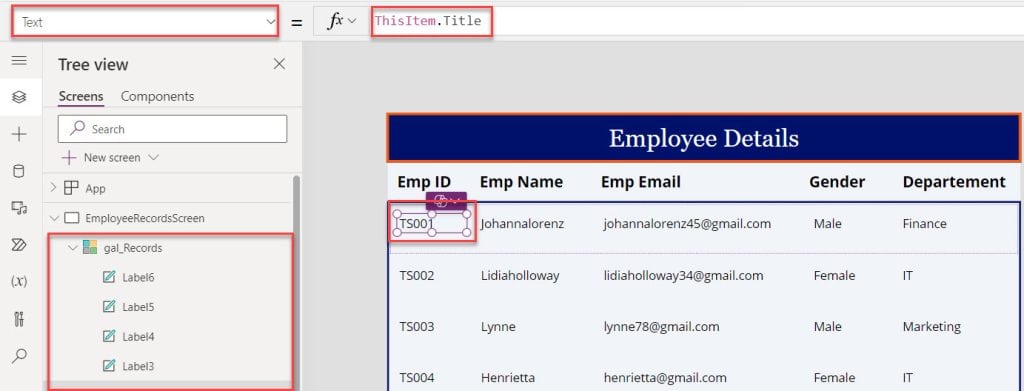
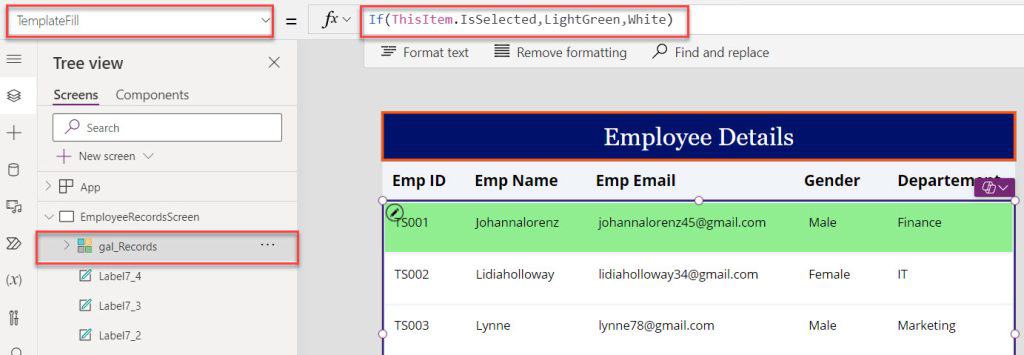
3. Next, select a Gallery control and set its TemplateFill property to the code below.
TemplateFill = If(
    ThisItem.IsSelected,
    Color.LightGreen,
    Color.White
)
4. Now, add another screen -> Insert a Display form and set its DataSource property as:
DataSource = 'Employee Onboarding'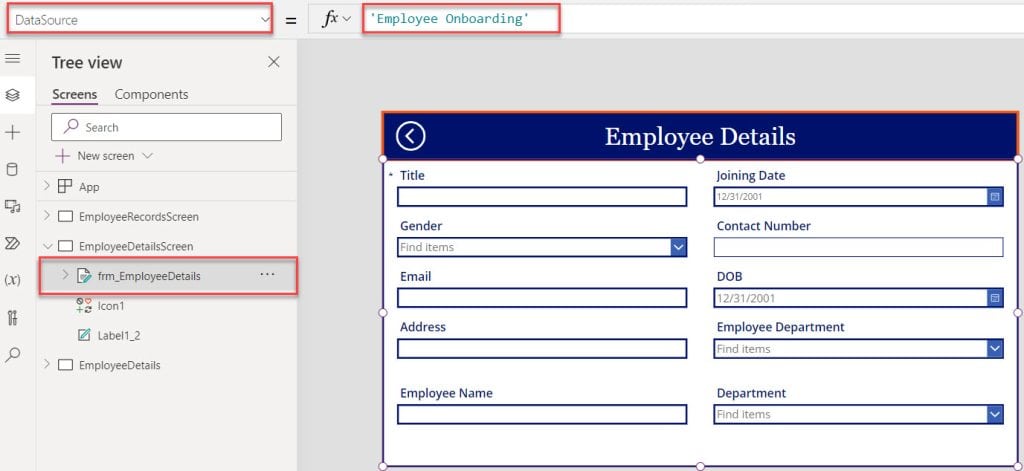
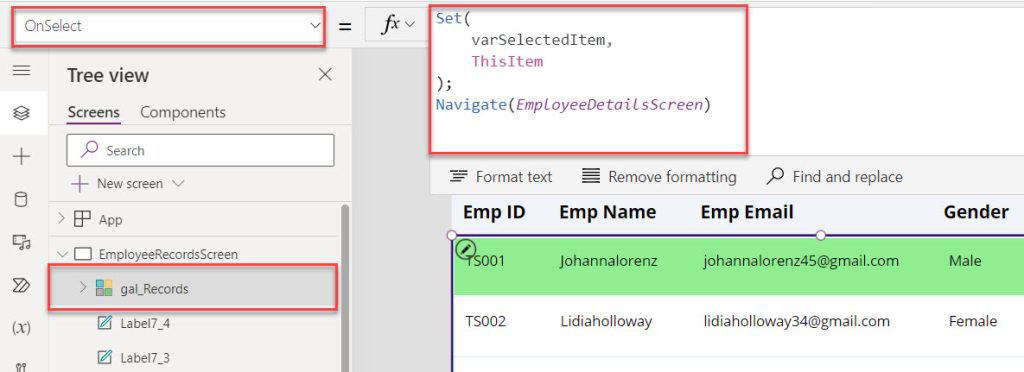
5. To get the selected gallery record details on a display form, select the gallery control and set its OnSelect property as:
OnSelect = Set(
    varSelectedItem,
    ThisItem
);
Navigate(EmployeeDetailsScreen)
Where,
- varSelectedItem = Power Apps variable name
- EmployeeDetailsScreen = Name of the 2nd screen
6. Next, select the Display form [frm_EmployeeDetails] and set its Item property as:
Item = varSelectedItem
7. Once your app is ready, Save, Publish, and Preview the app. Whenever the user selects any record from the gallery control, it will navigate to the 2nd screen where we will get selected record details on a display form, as in the screenshot below.

This is all about the Power Apps gallery OnSelect set variable.
Conclusion
From this Power Apps tutorial, we learned all about the Power Apps gallery control OnSelect. Then, we saw the Power Apps gallery control OnSelect navigate Screen and how to get selected gallery record details on a Display form/Edit form using the OnSelct property.
Last, we also covered how to set a variable in the Power Apps gallery control using the OnSelct property.
You may also like:
- How to Select Multiple Items in Power Apps Gallery Control?
- How to Add New Row in Power Apps Gallery Control?
- How to Sort Gallery by Person Column in Power Apps?
- How to Sort Power Apps Gallery By ID?
- Display Power Apps Gallery Distinct Values
I am Bijay a Microsoft MVP (10 times – My MVP Profile) in SharePoint and have more than 17 years of expertise in SharePoint Online Office 365, SharePoint subscription edition, and SharePoint 2019/2016/2013. Currently working in my own venture TSInfo Technologies a SharePoint development, consulting, and training company. I also run the popular SharePoint website EnjoySharePoint.com