Do you know how to customize a Power Apps gallery layout? This Power Apps tutorial will discuss all the information about customizing a Gallery Layout in PowerApps. Like:
- PowerApps gallery control layout
- How to customize a Power Apps gallery using different layouts
- Working with the Power Apps gallery blank layout
PowerApps Gallery Control Layout
- In PowerApps, There are two different categories of Gallery Layout [Properties -> Layout]. Such as:
- List
- Gallery
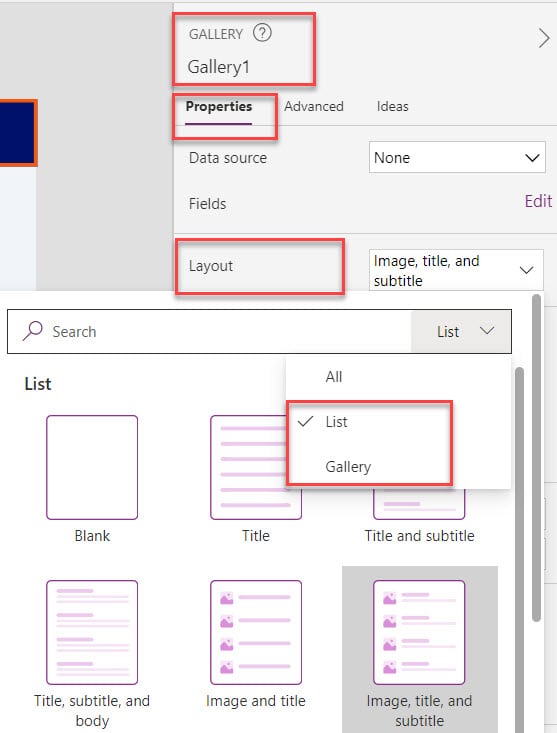
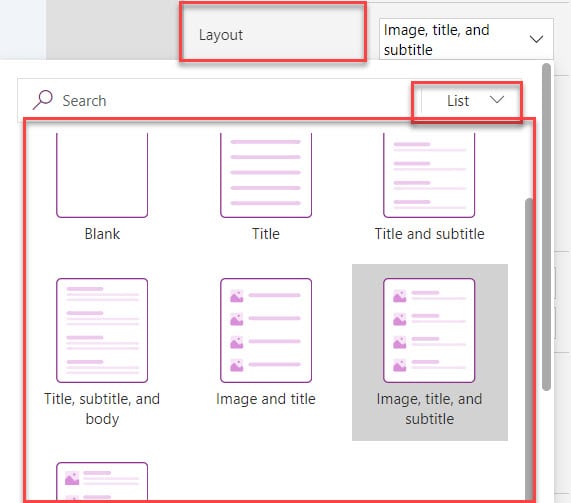
- If you select List in the Gallery Layout section, then you can see there are a total of seven types of layouts:
- Blank
- Title
- Title and subtitle
- Title, subtitle, and body
- Image and title
- Image, title, and subtitle
- Image, title, subtitle, and body
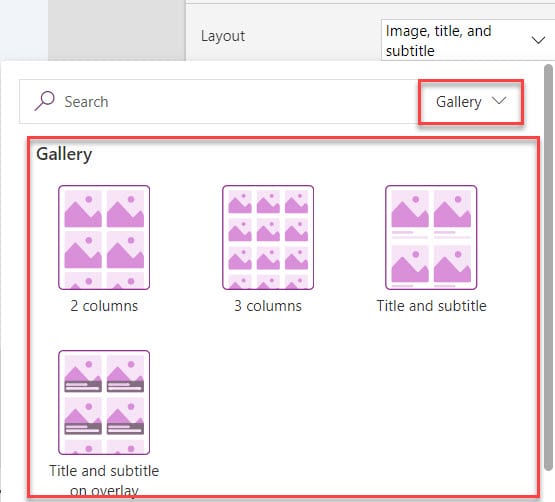
- Similarly, If you select Gallery in the Gallery Layout section, then you can see there are a total of four types of layouts:
- 2 columns
- 3 columns
- Title and subtitle
- Title and subtitle on overlay
- If you select All from the Gallery Layout section, all the layouts (List and Gallery) will appear at a time.
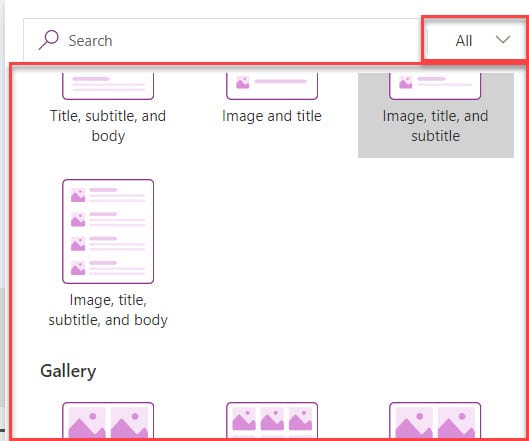
These are the layout options available in the Power Apps Gallery control.
Customize a Gallery Layout in Power Apps
Here, we will discuss how to customize a gallery layout in Power Apps with the below 2 examples. Such as:
- How to customize a Power Apps gallery using different layouts
- Working with the Power Apps gallery blank layout
How to customize a Power Apps gallery using different layouts?
Let’s take a simple example: I have a SharePoint Online list named “Employee Onboarding” and this list contains the below fields.
| Column Name | Data Type |
| Employee ID | Default single line of text |
| Employee Name | A single line of text |
| Gender | Choice |
| A single line of text | |
| Employee Department | Lookup |
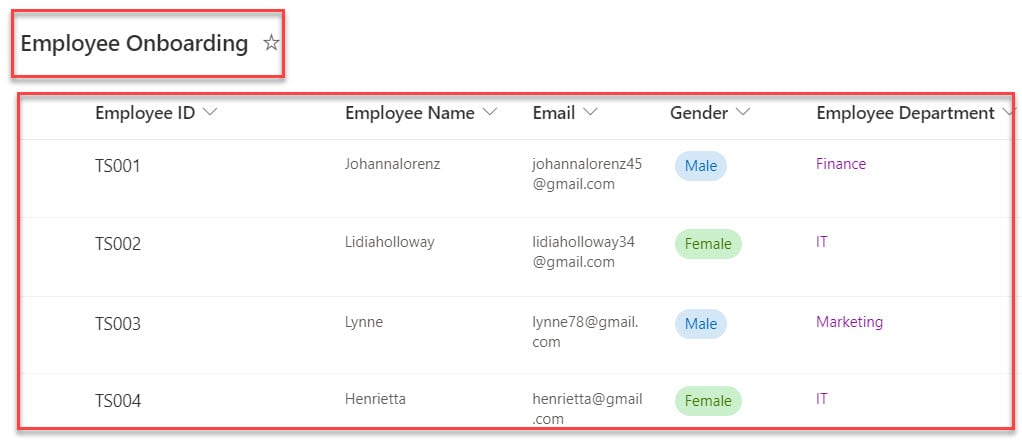
Now, I want to display this SharePoint list records on the Power Apps gallery using the layout [Image, title, subtitle, and body] as in the screenshot below.
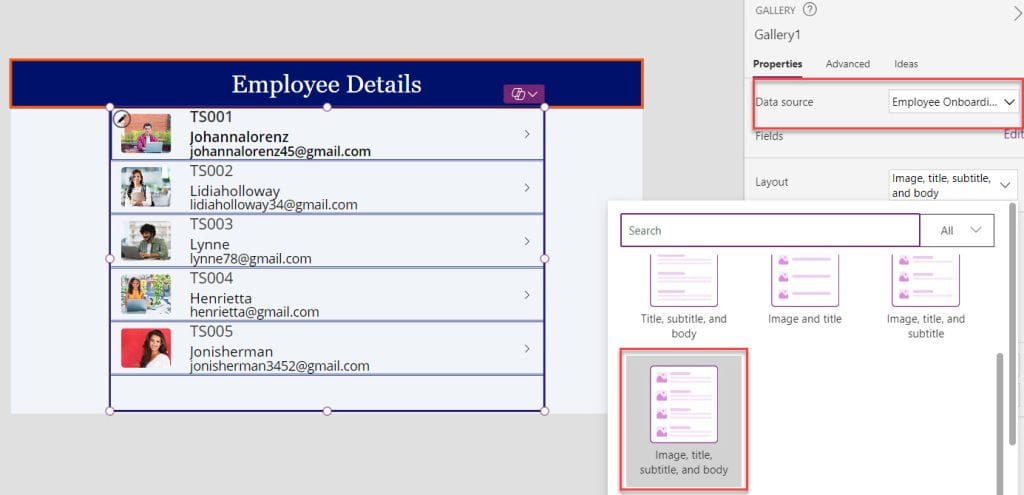
To achieve it, follow the below steps. Such as:
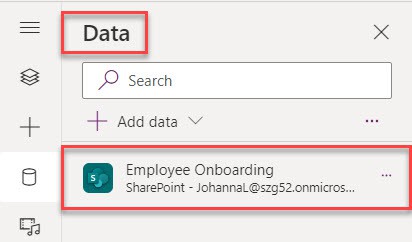
1. Open Power Apps -> Create a Blank Canvas app and connect it to the respective SharePoint list like below.
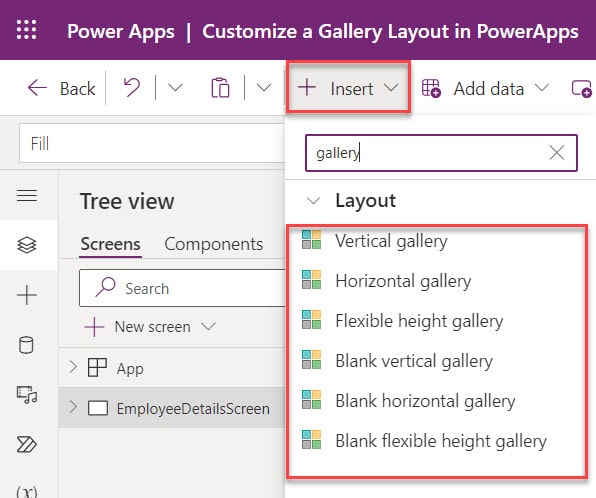
2. Whenever the user wants to insert a Gallery control, Power Apps will give the following six gallery options under the Layout dropdown. Such as:
- Vertical gallery
- Horizontal gallery
- Flexible hight gallery
- Blank vertical gallery
- Blank horizontal gallery
- Blank flexible hight gallery
3. But, as per our requirement, we can select “Vertical gallery”. Once we select a vertical gallery, it will appear with the List layout [“Image, title, and subtitle”]. Here, we can also change layout options as per our needs.
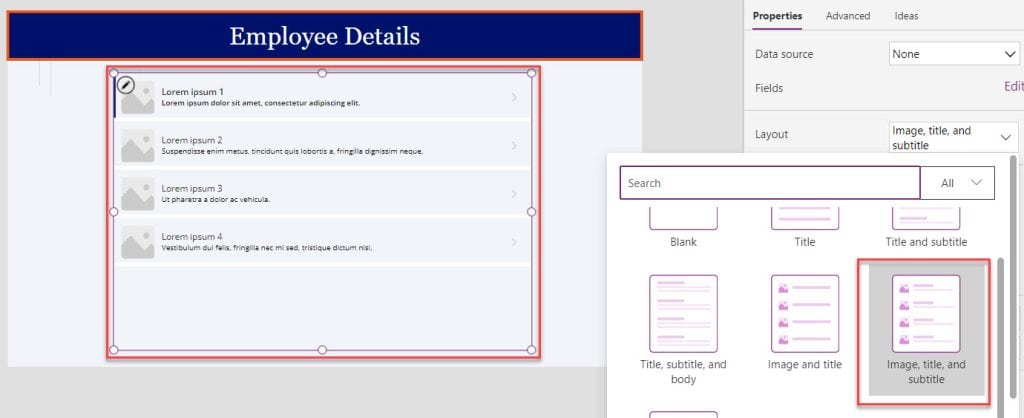
4. Now, select the “Image, title, subtitle, and body layout” option from the List layout and set its Items property as:
Items = 'Employee Onboarding'Where,
- ‘Employee Onboarding’ = SharePoint Online List

5. Once your app is ready, Save, Publish, and Preview the app. The Power Apps gallery will display each record from a SharePoint Online list based on the respective gallery layout, as in the screenshot below.
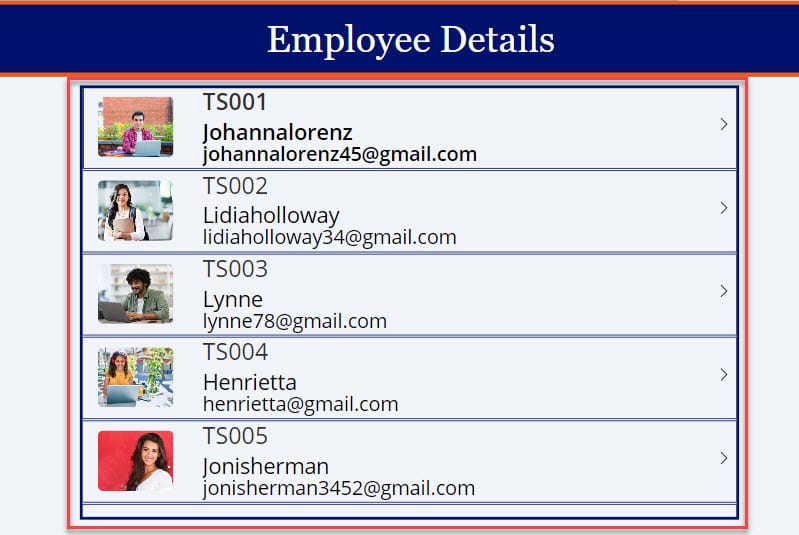
This is how to customize a Power Apps gallery using different layouts.
Customize a Power Apps Gallery Blank Layout
Now, we will see how to customize a Power Apps gallery blank layout. Suppose I want to design the gallery without using any layout template to display the SharePoint list records, as in the screenshot below.
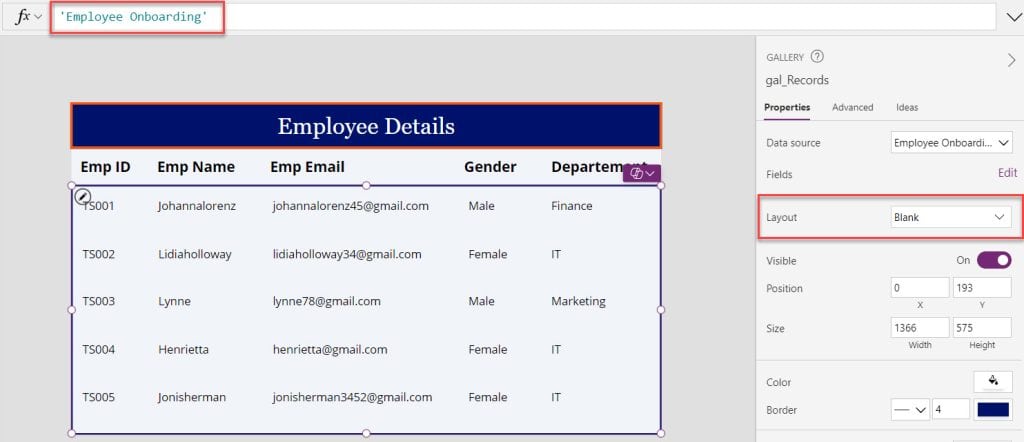
To do so, follow the below steps.
1. On the Power Apps Screen -> Insert a Gallery control (you can take any gallery control) and then make the Layout options “Blank“. Once you choose the Blank layout, then the gallery will appear as shown below.
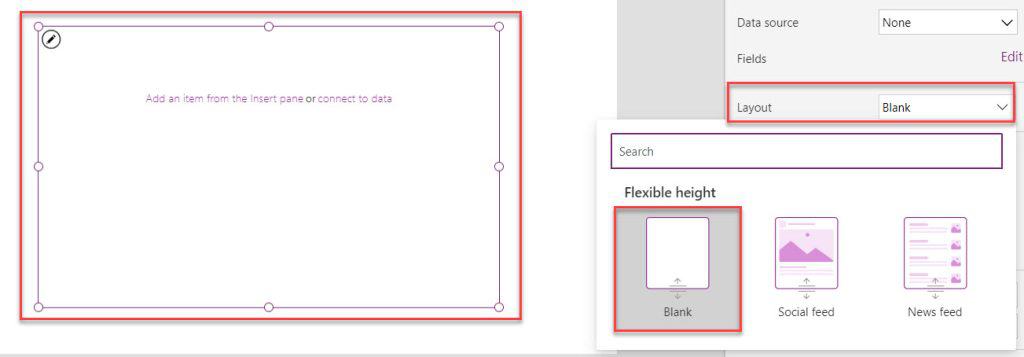
2. Then, set the Items property of a Power Apps gallery control as:
Items = 'Employee Onboarding'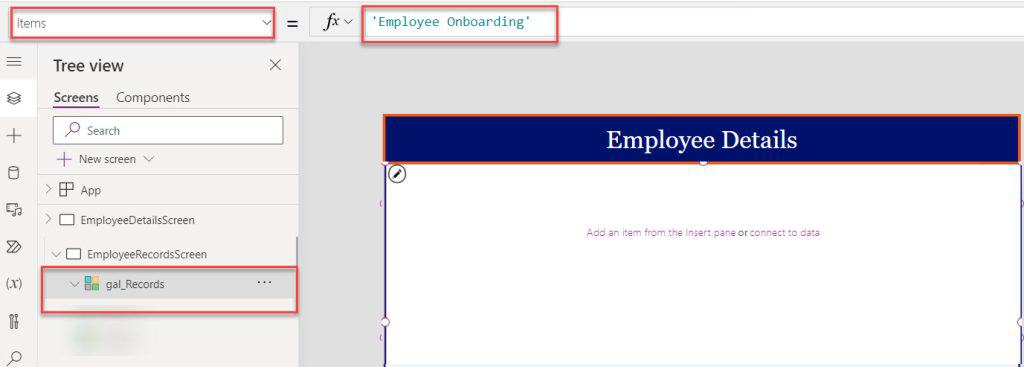
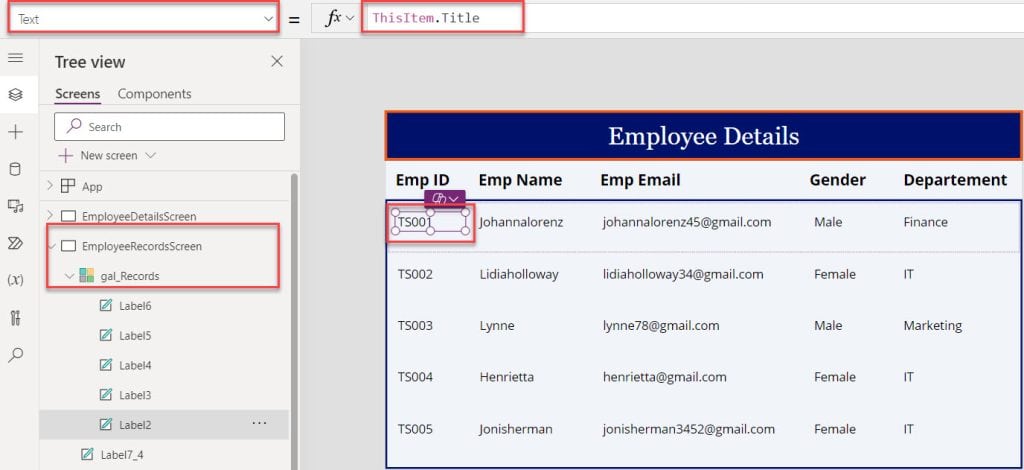
3. Next, Select the first section of the gallery control, insert a Text label, and set its Text property as:
Text = ThisItem.TitleWhere,
- Title: It is the SharePoint field name that I want to display in the label control
4. Similarly, You can take any SharePoint list field inside the gallery using text inputs as shown below.
Text = ThisItem.'Employee Name'

Text = ThisItem.Email

Text = ThisItem.Gender.Value

Text = ThisItem.'Employee Department'.Value
5. Similarly, you can take any PowerApps Control and show the SharePoint field value in the gallery as per your need.
6. Save, Publish, and Preview the app. The gallery will display each record from a SharePoint list with a blank layout option, as in the screenshot below.
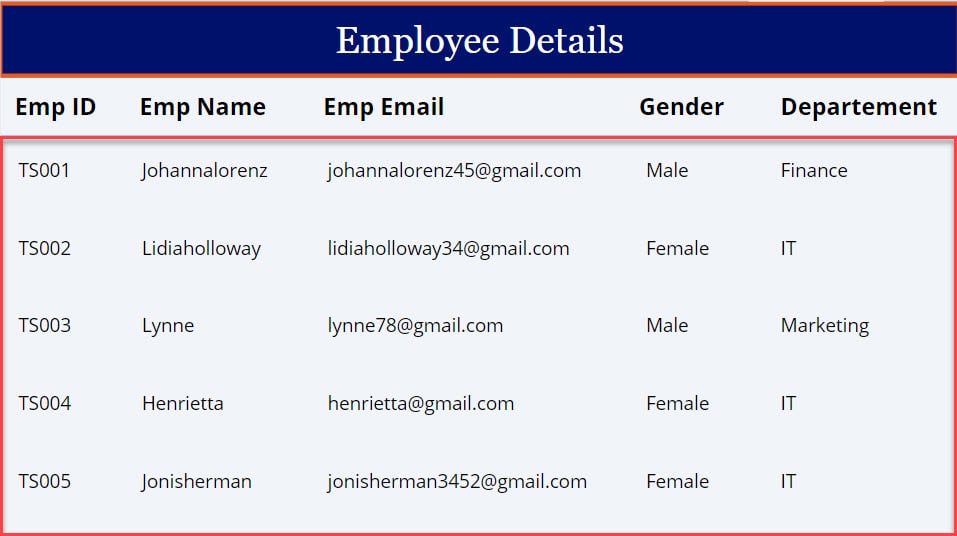
This is how to customize a Power Apps gallery blank layout.
Conclusion
We learned the Power Apps Gallery layout options from this Power Apps tutorial. Then, we discussed how to customize a Power Apps gallery control with different layout options and how to display the SharePoint list records on the gallery control
In the last, we also covered how to customize a Power Apps gallery with a blank layout option.
You may also like:
- Count Rows in Power Apps Gallery Control
- How to Sort Power Apps Gallery By Month
- Power Apps Sort Gallery By Calculated Field
- Power Apps Sort Gallery By Day
- How to Display Power Apps Collection on Gallery?
- How to Set Default Selected Item in Power Apps Gallery?
I am Bijay a Microsoft MVP (10 times – My MVP Profile) in SharePoint and have more than 17 years of expertise in SharePoint Online Office 365, SharePoint subscription edition, and SharePoint 2019/2016/2013. Currently working in my own venture TSInfo Technologies a SharePoint development, consulting, and training company. I also run the popular SharePoint website EnjoySharePoint.com