Do you want to auto populate SharePoint list columns based on the value in one column using Power Automate? In this tutorial, we will see how to auto populate SharePoint list columns based on value in one column using Power Automate.
For example, I have a SharePoint list called Employee Directory, which contains the following columns:
- First name
- Last name
- Joining Date
- Department
- Organization Email
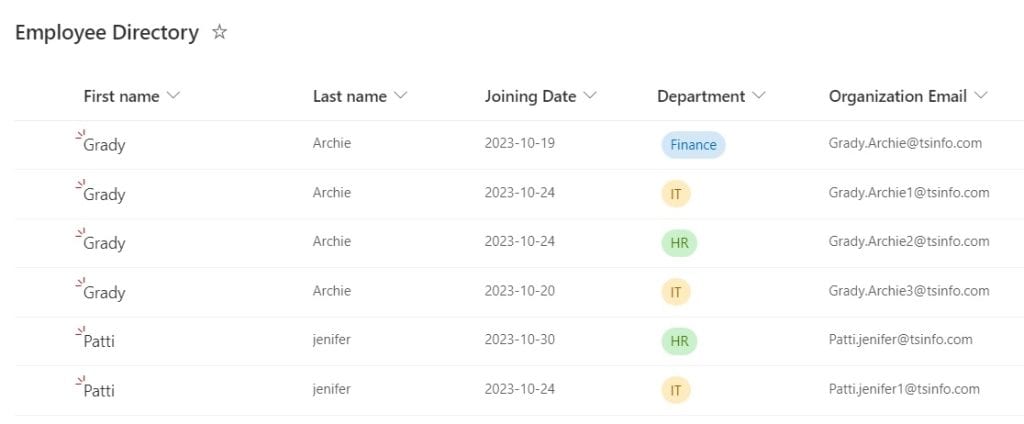
When a new employee is added to the list, we will automatically generate an email address by using First name and Last name. For example, first name =Grady and Last name = Jenifer, then the email ID will be Grady.jenifer@domain.com
Let’s say another employee joins the organization with the same name, in that case, the email id will be generated as Grady.jenifer1@domain.com.
Let’s see how we can auto-populate the email ID based on the first name and last name column using Power Automate.
Auto Populate SharePoint list columns based on the value in one column using Power Automate
Here we will see how we can auto-populate SharePoint list columns based on the value in one column using Power Automate.
Follow the below steps to auto-populate SharePoint list columns based on the value in one column using Power Automate.
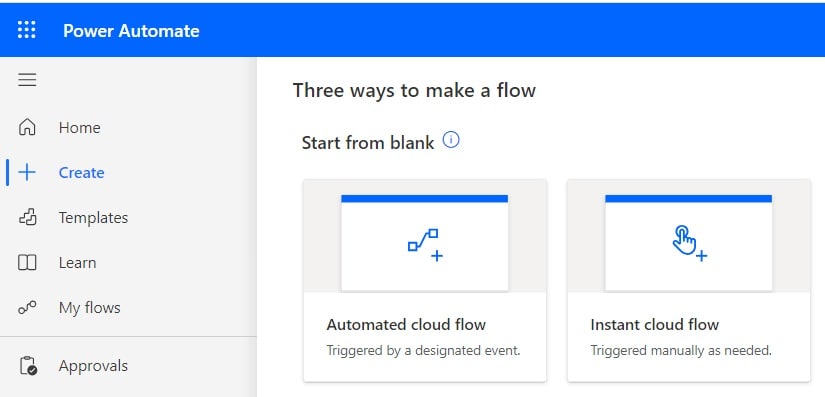
1. Open Power Automate Cloud, click on “+Create”, and select Automated Cloud flow.
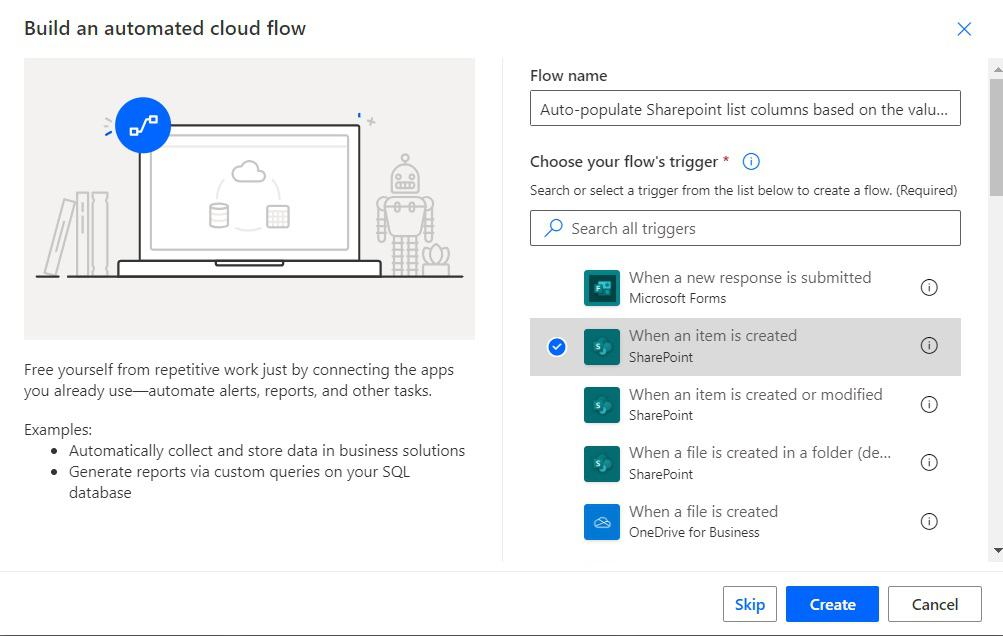
Then provide the flow name, and select the When an item is created action. Then click on Create.
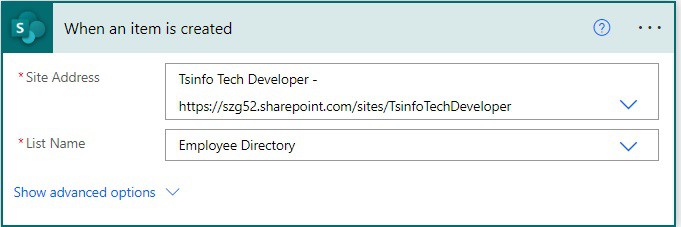
Now, you can When an item is created action is added to the flow. Provide the below information:
- Site address: Provide the SharePoint site address.
- List name: Provide the list name.
2. Next, we will create the first part of the email. for this, click on +New step -> select Compose action. Then provide the below information:
- Inputs: Provide like below
@{triggerOutputs()?['body/Title']}.@{triggerOutputs()?['body/Lastname']}
3. Now we initialize a variable, where we will store their email address, for this click on the +New step -> select Initialize variable action. Then provide the below information:
- Name: Provide the variable name
- Type: Select the type as string
- Value: Provide the value like below:
@{outputs('Compose')}@tsinfo.com
4. We will get the items from the SharePoint list, whose email address contains the firstname.lastname, of the current employee.
For this, click on +New step -> select ‘Get items action. Then provide the below information:
- Site address: Provide the SharePoint site address
- List name: Provide the list name
- Filter query: Provide the query like below:
substringof('@{outputs('Compose')}',OrganizationEmail)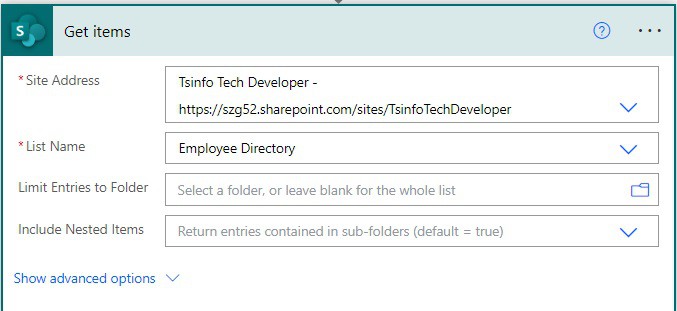
5. Next, we will initialize another variable which we will use as a counter, for this, click on +New step -> select Initialize variable action. Then provide the below information:
- Name: Provide the variable name
- Type: Select the type as Integer
- Value: Provide the value as 0

6. Now we will check the organization’s email, for this click on +New step -> select Condition action. Then provide the below information:
- Choose a value: Select the Orgemail variable from dynamic content.
- Operator: Select the operator as is equal to
- Choose a value: Select the Organizational Email -Get items, from dynamic content. This will automatically apply to each action.
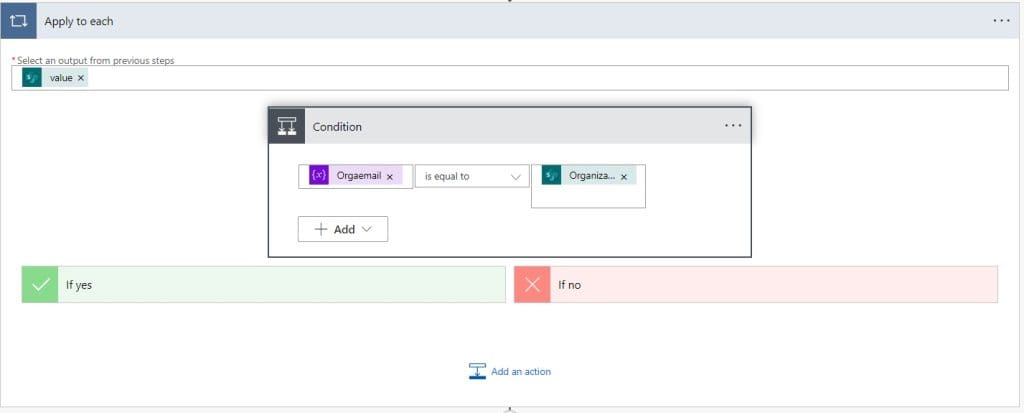
7. Now if the condition becomes true, that means the email exists in the list. So, in the If yes part we will increment the counter by 1 and set the email with the counter.
First, in the If Yes part of the condition, click on Add an action -> select Increment variable action. Then, provide the below informations.
- Name: Select the name as Counter.
- Value: Provide the value as 1.

Next, we will set the organization email; for this, click on Add an action -> select Set variable action. Then provide the below information:
- Name: Select the variable name.
- Value: provide the value like below.

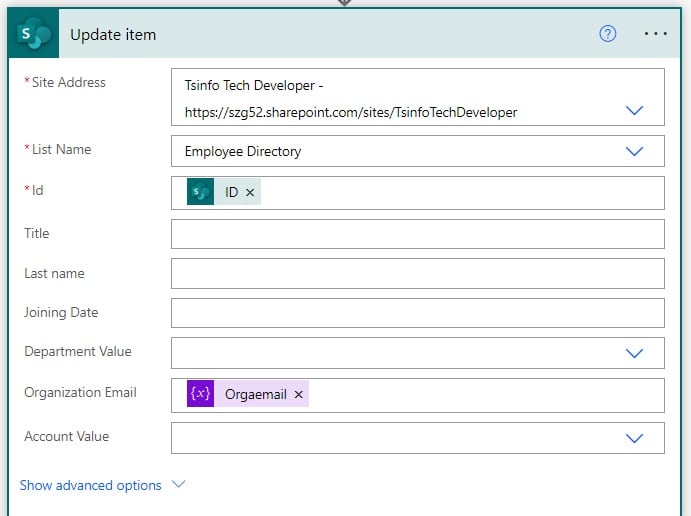
8. Now, if the condition is false then the email does not exist in the list, so we can use the email. So we can directly update the email in the SharePoint list. For this, click on +New step -> select Update site action.
Then provide the below information:
- Site address: Provide the SharePoint site address.
- List name: Provide the list name
- Id: Select the id from dynamic content
- Organization email: Select Orgemail from dynamic content.
9. Now run the flow manually and create an item in the SharePoint list to make the flow trigger.
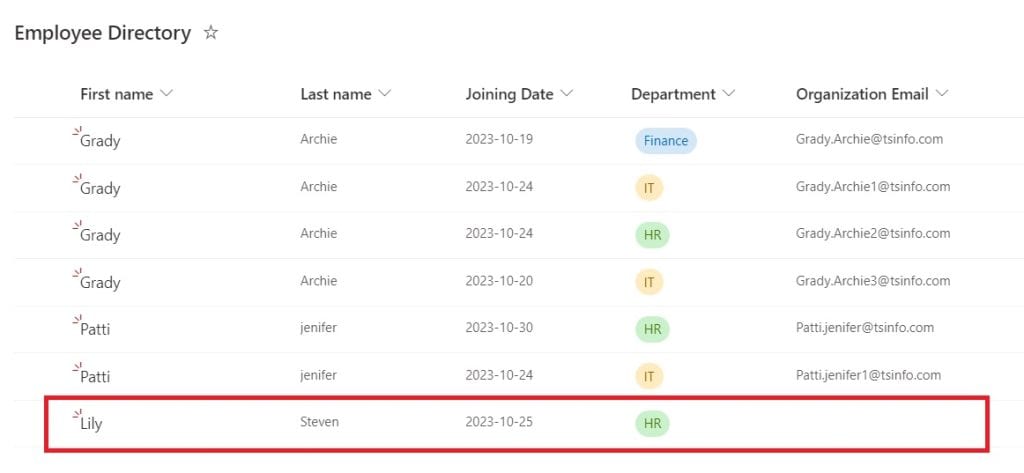
Now you can see the flow ran successfully in Power Automate.
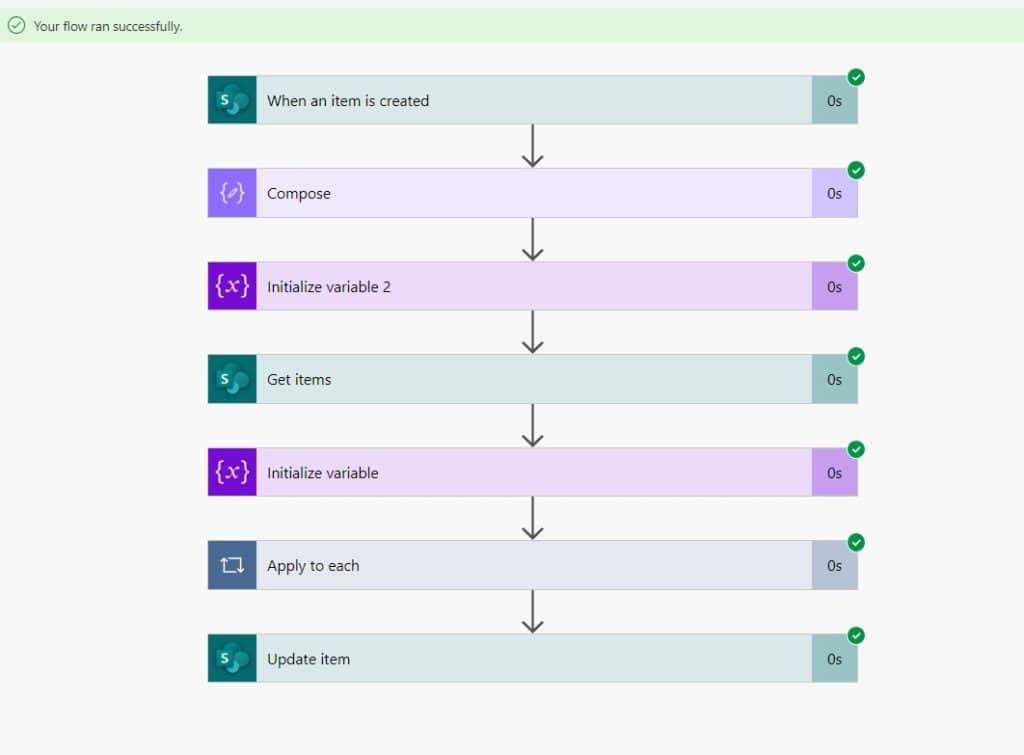
The Organization email is autogenerated with the Organization email field in SharePoint.
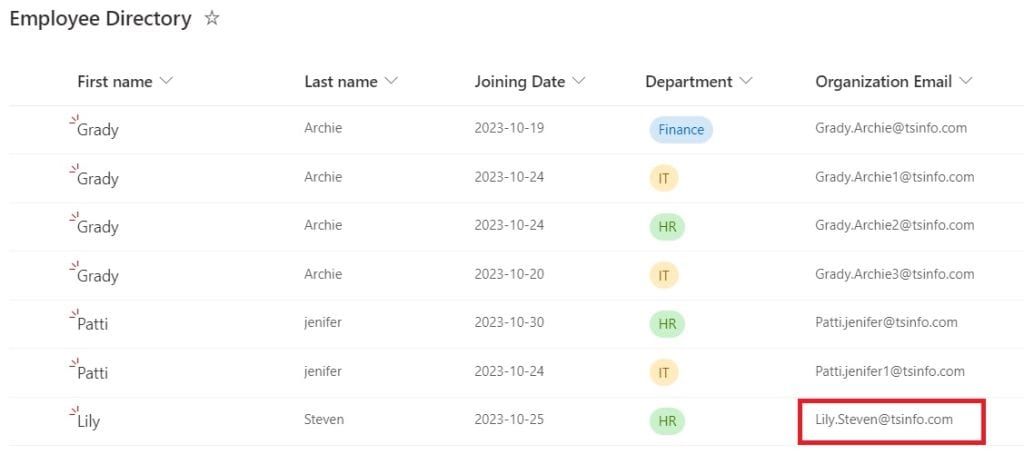
This is how to auto populate SharePoint list columns based on the value in one column using Power Automate.
Conclusion
In this Power Automate tutorial, we saw how to auto populate SharePoint list columns based on the value in one column using Power Automate.
You may also like the following tutorials:
- Schedule Flow in Power Automate
- How to Create a Word Document from a SharePoint list item using Power Automate?
- Move File from OneDrive to SharePoint using Power Automate
- When an item is created in SharePoint list send approval and create item using Power Automate
I am Bijay a Microsoft MVP (10 times – My MVP Profile) in SharePoint and have more than 17 years of expertise in SharePoint Online Office 365, SharePoint subscription edition, and SharePoint 2019/2016/2013. Currently working in my own venture TSInfo Technologies a SharePoint development, consulting, and training company. I also run the popular SharePoint website EnjoySharePoint.com
thanks for sharing this Bijay..