In this Power Automate article, we will learn how to create an array from an Excel table using Power Automate.
Create an array from an Excel table using Power Automate
Before creating the flow, we need to create the Excel file. Here is an example I have taken an Excel file having columns as:
- EmpId
- EmpName
- EmpSalary
- Date of Joining
- Status
- Last Date, etc.
Once you create the excel table, make sure to select everything (Header columns & Data) and then Format as Table from the Home tab. You can see below how the excel looks like:

Once you excel file is ready, upload it to a SharePoint document library.
Now, let us start creating the flow.
Step:1
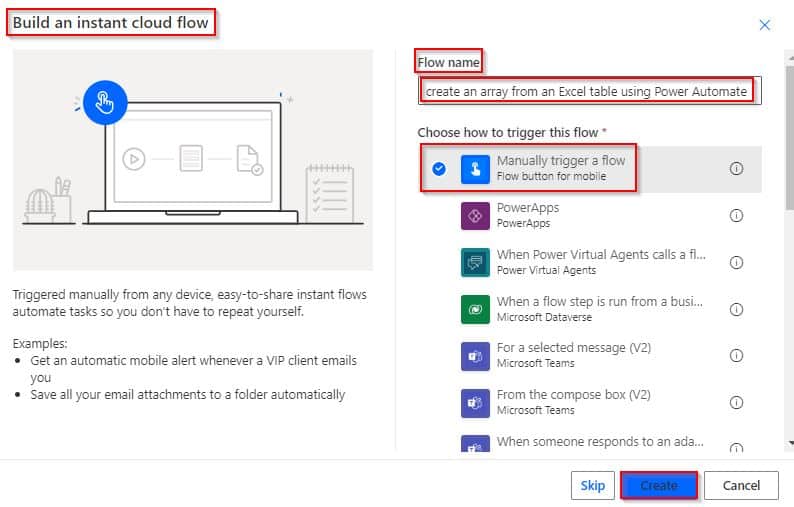
Login to Power Automate and create an instant cloud flow and then enter the flow name and choose the trigger as Manually trigger a flow and click on the Create button.
Step:2
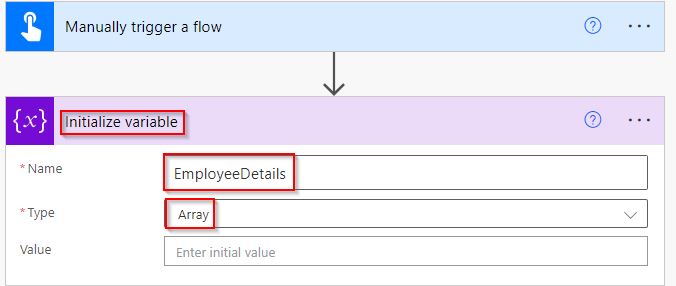
Select New step and choose the initialize variable action, Choose the variable type as Array as shown below: This variable we are going to use to store values after reading the Excel file.
Step:3
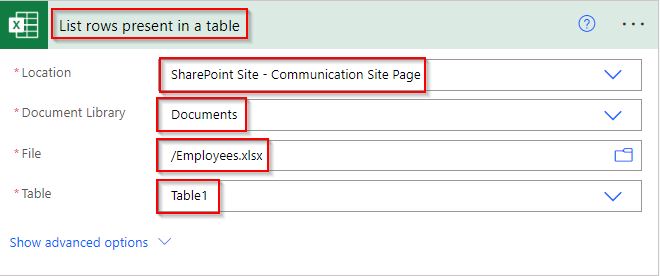
Add a new step and choose the List rows present in a table, And provide the below-required information.
- Location: Select the location of the SharePoint site where the Excel file is presented
- Document library: Select the document library where the Excel file that you have uploaded above.
- File: select a file from the options
- Table: Select the table. Here the table name was Table1 in the Excel file.
Step:4
- Select the +New step and choose the select data operation to map the key-value pairs. In the Form field, pass the values of the previous action to loop through the rows presented in the Excel sheet.
- In the Map field, map the related values like below: For the date column type values in the Excel sheet and pass the below expression:
- Because when we execute the flow for the date field it displays the random integer value in the compose action as highlighted below:
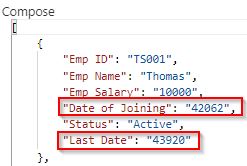
- To overcome this we have to format the date field value by using the below expressions so that it displays the date value in the dd-MM-yyyy format.
Date of Joining column(Date type)
addDays('1899-12-30', int(item()?['Date of Joining']), 'dd-MM-yyyy')Last Date column(Date type)
addDays('1899-12-30', int(item()?['Last Date']), 'dd-MM-yyyy')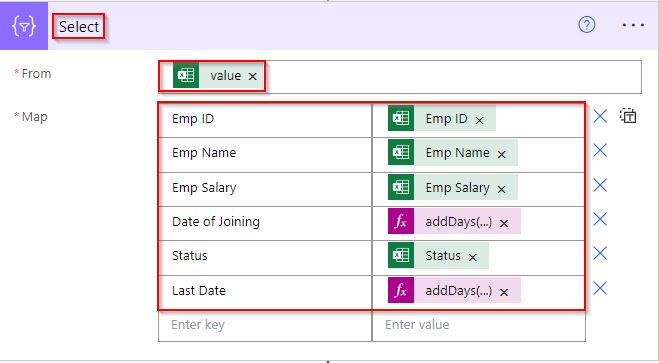
Step:5
Add a set variable action, In the Name section, select the variable that we have at step-2, and in the value section pass the Outputs of the select action.

Step:6
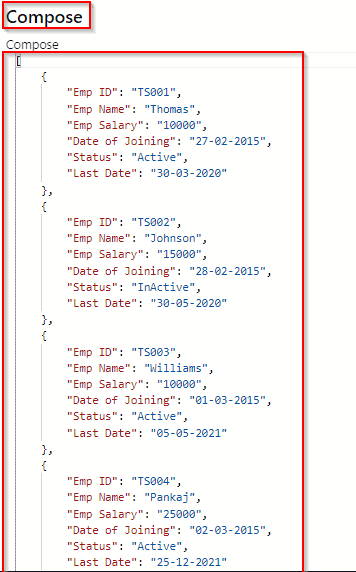
To check the output value, add a compose action and pass the variable name which stores the array of values.

Step:7
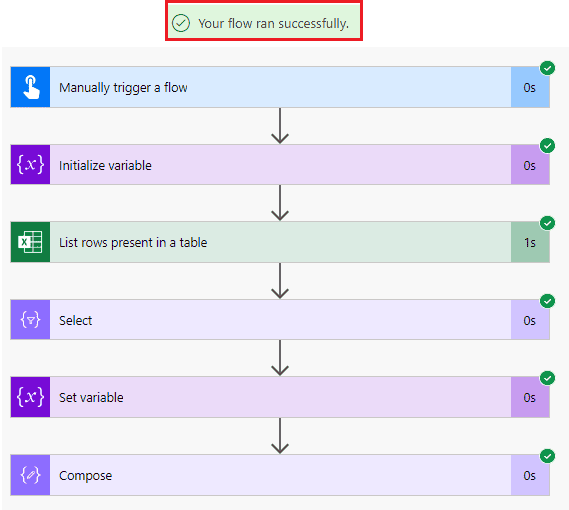
Now our flow is ready. Then Save -> Test and Run the flow by selecting the run flow option. Once the flow ran successfully like below:
We can see the expected output, which displays the Excel values in an array format in the outputs of compose action.
This is how to create an array from an Excel table using Power Automate.
Conclusion
In Power Automate, we can easily create an array from an excel file. In this tutorial, step by step I have explained, how to create an array from an excel file in Power Automate.
You may also like:
- Create an HTML Table from an Array in Power Automate
- Create an HTML Table from Excel in Power Automate
- Add Rows to Excel in Power Automate
- How to format a number as currency in Power Automate?
I am Bijay a Microsoft MVP (10 times – My MVP Profile) in SharePoint and have more than 17 years of expertise in SharePoint Online Office 365, SharePoint subscription edition, and SharePoint 2019/2016/2013. Currently working in my own venture TSInfo Technologies a SharePoint development, consulting, and training company. I also run the popular SharePoint website EnjoySharePoint.com