In this Power Automate tutorial, we will see how to add rows to Excel in Power Automate. Here we are going to cover the below examples:
- Power automate add a row to excel
- Add a row to the Excel table dynamically in Power Automate
- Power automate add a row to Excel from the form
- Add a row to Excel from email in Power Automate
- Add a row to Excel from an array in Power Automate
Let’s start with our first topic ‘Power automate add a row to Excel’ to understand what it is and how to use it.
Add a row to excel in Power Automate
To add a row to excel using Power Automate, we used a action ‘Add a row into a table’. This action allows us to add a new row to the Exel table.
For example, we have created an Instant cloud flow, in this flow when we run it will ask 4 inputs i.e.
- Product Id
- Product Name
- Product Description
- Product Price
To save this input in the Excel table we will create the ‘Add a row into a table’ action and then add it to the below excel. This Excel also contains the above column.

Login to Power Automate to create an Instant cloud flow -> choose the trigger as Manually trigger a flow action.
Now, you can see Manually trigger a flow is added, expand it, click on Add an input, then add the below user input field:
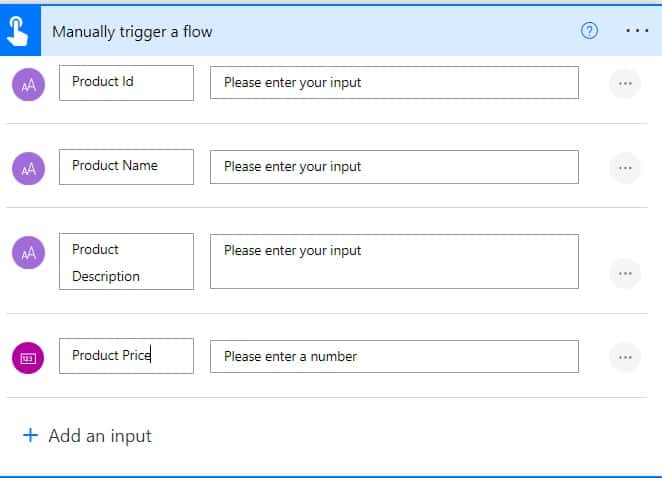
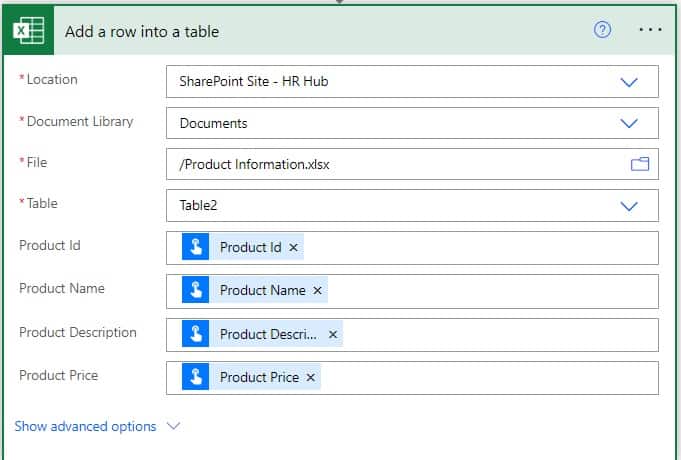
Next, we will add a row of data in Excel, so click on the +New step and select the ‘Add a row into a table’ action. Then provide the below information:
- Location: Select the Location of excel file
- Document Library: Select the document library excel file is present
- File: Select the excel file
- Table: Select the table of excel file
- Product Id: Select the Product Id from dynamic content.
- Product name: Select the Product name from the dynamic content
- Product Description: Select the product description from the dynamic content
- Product price:Select the Product price from the dynamic content.
Now let’s save the flow and run it manually, then fill out the below form. Click on Run flow.
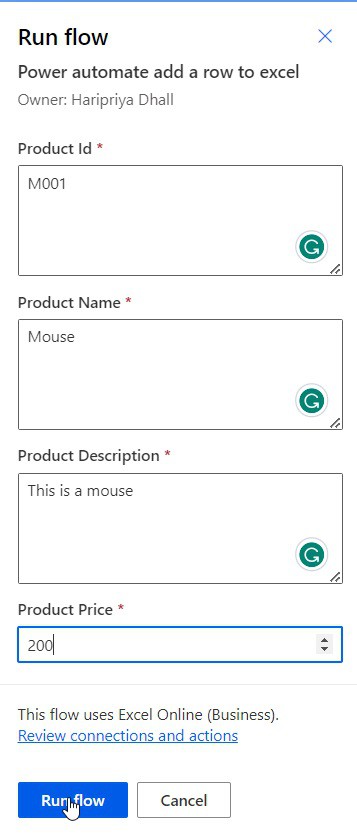
You can see your flow ran successfully, and the data is entered to Excel.

Add a row to an Excel table dynamically in Power Automate
Here we will see how to add a row to an Excel table from the SharePoint list using Power Automate.
For this example, also we will use the same Excel sheet ‘Product information’ to add a row of data. However, when an item is created in the below SharePoint list i.e. Product Details list, then it will add a row to the Excel.
So, our excel contains the below columns:
- Title: Single Line of text
- Product Name: Single line of text
- Product Description: multiple line of text
- Product Price : Currency

Now let’s see how we can add a row to excel dynamically using Power Automate.
Step 1: Log in to Power Automate, click on +Create, and select ‘Automated Cloud flow’.
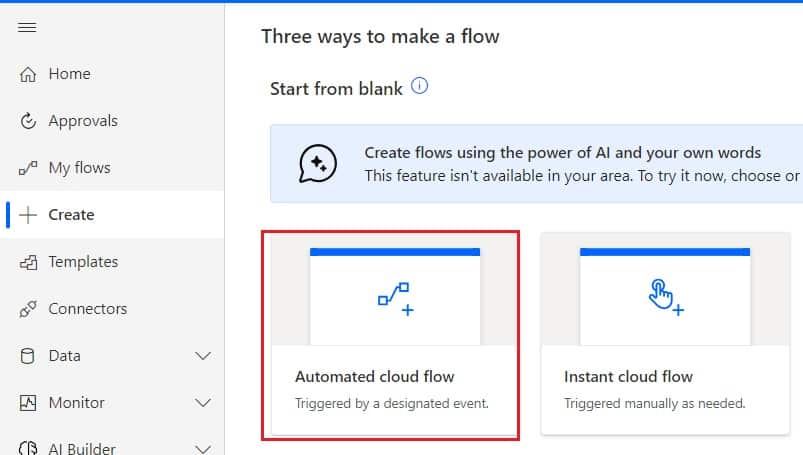
Then provide the flow name and select the ‘When an item is created’ trigger action. Then click on Create
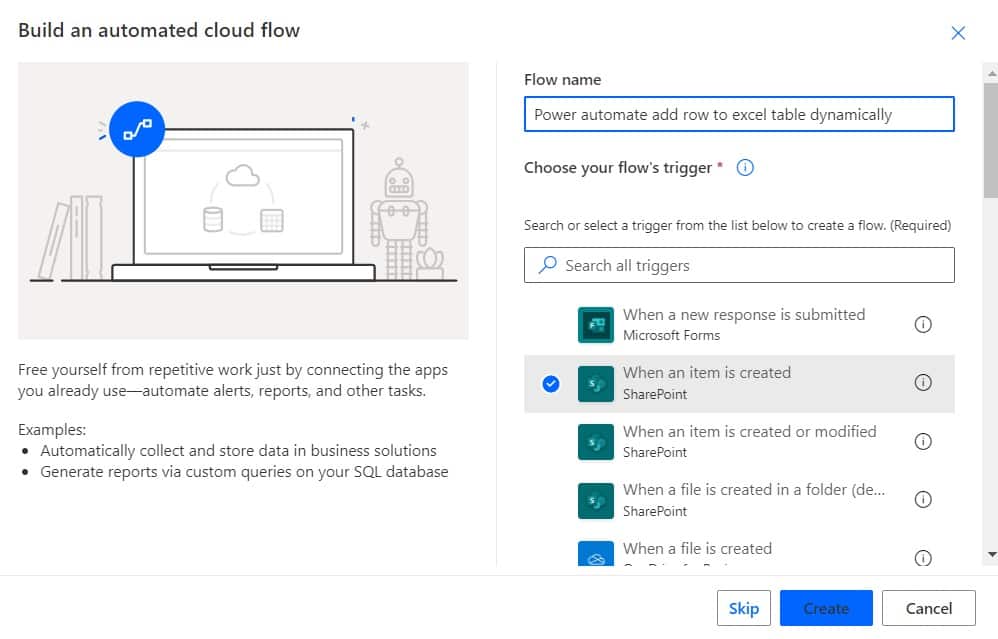
Now you can see When an item is created action is added to the flow, then provide the below information:
- Site address: Provide or select the site address.
- List name: Select the list name from the dropdown

Step 2: Then click on the +New step, select the ‘Add a row into a table’ action. Then provide the below information:
- Location: Select the Location of excel file
- Document Library: Select the document library excel file is present
- File: Select the Excel file
- Table: Select the table of Excel file
- Product Id: Select the Product Id from dynamic content.
- Product name: Select the Product name from the dynamic content
- Product Description: Select the product description from the dynamic content
- Product price: Select the Product price from the dynamic content.
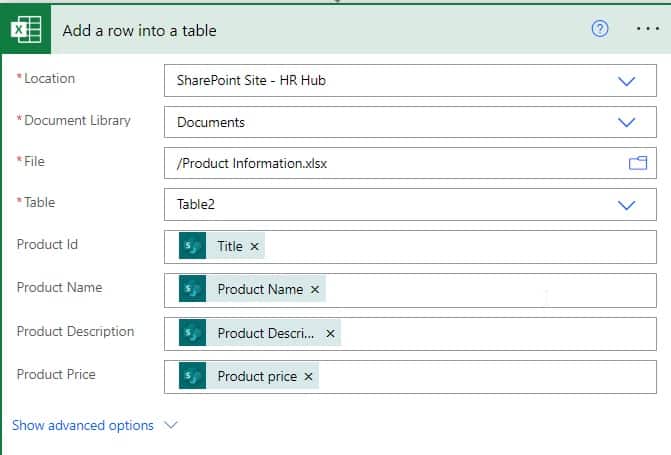
Step 3: Next click on Save and test the flow manually, for this click on the Test icon, -> Manually -> click on the Test button. Next, connect to the credential, and then click on the Continue button -> Next click on the Run Flow button -> click on Done.
Now create an item in the SharePoint list, you can see the data added to the excel.

Power automate add a row to Excel from the form
Here we will see how to add a row to Excel from the Microsoft form using Power Automate.
For this example, also we will use the same Excel sheet ‘Product information’ to add a row of data. However, when a response is submitted with all the product details from Microsoft form i.e. Product Details, then it will add a row to the Excel.
As our Microsoft Form contains the below fields:
- Product id: Text
- Product Name: Choice
- Product Description: Text (long answer enabled)
- Product Price: Text
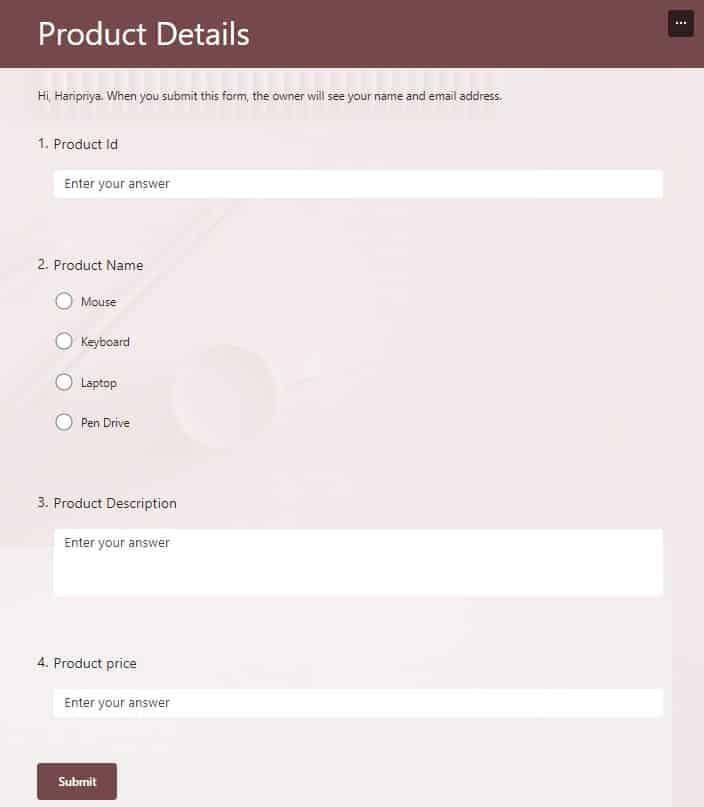
Let’s follow the below steps to add a row to excel from MS Form using Power Automate.
Step 1: Log in to Power Automate, click on +Create, and select ‘Automated Cloud flow’.
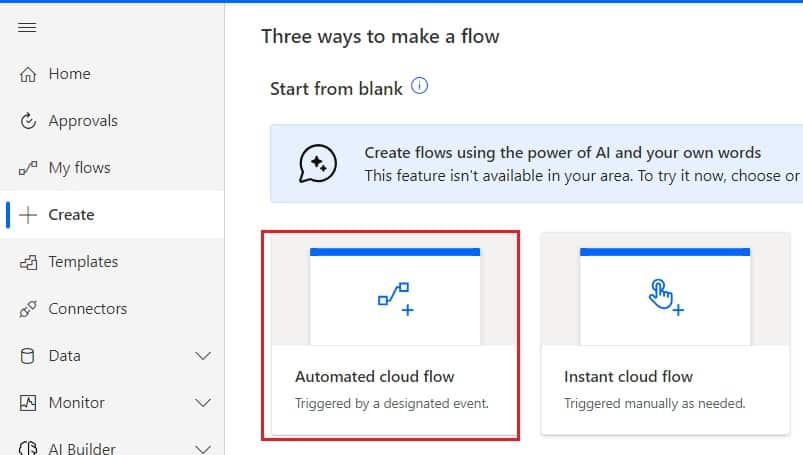
Then provide the flow name and select the ‘When a new response is submitted‘ trigger action. Click on Create
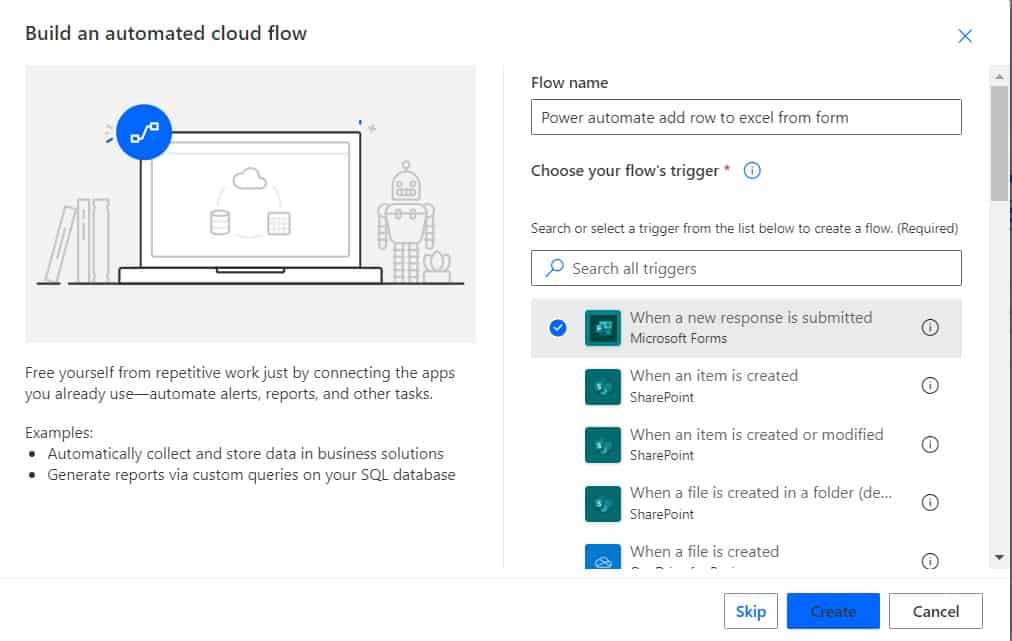
Now you can see ‘When a new response is submitted‘ action is added to the flow. Then provide the below information:
- Form Id: Select the Form from the dropdown.

Step 2: Next, click on the +New step, to get the response details, so select the ‘Get response details‘ action. Then provide the below information:
- Form Id: Select the Form from the dropdown.
- Response id: Select the response id from the dynamic content.

Step 3: Next, click on the +New step, then select the ‘Add a row into a table‘ action. Then provide the below information:
- Location: Select the Location of the Excel file
- Document Library: Select the document library Excel file is present
- File: Select the Excel file
- Table: Select the table of the Excel file
- Product Id: Select the Product Id from dynamic content.
- Product name: Select the Product name from the dynamic content
- Product Description: Select the product description from the dynamic content
- Product price: Select the Product price from the dynamic content.
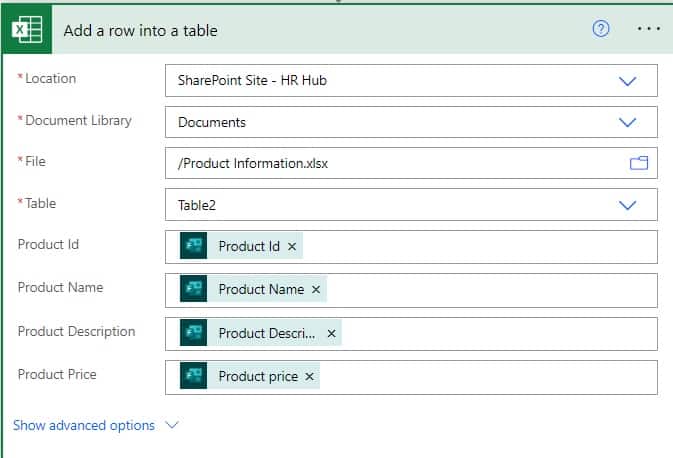
Step 4: Next click on Save and test the flow manually, for this click on the Test icon, -> Manually -> click on the Test button. Next, connect to the credential, and then click on the Continue button -> Next click on the Run Flow button -> click on Done.
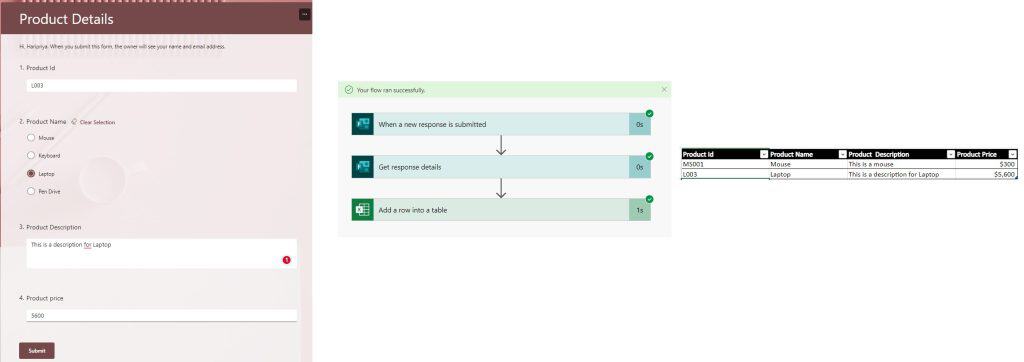
Next, fill the form and click on submit, you can see flow ran successfully. Now the data is added to the Excel table.
Power automate add a row to Excel from email
Here we will see how to add a row to Excel from an email using Power Automate.
For example, we will create an automated cloud flow, that will run when a new email recived with all Product details in Outlook inbox. Then we will read an email body and fetch the data and add it as a row in an Excel.
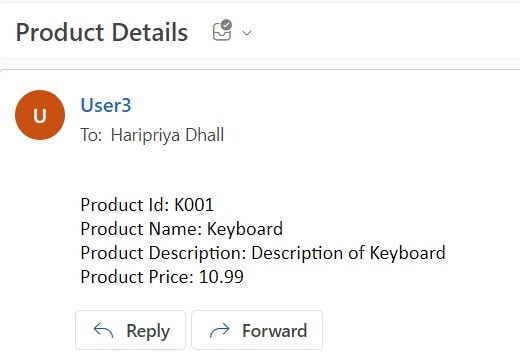
Let’s see step by step flow to add row to excel from an email using Power Automate.
Step 1: Log in to Power Automate, click on +Create, and select ‘Automated Cloud flow’.
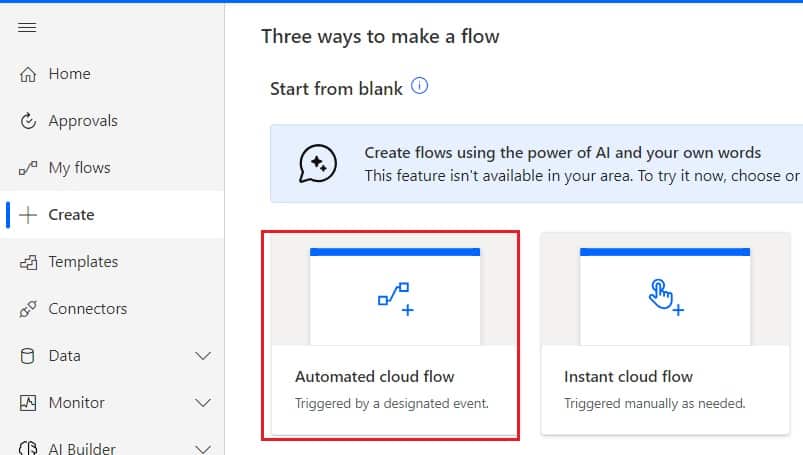
Provide the flow name and select the action as ‘When a new email arrives (V3). Then click on Create.
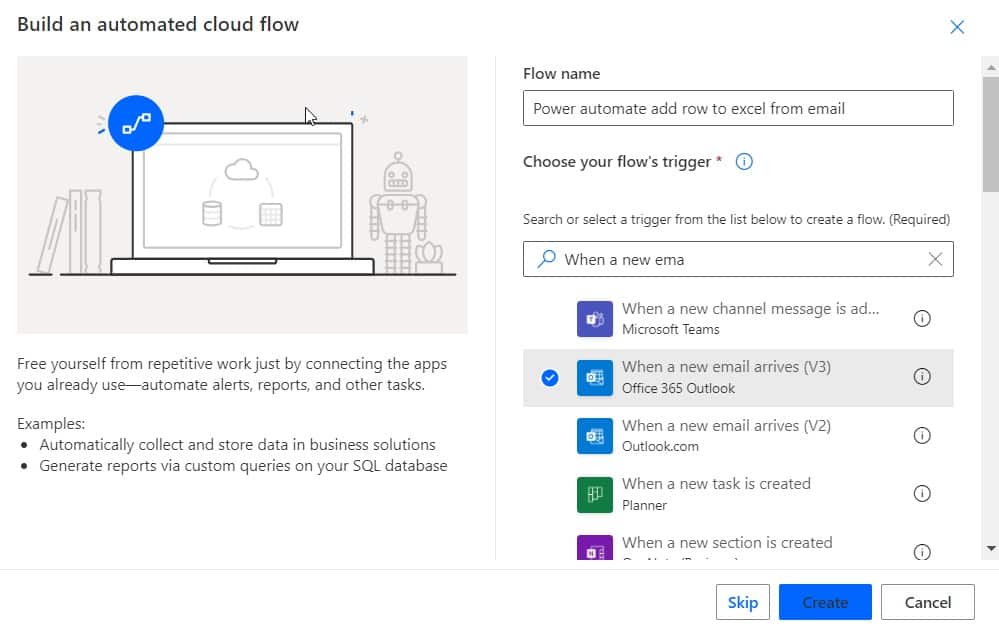
Then provide the flow name and select the ‘When a new email arrives (V3)‘ trigger action. Click on Create.
Then provide the below information:
- Folder: Select the Inbox from the folder icon

Step 2: Next click on+New step -> select Html to text action. Then provide the below information
- Content: Select Body from the dynamic content.

Step 3: Now we will add row to the Excel, so click on +New step -> select the ‘Add a row into a table‘ action. Then provide the below information:
- Location: Select the Location of excel file
- Document Library: Select the document library excel file is present
- File: Select the Excel file
- Table: Select the table of Excel file
- Product Id: Provide the below expression to get the Product Id:
first(skip(split(first(split(body('Html_to_text'),'Product Name')),'Product Id:'),1))
- Product name: Provide the below expression to get the Product name:
first(skip(split(first(split(body('Html_to_text'),'Product Description')),'Product Name:'),1))- Product Description: Provide the below expression to get the Product Description:
first(skip(split(first(split(body('Html_to_text'),'Product Price')),'Product Description:'),1))- Product price: Provide the below expression to get the Product price:
first(skip(split(body('Html_to_text'),'Product Price:'),1)) 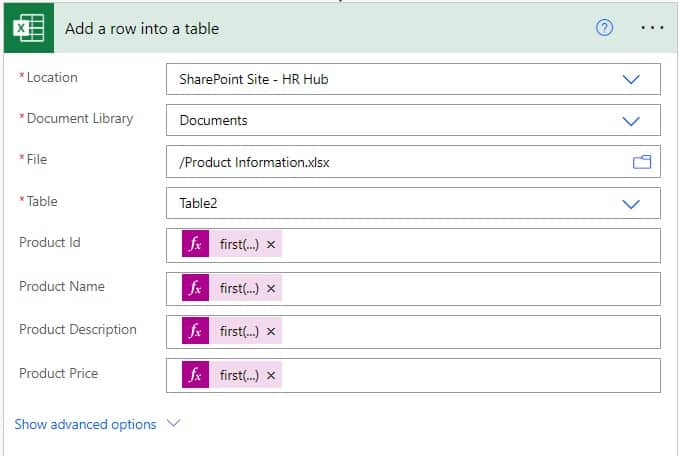
Step 4: Now click on save and test the flow manually, for this click on the Test icon, -> Manually -> click on the Test button. Next, connect to the credential, and then click on the Continue button -> Next click on the Run Flow button -> click on Done.
Now send an email to the inbox for text and you can see flow ran successfully and the data is added to the excel table.

Add a row to Excel from an array in Power Automate
Here we will see how to add a row to Excel from an array using Power Automate.
For example, we will use the same Product details Excel, and we will have an array of product details. We will loop through the array and add a row that contains details of the Product.
Let’s see the step by step to add a row to Excel from an array using Power Automate
Step 1: Log in to Power Automate, and then click on +Create, then select an Instant cloud flow.
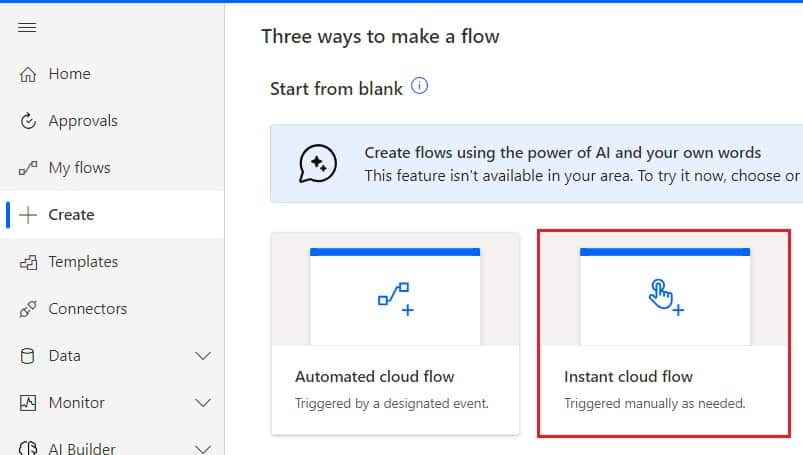
Provide the flow name, and select the Manually trigger a flow action. Then click on Create
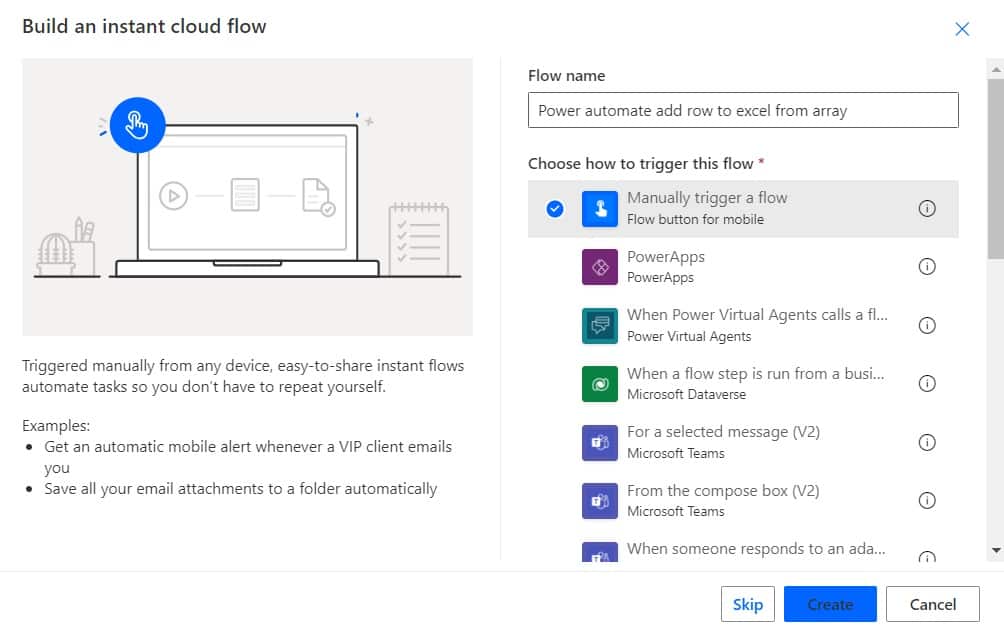
Now you can see the Manually trigger a flow action is added to the flow.

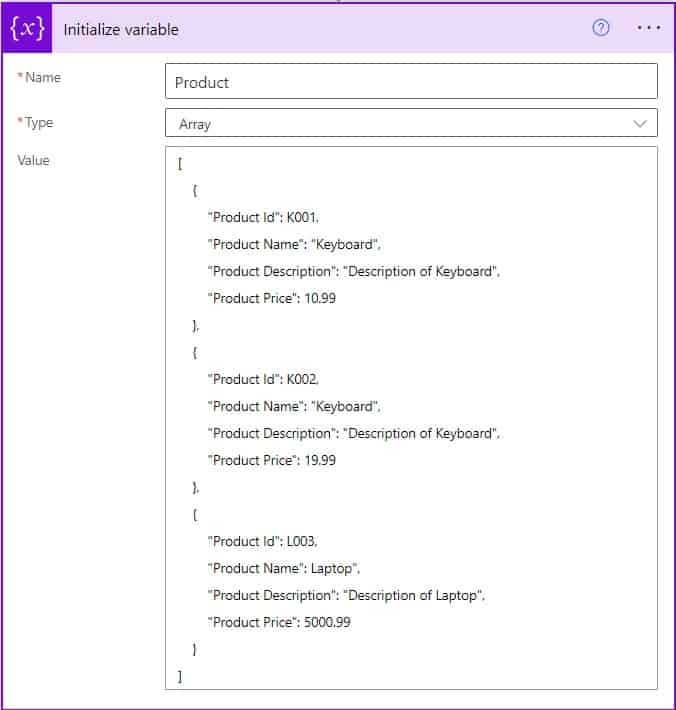
Step 2: Click on +new step, and select Initialize variable action. Then provide the below information:
- Name: Provide the name as Product Details.
- Type: Select the type as an array.
- Value: Provide the below array.
[
    {
        "Product Id": K001,
        "Product Name": "Keyboard",
        "Product Description": "Description of Keyboard",
        "Product Price": 10.99
    },
    {
        "Product Id": K002,
        "Product Name": "Keyboard",
        "Product Description": "Description of Keyboard",
        "Product Price": 19.99
    },
    {
        "Product Id": L003,
        "Product Name": Laptop",
        "Product Description": "Description of Laptop",
        "Product Price": 5000.99
    }
]
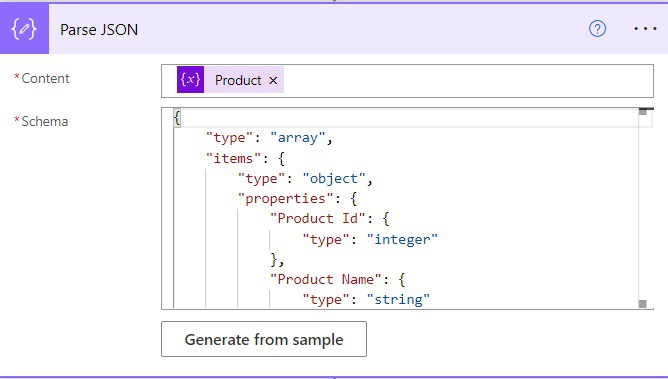
Step 3: Next click on +New step, select Parse json action. Then provide the below information:
- Content: Select the variable from the dynamic content
- Schema: To get the schema, select the Generate from the sample and give the above array code. Click on Done.
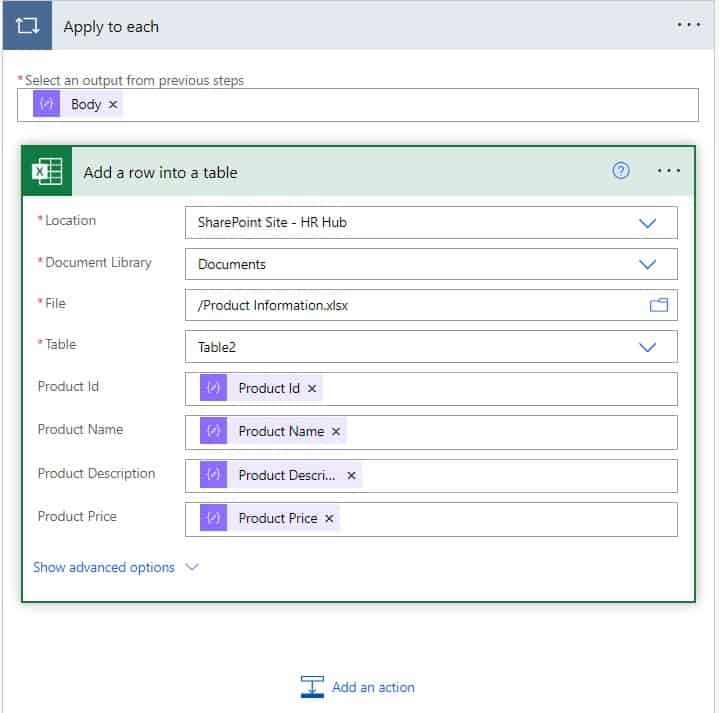
Step 4: Next, click on the +New step, then select the ‘Add a row into a table‘ action. Then provide the below information:
- Location: Select the Location of excel file
- Document Library: Select the document library excel file is present
- File: Select the Excel file
- Table: Select the table of Excel file
- Product Id: Select the Product Id from dynamic content. This will automatically add Apply to each action
- Product name: Select the Product name from the dynamic content.
- Product Description: Select the product description from the dynamic content
- Product price: Select the Product price from the dynamic content.
Step 5: Next click on Save and test the flow manually, for this click on the Test icon, -> Manually -> click on the Test button. Next, connect to the credential, and then click on the Continue button -> Next click on the Run Flow button -> click on Done.
You can see flow ran successfully. Also, you can see the information about Product from an array is added to the Excel table.

Conclusion
In this Power Automate tutorial, we saw how to add a row to an Excel table using Power Automate. Also, we covered the below examples:
- Power automate add a row to excel
- Power automate add a row to the Excel table dynamically
- Power automate add a row to Excel from the form
- Power automate add a row to Excel from email
- Power automate add a row to Excel from an array
You may also like:
- Expense Reimbursement and Approval using Power Automate [SharePoint List, Microsoft Forms, Planner]
- How to add Site columns to SharePoint content type using Power Automate?
- BadRequest. The property ‘columns’ must be specified unless the ‘from’ property value is an array of objects
- How to Create Calendar Events from a SharePoint list using Power Automate?
I am Bijay a Microsoft MVP (10 times – My MVP Profile) in SharePoint and have more than 17 years of expertise in SharePoint Online Office 365, SharePoint subscription edition, and SharePoint 2019/2016/2013. Currently working in my own venture TSInfo Technologies a SharePoint development, consulting, and training company. I also run the popular SharePoint website EnjoySharePoint.com