I will show you here how to create a web application in SharePoint server editions like SharePoint 2019, 2016, or SharePoint subscription edition.
What is a SharePoint web application?
A web application in SharePoint is essentially a top-level container that hosts site collections. It is an Internet Information Services (IIS) web site that provides a logical grouping for the site collections that you create. Each web application is associated with one IIS website, and each IIS website has a separate application pool in IIS which allows for better security, reliability, and performance.
When you create a web application, you’re setting up a new domain that can be accessed via a URL. This is the domain where all of your site collections under that web application will live. For example, if you create a web application for your company’s internal sites, you might access it through something like http://intranet.company.com.
Inside a web application, you can have multiple site collections, which are groups of websites that have the same owner and share administration settings, such as permissions. Each site collection contains one top-level site and any number of subsites below it. These sites and subsites can be used for various purposes, such as team collaboration, document management, or as a central repository for information and resources.
Each web application creates a content database and authentication method to connect to a database. The default website that IIS automatically creates listens for incoming HTTP requests on port 80. You can create additional IIS websites to provide additional HTTP entry points using different port numbers, different IP addresses, or different host headers.
A SharePoint on-premises farm typically runs two or more web applications. The first web application is created automatically when the farm is created. This web application is used to run SharePoint Central Administration. You need at least one additional web application to create sites that business users use.
Create SharePoint web application from Central Administration
Now, we will see how to create a web application in SharePoint server from central administration.
- Open SharePoint Server Central Administration and click on Application Management.
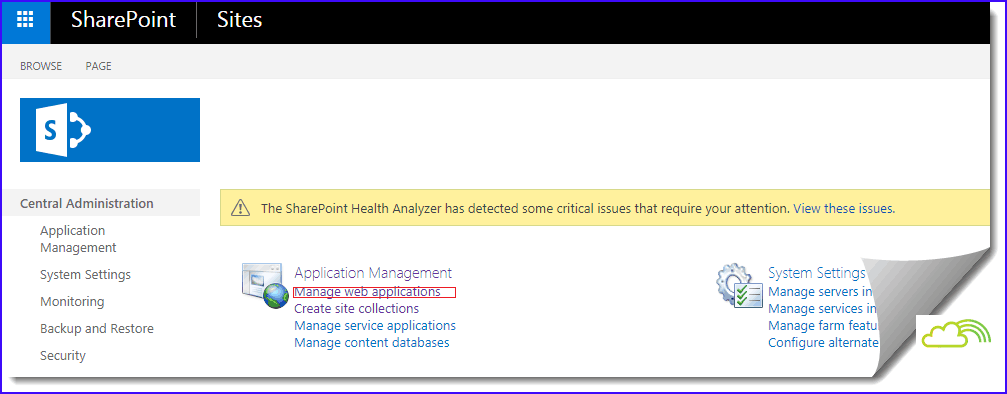
- Click on Manage Web Applications and then click New.
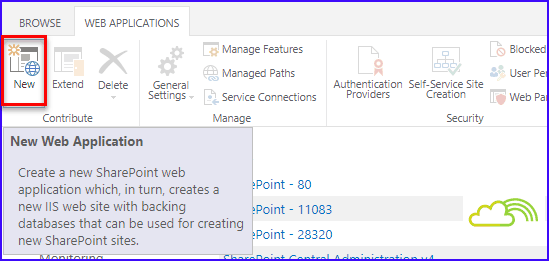
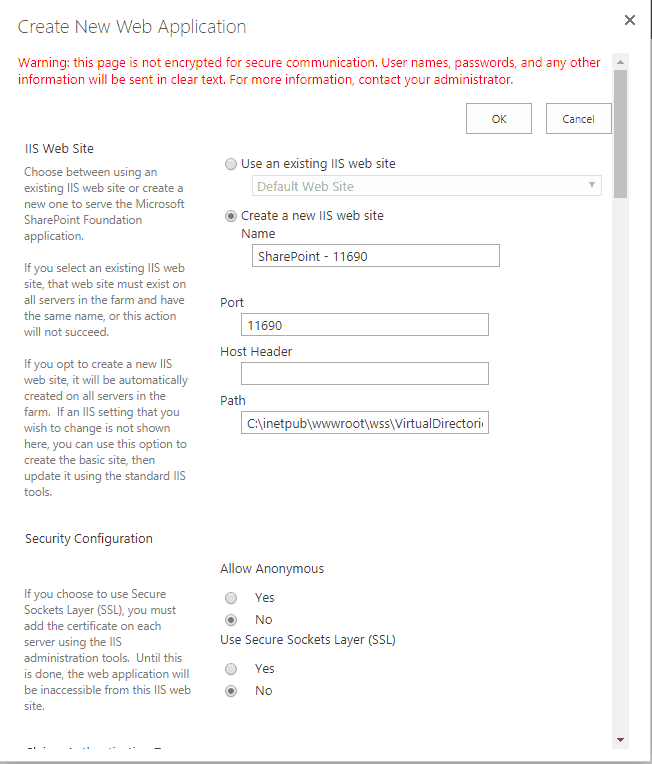
- Click Create a new IIS web site. Where we can find the following things:
- You can configure the settings for a new web application on the Create New Web Application page in the IIS Web Site section.
- To use an existing website, select Use an existing website, and then select the website on which to install your new Web application from the drop-down list.
- To choose to create a new Website, select Create a new IIS website, and then either accept the default name provided for you or type a new name for the Website in the Description box.
- In the Port box, type the port number that you want to use to access the Web application. If you are creating a new Website, this field is populated with a suggested port number. If you are using an existing Web site, this field is populated with the current port number.
- In the Host Header box, type the URL you want to use to set the IIS host header binding. This is an optional field. The following link provides more about the host header.
- In the Path box, type the path to the home directory on the server. If you are creating a new Web site, this field is populated with a suggested path. If you are using an existing Web site, this field is populated with the current path.
- In the Allow Anonymous section, choose Yes or No. If you choose to allow anonymous access, this enables anonymous access to the Website by using the computer-specific anonymous access account (that is, IUSR_<computer name>).
- In the Use Secure Sockets Layer (SSL) section, select Yes or No. If you choose to enable SSL for the Website, you must configure SSL by requesting and installing an SSL certificate.
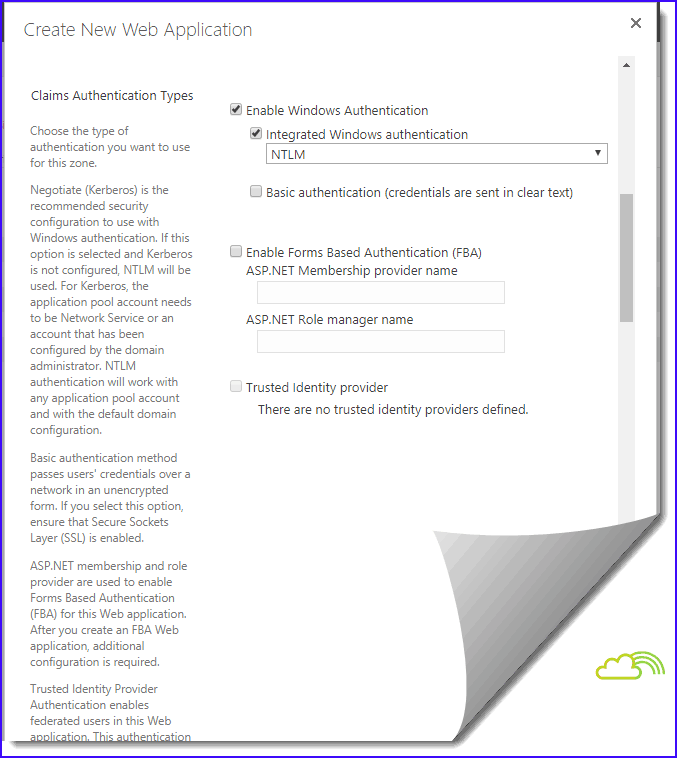
- In the Authentication Provider section, choose either Negotiate (Kerberos) or NTLM.
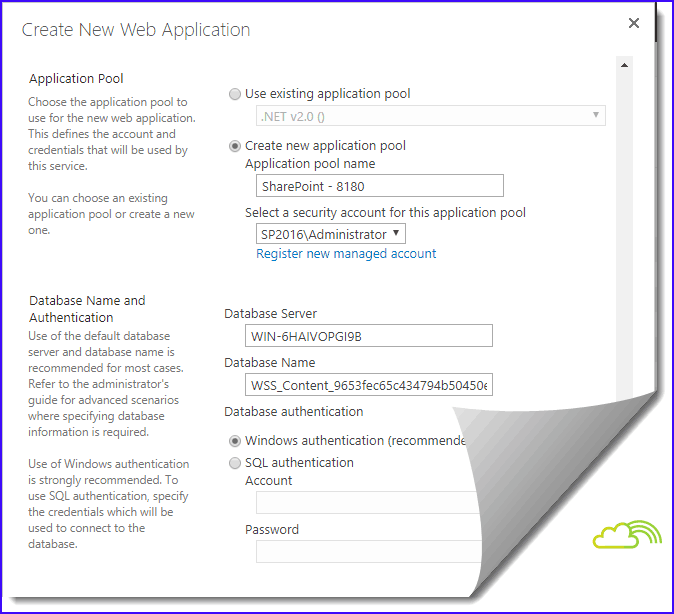
- In the Application Pool section, choose whether to use an existing application pool or create a new application pool for this Web application. To use an existing application pool, select Use existing application pool. Next, select the application pool you want to use from the drop-down list.
- To create a new application pool, select create a new application pool. In the Application pool name box, type the name of the new application pool, or keep the default name.
- In the Select a security account for this application pool section, select Predefined to use an existing application pool security account and then select the security account from the drop-down menu.
- Select Configurable to specify a new account to be used as a security account for an existing application pool. In the Username box, type the username of the account you want to use, and type the password for the account in the Password box.
- In the Database Name and Authentication section, choose the database server, database name, and authentication method for your new Web application.
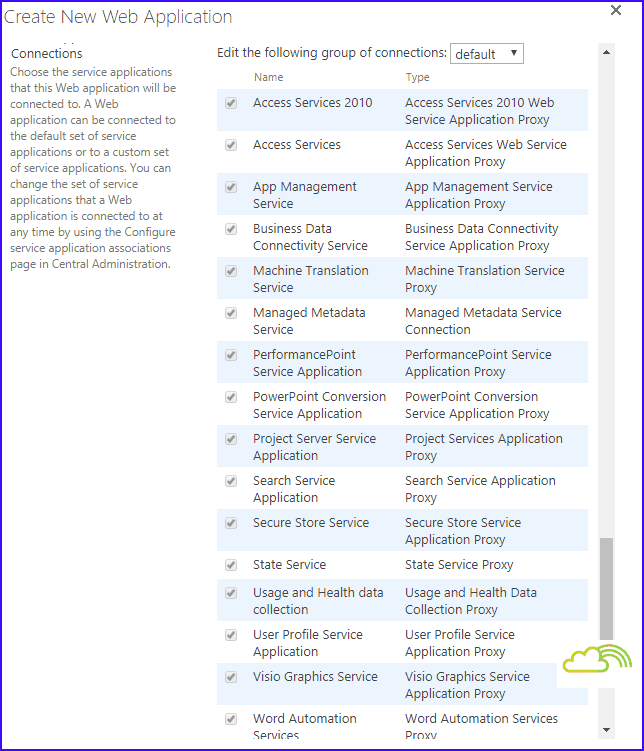
- In server application connections, we can see the default server connections and settings associated with the applications provided. This helps you choose the service applications that this Web application will be connected to.
- Click on OK to create a new web application. It will take some time, so you need to be patient.
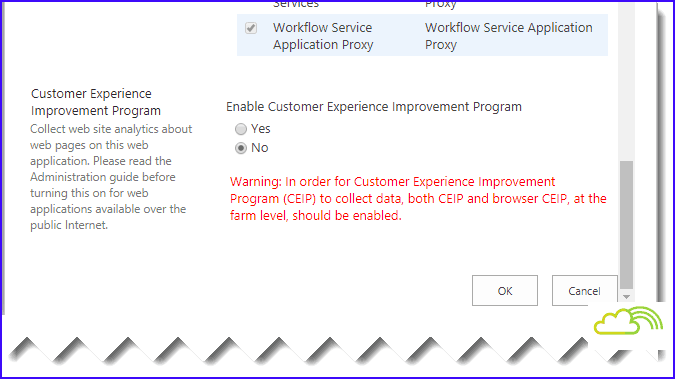
Sometimes, you can incur a very long waiting time, or sometimes after the timeout, as it will have created the database and the IIS website but didn’t copy all its contents into the Virtual Directory. We can go for a PowerShell script.
Create a SharePoint web application using PowerShell
Now, we will see how to create a SharePoint web application using PowerShell.
SharePoint provides New-SPWebApplication PowerShell cmdlets that we can use to create a SharePoint web application in SharePoint on-premises versions.
Add-PSSnapin "Microsoft.SharePoint.PowerShell"
$authentication = New-SPAuthenticationProvider -UseWindowsIntegratedAuthentication -DisableKerberos
New-SPWebApplication -Name "SharePoint 2019 Web App" -Port 80 -ApplicationPool "SP2019AppPool"
-ApplicationPoolAccount (Get-SPManagedAccount "Domain\Username") -AuthenticationMethod NTLM -AuthenticationProvider $authentication
Below is the PowerShell command to create claim based authentication in SharePoint Server.
Add-PSSnapin "Microsoft.SharePoint.PowerShell"
$ap = New-SPAuthenticationProvider
New-SPWebApplication -Name "SP2019WebApp" -ApplicationPool "SP2019AppPoolAcc" -ApplicationPoolAccount (Get-SPManagedAccount "Domain\Username") -URL "SP2019WebApp" -Port 3535 -AuthenticationProvider $ap
Once you run the code, you can see it will create the SharePoint web application.
Conclusion
In this SharePoint tutorial, I have explained how to create a web application in SharePoint server from the central administration, and using PowerShell.
You may also like the following tutorials:
- SharePoint Site Owner
- How to Delete SharePoint Site?
- Server relative URLs must start with spweb.serverrelativeurl in SharePoint
- CSOM in SharePoint Online
- SharePoint Site Regional Settings
I am Bijay a Microsoft MVP (10 times – My MVP Profile) in SharePoint and have more than 17 years of expertise in SharePoint Online Office 365, SharePoint subscription edition, and SharePoint 2019/2016/2013. Currently working in my own venture TSInfo Technologies a SharePoint development, consulting, and training company. I also run the popular SharePoint website EnjoySharePoint.com
Question: in a minrole multiserver environment where do you run this script? on the CA host machine or on one of the WFE devices ?