Recently, I was working on Power Automate flows when one of our clients required me to copy files from my PC to the SharePoint document library.
In this blog post, I will discuss how to connect an on-premises gateway to connect the file system to SharePoint. Also, I will show copying files from the local drive to SharePoint using the Microsoft flow template.
Power Automate Flow to Copy from Local Drive to SharePoint
Here, I have a folder on my PC, and I want to transfer those files to a SharePoint document library.
I have created a SharePoint document library and a folder called ‘Employee Details’ inside it.
Look at the image below:

Now, let’s create the Power Automate flow.
1. Sign in to your Microsoft 365 Account -> Open the Power Automate Home page by browsing make.powerautomate.com in the browser.
- Click on Templates -> Search and select “Copy new files from your PC to SharePoint“ template.
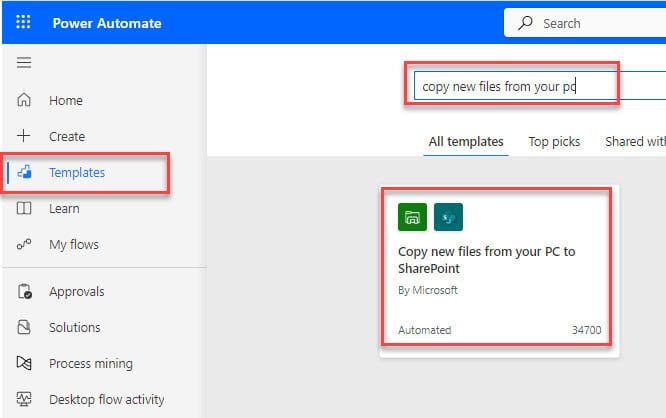
2. Once we selected the template, the prebuilt flow will be added to the Power Automate canvas, as shown in the below image:
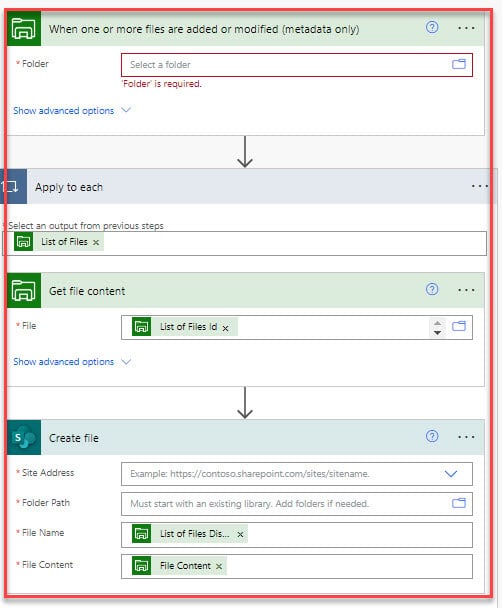
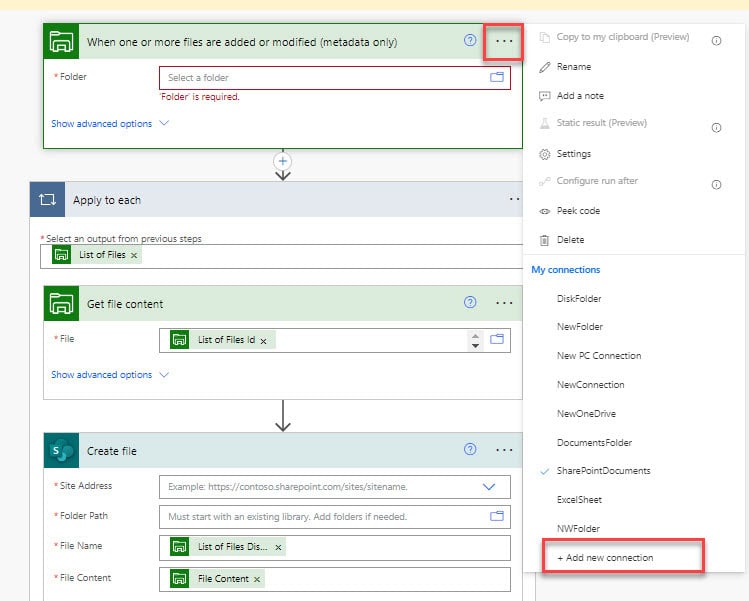
3. To copy files from your PC to the SharePoint Online library, you need to create a new Data gateway connection for your PC.
Click on the context menu “…” option -> “ +Add new connection,” as shown in the screenshot below.
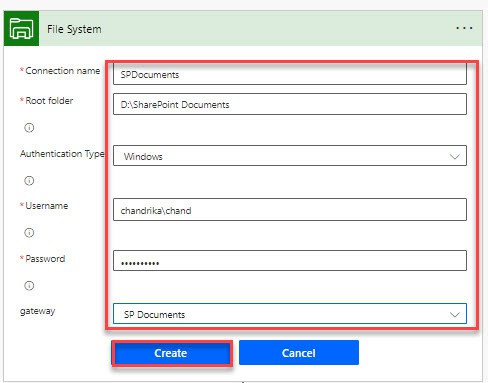
4. Then, the File system box will display where we need to connect and enter the PC details.
- Connection Name: Enter a connection name for your PC without any space.
- Root Folder: Provide the folder path where you want to copy files to the SharePoint library.
Right-click on the created folder -> select Copy as a path -> Paste it in the Root folder -> Remove the double quotes from it.

- Authentication Type: Select the Authentication Type as “Windows” from the dropdown.
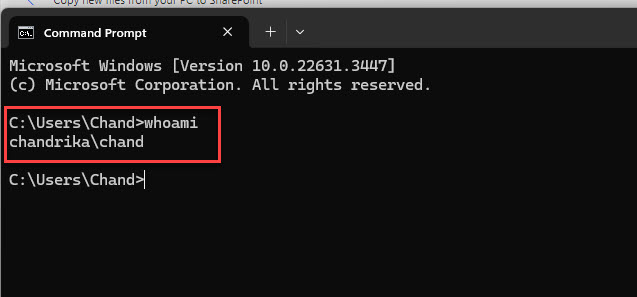
- Username: Enter the Username of your PC with DOMAIN\Username.
If you are not aware of your PC username -> Go to Search -> Select Command Prompt -> Type whoami without space -> Then, it will give the domain and username as look like below:
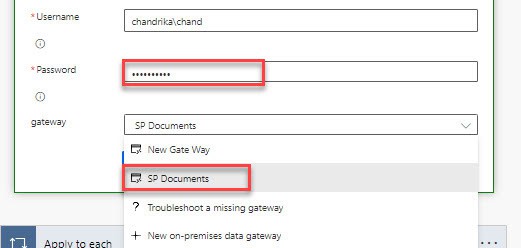
- Password: Provide a password for Outlook that you have signed in to your PC.
- gateway: Select the gateway for your PC connection.
Once all the field values are filled, Click on “Create,” as shown below.
5. Then, in the trigger, copy and paste the folder path from where it will transfer the files to the SharePoint list shown below:

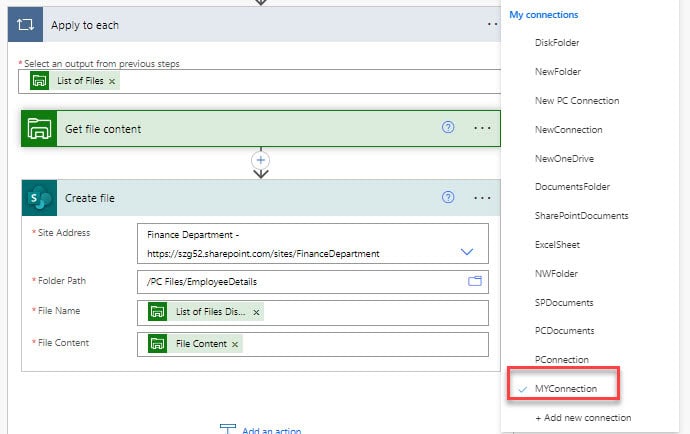
6. Under the Apply to each loop, click on context menu of Get file content and select a connection.
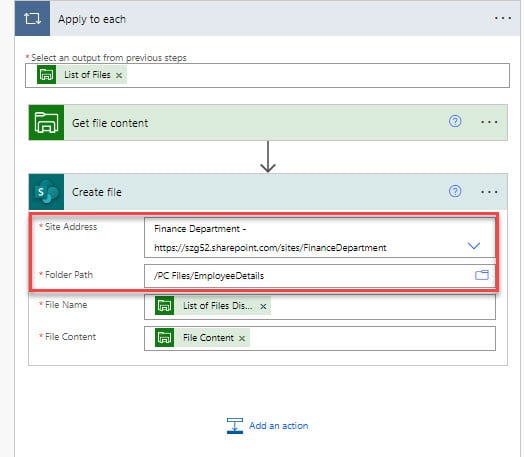
7. Inside the Create file flow action, set the parameters like Site Address and Folder Path from the show picker icon.
Refer to the image below:
Once the flow is ready, click on save and test the flow.
8. Now, add or create a file in the folder we have created. I have created a folder named ‘Employee Data’, as shown in the figure below.
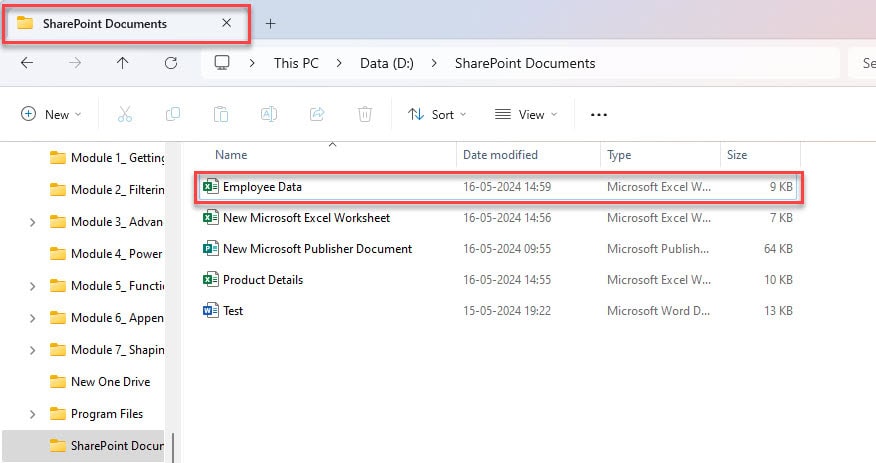
8. Now, the flow will trigger and copy the files to the Share Document library, as shown in the image below:

This way, you can copy files from the local drive from the PC to the SharePoint library using Power Automate.
How to Download and Install On-Premises Data Gateway
If you are new to File system connector, then you don’t have any data gateway connection. We need to install a new on-premise data gateway from the dropdown using the “+ New on-premises data gateway” option.
Steps for On-premises data gateway installation:
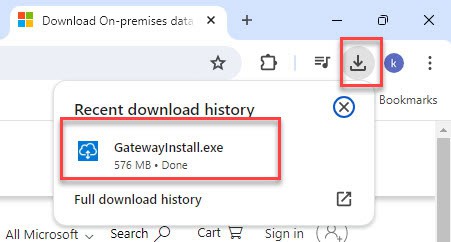
A. Use the provided link to download the On-premises data gateway. Click on the Download button -> Then it will download the file with the extension like below:
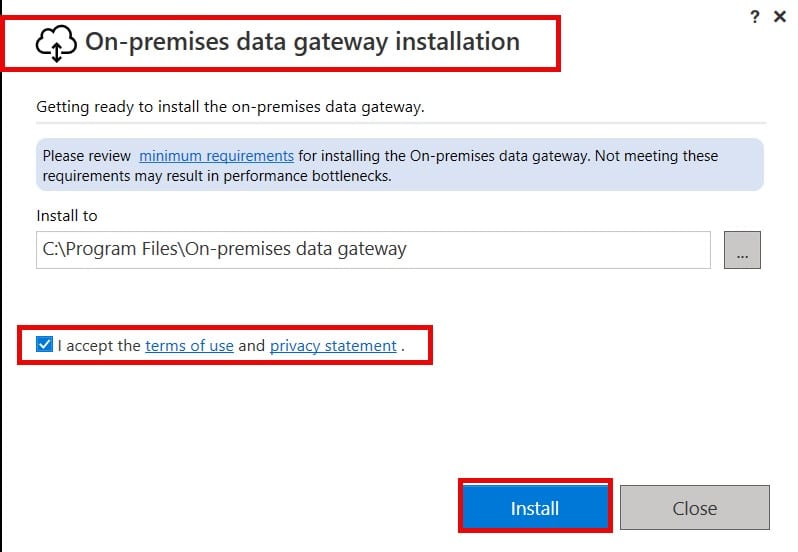
B. Open the file, then it will display the On-premises data gateway installation box-> Click on the check box if I accept the terms -> Select Install.
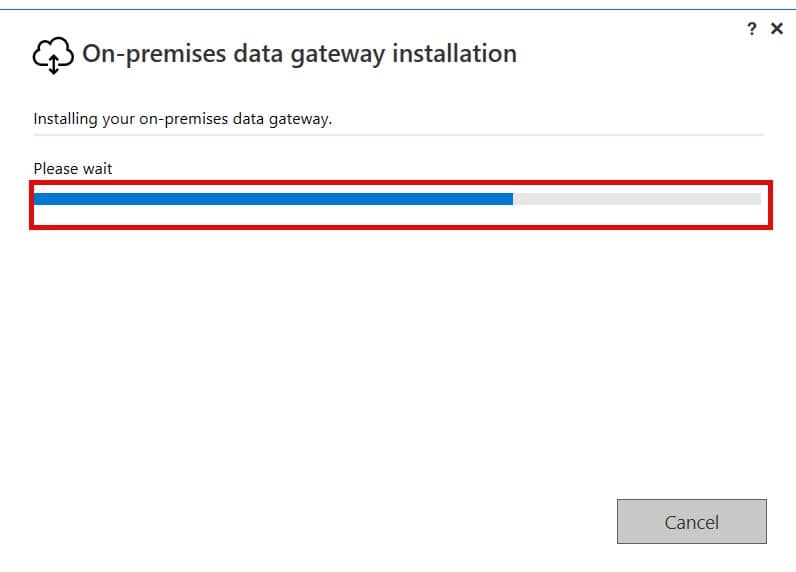
C. In the next window, it will install the gateway in a few seconds, as shown in the picture:
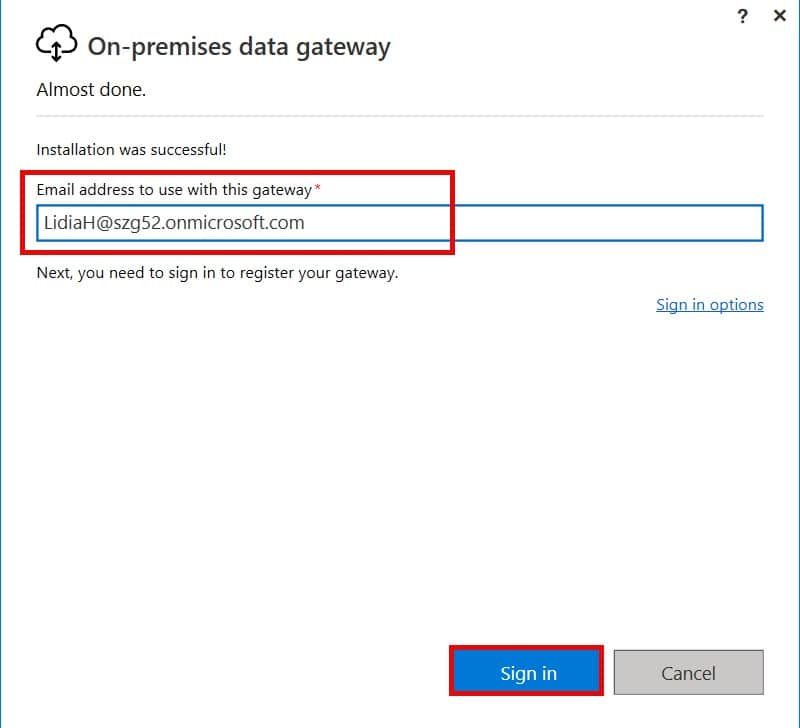
D. When the installation is successful, it will ask for an Email address to use this gate way, Provide the Microsoft365 account username -> Click on Sign in.
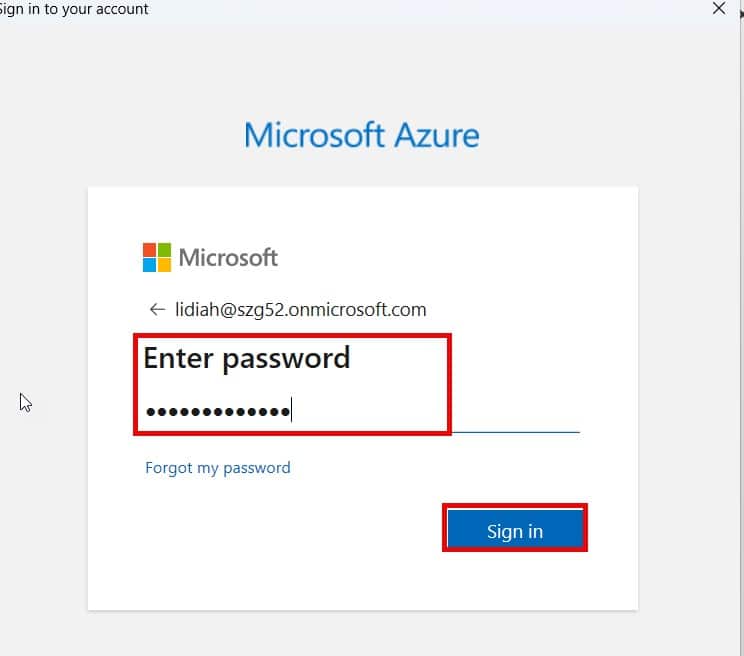
E. In the next window, enter the password and click on Sign in.
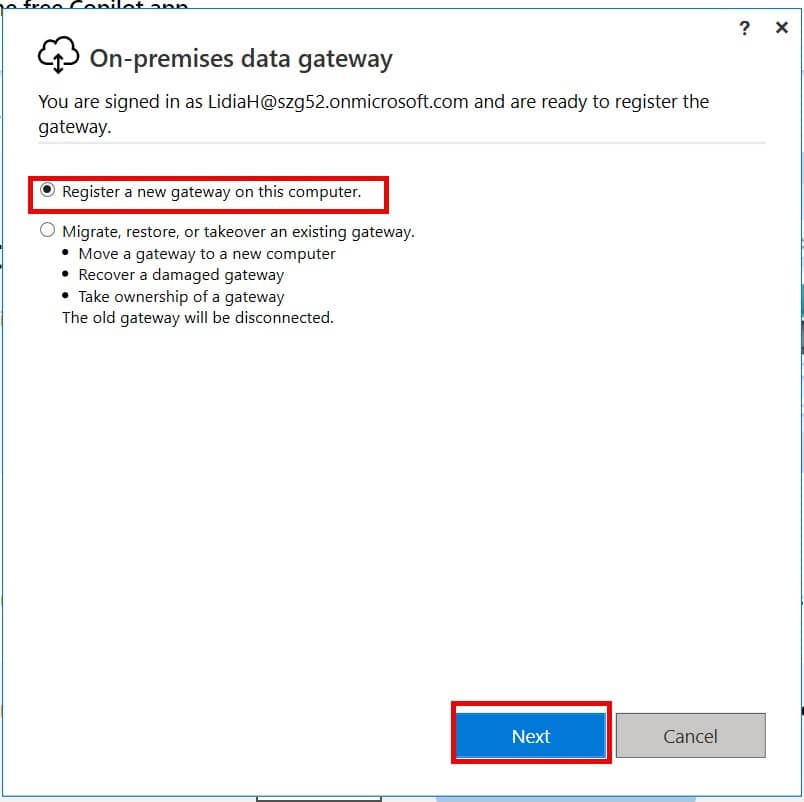
F. After signing in with the user account, select Register a new gateway on this computer option -> Click Next.
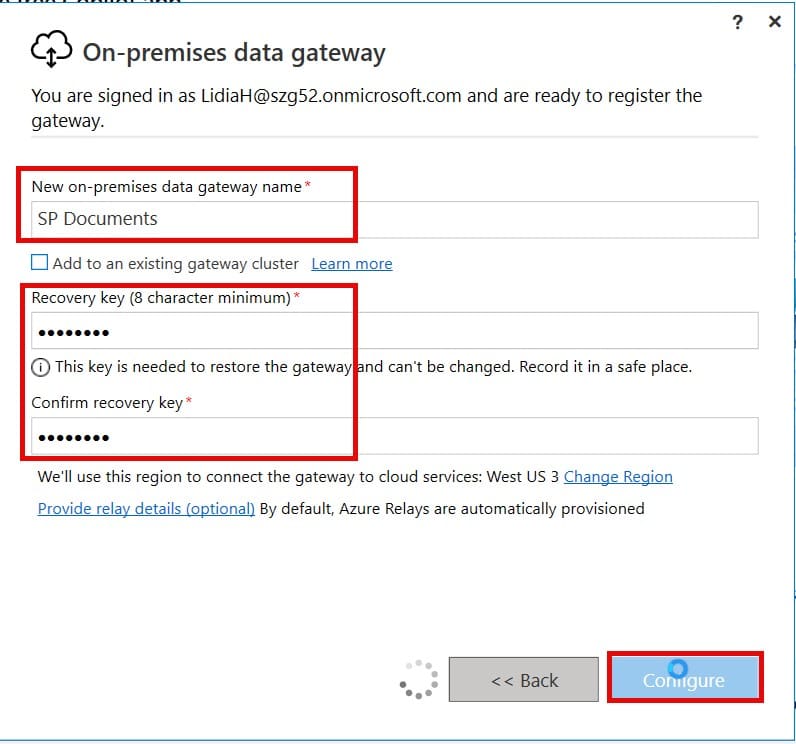
G. Next, provide a name for the new on-premises data gateway, set the Recovery Key, and Choose Configure.
H. Then, it will show that the new on-premises data gateway is ready to be used, as displayed in the screenshot below:
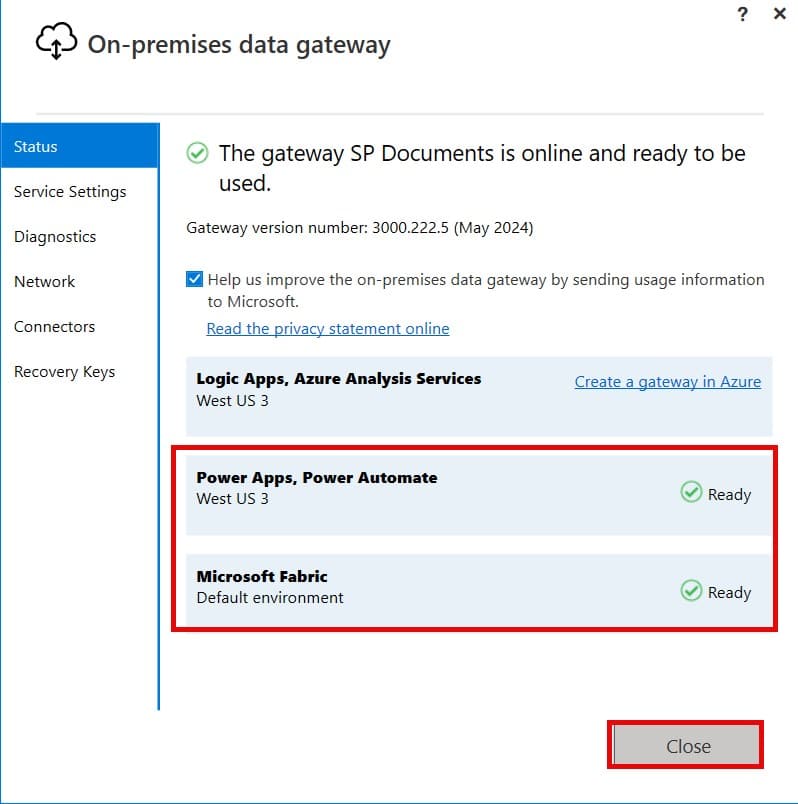
This is how to download and install the On-premises data gateway.
Conclusion
I hope this tutorial blog will help you better understand how to copy files from your PC to SharePoint using Power Automate.
You may also like:
- Power Automate save email attachment to SharePoint
- Copy List Items To Another List In SharePoint Using Power Automate
- Power Automate Trigger Conditions
- When a New Email Arrives Subject Filter in Power Automate
I am Bijay a Microsoft MVP (10 times – My MVP Profile) in SharePoint and have more than 17 years of expertise in SharePoint Online Office 365, SharePoint subscription edition, and SharePoint 2019/2016/2013. Currently working in my own venture TSInfo Technologies a SharePoint development, consulting, and training company. I also run the popular SharePoint website EnjoySharePoint.com
Is it possible to schedule flows to run at a specific time?
I have a file, which takes about 1hr to load. It is not big but takes a long time to finish. Power flow fails to upload it.
Can the file system get the files from sub folders? Can you please share the flow for that