In this SharePoint tutorial, we discussed Content Approval in SharePoint lists or libraries. We covered topics such as what Content Approval is in SharePoint lists or libraries and why content approval is necessary.
We will also learn how to enable Content Approval in a SharePoint list or library and how to approve documents in SharePoint lists or libraries.
Also, we will learn how to set up a document approval workflow in the SharePoint document library.
SharePoint Content Approval
The SharePoint content approval feature allows site members with approver permission to approve new items created in the list or library. Once approved, the item will appear in the list or library.
When an approval feature is enabled in a SharePoint list or library, any item added by a user won’t be immediately available to all users. Instead, it will be in a pending stage. Only after an approver approves the item will it become available to all users.
By default, content approvals are turned off in the SharePoint list or library.
Why is SharePoint Content Approval Necessary?
SharePoint content approval is essential because it ensures that only accurate content is added to the list or library. It helps prevent errors and protects sensitive information.
Senior:
Imagine you are running a company’s website using SharePoint. Different departments submit content like articles or updates.
Content approval ensures that before anything goes live, someone checks it to make sure it’s accurate, appropriate, and aligns with the company’s standards.
By utilizing this feature, we can prevent misinformation from reaching our audience.
How to Enable Content Approval in SharePoint List or Library?
Now, we see how to enable content approval in a SharePoint list using the same steps as for the library.
To do this, follow the below steps:
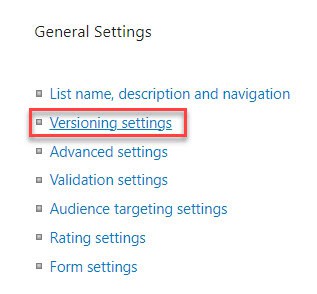
1. Go to any SharePoint list and click on the gear icon. After that, click on List Settings. Then click Versioning Settings.
2. In the Content Approval section, select ‘Yes’ for “Require content approval for submitted items? ” like the screenshot below:

3. Then choose “Create a version each time you edit an item in this list?” as Yes.

4. In the Draft Item Security section, specify that only the site author or administrator should be able to view drafts in this document library. Select ‘Only users who can approve items (and the author of the item).’ Then click OK.

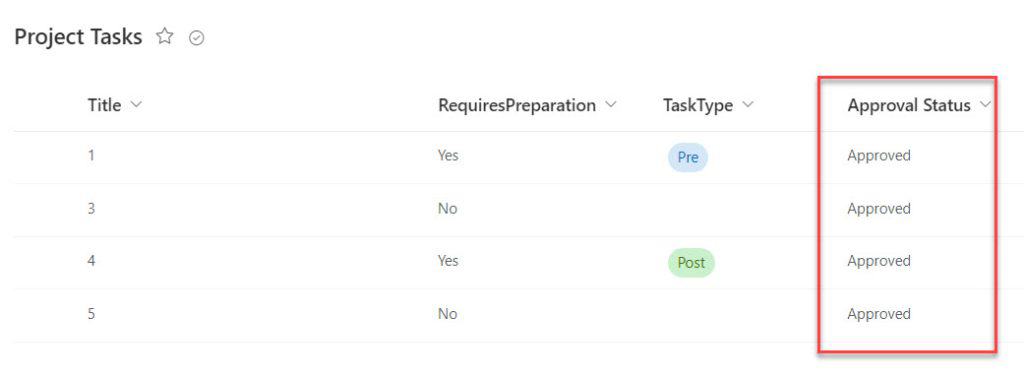
5. When you go to the SharePoint list, you can see the Approval Status column. By default, the Approval Status of each existing item is Approved.
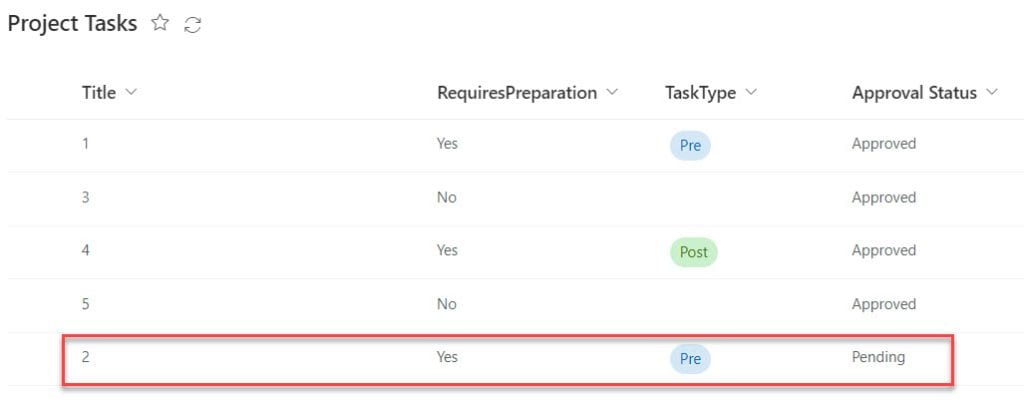
6. If you add any item to the SharePoint list, its Approval Status is pending.
This way, you can enable content approval in the SharePoint list or library.
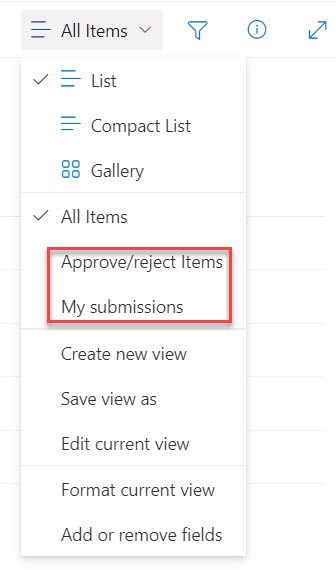
After enabling content approval, you can see two views were added to the SharePoint list or library.
How to Approve/Reject Items in a SharePoint List
Now, we will see how to approve/reject items in the SharePoint list.
There are two ways we can Approve or Reject items in the SharePoint list or library.
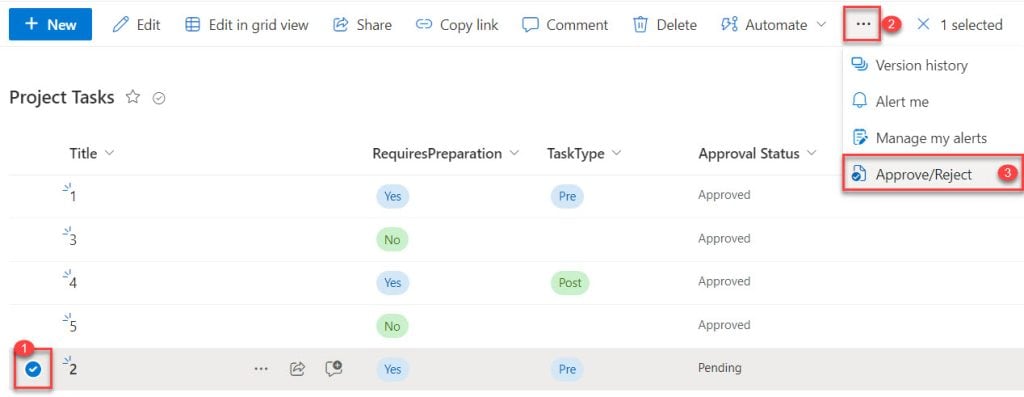
The first way is to select the SharePoint list item, click on the three dots (…), and then choose ‘Approve/Reject’ from the command bar.
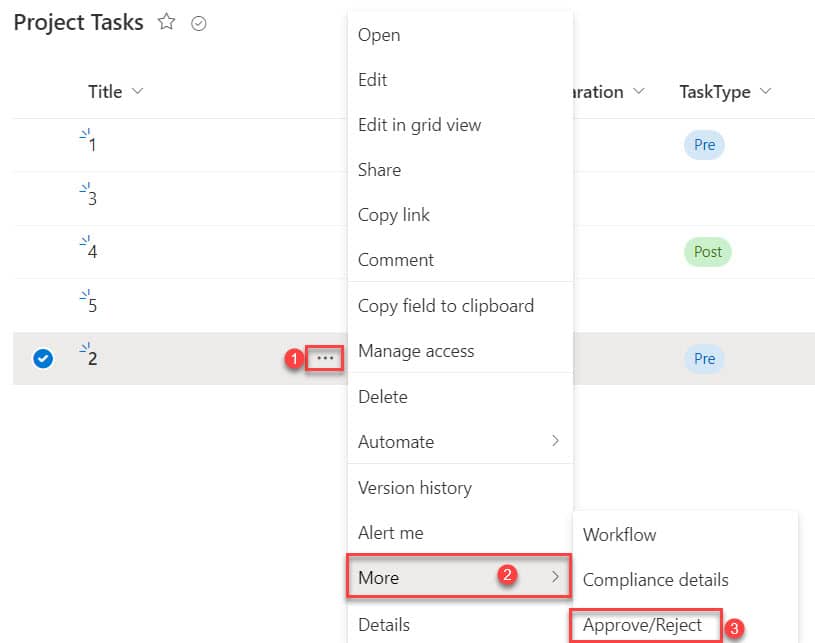
The second way is to select the ECB (Edit Control Block) menu for the item you want to approve or reject. Then click ‘More’, and you will see the ‘Approve/Reject’ option in a dialog box.
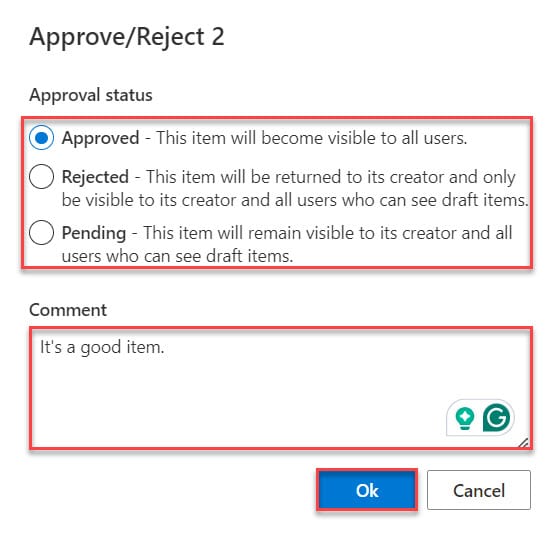
You can use either method. After clicking ‘Approve/Reject,’ a dialog box will appear where you can choose ‘Approved,’ ‘Rejected,’ or ‘Pending.’ You can also add comments in the comment box(If you have permission).
Here, I approved the item and added a comment, then clicked OK.
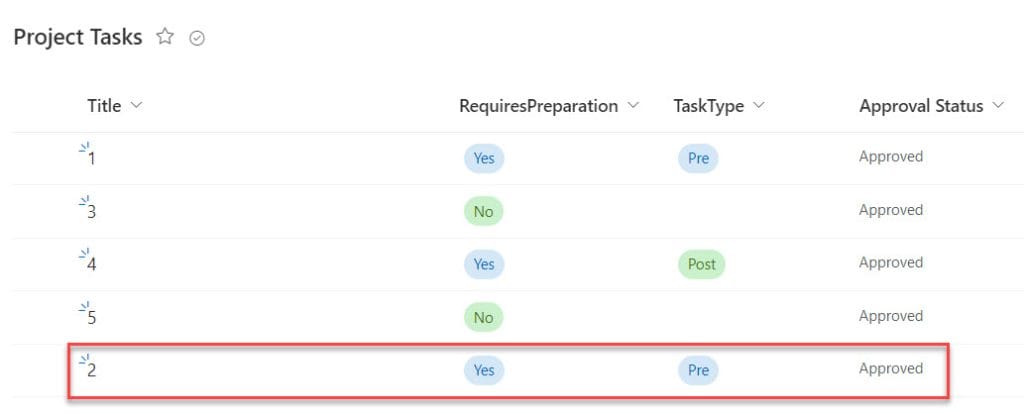
Then, you can see the item was approved successfully.
This way, you can approve or reject items in the SharePoint list or library.
SharePoint Document Approval Workflow
In this example, I will see how to create a document approval workflow in the SharePoint library.
The same way you can do for the SharePoint list. Now follow the below steps:
1. Open the SharePoint document library. Do not enable the content approval feature, as it will not work if enabled.

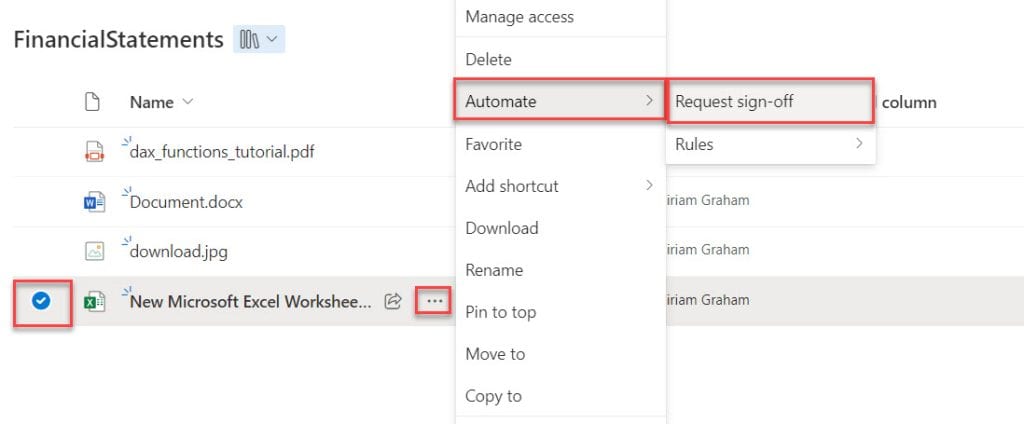
2. Select the document, click the ECB (Edit Control Block), then choose ‘Automate‘ and click ‘Request sign-off.’
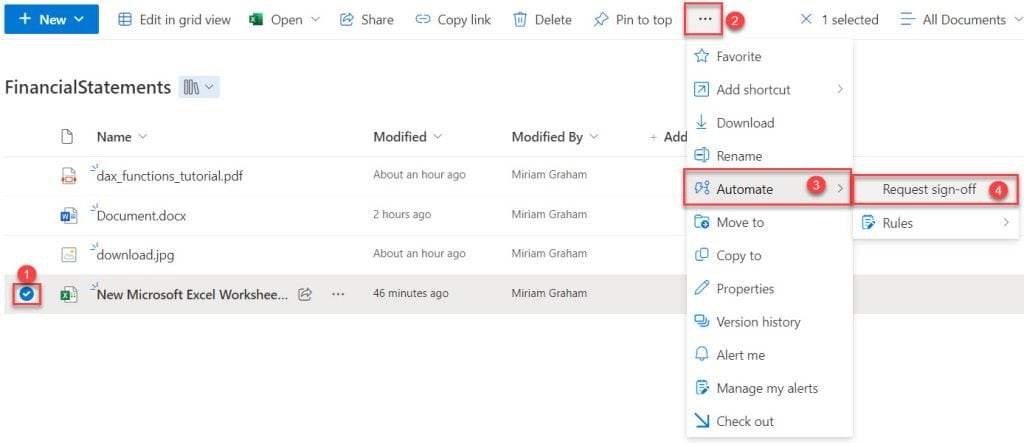
Alternatively, you can select the document, click the three dots (…), choose ‘Automate,’ and then click ‘Request sign-off.’
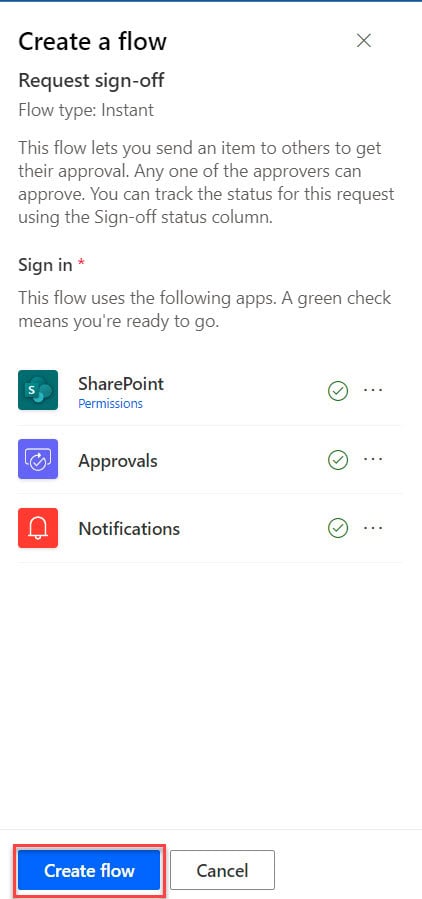
3. On the right side, the Create a Flow panel opens, then click Create Flow.
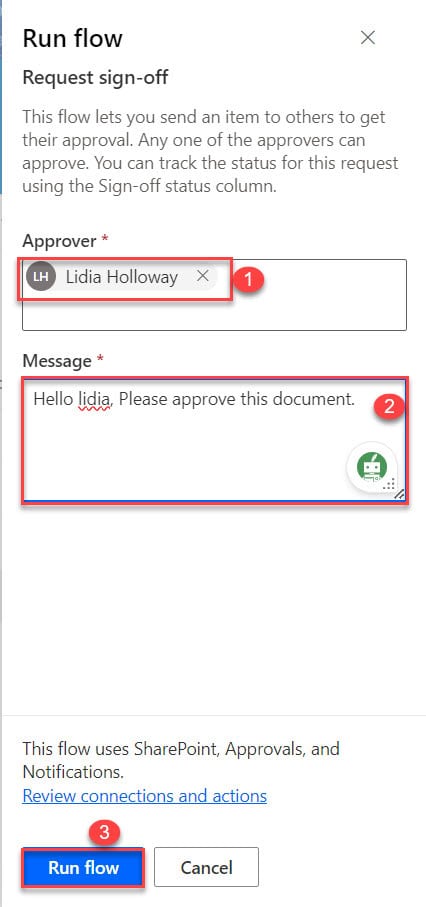
4. Then, the Run flow panel opens. Then, type in the name of the approvers and add a personal message then click Run flow.
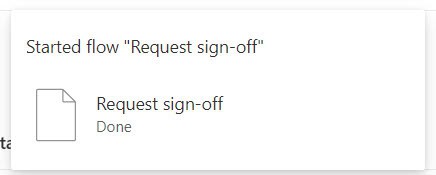
5. You will receive a confirmation message.
6. Now, you can see a new column, “Sign-off status,” added to our document library.

7. Now, the approver will receive an email in Outlook to approve or reject the document.
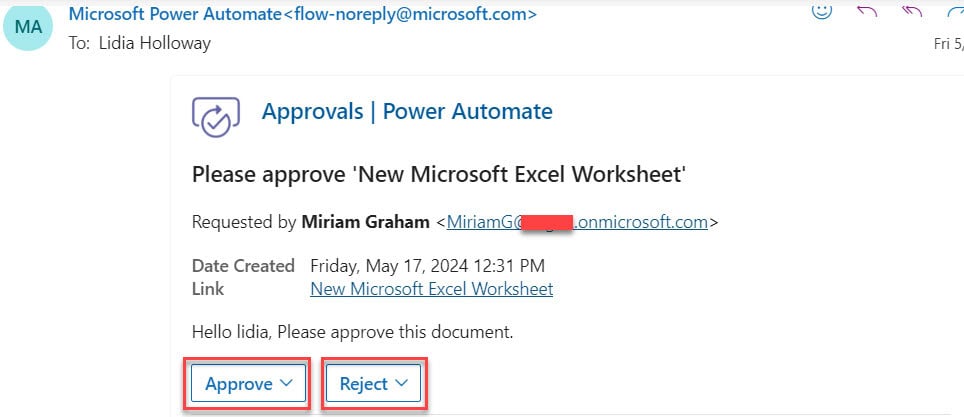
8. The approver can see the document using the link below the date.

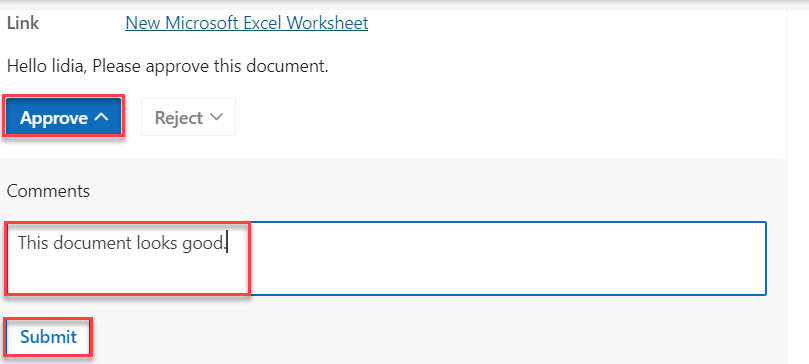
9. After checking the document, the approver can approve or reject it by clicking ‘Approve’ or ‘Reject,’ adding a comment, and then clicking ‘Submit.’ In my case, the approver approved my document.
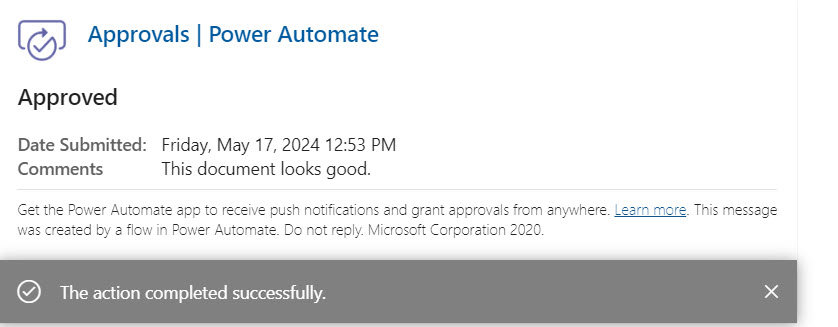
10. After submitting, the approver will receive a message like this in Outlook.
11. When you go to your document library, you can see your document is approved.
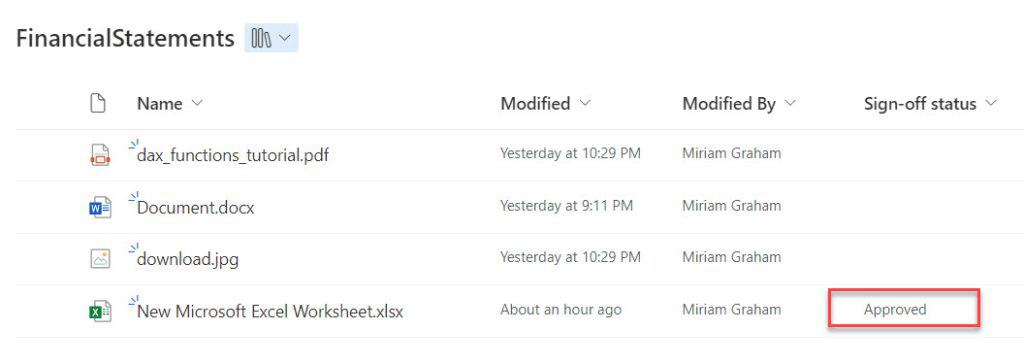
By following these steps, you can set up a document approval workflow in the SharePoint library.
In this article, we discussed SharePoint Content Approval and explained why it’s important. We also walked through the process of enabling Content Approval in SharePoint lists or libraries and approving or rejecting items once it’s activated. Finally, we covered setting up a document approval workflow in SharePoint document libraries.
You may also like the following tutorials:
- How to Delete SharePoint Site?
- SharePoint Site Regional Settings
- SharePoint List Title Column
- SharePoint Column Validation Formula Examples
- SharePoint Calculated Column
- How to Disable Attachments in SharePoint List?
I am Bijay a Microsoft MVP (10 times – My MVP Profile) in SharePoint and have more than 17 years of expertise in SharePoint Online Office 365, SharePoint subscription edition, and SharePoint 2019/2016/2013. Currently working in my own venture TSInfo Technologies a SharePoint development, consulting, and training company. I also run the popular SharePoint website EnjoySharePoint.com
A great article! Very Informative! One question though: how/where do I see any comments that are included with the content approval/rejection?
Hi Bhawana, Such a great explanation and it is very useful for us. We are expecting more articles from you. Thaks for your effort.
Hello, I try to open Approve.aspx from PowerApps by clicking on custom button as launch(“https://mysptest.sharepoint.com/sites/AvianTest/_layouts/15/approve.aspx?List=%7B1e3329c5-f919-47f6-a21a-3b3c225cbf2d%7D&ID=23&&IsDlg=1”)
it is opening in separate tab instead of as modal dialog form as you mentioned in above image (SharePoint Content Approval Form).
How can I do this?
Regards
Avian
I want to copy the Approved/Rejected items to another list with Approve name and approval date, but these 2 columns are not available to copy. How should I do?
How can you prevent an approver from approving their own edits?