Have you ever done the Power Apps split text into a collection? Follow this Power Apps tutorial to learn all about the Power Apps split text into a collection.
Power Apps Split Text Into Collection
Here, we will discuss the Power Apps split text into a collection with two examples.
Example – 1:
I have a Power Apps collection, i.e., [colEmployeeRegistration] and this collection contains the below fields.
| Column Name | Data Type |
| FullName | Text |
| Text | |
| Designation | Choice |
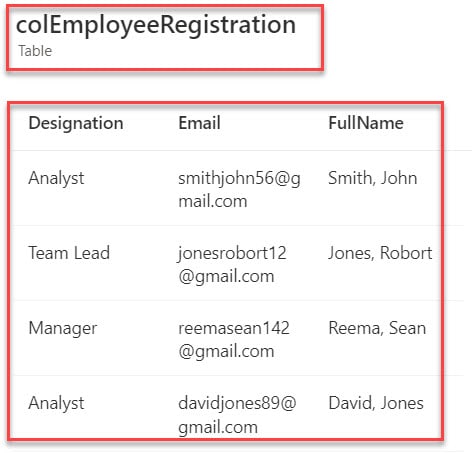
Now, I would like to split the text column [FullName] into a collection, like “FirstName” and “LastName” and display the collection on the data table control.
Refer to the below Screenshot:
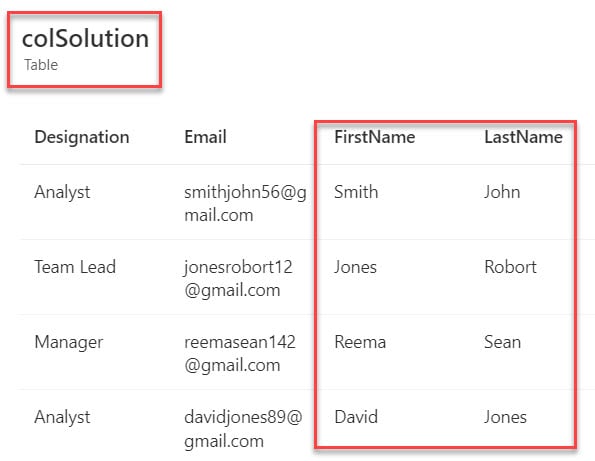
To work around this example, follow the below-mentioned steps. Such as:
1. Create a Blank canvas app -> Select the App object [From left navigation] and set its OnStart property to the code below.
OnStart = ClearCollect(
    colEmployeeRegistration,
    {
        FullName: "Smith, John",
        Email: "smithjohn56@gmail.com",
        Designation: "Analyst"
    },
    {
        FullName: "Jones, Robort",
        Email: "jonesrobort12@gmail.com",
        Designation: "Team Lead"
    },
    {
        FullName: "Reema, Sean",
        Email: "reemasean142@gmail.com",
        Designation: "Manager"
    },
    {
        FullName: "David, Jones",
        Email: "davidjones89@gmail.com",
        Designation: "Analyst"
    }
)
Where,
- colEmployeeRegistration = Power Apps Collection Name
- FullName, Email, Designation = Collection Headers/Columns
- “Smith, John”, “smithjohn56@gmail.com”, Designation: “Analyst” = Collection Records/Rows

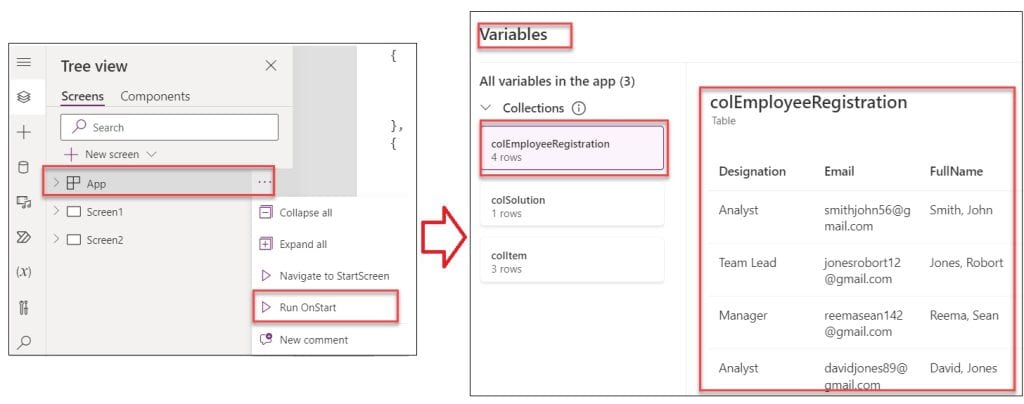
2. click on the App’s Run OnStart property to get the created collection. Then, go to the Variables section and select your created collection as shown below.
3. On the Power Apps Screen -> Insert a Button control and set its OnSelect property to the code below.
OnSelect = ClearCollect(
    colSolution,
    DropColumns(
        AddColumns(
            colEmployeeRegistration,
            "FirstName",
            First(
                Split(
                    FullName,
                    ","
                )
            ).Value,
            "LastName",
            Last(
                Split(
                    FullName,
                    ","
                )
            ).Value
        ),
        "FullName"
    )
)
Where,
- colSolution = Power Apps Collection Name
- DropColumns() = The DropColumns function excludes columns from a table
- AddColumns() = This function helps to add a column to a table and the specified formula
- colEmployeeRegistration =Power Apps Source Collection
- “FirstName” = New column name in the collection
- First() = This function is used to retrieve the first record from the data source
- Split() = This Power Apps Split() function breaks a text string into a table of substrings
- FullName = It is a Text column that we want to split into the collection
- “LastName” = New column name in the collection
Refer to the below image:

4. Then, insert a Data table control and set its Items property as:
Items = colSolution5. To display the collection fields, click on the Edit fields option and choose respective fields as per needs as in the screenshot below.

5. Once your app is ready, Save, Publish, and Preview the app. When the user clicks on the button control, the data table displays the Power Apps split text into a collection as in the screenshot below
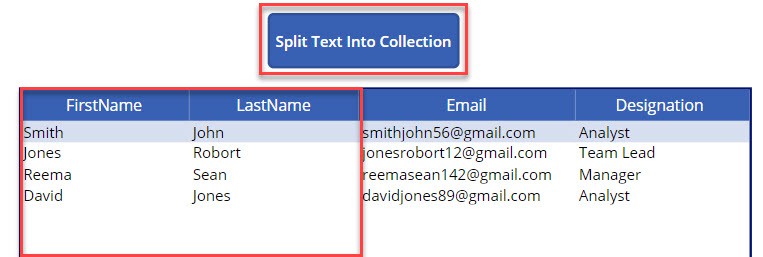
This is how to split text into the Power Apps collection.
Example – 2:
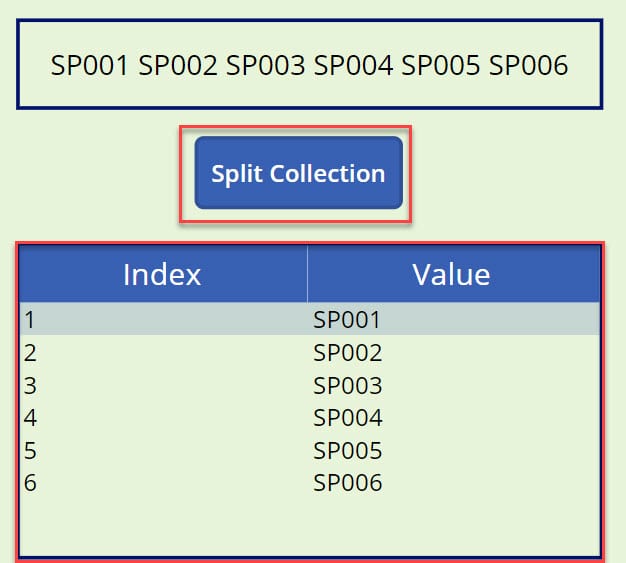
In Power Apps, there is a Text label, a Button control, and a Data table. Now, I want to split a string from the text label and store this information with two columns, i.e., [“Index” and “Value”] in the Power Apps collection.
Whenever a user clicks on the button control, the collection will be created and it will display on the data table as shown below.
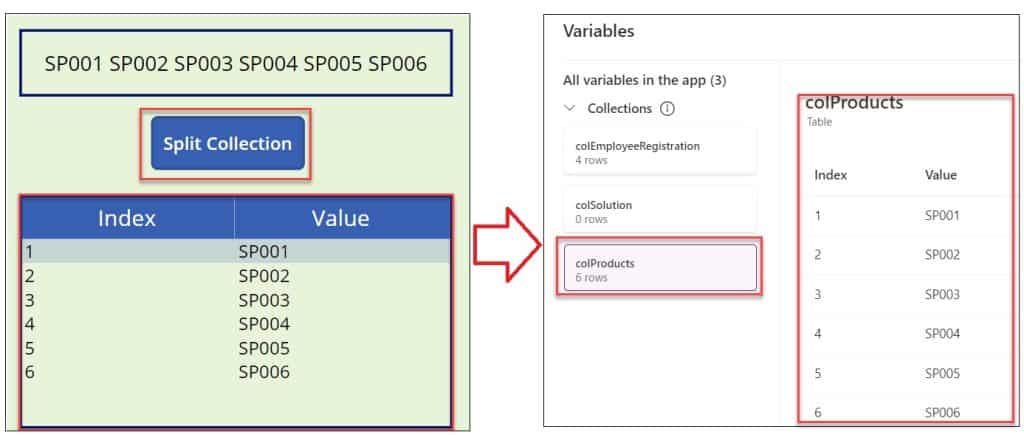
To achieve it, follow the below steps. Such as:
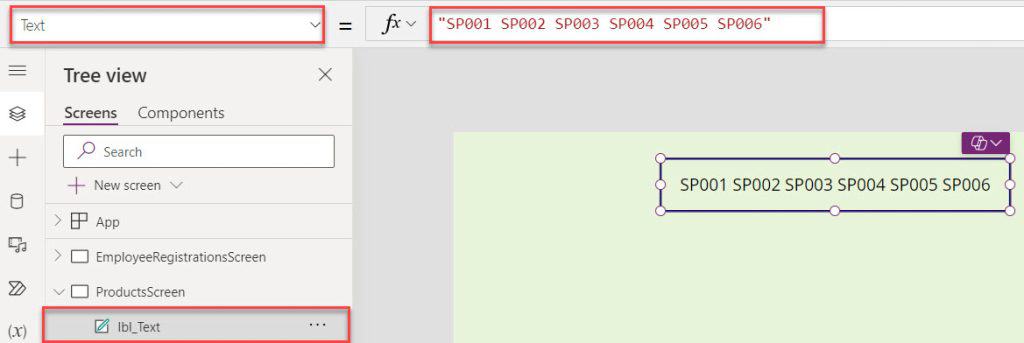
1. On the Power Apps Screen -> Insert a Text label and set its Text property to the code below.
Text = "SP001 SP002 SP003 SP004 SP005 SP006"Where,
- “SP001 SP002 SP003 SP004 SP005 SP006” = Product ID Values
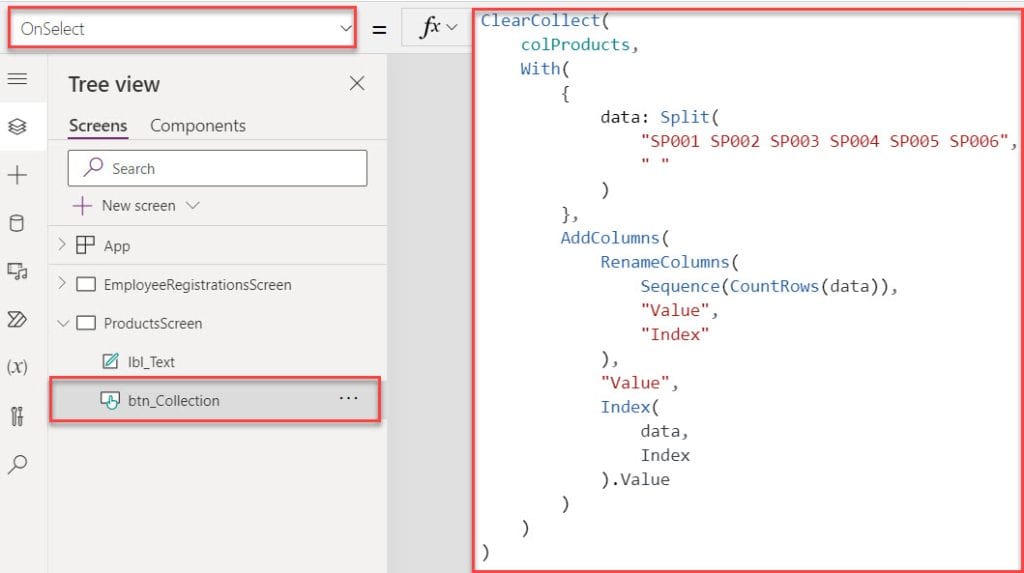
2. Then, insert a Button control and set its OnSelect property to the code below.
OnSelect = ClearCollect(
    colProducts,
    With(
        {
            data: Split(
                "SP001 SP002 SP003 SP004 SP005 SP006",
                " "
            )
        },
        AddColumns(
            RenameColumns(
                Sequence(CountRows(data)),
                "Value",
                "Index"
            ),
            "Value",
            Index(
                data,
                Index
            ).Value
        )
    )
)
Where,
- colProducts = Power Apps Collection Name
- With() = This function is used to simplify complex formulas by assigning a name to an expression or value
- data = It is the scope of the second parameter
- “SP001 SP002 SP003 SP004 SP005 SP006” = Text label’s String Value
- RenameColumns() = This RenameColumns() function to rename one or more columns of a table
- Sequence() = This function can be used to generate a sequential list of information
- CountRows() = This function counts the number of rows in a table
- “Value”, “Index” = Collection columns
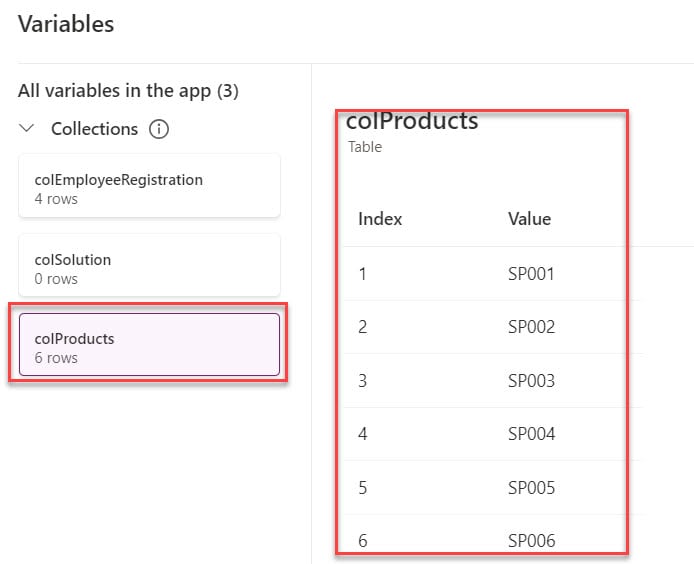
2. Now, click on the button control to get the created collection, and if you want to find the collection then, go to the Variables section and select your respective collection.
Refer to the below screenshot:
3. Once it is done, insert a Data table control and set its Items property to the code below.
Items = colProducts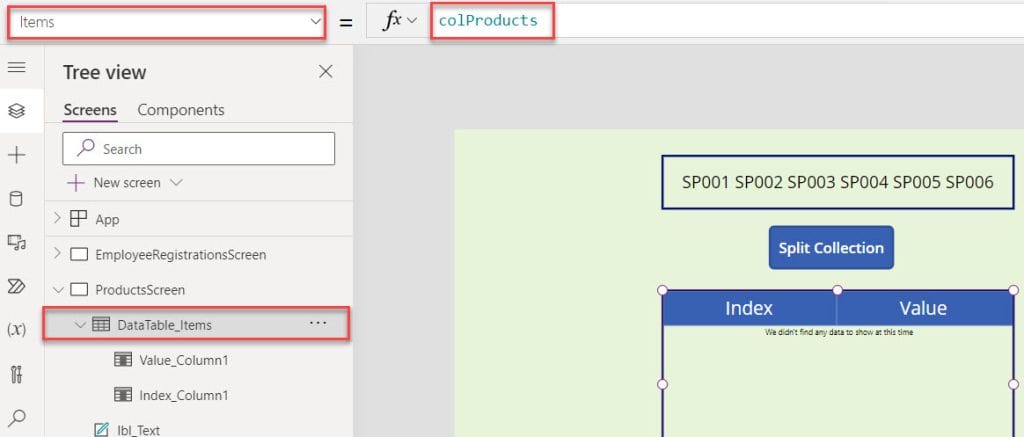
4. Save, Publish, and Preview the app. Whenever the user clicks on the button control, the data table will display the collection with respective columns as in the screenshot below.
This is all about the Power Apps split text into a collection.
Conclusion
I hope this Power Apps tutorial explains in detail information about the Power Apps split text into a collection with two different examples.
You may also like:
- Patch Power Apps Collection to SharePoint List
- Add Column in Power Apps Collection
- Remove Duplicate Rows From a Power Apps Collection
- Power Apps Save Collection to SharePoint List
I am Bijay a Microsoft MVP (10 times – My MVP Profile) in SharePoint and have more than 17 years of expertise in SharePoint Online Office 365, SharePoint subscription edition, and SharePoint 2019/2016/2013. Currently working in my own venture TSInfo Technologies a SharePoint development, consulting, and training company. I also run the popular SharePoint website EnjoySharePoint.com