While sending emails from Power Automate, you may required to do some email body formatting. In this tutorial, I will show you how to format the email body when sending an email(V2) in Power Automate.
Along with this, I will discuss a few topics:
- Power Automate email with options body formatting
- Power Automate: Send email with HTML format
- Power Automate Email embed an image
Power Automate Email Formatting
Let’s examine the parameters we can include in the send an email(V2) action and format it in the Power Automate flow.
Example:
When a new item is created in the SharePoint list [Products], I wanted to send an email mentioning the product details to the assigned quality inspection person.

Check out the Power Automate flow below:
1. Browse make.powerautomate.com to navigate to the Power Automate Home page -> Choose +Create -> Select Automated cloud flow.
Then, select the ‘When an item is created trigger‘ -> Click Create -> Inside the trigger, provide the parameters like Site Address and List Name.

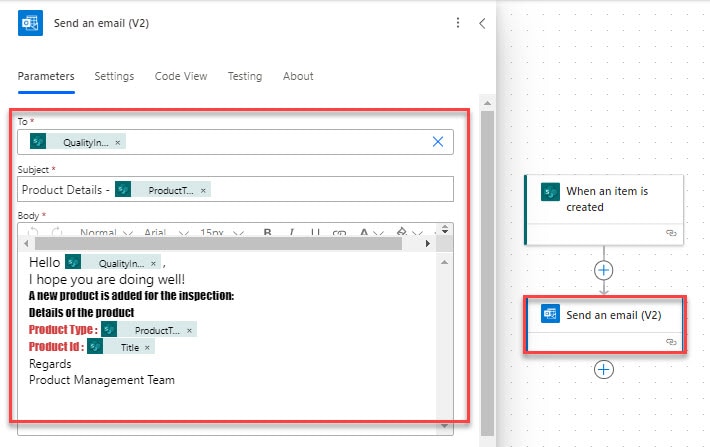
2. Next to that, add Send an email(V2) flow action from the Outlook connector. Configure the parameters below:
- To- Provide the user ID or email address to whom an email should be sent. We can provide the email address manually or remove it from the dynamic content.
- Subject- Give a subject line to the email where it defines the email’s purpose.
- Body- Specify the detailed description of the email including dynamic content and formatting the mail.
Here, we can format the body of an email in a different font type, change the font size, bold the characters and highlight them by underlining them, Insert links, change the font color and background colour, etc.
The Body part is a rich text editor that you can use to format the text below.
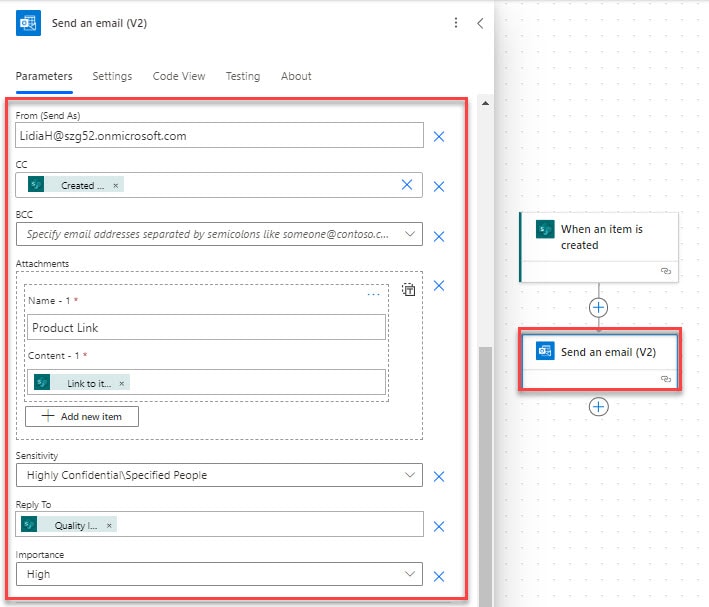
Click Showall to display the advanced parameters:
- From (Send as): Here, a user can enter an email address on behalf of someone. In simple terms, it is a ‘Send as’ field. The recipient will receive an email from the email ID we entered in the field From(send as).
- CC: A user can send a copy of the email content to recipients where one recipient can see another. We can give email addresses through dynamic content.
- BCC: The difference between CC and BCC is the recipients can’t see one another who has received the email.
- Attachments: This parameter allows us to provide a link to the item and the attachment name from the dynamic content.
- Sensitivity: Specify the sensitivity of the email from the drop-down option regarding your requirements.
- Reply to: The email address to use when replying to the mail.
- Importance: Choose the importance of the email from given options like High, Medium, and Low.
3. Once it is done, click on Save -> Click on the Test icon. At this point, add a new item to the SharePoint list.

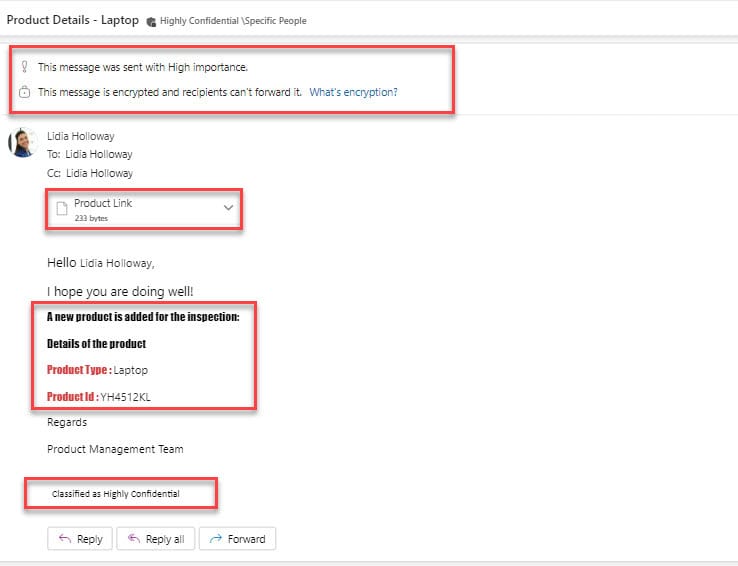
4. When the flow runs successfully, it will email the assigned person about the product details.
The image below represents an email received with the details mentioned inside the flow.
This is how you can format the email body with different options and in different styles using Power Automate.
Power Automate Send Email HTML Format
Now, let’s discuss how to send an email by adding HTML text in the body. Dive into the below instructions:
Example:
When an item mentioned in the above example is created in the SharePoint list, notify the quality inspection person by sending a message.

I wanted to format the email body by using HTML context in send an email(V2) action.
1. In the Send an email(V2) action of Outlook, click the Toggle code view icon <>; inside this editor, we can add HTML tags and content.
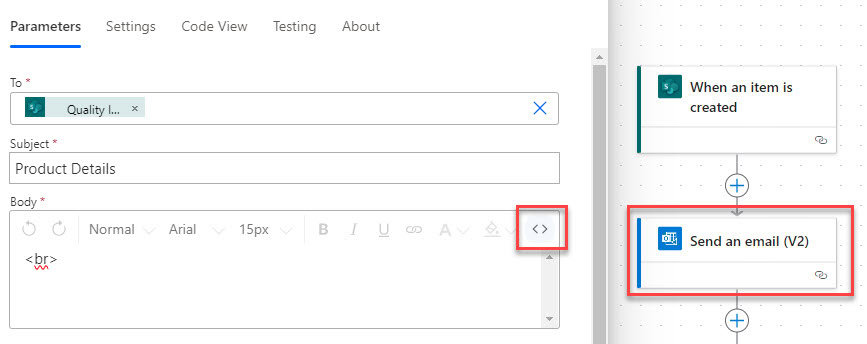
2. Now, I wanted to add a hyperlink to an item layered with text. Add the code below to it.
- To- Set the email address
- Subject- Give a subject to the email.
- Body- Specify the body using dynamic content.
<p>Hello @{triggerBody()?['QualityInspectedBy']?['DisplayName']},</p><p>I hope you are doing well!</p><p><b><strong style="color: rgb(134, 29, 29);">A Product has been added for the Inspection.</strong></b></p><p><b><strong style="color: rgb(134, 29, 29);">For the details of the product:</strong></b><a href="@{triggerBody()?['{Link}']}"><b><strong style="color: rgb(0, 0, 0);">Click Here</strong></b></a><span>
</span><b><strong style="color: rgb(0, 0, 0);">Thankyou</strong></b></p>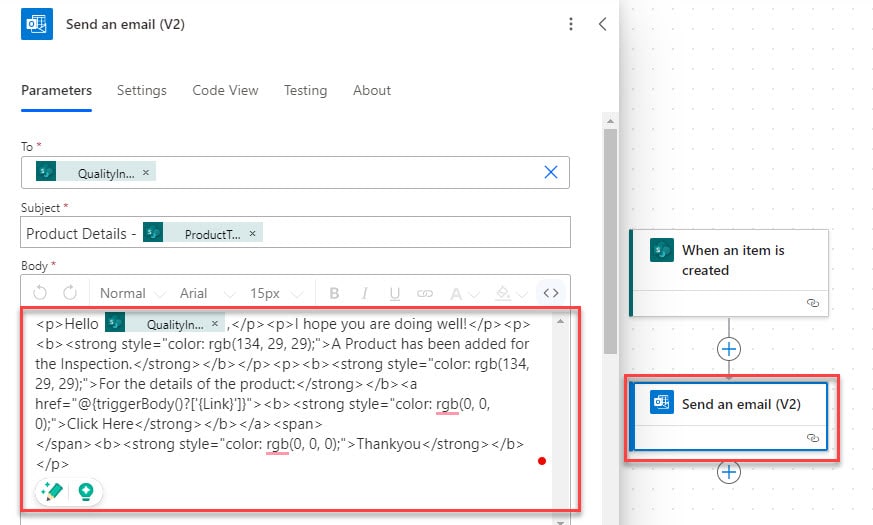
3. Let’s save the flow and test it manually. Now, create an item in the SharePoint list as shown in the below image:

4. Within a few seconds, a user can receive the email with the link as represented in the screenshot:
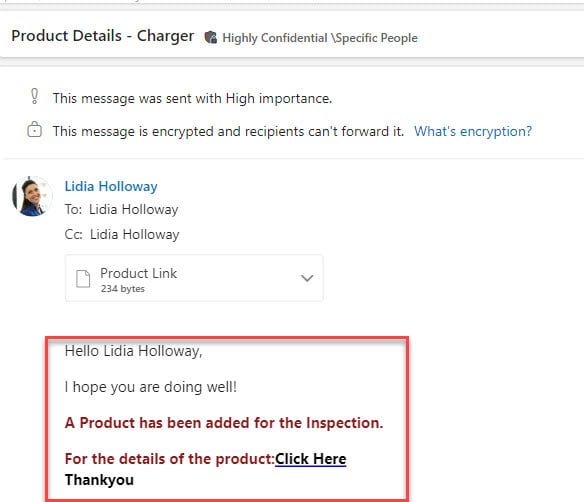
If you want to insert the HTML table in the email body, check the below step:
5. In the code view of the email body, add the HTML tags and tables. Insert the below code:
<p>Hello @{triggerBody()?['QualityInspectedBy']?['DisplayName']}</p><p>The below table shows the details of a product:</p>
<table style="border-collapse: collapse; width: 100%; border: 2px solid #4CAF50; margin: 20px;">
    <thead>
        <tr style="background-color: #4CAF50; color: white;">
            <th style="border: 2px solid #4CAF50; padding: 12px;">Product Type</th>
            <th style="border: 2px solid #4CAF50; padding: 12px;">Product ID</th>
            <th style="border: 2px solid #4CAF50; padding: 12px;">Billing Date</th>
        </tr>
    </thead>
    <tbody>
        <tr style="background-color: #f2f2f2;">
            <td style="border: 2px solid #4CAF50; padding: 12px;">@{triggerBody()?['ProductType']?['Value']}</td>
            <td style="border: 2px solid #4CAF50; padding: 12px;">@{triggerBody()?['Title']}</td>
            <td style="border: 2px solid #4CAF50; padding: 12px;">@{triggerBody()?['BillingDate']}</td>
        </tr>
    </tbody>
</table>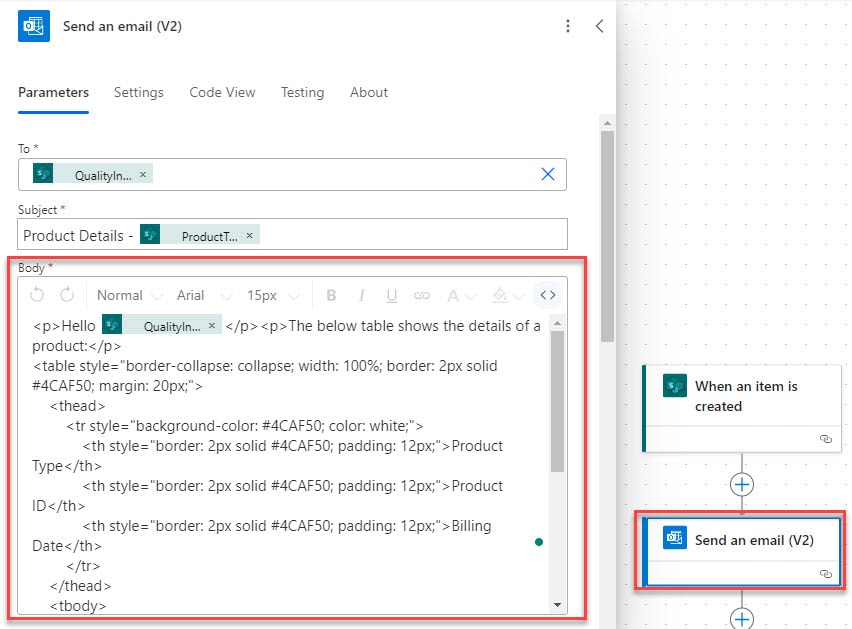
Output:
Then, save and test the flow. The email will get the table with the data below:
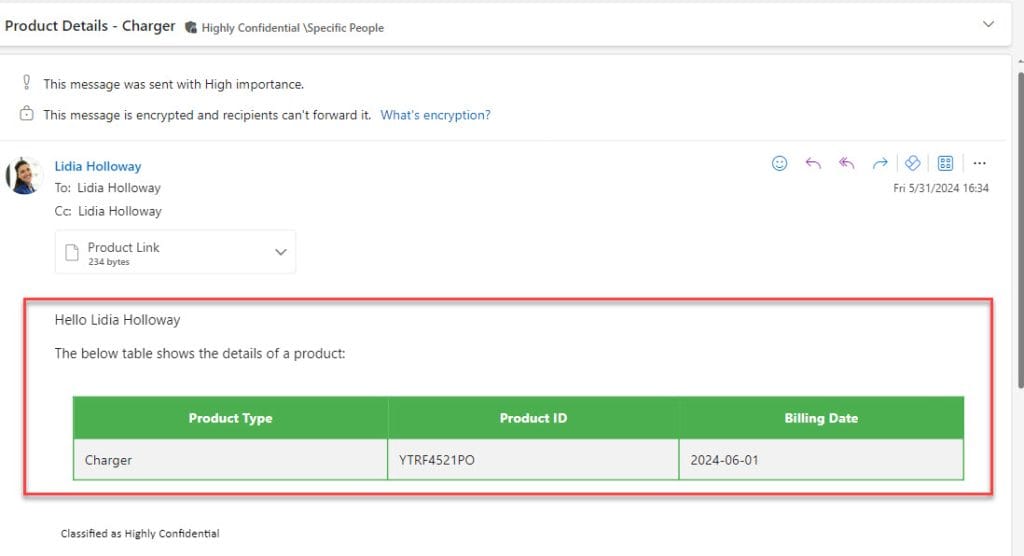
This is how to provide HTML tags and context in the email body using Power Automate.
Power Automate Send Email Add an Image
To embed an image to the email using Power Automate, go through the below example:
Example:
I have a SharePoint document library named ‘Company Certificates‘ with the company logo file, as shown in the screenshot below:
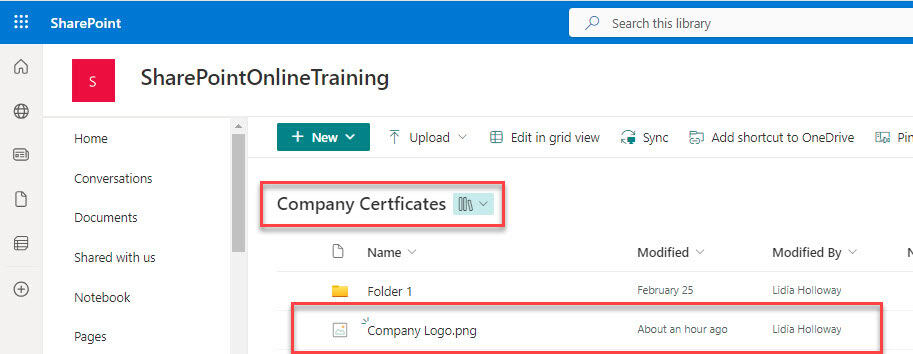
Here, my requirement from the client side is to send the company logo as an image in the email [Outlook].
Let’s create an instant flow to implement this.
1. On Power Automate, click on +Create> Instant cloud flow> Manually trigger the flow.
2. Under the trigger, add an action of Get file content to retrieve the data from the document and provide the Site Address and File Identifier.
- File Identifier: Select the file from the open folder icon that you need to send in an email.
Power Automate Get file content will convert the image into content that can be passed in email.

Now, it will retrieve the image’s content that needs to be sent via email.
3. Next, take the Compose flow action to convert the content into base64 [convert images into readable strings that can be saved without data loss].
Add the below given expression in the inputs section:
base64(outputs('Get_file_content')?['body'])
4. After that, initialize a variable to create an image from the HTML code. In that code, take the outputs of the compose action that will add converted image content to that variable.
- Then the expression will look like below:
<img src="data:image/png;base64,@{outputs('Compose')}" width="200" height="90">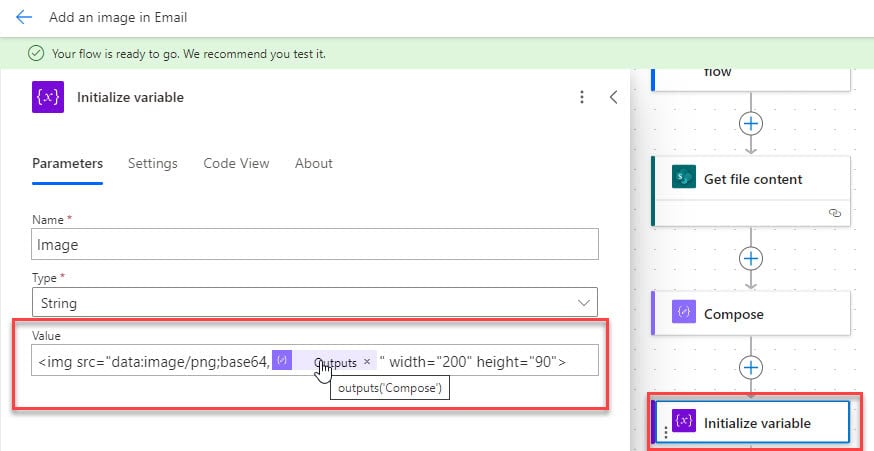
6. Next, add the Send an email (V2) action to send the email with the image. Set the parameters such as To and Subject.
Body: Here, format the email body using the dynamic content and take the outputs of the initialized variable.
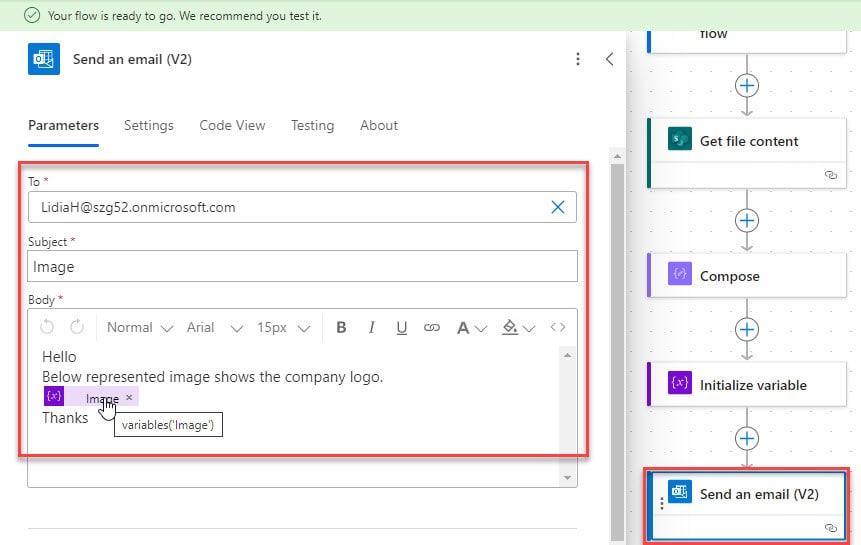
7. Let’s save the flow and test it manually. Within a few seconds, you can check that the email has been received with an image.
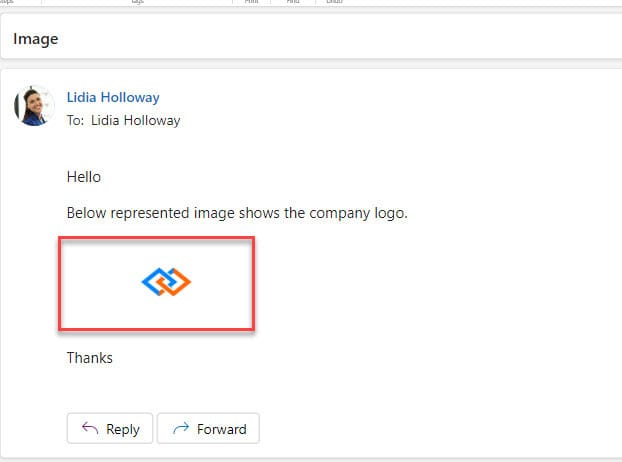
This is how to embed an image into the Outlook email using Power Automate.
Conclusion
I hope this tutorial has taught you how to format the email body while sending an email using Power Automate. We saw some examples of email body formatting in Power Automate.
You may also like:
- How to delete all files in a SharePoint folder using Power Automate?
- Create a Task in Microsoft Planner using Power Automate
- Power Automate Shared Mailbox
- adddays() in Power Automate + Examples
I am Bijay a Microsoft MVP (10 times – My MVP Profile) in SharePoint and have more than 17 years of expertise in SharePoint Online Office 365, SharePoint subscription edition, and SharePoint 2019/2016/2013. Currently working in my own venture TSInfo Technologies a SharePoint development, consulting, and training company. I also run the popular SharePoint website EnjoySharePoint.com
This is excellent! Thank you so much!
Bijay,
I have a Microsoft Form with 3 email entry fields where a user’s response is to enter the email addresses of other users. How will I check and validate if the entered email addresses are valid company emails in a Power Automate Flow.