If you want to become a Power Platform developer, you should know how to use Dynamic content in Power Automate. I will explain what is dynamic content in Power Automate and how to add dynamic content in Power Automate flow.
- Power Automate dynamic content missing
- Power Automate formatdatetime dynamic content
- power Automate dynamic content in expression
- Concat dynamic content to string in Power Automate
- Add dynamic content to hyperlink in Power Automate
- Power Automate split dynamic content
What is Dynamic Content in Power Automate
Power Automate dynamic content is the output of actions and triggers. A user can select values or properties from the dynamic content of previous steps instead of logical names.
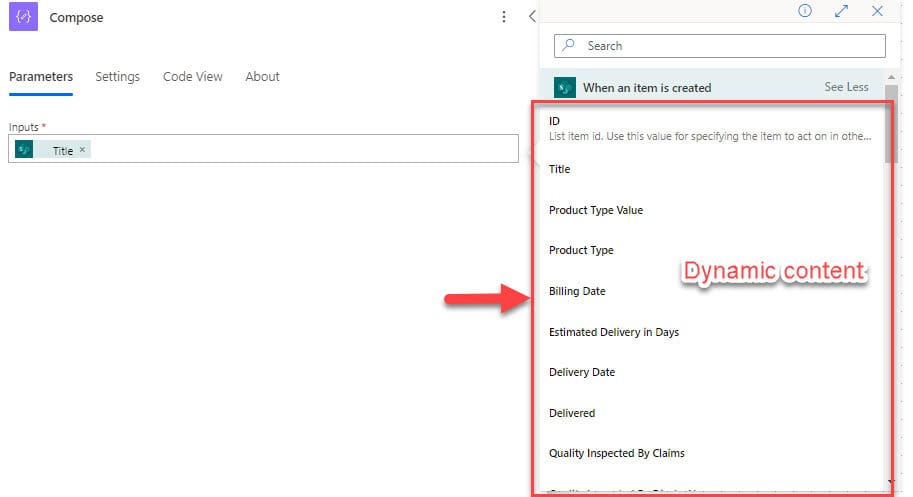
Example: Here, I will take a trigger ‘When an item is created‘ in Power Automate flow -> Add Compose action. In the compose action step, a user can select the value from the dynamic content of that particular trigger.
How to Add Dynamic Content Power Automate
I will show you how to add dynamic content in Power Automate flow actions.
Example:
My requirement is that whenever an item is created in the SharePoint list, an event is added to the Outlook calendar. For this example, I will show how to add dynamic content of a trigger in flow action [Create event(V4)].
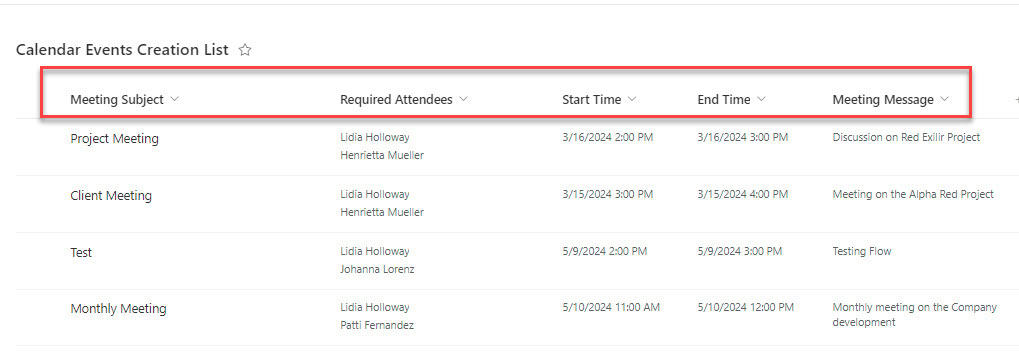
Steps to follow:
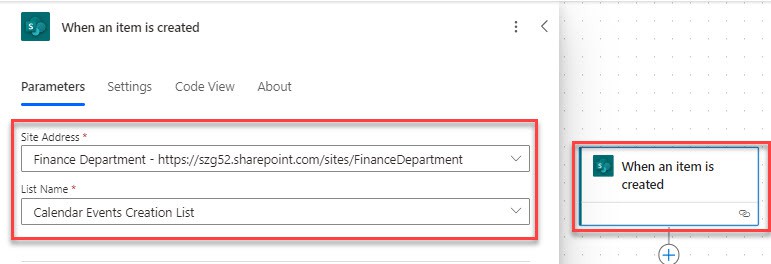
1. On the Power Automate home page, Go to +Create > select Automated cloud flow with the trigger When a new item is created. Choose the site address and list name.
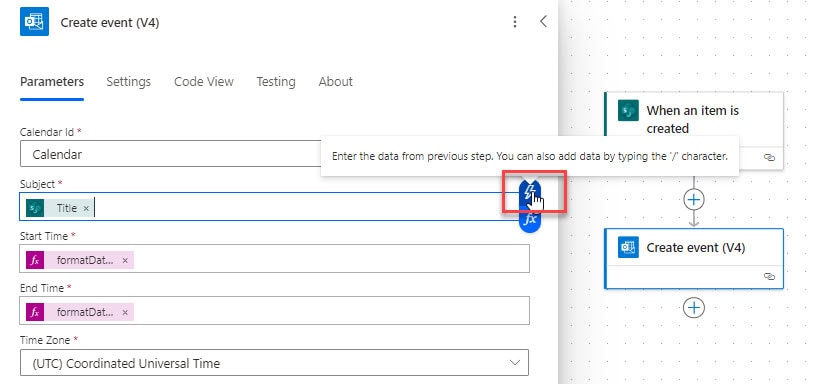
2. Next, I will add a Create event(V4) flow action. Set the parameters:
Click on the dynamic content icon inside the parameter -> Select values to add the dynamic content.
As shown below, you can take dynamic content values for all the parameters.
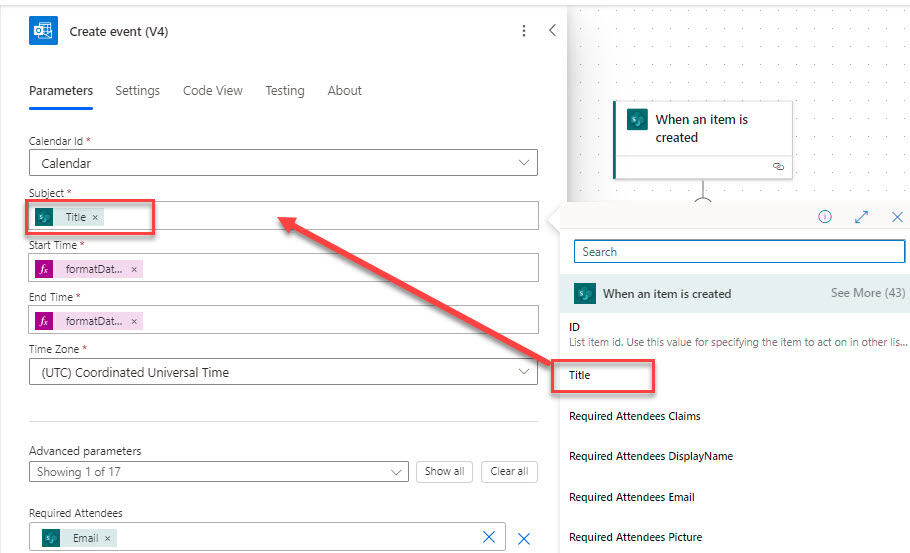
3. Let’s Save the flow and test it manually. Create an item in the SharePoint list, as shown in the below figure:
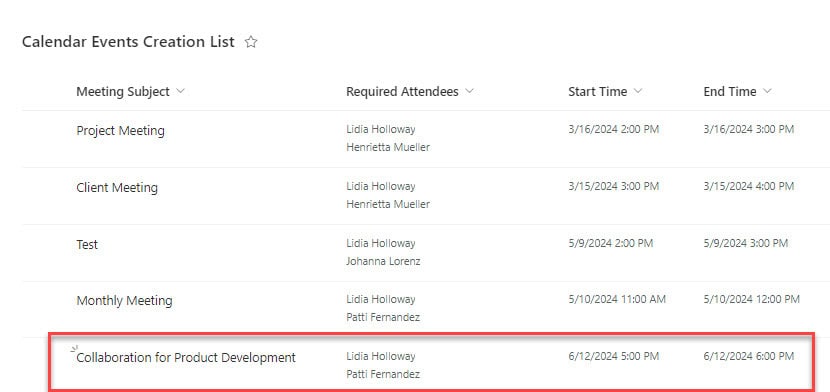
4. Then, an Outlook calendar event has been created with the values taken from the trigger’s dynamic content.
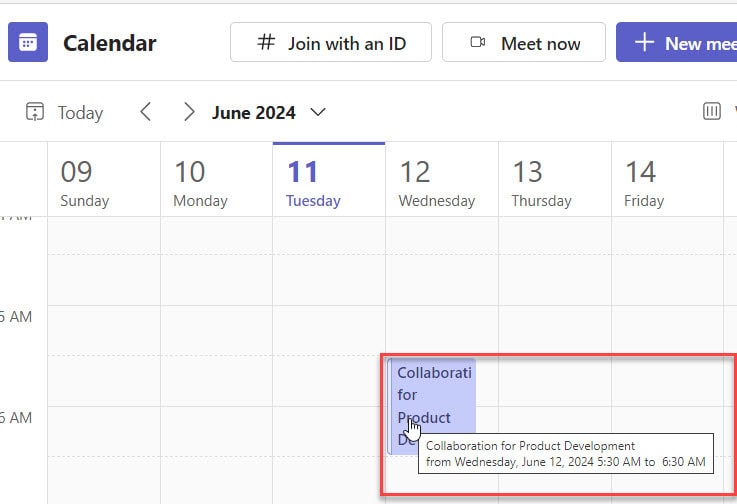
This is how to add dynamic content in Power Automate.
Power Automate Dynamic Content Missing
See the explanation below for why dynamic content is missing in a Power Automate flow action.
In a Power Automate flow, sometimes you can not see the dynamic content coming from the previous step when attempting to add dynamic content to a parameter.
Example:
Whenever a user submits a response in the Microsoft Form -> Create an HTML table with the responses and send an email.
I have created a Power Automate flow for this, but unfortunately, I can see the dynamic content is missing in the Create HTML table step.
Refer to the image below:
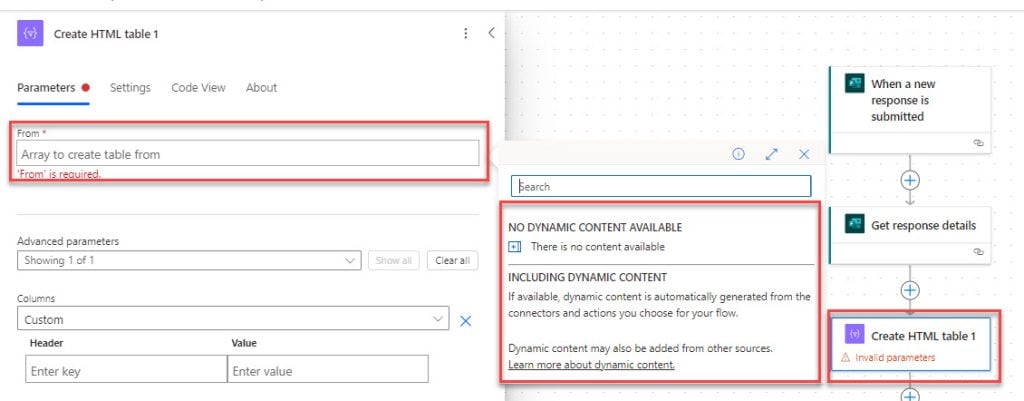
Solution:
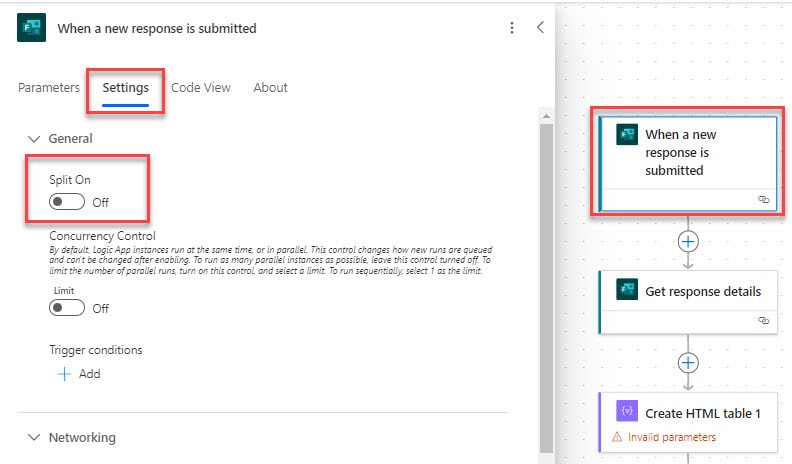
If the Power Automate trigger [When a new response is submitted] supports the Split On option in the settings, the dynamic content will not be displayed in the following actions. To show the dynamic content available, we need to turn off the Split On option in the trigger.
To do so, follow the steps below:
1. Inside the trigger, select Settings tab -> Under General settings, turn off the Split On option as shown below:
2. Then, go back to the flow action, where the dynamic content is now available to add as a parameter.
Check the image:
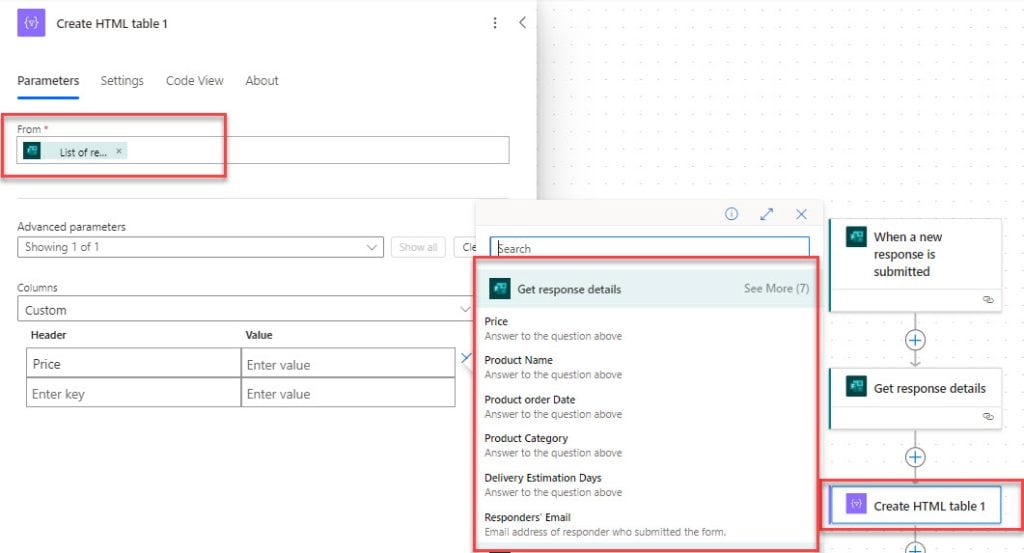
This is how to resolve and make dynamic content available in Power Automate.
Power Automate Formatdatetime Dynamic Content
To format the date and time column values using dynamic content in Power Automate, follow the below points:
Example:
I have created a SharePoint list named ‘Holidays List‘ with a Holiday Date column, as represented in the figure below:
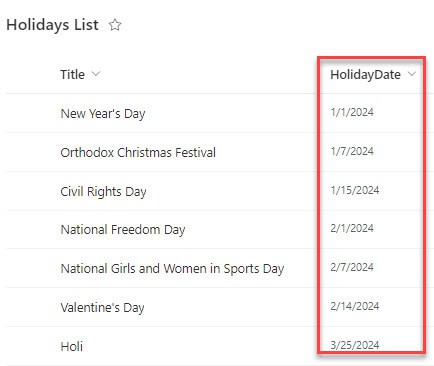
However, the SharePoint list date will store the values in the default format ‘MM/dd/yyyy‘, i.e., 06/11/2024. I want to format the date according to our requirements [MMMM dd, yyyy HH:mm: ss].
Check out the steps below:
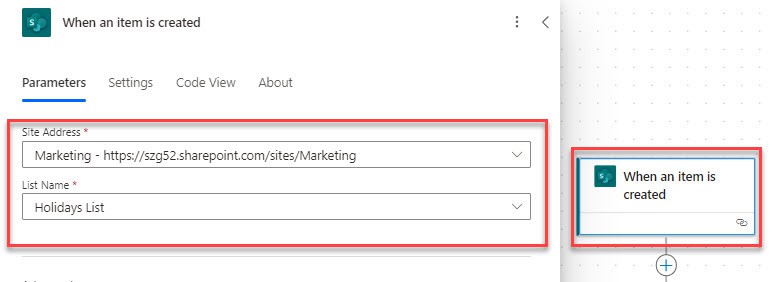
1. On the Power Automate Home page, click on +Create -> Select Automated cloud flow with When an item is created trigger.
Select the site address and list the name to the trigger.
2. Next, add a Compose flow action to format the date and time according to our requirements.
Take the below expression:
formatDateTime(triggerBody()?['HolidayDate'],'MMMM dd, yyyy HH:mm:ss')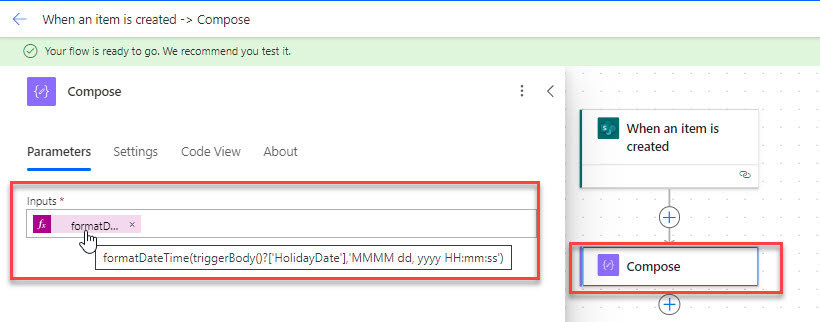
Save and run the flow; the output will display the formatted date and time in the image.
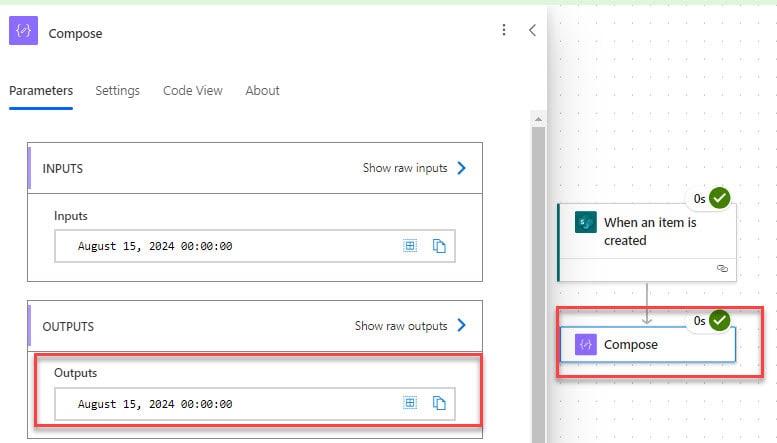
This is how you can format dates and times from the dynamic content in Power Automate.
Power Automate Dynamic Content in Expression
Let’s check how to use dynamic content in Power Automate expressions; see the example.
Example:
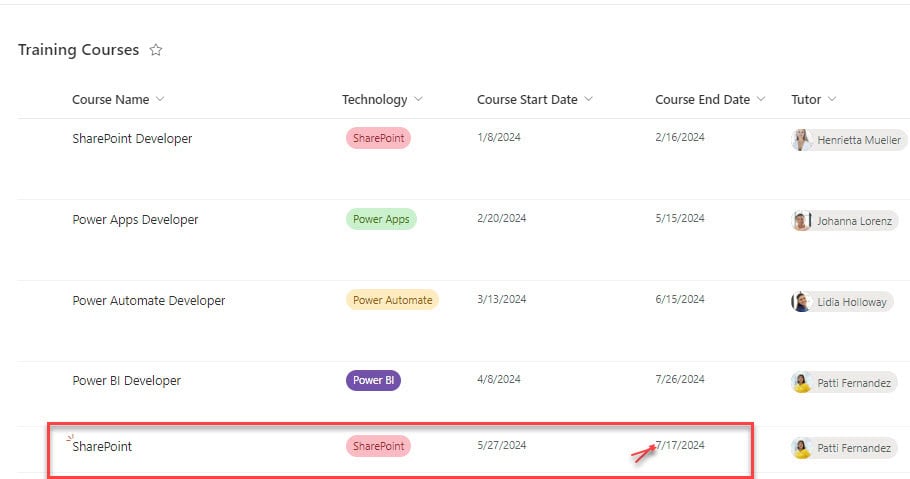
Suppose I have taken a SharePoint list [Training Courses] with a few columns, as looked at in the screenshot below:
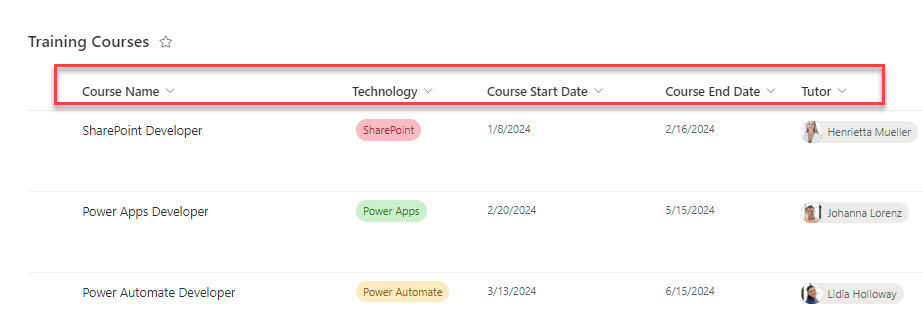
My requirement is to subtract 10 days from the course end date. So, I need to use course end-date dynamic content in the subtractfromtime() expression.
Follow the steps below:
1. On the Power Automate Home page, click on +Create -> Select Automated cloud flow with When an item is created trigger.
Select the site address and list the name to the trigger.

2. To subtract the days from the course end date, add the dynamic content in the expression.
Take a Compose flow action, place the below expression:
subtractFromTime(triggerBody()?['EndDate'],10,'Day')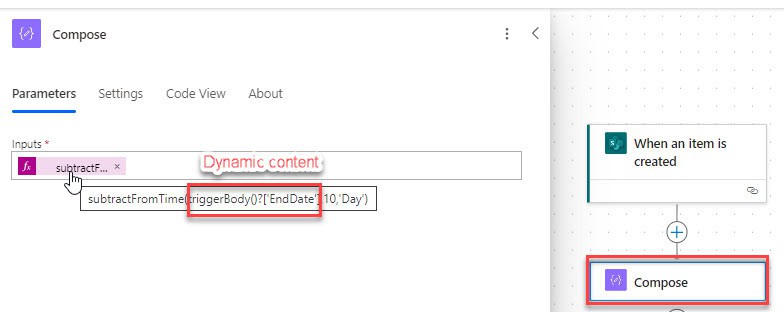
3. Save and test the flow; while the flow is running, add an item to the SharePoint list.
Output:
The output will give the below result by subtracting days from the Course end date.
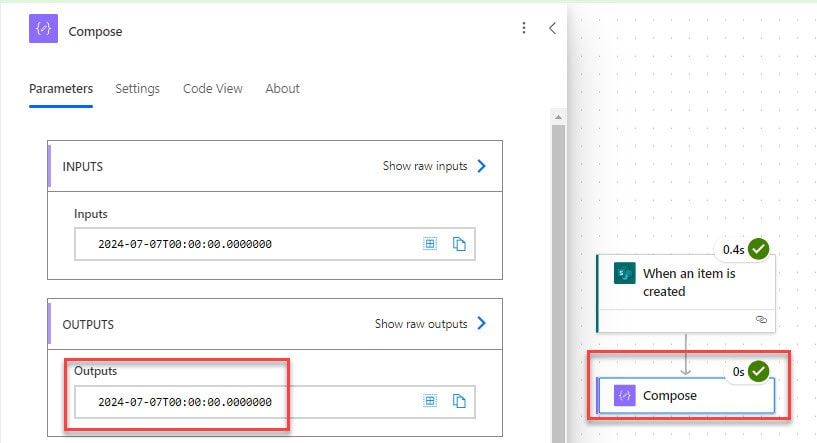
This way, you can use dynamic content in the expression using Power Automate.
Concat String with Dynamic Content in Power Automate
To get a concatenated string with dynamic content in Power Automate, dive into the more steps:
Example:
I will represent a simple example of concat two text strings separated by a space and string with the dynamic content.
- Lidia + Holloway + String [SharePoint Developer]=> Lidia Holloway-SharePoint Developer
I will create an Instant cloud flow in Power Automate.
1. In the Power Automate, select Instant cloud flow with Manually trigger a flow.
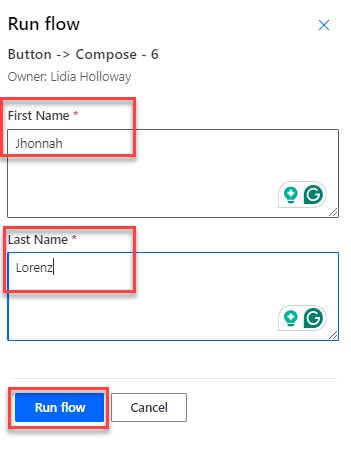
Choose to add two text inputs for First name and Last name.

2. Then, take a Compose flow action to concat first and last names from the dynamic content.
Insert the below-given expression, which will take dynamic content from the trigger.
concat(triggerBody()?['text'],' ',triggerBody()?['text_1'],'-SharePoint Developer')
3. Now, save the flow and test it. In the Runflow window, provide the value in the first and last names -> click Runflow.
Result:
The output will display the concatenated string from the dynamic content.
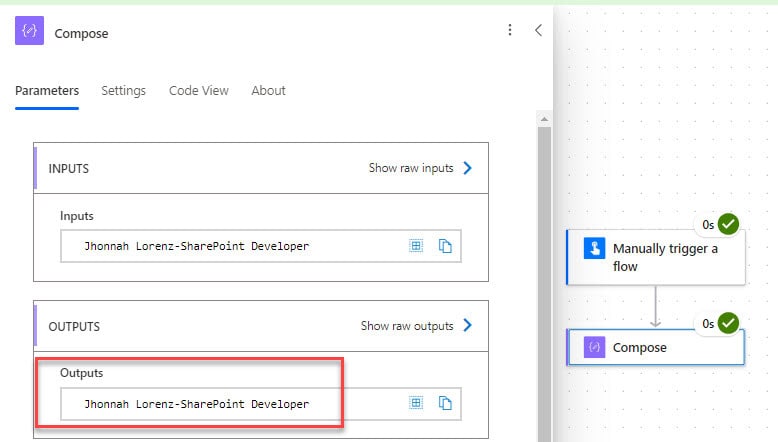
This way, a user can concact string with dynamic content using Power Automate.
Power Automate Hyperlink Dynamic Content
In this section, I will show you how to add dynamic content to the hyperlink in Power Automate.
Example:
When a new item is created in the SharePoint list [Products], I wanted to send an email mentioning the product details to the assigned quality inspection person.

Here, my requirement is to add dynamic content to the hyperlink in sending an email flow action by linking item link.
Here are the steps below:
1. Select Automated cloud flow in Power Automate. Then, select the ‘When an item is created trigger‘ -> Click Create -> Inside the trigger, provide the parameters like Site Address and List Name.

2. Next, add Send an email(V2) flow action. I wanted to add dynamic content to hyperlink. Add the code below to it.
- To- Set the email address of the inspection person
- Subject- Give a subject to the email.
- Body- Specify the body using dynamic content.
In the code view, insert the hyperlink that will take a link to the item.
<a href="@{triggerBody()?['{Link}']}">Click Here</a>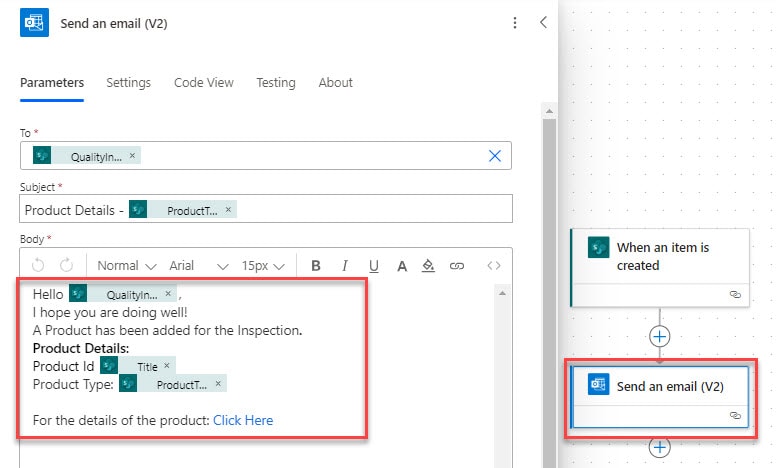
Save and test the flow. Create an item in the SharePoint list as below:

3. Within a few seconds, a user can receive the email with the link that navigates to the list item as represented in the screenshot:
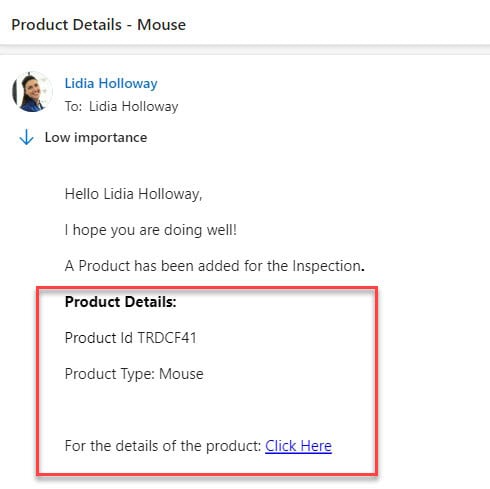
Check out the tutorial to learn more about Power Automate email format dynamic content.
Split Dynamic Content in Power Automate
To split the dynamic content in Power Automate, use a split() expression, where it will split the strings into an array by a delimiter.
I will explain this example in manual trigger flow.
1. Select Instant cloud flow. Then, set the flow name, choose Manually trigger a flow, and click the Create button.
2. select an Initialize variable flow action to take the string value manually. Enter details such as Name, Type, and value.
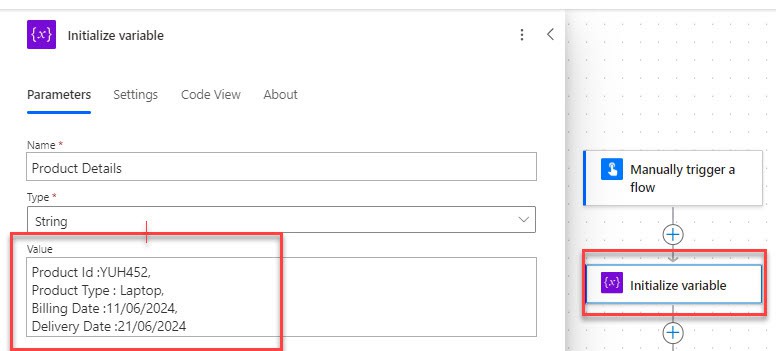
3. Now, add a Compose action to split the dynamic content.
To split the string value, take the split expression with the dynamic content of variables along with the delimiter.
split(variables('Product Details'),',')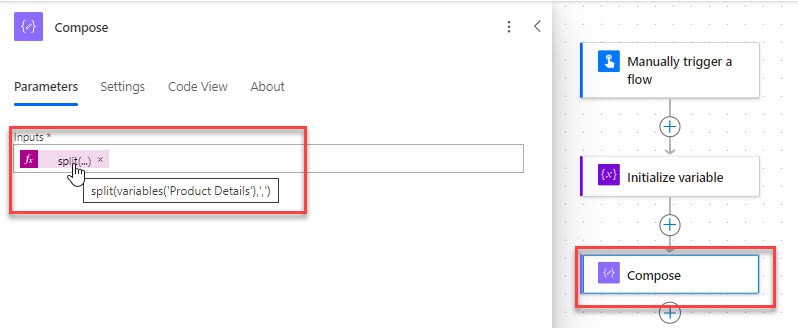
Save and run the flow.
4. You can see the string value has been split into an array in the screenshot below:
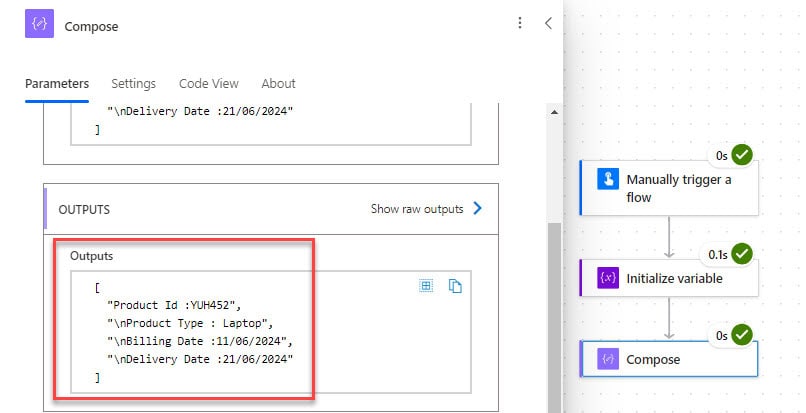
This is how to split the dynamic content in a Power Automate flow.
Conclusion
In this Power Automate tutorial, I have explained what is dynamic content in Power Automate? and how to add dynamic content in Power Automate. Also, I have explained how to get dynamic content in Power Automate if no dynamic content is available in Power Automate.
You may like the following tutorials:
- Power Automate Increment Variable
- Power Automate Convert String to Float
- Power Automate Get items
- Convert Time Zone in Power Automate
I am Bijay a Microsoft MVP (10 times – My MVP Profile) in SharePoint and have more than 17 years of expertise in SharePoint Online Office 365, SharePoint subscription edition, and SharePoint 2019/2016/2013. Currently working in my own venture TSInfo Technologies a SharePoint development, consulting, and training company. I also run the popular SharePoint website EnjoySharePoint.com
Fantastic tip my friend, I found these very useful 🙂