As a Typescript developer, you should know how the control flow works, especially how the switch case statement works. Switch case provides a structured way to handle multiple conditions, making code more readable and maintainable. By matching an expression against different case clauses, you can execute specific code blocks based on the value.
In my experience, using switch case statements in TypeScript saves time and reduces errors. This technique is not just for handling simple conditions; it is also efficient for more complex scenarios.
I will show you how switch cases work in real-life coding using Typescript.
Typescript Switch Statements
In TypeScript, switch statements are used to handle multiple conditions. They allow you to match an expression against a series of case statements, providing a clean and readable way to execute different blocks of code based on the value of an expression.
Syntax of a Switch Statement
A switch statement in TypeScript starts with the keyword switch, followed by an expression in parentheses. This expression is evaluated once. After the expression, a series of case statements define blocks of code to execute for specific values.
Below is the syntax of the Typescript switch statement:
switch (expression) {
    case value1:
        // Code to execute if expression matches value1
        break;
    case value2:
        // Code to execute if expression matches value2
        break;
    default:
        // Code to execute if expression does not match any case
}
Each case statement starts with the keyword case followed by a value and a colon. If the expression matches this value, the code block under the case statement executes. The break statement is crucial to prevent code under subsequent case statements from executing.
Typescript Case Statement
Case statements within a switch statement in Typescript are used to compare the expression’s result against defined values. If the expression matches a case value, the corresponding block of code runs.
If no case matches, the switch…case statement checks for a default case, defined using the default keyword. This is optional but useful for handling unexpected values.
Here is a simple example.
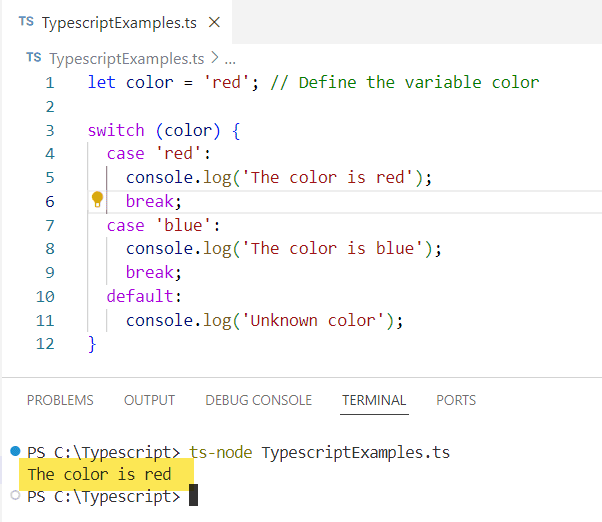
let color = 'red'; // Define the variable color

switch (color) {
  case 'red':
    console.log('The color is red');
    break;
  case 'blue':
    console.log('The color is blue');
    break;
  default:
    console.log('Unknown color');
}
In this example, if color matches 'red', it logs “The color is red”. If it’s 'blue', it logs “The color is blue”. If color is neither, the default clause handles this, logging “Unknown color”.
Here you can see the output:

TypeScript Switch Case with Different Types
Here, I will explain how to use Typescript switch statements with different data types. This includes working with enums, boolean values, union types, and even null or undefined values.
Using Enums in Switch Cases
Enums are a powerful feature in TypeScript, providing a way to define a set of named constants. When using enums in switch statements, each case corresponds to an enum member. This makes code more readable and maintainable.
enum Direction {
  Up,
  Down,
  Left,
  Right
}

let direction = Direction.Up;

switch (direction) {
  case Direction.Up:
    console.log("Moving Up");
    break;
  case Direction.Down:
    console.log("Moving Down");
    break;
  // other cases...
}
Enums provide type safety and can prevent possible errors from unexpected values.
Boolean and Union Types
Handling boolean values in a switch statement is also very easy. Since a boolean can only be true or false, your cases are limited to these two.
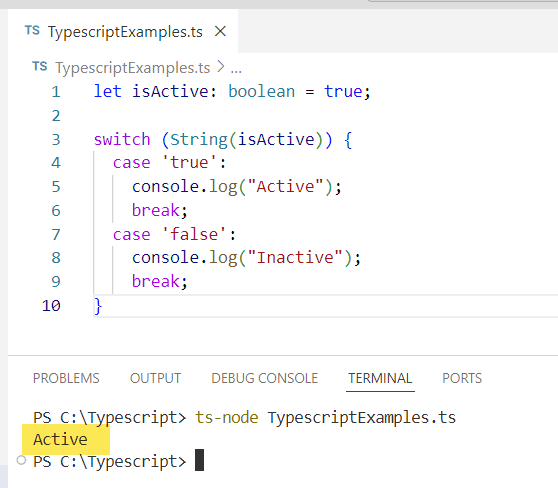
let isActive: boolean = true;

switch (String(isActive)) {
  case 'true':
    console.log("Active");
    break;
  case 'false':
    console.log("Inactive");
    break;
}
You can see the output in the screenshot below after executing the VS code.

For union types, which can represent multiple types in one variable, switch statements can simplify the handling of each possible type.
type Status = "success" | "error" | "loading";

let responseStatus: Status = "success";

switch (responseStatus) {
  case "success":
    console.log("Success");
    break;
  case "error":
    console.log("Error");
    break;
  case "loading":
    console.log("Loading");
    break;
}
Handling Null and Undefined
When dealing with null or undefined values, it’s important to check these explicitly in a switch statement in Typescript.
Here is a code sample.
let value: string | null | undefined = null;

switch (value) {
  case null:
    console.log("Value is null");
    break;
  case undefined:
    console.log("Value is undefined");
    break;
  default:
    console.log("Value is", value);
}
Explicitly checking for null and undefined helps avoid runtime errors and unexpected behaviors.
Interface Types
Using interfaces with switch statements involves checking the type of the object, often done with the typeof operator.
interface Cat {
  meow(): void;
}

interface Dog {
  bark(): void;
}

function handleAnimal(animal: Cat | Dog) {
  switch (typeof animal) {
    case "object": // Since both are objects, further type narrowing is needed
      if ('meow' in animal) {
        animal.meow();
      } else if ('bark' in animal) {
        animal.bark();
      }
      break;
  }
}
This approach ensures the correct methods are called based on the object’s type.
Advanced Typescript Switch Case
Let us see how we can use more examples of TypeScript switch cases, including handling multiple switch cases, managing fall-through behavior, and employing type guarding.
Multiple Switch Cases
In TypeScript, you can handle multiple cases that should execute the same block of code by listing them one after another, separated by colons.
let value = 'orange';

switch (value) {
  case 'orange':
  case 'blueberry':
  case 'strawberry':
    console.log('This is a fruit!');
    break;
  case 'broccoli':
    console.log('This is a vegetable!');
    break;
  default:
    console.log('Unknown item');
}
By grouping cases together, you can avoid repetitive code and make your switch statements cleaner and easier to read. This pattern is efficient, especially when multiple cases map to a single outcome.
Fall-Through Behavior
Fall-through in switch cases means that if a matching case doesn’t have a break statement, the execution moves to the next case. In TypeScript, this behavior allows you to intentionally handle scenarios where multiple cases should execute the same block of code in succession.
let status = 'processing';

switch (status) {
  case 'processing':
    console.log('Processing...');
  case 'fetching':
    console.log('Fetching data...');
  case 'done':
    console.log('Done!');
    break;
  default:
    console.log('Unknown status');
}
In the example above, if status is ‘processing’, all the console.log statements from ‘processing’ to ‘done’ will execute.
Type Guarding with Switch
Type guarding ensures that TypeScript correctly infers the type within each case block. This makes your code safer and helps catch errors early. You can achieve this by using type predicates or checking the discriminant property of union types.
Here is an example:
type Shape =
  { kind: 'circle', radius: number } |
  { kind: 'square', side: number };

function getArea(shape: Shape): number {
  switch (shape.kind) {
    case 'circle':
      return Math.PI * shape.radius ** 2;
    case 'square':
      return shape.side ** 2;
    default:
      throw new Error('Invalid shape');
  }
}
In this example, when I switch on shape.kind, TypeScript narrows down the type correctly within each case block. This helps ensure that the operations I perform on shape are type-safe.
Typescript Switch Case Best Practices
When using switch cases in TypeScript, I focus on a few key practices to improve code readability and prevent potential errors.
First, always include a default case. This effectively handles unexpected values. Even if I think I’ve covered all possibilities, it’s good practice to prepare for unforeseen cases.
Here is the syntax:
switch (value) {
  case 1:
    // code for case 1
    break;
  case 2:
    // code for case 2
    break;
  default:
    // handle unexpected values
}
Use the break keyword after each case to prevent fall-through. This makes my code cleaner and avoids running into bugs where multiple cases execute unintentionally.
case value1:
  // some code
  break;
case value2:
  // some other code
  break;
To maintain code readability, I label each case clearly and keep the logic simple. Long, complicated blocks inside case statements can be confusing.
For number and string values, TypeScript’s type safety helps by catching typos and invalid comparisons. Setting noImplicitReturns to true ensures that all code paths in the switch statement return a value.
Here’s how I handle various types of values effectively:
Example Switch Case:
function getValueType(value: number | string) {
  switch (typeof value) {
    case 'number':
      return 'This is a number';
    case 'string':
      return 'This is a string';
    default:
      return 'Unknown type';
  }
}
By following these practices, you ensure my switch statements are both reliable and easy to understand.
Typescript Switch Case Real-World Examples
Let me show you how to use the TypeScript switch case statements with real-world examples in values like strings, enums, and numbers.
Control Flow with Strings
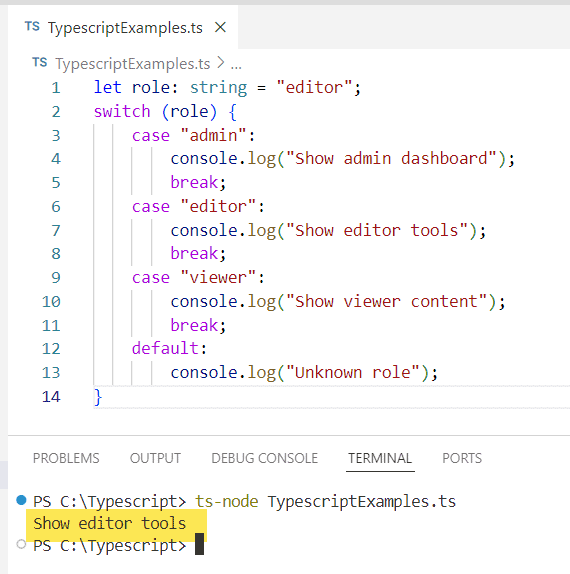
In TypeScript, handling strings with a switch statement can streamline your code. For instance, if I need to manage different user roles such as “admin,” “editor,” and “viewer,” I can use a switch case to direct the flow of control based on the role.
Below is the complete code:
let role: string = "editor";
switch (role) {
    case "admin":
        console.log("Show admin dashboard");
        break;
    case "editor":
        console.log("Show editor tools");
        break;
    case "viewer":
        console.log("Show viewer content");
        break;
    default:
        console.log("Unknown role");
}
You can see the output in the screenshot below:

Enums for Days of the Week
Enums in TypeScript are useful for representing constants like days of the week. This makes the code easier to read and reduces errors associated with using string literals. When I need to execute different logic based on the day, I can use enums in a switch case.
Here is a complete code:
enum Day {
    Monday,
    Tuesday,
    Wednesday,
    Thursday,
    Friday,
    Saturday,
    Sunday
}

let today: Day = Day.Monday;

switch (today) {
    case Day.Monday:
        console.log("Start of the work week");
        break;
    case Day.Friday:
        console.log("Last work day");
        break;
    case Day.Saturday:
    case Day.Sunday:
        console.log("Weekend!");
        break;
    default:
        console.log("Midweek day");
}
Case Clauses with Numbers
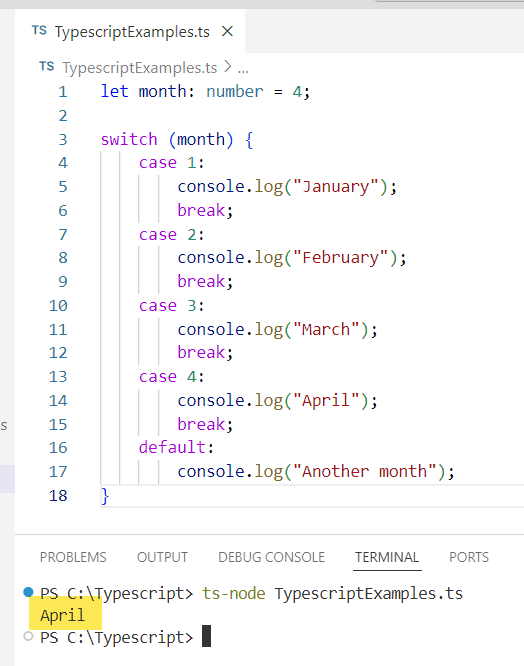
TypeScript also makes handling numeric values with switch statements easy. For example, a switch case can neatly manage different cases based on a month number.
Here is a complete code:
let month: number = 4;

switch (month) {
    case 1:
        console.log("January");
        break;
    case 2:
        console.log("February");
        break;
    case 3:
        console.log("March");
        break;
    case 4:
        console.log("April");
        break;
    default:
        console.log("Another month");
}
I executed the above Typescript code and you can see the output in the screenshot below:

Conclusion
Using TypeScript switch case statements makes it easier to manage multiple conditions. This control statement is useful when handling different values without writing numerous if-else statements.
One significant benefit is controlling the code flow with clear and straightforward syntax.
Here’s a basic example to understand the Typescript switch case:
switch (day) {
    case 0:
        console.log('Sunday');
        break;
    case 1:
        console.log('Monday');
        break;
    case 2:
        console.log('Tuesday');
        break;
    // more cases
    default:
        console.log('Invalid day');
}
The return type remains consistent, and TypeScript’s type-checking ensures you avoid unexpected errors. This makes debugging easier and faster.
Advantages of using switch case in TypeScript:
- Improved Readability: Each case stands out, making the code easy to read.
- Efficiency: Only evaluates the expression once, saving processing time.
- Maintainability: Clear structure aids in maintaining and updating code.
I hope now you know how to use the Typescript switch case with various examples.
You may also like:
- TypeScript for Loop with Examples
- TypeScript Array Filter with Multiple Conditions
- TypeScript Exclamation Mark
- Typescript string to boolean
I am Bijay a Microsoft MVP (10 times – My MVP Profile) in SharePoint and have more than 17 years of expertise in SharePoint Online Office 365, SharePoint subscription edition, and SharePoint 2019/2016/2013. Currently working in my own venture TSInfo Technologies a SharePoint development, consulting, and training company. I also run the popular SharePoint website EnjoySharePoint.com