In this Power Automate tutorial, we will see how to save Microsoft Forms responses and attachments to SharePoint lists using Power Automate.
Moreover, when we will submit a Microsoft form, the response, and attachments are added to the SharePoint list automatically using Power Automate.
For example, we will create a Microsoft Form i.e. Product Information, where the user will fill the form and click on Submit. The Microsoft Form contains the below column:
- Product Id: Text
- Product name: choice
- Product Description: Text (enable long answer)
- User Testimonial: Upload file
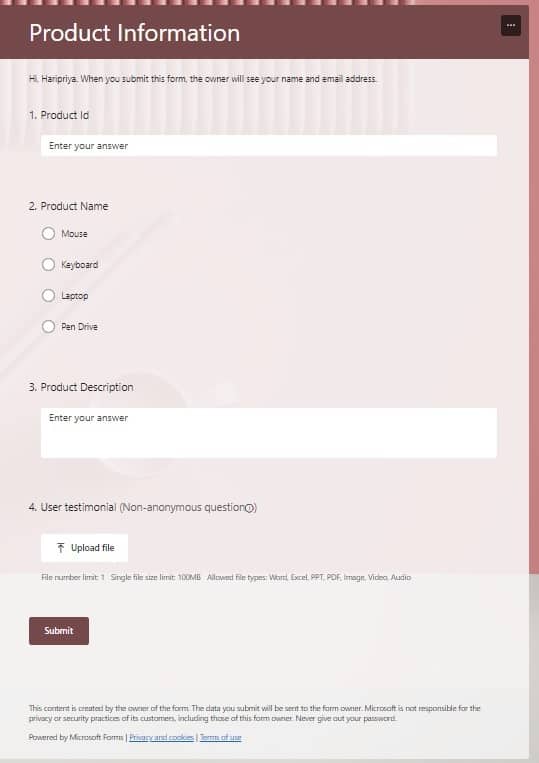
Once the user submits the form, it will save the responses and attachments in a SharePoint list called Product Information automatically using Power Automate. The SharePoint list contains below columns:
- Title – Single line of text
- Product Id -Single line of text
- Description: Multi-line text
- Attachments: Enable this column from the ‘Show or hide column’
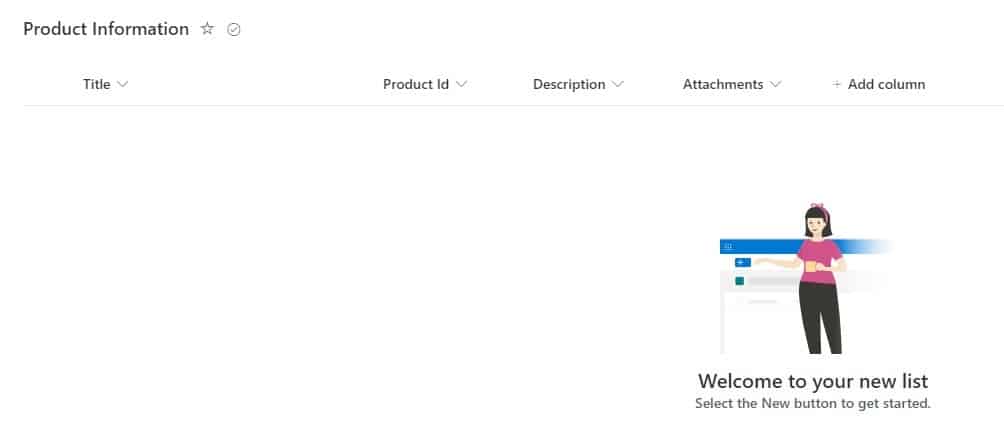
Now, let’s see how to save Microsoft Forms responses and attachments to SharePoint lists or libraries.
How to save Microsoft Forms responses and attachments to SharePoint lists using Power Automate?
Here we will see step by step solution to save Microsoft form responses and attachments to the SharePoint list using Power Automate with Automated cloud flow.
Before creating this flow just build the Microsoft form and SharePoint list. Then follow the below steps.
Saving Microsoft Form responses to SharePoint list
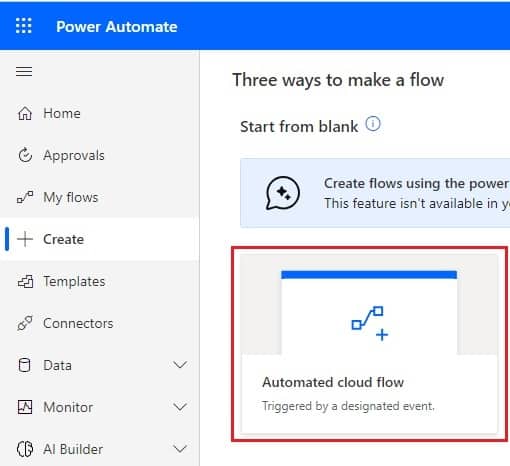
Step 1: Logged in to Power Automate, and click on the +Create icon from the Navigation menu. Then select Automated cloud flow.
Provide the Flow name, and select’ When a new response is submitted‘. Then click on Create.
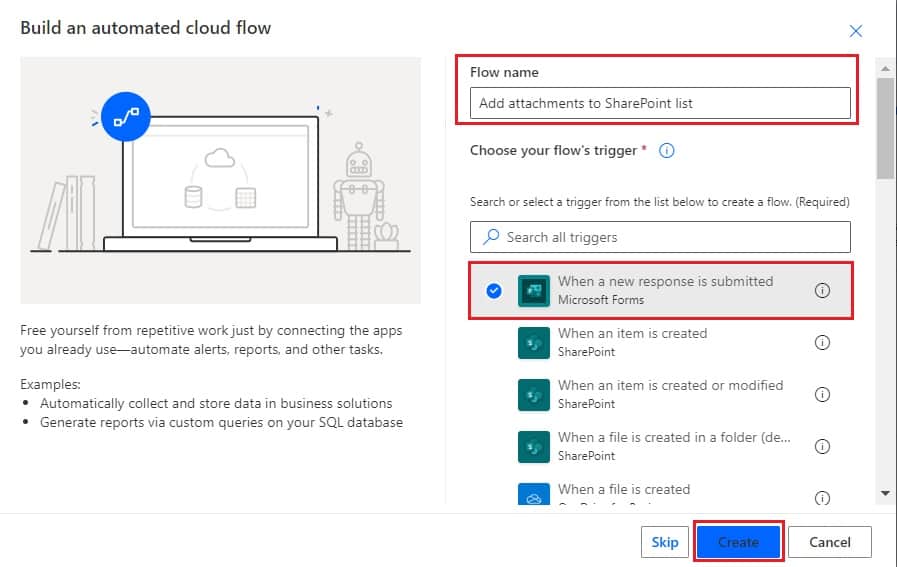
Now, you can see when a new response is submitted, trigger action, and provide the below information:
- Form Id: Select the Form from the dropdown.

Step 2: Get all the response details from the form, for this click on Add an action -> select ‘Get response details‘ action.
Then provide the below information.
- Form Id: Select the Form from the dropdown.
- Response Id: Select the response id from the dynamic content.

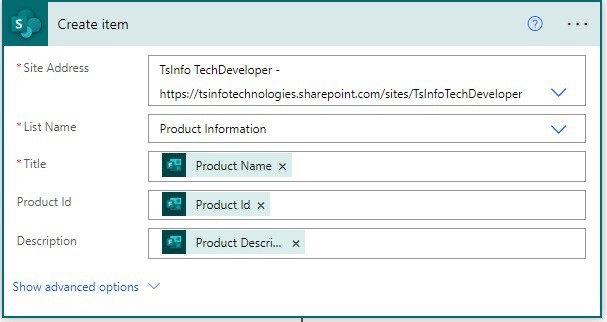
Step 3: Now we will create an item in the SharePoint list to save the response from Microsoft form, so, click on the +New step -> select Create item action, and then provide the below information:
- Site address: Then select the site address from the dropdown.
- List name: Then select the list name from the below options.
- Title: Then select the Product name from the dynamic content.
- Product Id: Then select the Product Id from the dynamic content.
- Description: Then select the Product description from the dynamic content.
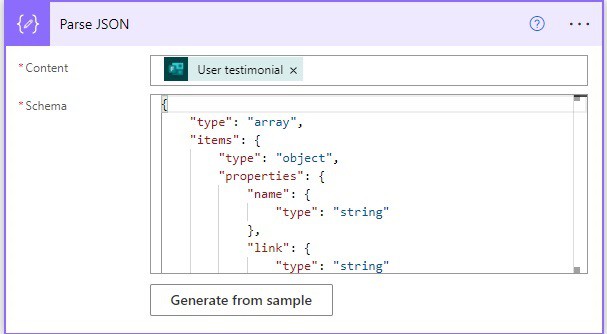
Step 4: Now we will parse the data (Get response details), to get the file name. So, click on +New step -> then select the parse json action. Then provide the below information:
- Content: Select a User testimonial from the dynamic content
- Schema: To get the schema, click on ‘Generate from sample’ and then provide the previous step ‘get response details’ json code from the output (user testimonial section).
Step 5: Next, we will get the file content from one drive, as when we create a Microsoft form when we upload the file and submit the form, it gets saved in OneDrive.
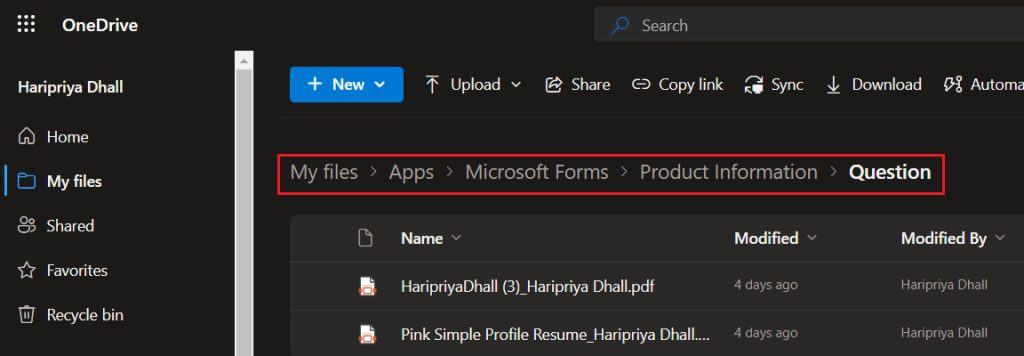
So, click on +New step, select ‘Get file content using path‘ -one drive, then write the below information.
- File path: Provide the file path like below with the expression to get the first file content.
first(body('Parse_JSON'))?['name']
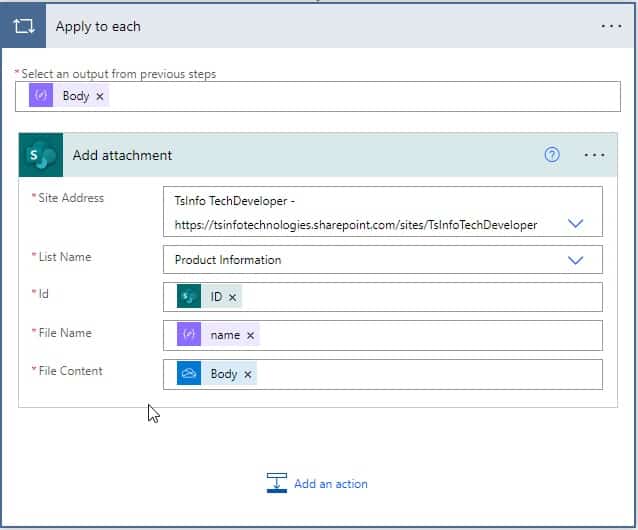
Step 6: Next we will add attachments to the SharePoint list using Power Automate. So, click on the +New step, then select the ‘Add attachments‘ action, then provide the below information:
- Site address: Provide or select the site address from the options
- List name: Provide the list name from the options
- Id: Select the id from the dynamic content
- File name: Select the name -parse json from the dynamic content
- File content: Select the body from the dynamic content.
Once you will provide the name in the ‘File Name’ field, it will automatically add Apply to each action, as we are working with multiple files.
Now our Ms flow is ready to go, so we can test our flow by filling and submitting the form.
Step 7: To run the flow, click on Save and then click on the Test icon -> choose Manually -> click on Test. Then configure with the connector using the credential, if it is done click on the ‘Run Flow‘ button.
Now you can see Flow ran successfully, also items and attachments were added to the list successfully.

This is how we can add attachments to the SharePoint list from the Microsoft Form using Power Automate.
Conclusion
In this Power Automate tutorial, we saw how to save Microsoft Forms responses and attachments to SharePoint lists using Microsft Power Automate.
You may also like:
- Remove unwanted properties from an object using Power Automate
- Power Automate Exception handling using Try Catch Block
- Power Automate which exceeds the maximum nesting limit of ‘8’
- Create SharePoint Online List and Columns from Excel Using Power Automate
I am Bijay a Microsoft MVP (10 times – My MVP Profile) in SharePoint and have more than 17 years of expertise in SharePoint Online Office 365, SharePoint subscription edition, and SharePoint 2019/2016/2013. Currently working in my own venture TSInfo Technologies a SharePoint development, consulting, and training company. I also run the popular SharePoint website EnjoySharePoint.com